I can still remember standing on a wobbly kitchen chair next to my grandma, watching her stir that magical chocolatey mixture on the stove. The scent of cocoa and peanut butter filled the whole house – it was like edible happiness bubbling away in that old saucepan. Those vintage no-bake cookies were my first baking “project,” if you can call dumping oats into a pot baking!
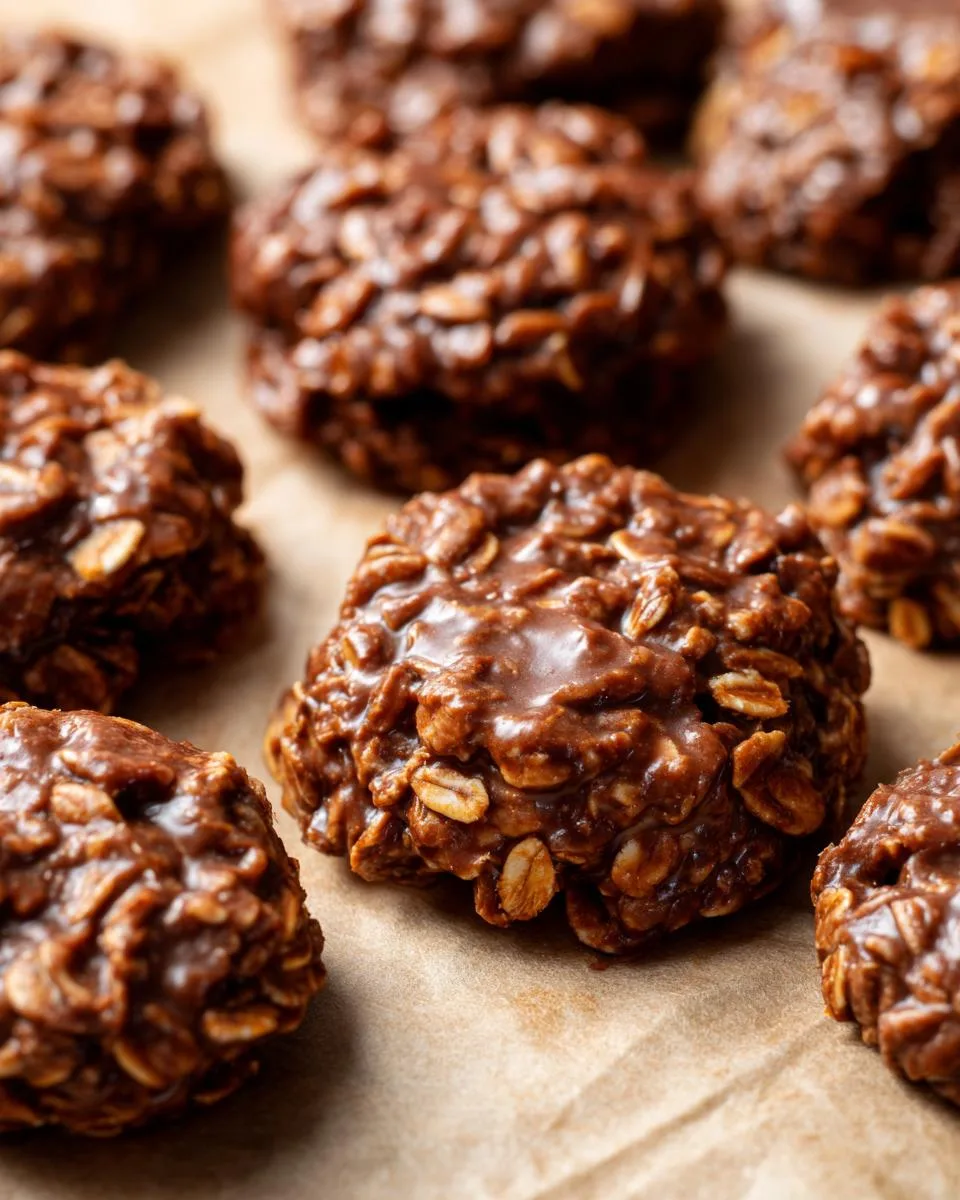
Table of Contents
Table of Contents
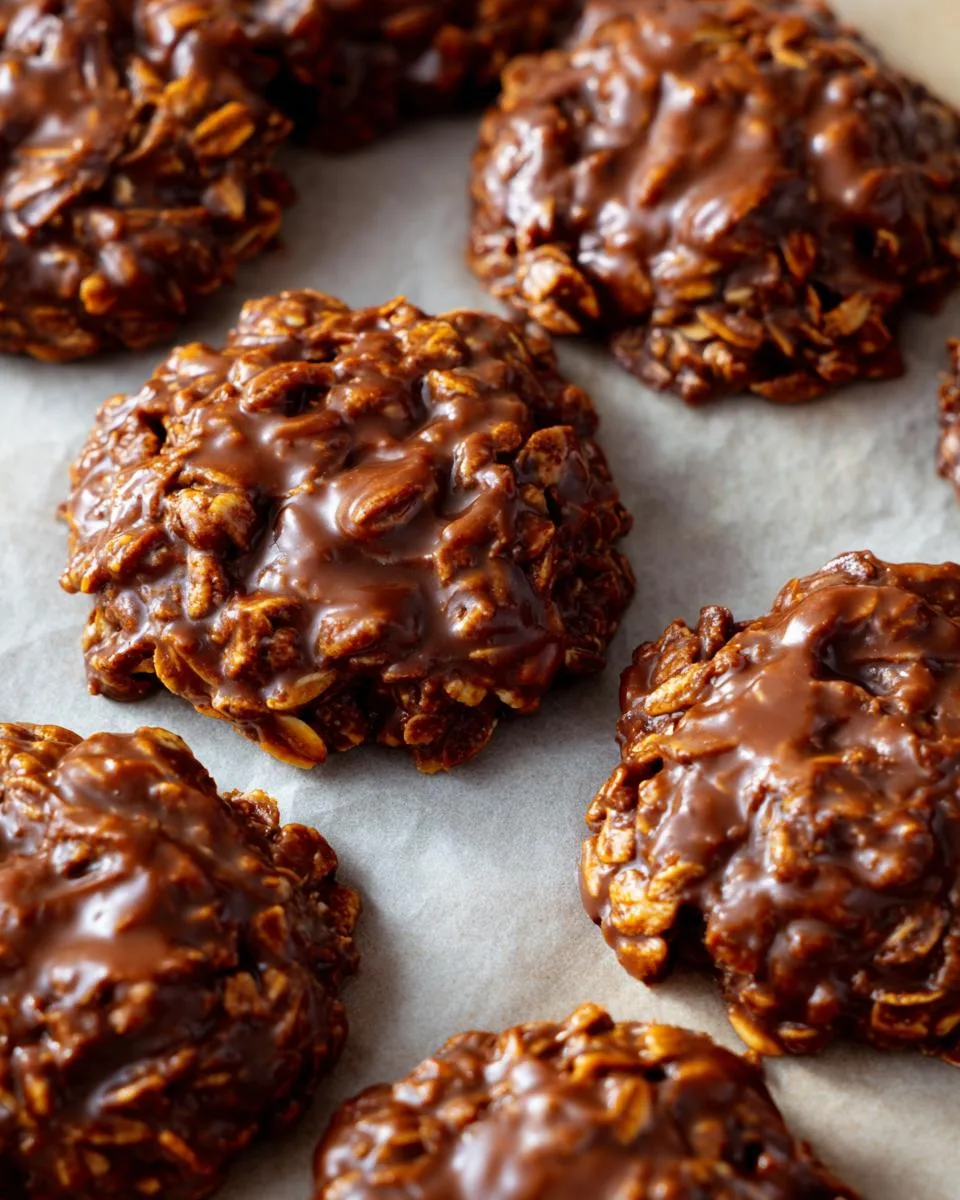
What makes these cookies so special? They’re the ultimate kitchen hack – ready in 15 minutes flat with zero oven time. As a chef, I appreciate recipes that deliver big flavor with minimal fuss, and these vintage no-bake cookies are exactly that. Seven simple ingredients transform into chewy, chocolate-peanut butter bites that taste like nostalgia in every mouthful.
My grandma’s version stuck to the classic formula – the same one generations have loved since the 1950s. No fancy equipment, no complicated techniques, just good old-fashioned comfort food that comes together faster than you can preheat an oven. The beauty lies in their imperfection – each cookie forms its own quirky shape as it sets on the parchment paper, just like my lopsided childhood attempts!
Why You’ll Love These Vintage No-Bake Cookies
These aren’t just cookies – they’re little bites of joy that solve all your dessert emergencies. Here’s why they’ve been a family favorite for generations:
- Lightning fast – From pantry to plate in 15 minutes flat (perfect for last-minute guests or sudden chocolate cravings)
- No oven required – A lifesaver during summer heatwaves or when your oven’s on strike
- Nostalgia in every bite – That same chocolate-peanut butter magic grandma used to make
- Minimal cleanup – Just one saucepan and a spoon (my kind of baking!)
- Pantry staple ingredients – You probably have everything you need right now
Trust me – once you taste that perfect combo of chewy oats and rich chocolate, you’ll understand why this recipe has stood the test of time.
Ingredients for Vintage No-Bake Cookies
The best part is you only need seven simple ingredients to make these classic cookies. I’ve made this recipe countless times, and trust me—sticking to these measurements and a few key details makes all the difference:
- 1/2 cup butter, cut into pieces – I use unsalted so I can control the saltiness. Cube it cold; it melts faster that way!
- 2 cups sugar – Regular white granulated sugar does the trick.
- 1/2 cup whole milk – The fat content helps create that perfect chewy texture. Non-dairy milk works in a pinch but may affect softness.
- 1/4 cup unsweetened cocoa powder – My grandma swore by Hershey’s; it gives that deep chocolate flavor we all love.
- 1/2 cup creamy peanut butter – This is non-negotiable! Chunky peanut butter will ruin the texture. Go for smooth.
Ingredient Substitutions and Variations
Listen, I get it – sometimes you’re staring into your pantry thinking “I swear I had peanut butter yesterday!” No worries – these vintage no-bake cookies are surprisingly flexible. Here are my tested swaps that still deliver that classic taste:
Peanut butter alternatives: While creamy peanut butter gives that signature flavor, almond butter works beautifully if you’re allergic or just want something different. The texture stays perfect, though you’ll get a slightly nuttier taste. Sunflower seed butter makes them school-safe!
Sugar swaps: Granulated sugar gives that crisp exterior we all love, but coconut sugar brings a caramel-like depth (just know your cookies will be darker). For a less refined option, I’ve had success with maple syrup – reduce the milk by 2 tablespoons to compensate.
Butter options: My vegan friends rejoice – plant-based butter substitutes work great here! Just choose one with at least 80% fat content. Margarine can work in a pinch, but your cookies might spread more – no biggie if you don’t mind rustic shapes!
Milk modifications: Whole milk gives richest results, but any milk you’ve got will do. Almond milk? Fine. Oat milk? Go for it. Even water works if you’re really in a bind – they’ll just be slightly less creamy.
Fun mix-ins: While purists (like my grandma) would gasp, I sometimes stir in a handful of mini chocolate chips or chopped nuts after mixing in the oats. Shredded coconut? Divine. A pinch of espresso powder? Next-level chocolate flavor!
The beauty of these vintage no-bake cookies is how forgiving they are. Just remember – the more substitutions you make, the more the texture might change. But hey, that’s how new family traditions start!
How to Make Vintage No-Bake Cookies
Now for the fun part – turning those simple ingredients into cookie magic! Don’t let the easy steps fool you – there’s a bit of technique that makes all the difference. I’ve burned my fair share of batches before nailing Grandma’s method, so let me save you the trouble.

Step 1: Melt the Base Ingredients
Grab your heaviest saucepan (lightweight pans scorch too easily!) and set it over medium heat. Toss in the butter pieces, sugar, milk, and cocoa powder. Now here’s my trick – stir constantly with a wooden spoon as the butter melts. The mixture will look grainy at first, but keep going until it turns into a smooth, glossy chocolate sauce – about 3-4 minutes. Resist cranking up the heat – patience prevents burning!
Step 2: Boil and Time Precisely
Once everything’s melted together, this is where the cookie magic happens. Bring the mixture to a full rolling boil – you’ll see big bubbles popping across the whole surface. Now set your timer for exactly 60 seconds (I use my microwave timer – it’s loud enough to hear over the stove fan). Stir occasionally during this minute – just enough to prevent sticking but not so much that the temperature drops. Those 60 seconds are crucial – under-boiled cookies won’t set, over-boiled ones turn into dry hockey pucks!
Step 3: Mix in Peanut Butter and Oats
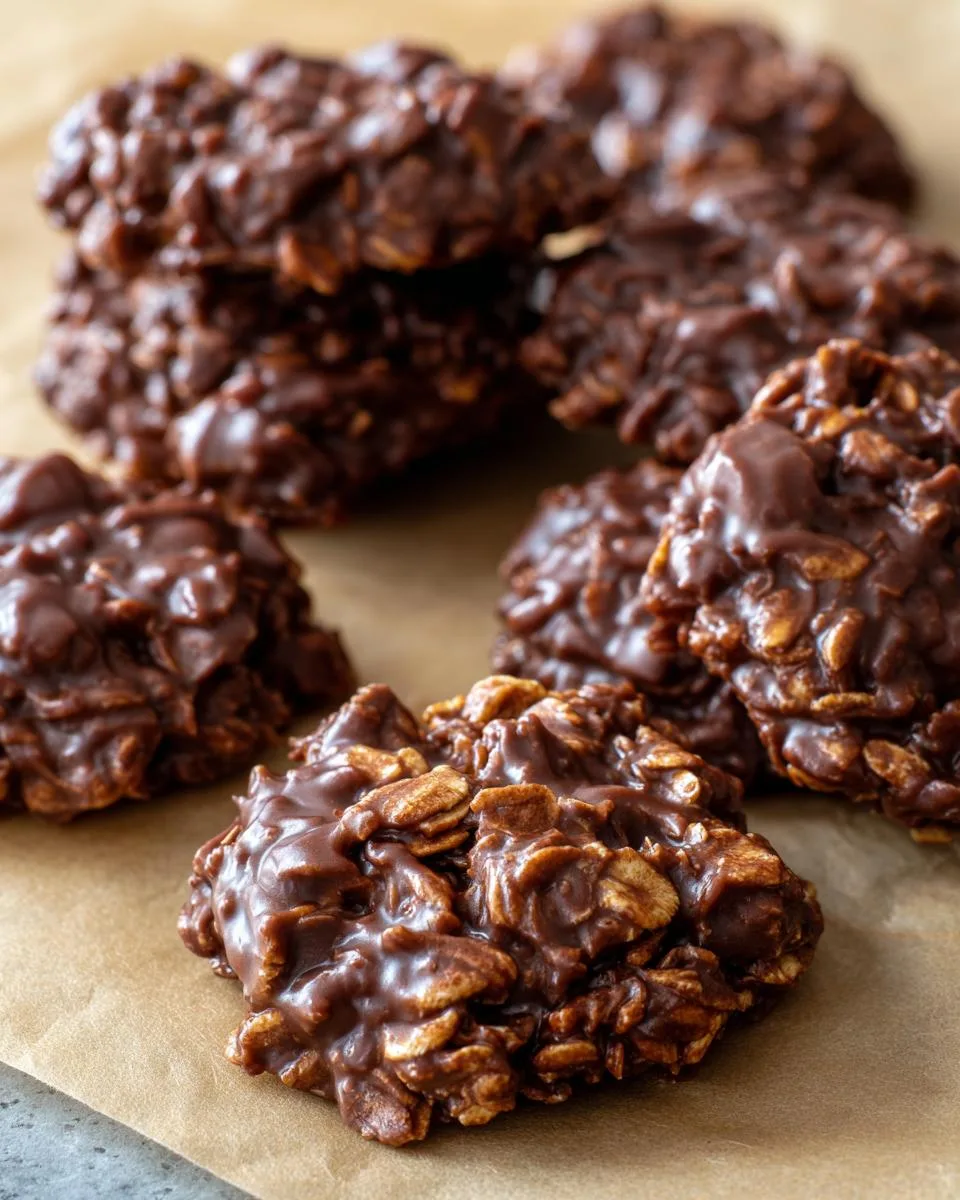
Take the pan off the heat and immediately stir in the peanut butter and vanilla. Watch how the peanut butter melts into silky ribbons – that’s when you know it’s perfectly incorporated. Now add the oats, but here’s Grandma’s wisdom – fold them in gently with a spatula instead of stirring aggressively. You want every oat coated but still maintaining their shape. The mixture will thicken as you work – that’s your cue to start dropping spoonfuls onto parchment paper. Work quickly before it sets!
Pro tip: If the mixture gets too stiff, just pop the pan back on the warm (but turned-off) burner for 30 seconds to loosen it up again. Then let those cookies cool completely – I know it’s hard to wait, but they need at least 30 minutes to firm up properly. Trust me, the anticipation makes that first bite even better!
Print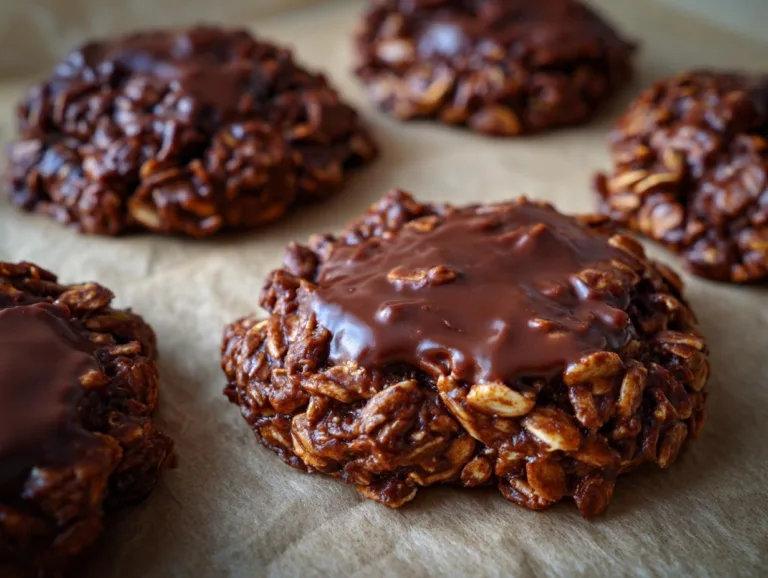
Irresistible Vintage No-Bake Cookies Ready in 15 Minutes
Classic no-bake cookies with cocoa, peanut butter, and oats for a quick and delicious treat.
- Total Time: 15 minutes
- Yield: 24 cookies 1x
Ingredients
- 1/2 cup butter, cut into pieces
- 2 cups granulated sugar
- 1/2 cup whole milk
- 1/4 cup unsweetened cocoa powder
- 1/2 cup creamy peanut butter
- 1 teaspoon vanilla extract
- 3 cups rolled or quick cooking oats
Instructions
- Place the butter, sugar, milk, and cocoa powder in a saucepan and heat over medium heat.
- Stir often until the butter melts and all ingredients combine.
- Bring the mixture to a boil and let it boil for 60 seconds, stirring occasionally.
- Remove the saucepan from heat.
- Stir in peanut butter and vanilla extract until fully combined.
- Add oats and mix until all oats are coated.
- Drop spoonfuls of the mixture onto parchment paper.
- Cool completely before serving or storing.
Notes
- Use rolled oats for a coarser texture or quick oats for a chewier cookie.
- Set a timer for boiling to ensure perfect consistency.
- Cookies firm up as they cool.
- Prep Time: 5 minutes
- Cook Time: 10 minutes
- Category: Dessert
- Method: No-Bake
- Cuisine: American
- Diet: Vegetarian
Nutrition
- Serving Size: 1 cookie
- Calories: 150
- Sugar: 12g
- Sodium: 50mg
- Fat: 7g
- Saturated Fat: 3g
- Unsaturated Fat: 3g
- Trans Fat: 0g
- Carbohydrates: 20g
- Fiber: 2g
- Protein: 3g
- Cholesterol: 10mg
Pro Tips for Perfect Vintage No-Bake Cookies
After making countless batches of these vintage no-bake cookies (and yes, a few flops along the way), I’ve learned all the little tricks that take them from good to “grandma-worthy.” Here are my can’t-live-without secrets:
Oat texture matters more than you think! Rolled oats give these cookies a delightful chew and rustic look – exactly how Grandma made them. But if you prefer softer cookies, quick oats blend in more smoothly. Whatever you do, don’t try steel-cut oats – they’ll stay way too crunchy!
That 60-second boil timer isn’t optional. I learned this the hard way when I got distracted by my cat one afternoon. Set a loud timer – your phone works great – and stick to it religiously. One Mississippi… sixty Mississippis… perfection!
Cooling is actually cooking. I know it’s tempting to sneak one early, but these cookies need their beauty rest. Let them sit undisturbed on the parchment paper for at least 30 minutes – they firm up as they cool. The wait makes that first bite magical.
Parchment paper is your best friend. Wax paper? Forget it. Aluminum foil? Disaster waiting to happen. Only parchment gives you that perfect non-stick surface without any cookie casualties. Bonus – you can slide the whole sheet right onto the counter when space is tight!
Weather affects everything. On humid days, your cookies might take longer to set. If they’re still soft after an hour, pop them in the fridge for 20 minutes. Rainy day baking hack – add an extra tablespoon of oats to help absorb moisture.
My final tip? Make a double batch. These disappear faster than you’d believe, and they actually taste even better the next day – if they last that long!
Storing and Serving Vintage No-Bake Cookies
Now that you’ve made these beauties, let’s talk about keeping them perfect – because let’s be honest, you’ll want to savor every last crumb! I’ve learned through many batches (and many sneaky midnight snacks) exactly how to keep these vintage no-bake cookies at their best.
Storage secrets: An airtight container is your cookie’s best friend. I like using my grandma’s old cookie tins – they look cute and keep everything fresh. Layer cookies between sheets of parchment paper if stacking them. At room temperature, they’ll stay dreamy for about 5 days. In the fridge? A solid week – though the texture gets slightly firmer (which some people actually prefer!).
Freezer magic: Yes, you can freeze these! Arrange cooled cookies in a single layer on a baking sheet, freeze until solid (about 2 hours), then transfer to freezer bags. They’ll keep for 3 months – just thaw at room temperature for 15 minutes when the craving hits. Pro tip: Write the date on the bag unless you want a delicious mystery in your freezer later!
Serving suggestions: These cookies practically beg for a cold glass of milk – it’s the classic pairing for a reason! But my adult self loves them with:
- Strong black coffee (the bitterness balances the sweetness perfectly)
- Vanilla ice cream sandwich (cookie ice cream sandwiches? Yes please!)
- Drizzled with extra melted peanut butter (because you can never have too much)
Fun fact: These actually taste better on day two as the flavors meld. I often make them the night before special occasions – it’s like the cookies are getting ready for their big debut! Just resist the urge to peek at them too often – every time you open that container, you’re letting in humidity that can make them sticky.
One last tip from my grandma: Always store cookies with a slice of bread in the container. The bread absorbs excess moisture, keeping your vintage no-bake cookies perfectly chewy. Just replace the bread every couple days. Genius, right?
Vintage No-Bake Cookies Nutritional Info
Now, I’m no nutritionist (just a cookie enthusiast!), but here’s the scoop on what’s in these sweet little treats. Remember – these values are estimates and can change based on the exact brands you use. My grandma never worried about numbers – she just knew when something tasted good!
Per cookie (based on 24 cookies per batch):
- Calories: 150 – Just right for a little afternoon pick-me-up
- Sugar: 12g – That’s that sweet chocolatey goodness we all crave
- Sodium: 50mg – Not bad for such a flavorful bite
- Fat: 7g (3g saturated) – Thank the butter and peanut butter for that rich texture
- Carbohydrates: 20g – Mostly from the oats and sugar
- Fiber: 2g – Those oats are doing some good work!
- Protein: 3g – Peanut butter power!
- Cholesterol: 10mg – Not too shabby for a dessert
Here’s my chef’s perspective – these vintage no-bake cookies are treats, not health food, but they’re made with real ingredients you can pronounce. The oats add fiber, the peanut butter brings protein, and that cocoa powder? Well, it makes your soul happy – and that counts for something!
Pro tip: If you’re watching sugar intake, try reducing it to 1 3/4 cups – the cookies will be slightly less sweet but still delicious. And remember what my grandma always said: “One cookie is a treat, the whole batch is a problem!”
Frequently Asked Questions
Over the years, I’ve gotten all sorts of questions about these vintage no-bake cookies. Here are the ones that pop up most often – with my tried-and-true answers!
Can I use steel-cut oats?
Oh honey, no! Steel-cut oats stay way too crunchy. Stick with old-fashioned rolled oats for that perfect chewy texture or quick oats if you prefer them softer.
Why did my cookies stay sticky?
Usually means the mixture didn’t boil long enough or it’s humid. Next time, set that 60-second timer religiously! If they’re still sticky, pop them in the fridge for 20 minutes.
Can I freeze them?
Absolutely! Freeze in a single layer first, then store in bags for up to 3 months. They thaw in minutes – not that they’ll last that long!Share Your Vintage No-Bake Cookies Experience
Nothing makes me happier than seeing these cookies bring joy to other kitchens just like they did in my grandma’s! If you whip up a batch, I’d love to hear how they turned out for you. Did your family go crazy for them? Maybe you put your own spin on the recipe?
Drop a rating below to let others know what you thought – was it five stars for that perfect chewy texture? Four stars because you couldn’t stop eating them? Every review helps fellow bakers know what to expect.
Most of all – enjoy every bite. That’s what my grandma would want. Happy baking, friends!
For More recipes, Follow me on Facebook!