Oh my gosh – do I ever have a FUN Halloween treat for you! These Halloween Ghost Cupcakes became my absolute favorite tradition when my niece begged me to make “spooky desserts” last year. Picture this: fluffy cupcakes topped with billowy white frosting ghosts that look adorable AND take barely any effort. The best part? My 5-year-old niece could help decorate them (and by “help,” I mean she ate half the chocolate chips meant for eyes). Whether you’re throwing a party or just want festive treats, these ghostly goodies disappear faster than… well, ghosts!
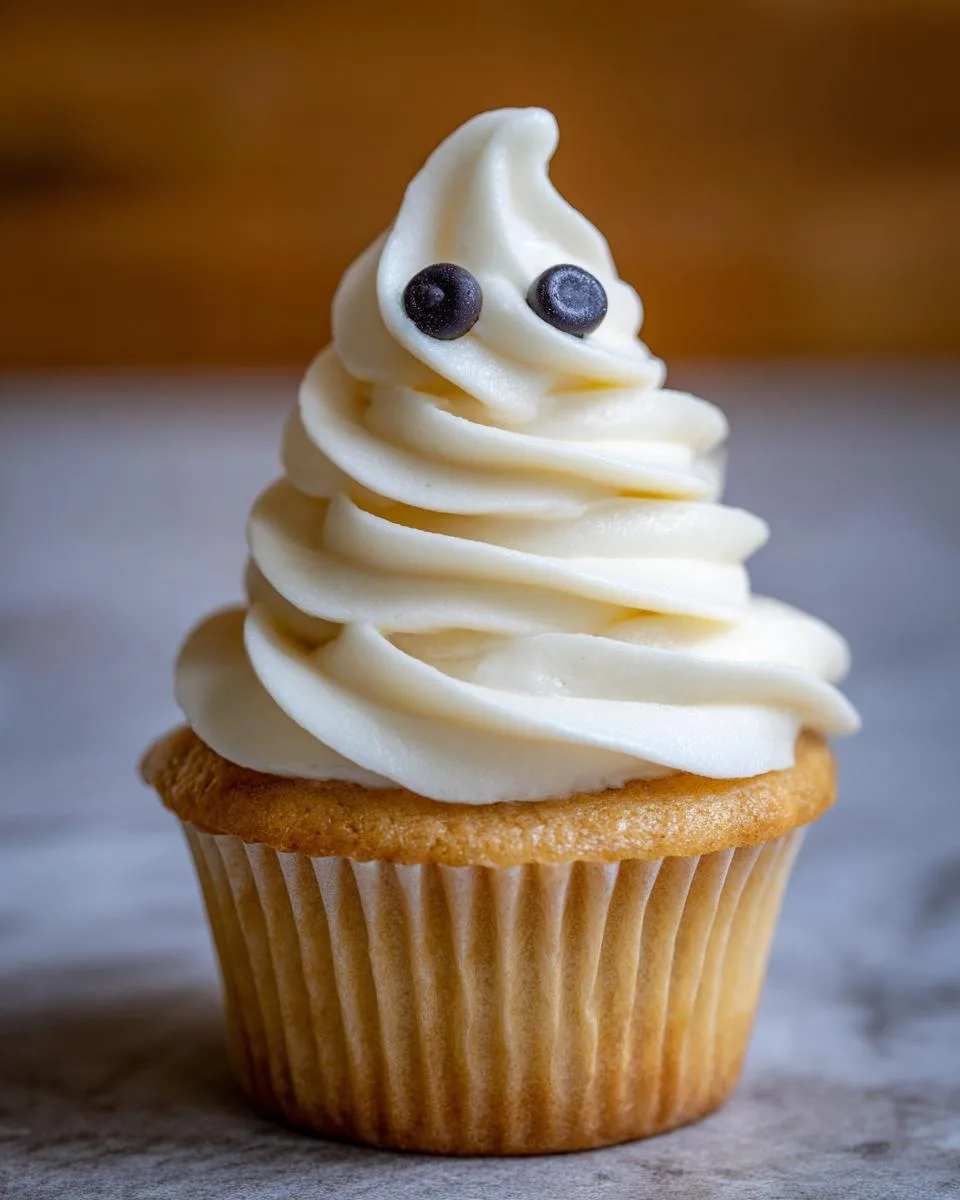
Table of Contents
Table of Contents
Why You’ll Love These Halloween Ghost Cupcakes
Trust me, these little ghosties are about to become your go-to Halloween treat. Here’s why:
- Super easy – No fancy skills needed! If you can swirl frosting and plop on chocolate chips, you’re golden.
- Instant Halloween vibes – One bite and you’ll feel like you’re at the best costume party (even if it’s just you in pajamas).
- Kid-approved fun – My niece still talks about “helping” me make them (mostly by taste-testing).
- Totally customizable – Swap vanilla for chocolate cupcakes, use mini chips for tiny ghosts, or add edible glitter for extra spook!
Seriously – they’re almost too cute to eat. Almost.
Ingredients for Halloween Ghost Cupcakes
Okay, confession time – I’ve made these with both homemade and store-bought cupcakes, and nobody could tell the difference! Here’s all you’ll need for your ghoulishly good treats:
- 24 cupcakes – vanilla or chocolate (my niece insists on Funfetti for “ghosts with sprinkles in their bellies”)
- 3 cups vanilla buttercream – softened just enough to pipe easily (if it’s too stiff, you’ll get arm cramps!)
- 1 bag chocolate chips – regular size makes classic ghost eyes, but minis are adorable for baby ghosts
That’s it! Well… plus any extra chocolate chips that accidentally “disappear” during decorating. No judgment here.
Equipment Needed for Halloween Ghost Cupcakes
Don’t stress – you probably have most of this already! The must-haves are just:
- A piping bag with large round tip (I use Wilton 1A)
- Rubber spatula for scooping frosting
No piping bag? Ziplock with the corner snipped off works in a ghostly pinch!
How to Make Halloween Ghost Cupcakes
Alright, let’s make some adorable ghost cupcakes! This is where the magic happens – turning simple ingredients into little edible spooks. I’ll walk you through each step, just like I did with my niece (though she was more interested in “quality testing” the chocolate chips).
Step 1: Prepare the Frosting
First things first – your buttercream needs to be just the right consistency. Too stiff and your arm will ache from piping. Too soft and your ghosts will slump like they’ve seen a mouse! If your frosting is cold from the fridge, let it sit at room temperature for about 15 minutes. Give it a quick stir – you want it smooth and slightly fluffy, like whipped cream.
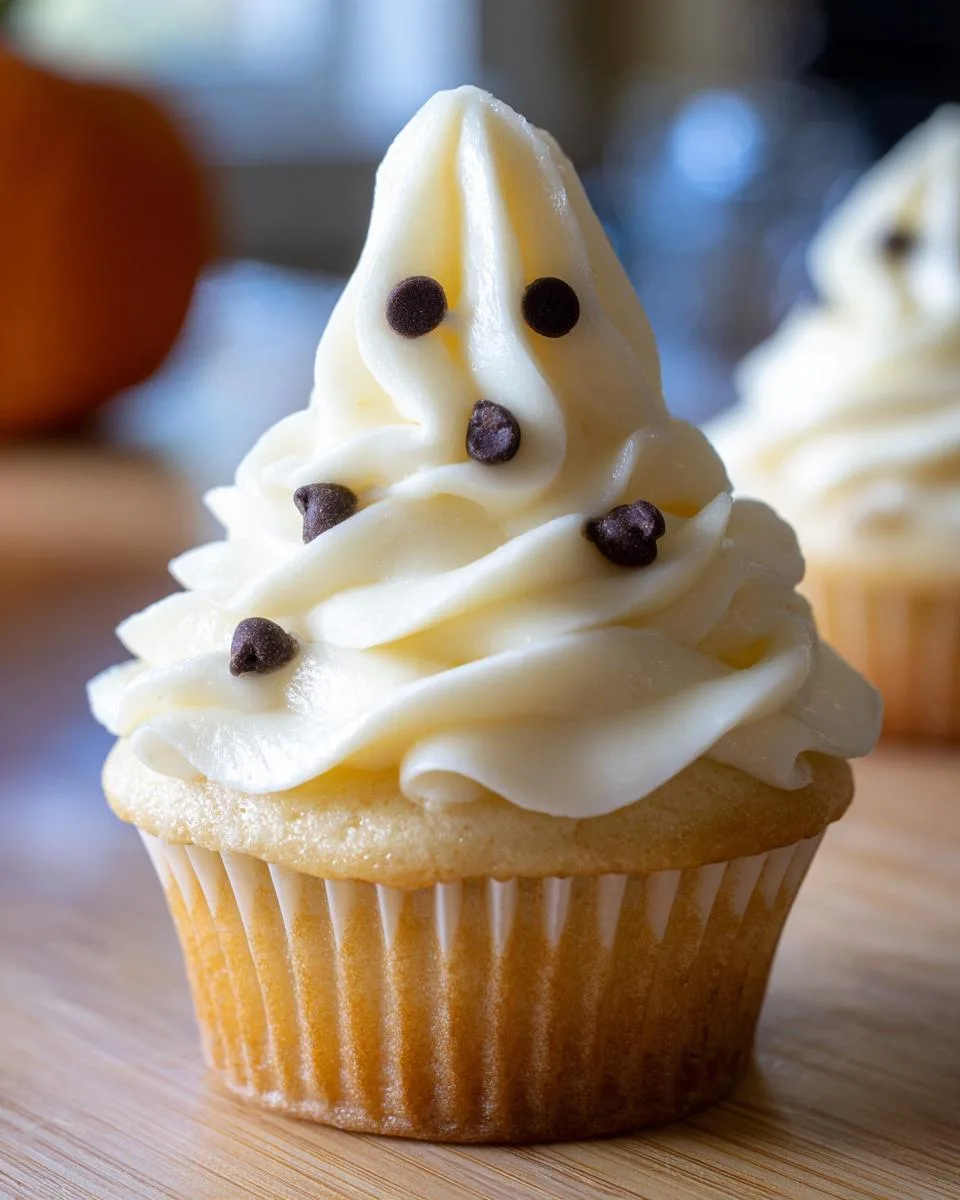
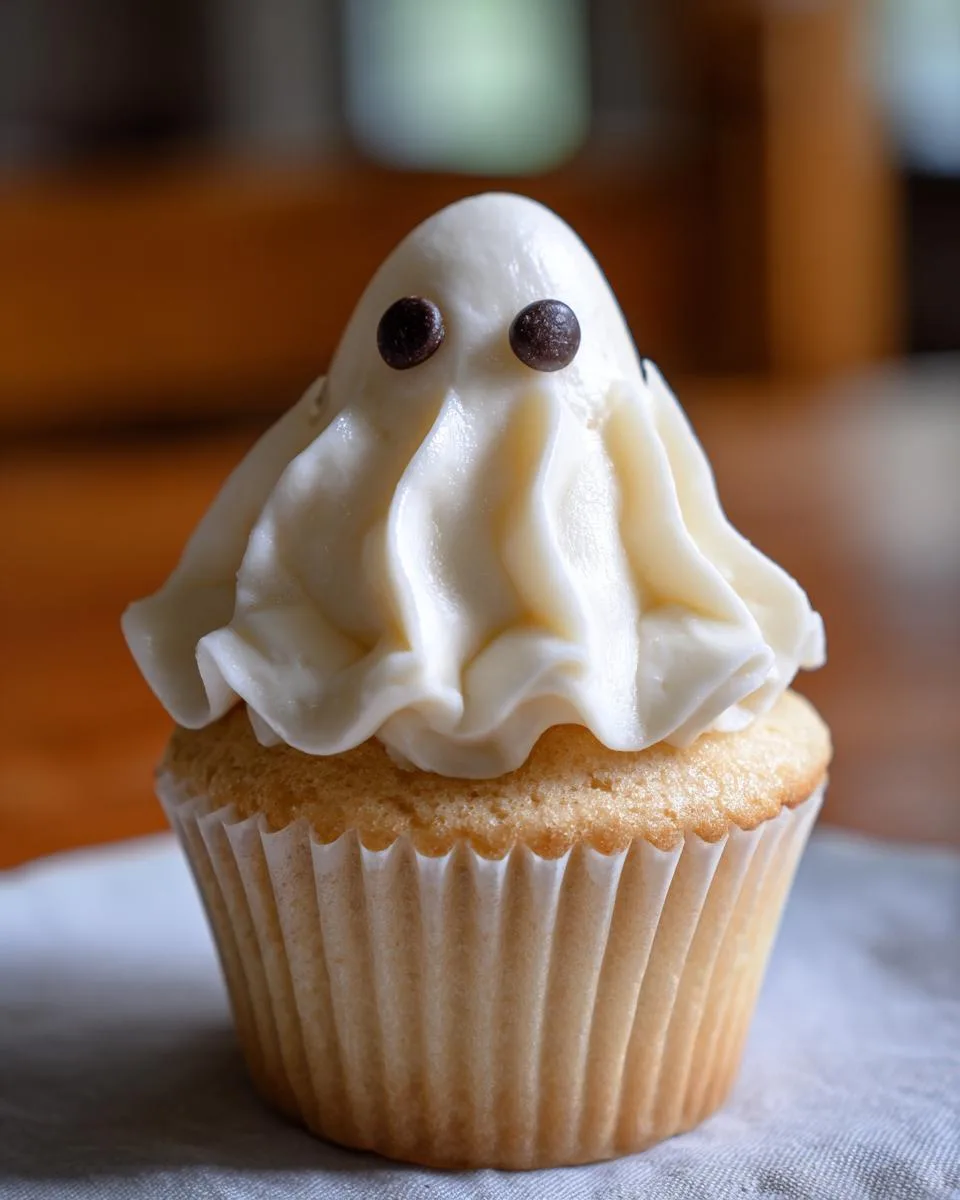
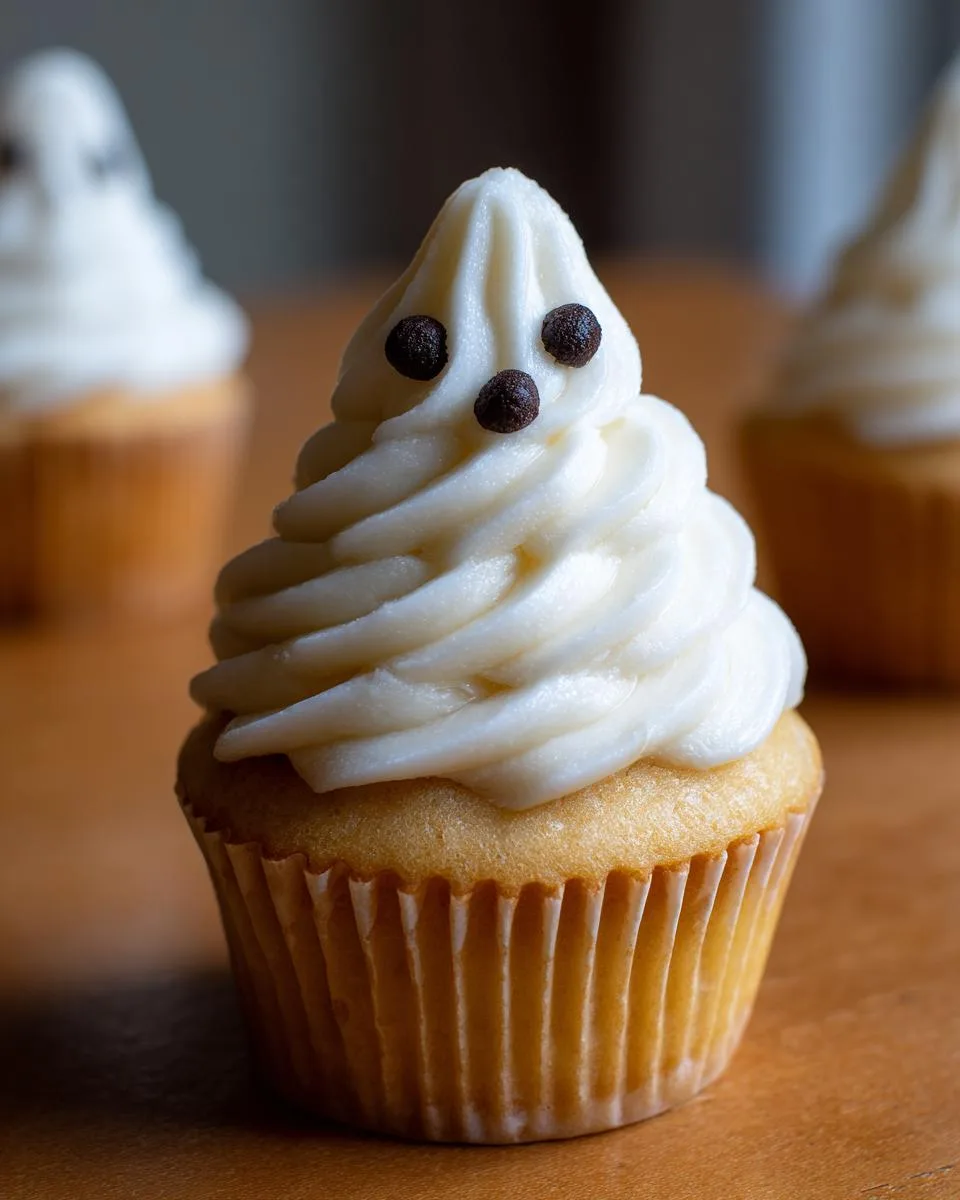
Step 2: Pipe the Ghost Shape
Now for the fun part! Load your piping bag with frosting and hold it straight up over each cupcake. Start at the base – squeeze firmly while moving upward, then ease off pressure as you reach the top to form that perfect ghostly point. Pro tip: give a little wiggle as you pull away to create that cute, wavy ghost tail. If your first few look wonky, no worries – just scoop the frosting back in the bag and try again!
Step 3: Add the Eyes
Time to bring your ghosts to life! Press two chocolate chips pointy-side-down into the frosting near the top. My niece likes making “sleepy ghosts” with the chips horizontal, or “surprised ghosts” with one chip slightly higher than the other. Get creative – mini chips make adorable baby ghosts, while jumbo chips give a goofy, cartoonish look. And if any chips “fall off” during decorating… well, the chef just has to eat those, right?
Print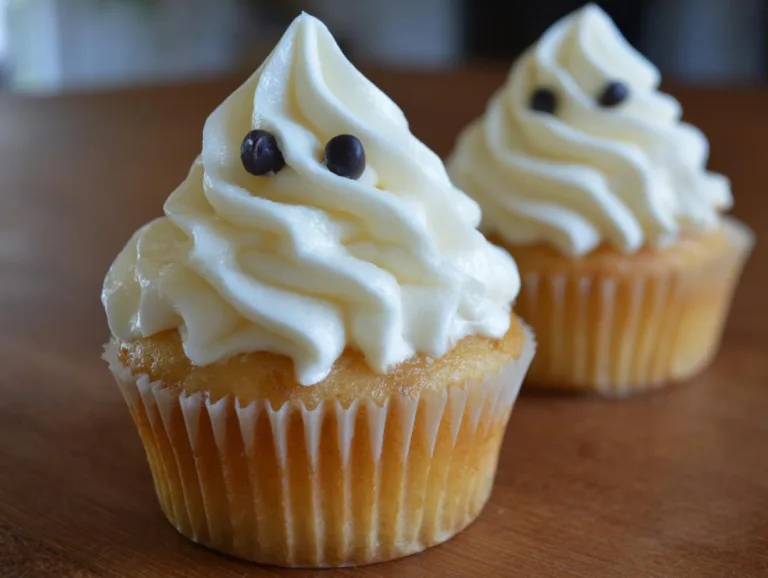
5 Spooky Halloween Ghost Cupcakes Kids Will Devour
Delightful Halloween-themed cupcakes shaped like ghosts, perfect for parties or festive treats.
- Total Time: 15 minutes
- Yield: 24 cupcakes 1x
Ingredients
- 24 Cupcakes
- 3 cups Vanilla Buttercream
- 1 bag Chocolate Chips
- Piping bag with large round tip
Instructions
- Place buttercream in piping bag with large round tip.
- Pipe tall mound of frosting in center of cupcake, shaping it like a ghost (wider at the bottom, narrower at the top).
- Add chocolate chips for eyes.
- Enjoy!
Notes
- Use store-bought or homemade cupcakes.
- Adjust frosting consistency if needed for easier piping.
- Experiment with different types of chocolate chips for varied looks.
- Prep Time: 15 minutes
- Cook Time: 0 minutes
- Category: Dessert
- Method: No-Bake
- Cuisine: American
- Diet: Vegetarian
Nutrition
- Serving Size: 1 cupcake
- Calories: 200
- Sugar: 15g
- Sodium: 100mg
- Fat: 8g
- Saturated Fat: 5g
- Unsaturated Fat: 2g
- Trans Fat: 0g
- Carbohydrates: 30g
- Fiber: 1g
- Protein: 2g
- Cholesterol: 20mg
Tips for Perfect Halloween Ghost Cupcakes
Here are my hard-earned tricks for ghost cupcakes that look straight out of a bakery case (even when made by tiny, chocolate-covered hands):
- Chill first! Pop cupcakes in the fridge for 10 minutes before piping – the cold surface helps frosting hold its shape better.
- Frosting too runny? Add powdered sugar 1 tbsp at a time. Too thick? A teaspoon of milk will loosen it right up.
- Ghosts slouching? Pipe a bit faster with firm pressure – hesitation makes wobbly spirits!
Remember – imperfect ghosts have more personality! Mine usually end up looking adorably deranged.
Variations for Halloween Ghost Cupcakes
Who says ghosts have to be plain vanilla? Here are some of my favorite ways to mix things up:
- Spooky flavors – Try chocolate cupcakes for “dark spirits” or add a teaspoon of peppermint extract to the frosting for “icy ghosts”
- Colorful specters – Tint the frosting pale green or blue with food coloring for an ethereal glow
- Eyes galore – Swap chocolate chips for candy eyeballs or use mini M&Ms for rainbow-eyed phantoms
The best part? No two batches ever turn out exactly alike – just like real ghosts!
Serving and Storing Halloween Ghost Cupcakes
These little ghosts are happiest served fresh – their frosting stands tall and proud right after decorating, just like Grandma’s pound cake ghosts from the 50s! But if you need to stash them, here’s my go-to trick: arrange them in a single layer in an airtight container and refrigerate for up to 3 days. The buttercream firms up nicely in the fridge – just let them sit at room temperature for 15 minutes before serving so the frosting softens to that perfect “cloud-like” texture again. Pro tip: add the chocolate chip eyes after refrigerating if you want them to stay extra crisp!
Halloween Ghost Cupcakes Nutritional Information
Now, let’s be real – nobody eats ghost cupcakes for their health benefits! But since you asked: estimates per cupcake (using standard ingredients) are about 200 calories, 8g fat, and 30g carbs. Of course, this changes if you use different brands or go wild with extra chocolate chips (no judgment – I’ve been there). The real nutrition? 100% joy per bite!
Frequently Asked Questions About Halloween Ghost Cupcakes
Over the years (and many ghostly cupcake batches), I’ve gotten ALL sorts of questions – here are the ones that pop up most often!
Can I use store-bought frosting? Absolutely! I’ve done it countless times when short on time. Just give it a quick stir first – sometimes it’s too stiff straight from the tub. If it’s runny, chill it for 10 minutes before piping.
How far in advance can I make these? The ghosts hold their shape best if decorated same-day, but you can bake cupcakes 1-2 days early. Store unfrosted in an airtight container, then frost and add eyes right before serving.
No piping bag – help! No panic! A ziplock bag with the corner snipped off works almost as well. Or go rustic – use a spoon to mound frosting, then shape lightly with clean fingers.
Any nut-free options? Skip chocolate chips and try candy eyes or mini marshmallows cut in half! Always check frosting ingredients too if allergies are a concern.
Final Thoughts
There you have it – the easiest, cutest Halloween treat that’ll have everyone saying “Boo-tiful job!” I can’t wait to see your ghostly creations – tag me @MartaviaEats so I can cheer on your spooky baking adventures. Now go make some memories (and maybe let a few chocolate chips “disappear”)!
For More recipes, Follow me on Facebook!