You know Halloween has arrived when my kitchen turns into a mini graveyard of creepy, delicious treats! My Halloween dirt cups are the ultimate no-bake dessert that always steals the show at parties. I started making these years ago when my nephew begged for something “gross but tasty” for his school party—now they’re a yearly tradition. The best part? They take minutes to whip up with just pudding, crushed Oreos, and gummy worms crawling through the dirt. Trust me, kids (and sneaky adults) go wild digging into these spooky cups. Let’s make your Halloween spread unforgettable with this simple, crowd-pleasing recipe!
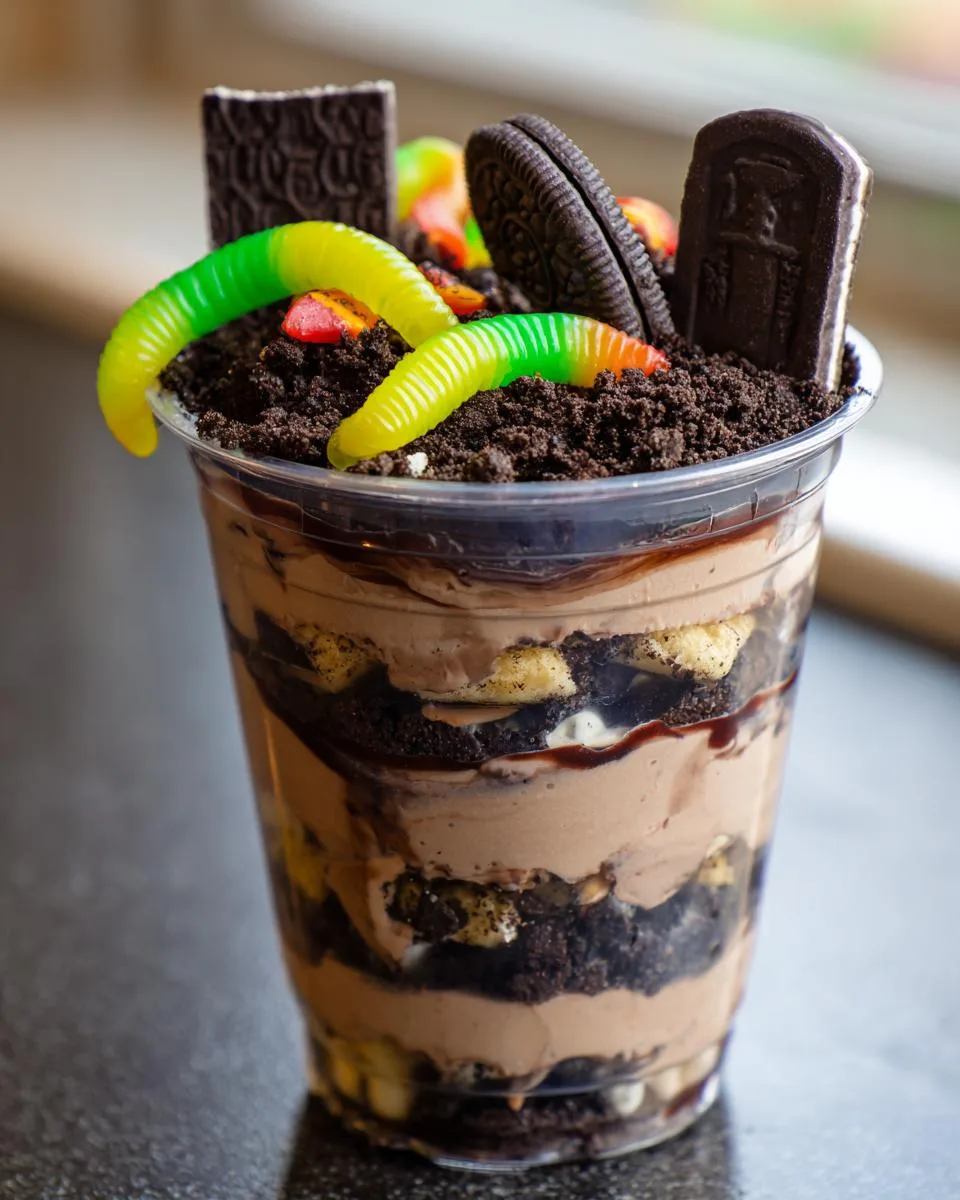
Table of Contents
Table of Contents
Why You’ll Love These Halloween Dirt Cups
Listen, these dirt cups aren’t just dessert—they’re a whole Halloween experience. Here’s why they’ve been my go-to for years:
- No-bake magic: No oven? No problem. Just mix, layer, and chill—perfect for when you’re drowning in costume prep.
- Kid-approved (and adult-sneaked): The gummy worms get ’em every time. I’ve caught more than one grown-up “taste-testing” the leftovers.
- Endlessly customizable: Swap in vanilla pudding for ghosts, or use candy bones instead of worms. Your creativity (and pantry) are the limit!
- Party hero: They look fancy but take 15 minutes. I once whipped up 30 cups during a commercial break.
- Budget-friendly: Oreos + pudding = spooky savings. More money for… well, more candy.
Seriously, these cups are the easiest way to win Halloween.
Ingredients for Halloween Dirt Cups
Gather your graveyard crew – here’s everything you’ll need to whip up these spooky treats. I’ve made these so many times I could probably recite this list in my sleep (and sometimes do when midnight snack cravings hit).
- 12 Oreo cookies – crushed into fine “dirt” (save a couple extra for snacking – chef’s privilege!)
- 1 box (3.3 oz) instant chocolate pudding mix – the rich, chocolaty base of our edible graveyard
- 2 cups cold milk – whole milk makes it extra creamy, but any works
- 16 oz Cool Whip, thawed – or homemade whipped cream if you’re feeling fancy
- 8 Milano cookies – our edible tombstones (Pepperidge Farm remembers… to be delicious)
- Gummy worms & candy pumpkins – the creepier the better!
- Wilton black writing icing – for those RIP tombstone messages
Quick tip: If you’re making these with kids, grab extra gummy worms – about half will mysteriously disappear during prep. I may or may not be guilty of this too.
How to Make Halloween Dirt Cups
Okay, let’s turn these ingredients into the spookiest dessert on the block! I’ve made these so many times I could probably do it blindfolded (though I don’t recommend that with gummy worms involved). Here’s my foolproof method for creepy perfection:
Step 1: Prepare the Pudding Mixture
Grab a medium bowl and whisk together your pudding mix and cold milk like your life depends on it. Okay, maybe not that dramatic, but you do want to whisk for a good minute until it’s completely smooth with no powder lumps. This is where the magic starts! Pop it in the fridge for about 10 minutes – you’ll know it’s ready when it coats the back of a spoon but still jiggles slightly when you nudge the bowl.
Step 2: Fold in Cool Whip
Now for the fluff factor! Take your chilled pudding and gently fold in the Cool Whip. I use a rubber spatula and make big, slow figure-eight motions – think of it like tucking the pudding into a cloud blanket. Don’t overmix or you’ll lose that dreamy texture. Once combined, back into the fridge it goes for 20 minutes. This chill time makes the mixture firm enough to hold those Oreo layers beautifully.
Step 3: Crush the Oreos
Time to make some edible dirt! Toss your Oreos (creme filling and all) into a food processor and pulse until they’re fine crumbs. No processor? No problem – a zip-top bag and rolling pin work great (and let kids help safely). You want the texture to resemble potting soil – some small chunks are fine, but mostly fine crumbs. Pro tip: Save a tablespoon of bigger chunks to sprinkle on top for realistic “rocks” in your dirt.
Step 4: Assemble the Halloween Dirt Cups
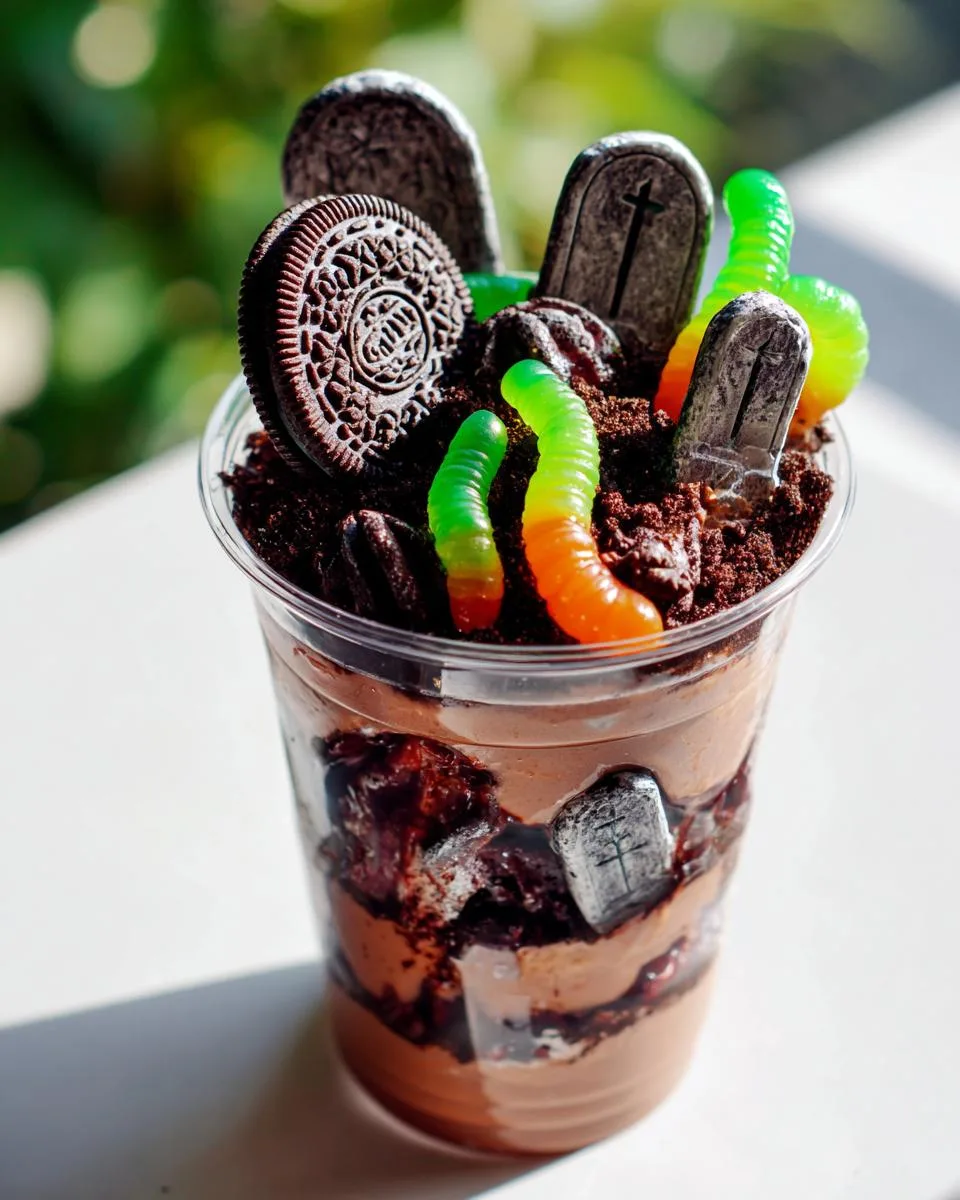
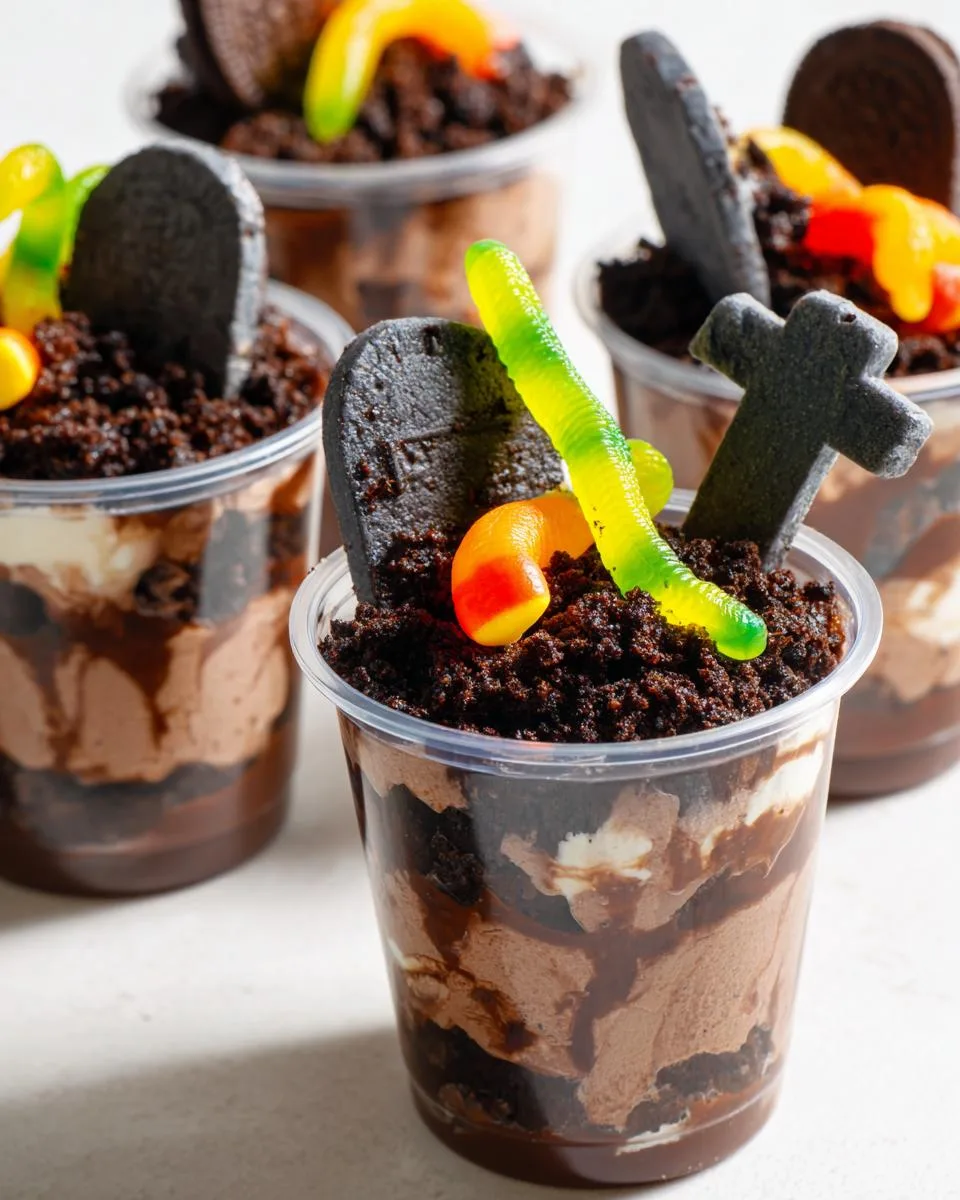
Grab your cups – I use clear plastic ones to show off the layers – and let’s build our graveyard! Here’s my layering secret: start with pudding (about 1/3 cup), then Oreo crumbs (2 tablespoons), then repeat. The double layers make every spoonful a perfect mix of creamy and crunchy. Gently tap the cups on the counter between layers to settle everything in. I usually get 8 good-sized portions from this recipe, but you can go smaller for a party crowd.
Step 5: Decorate Like a Graveyard
The best part – making it terrifyingly tasty! Write “RIP” or spooky names on your Milano cookies with the black icing (let dry for 2 minutes so it doesn’t smear). Stick them at angles in the cups like tombstones. Now unleash the gummy worms – some peeking out of the dirt, some wrapped around tombstones. Add candy pumpkins for extra Halloween flair. The messier it looks, the better! Serve immediately or chill until your little monsters are ready to dig in.
See? Told you it was easy. Now try not to eat all your decorations before serving – I won’t judge if a few worms “disappear” though.
Print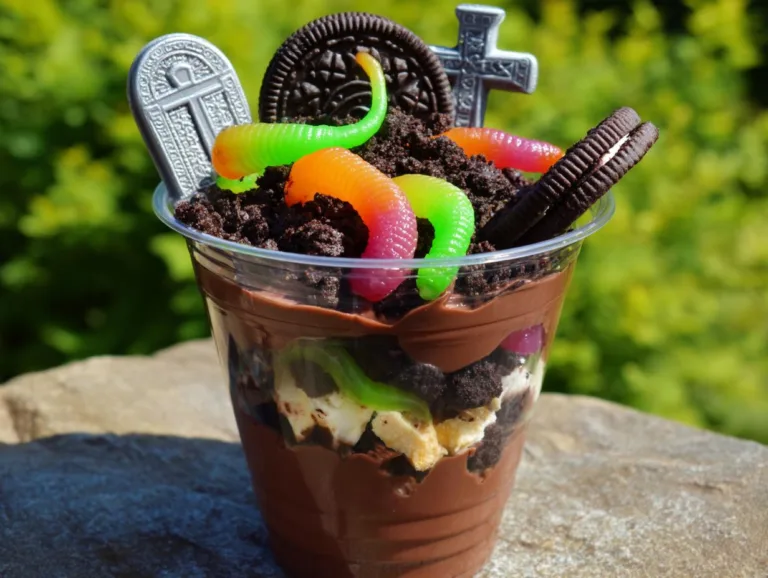
Spooky Halloween Dirt Cups That Kids Devour in 15 Minutes
Halloween Dirt Cups are a fun and spooky dessert perfect for Halloween parties. These no-bake treats feature layers of chocolate pudding, whipped cream, and crushed Oreos, topped with cookie tombstones and gummy worms.
- Total Time: 35 minutes
- Yield: 8 servings 1x
Ingredients
- 12 Oreo Cookies
- 16 oz Cool Whip
- 1 box (3.3 oz) Instant Chocolate Pudding Mix
- 2 cups Milk
- 8 Milano Cookies
- Gummy Worms and Candy Pumpkins (optional)
- Wilton Black Writing Icing
Instructions
- Whisk together the pudding mix and milk in a medium bowl. Refrigerate for 10 minutes or until set.
- Fold in the Cool Whip until well combined. Refrigerate for 20 minutes to chill.
- Crush the Oreos in a food processor or blender until fine.
- Assemble the cups: Fill small cups 1/3 full with pudding mixture.
- Top with a layer of crushed Oreos. Repeat layers in all cups.
- Write ‘RIP’ on Milano cookies with black icing and place them in the cups as tombstones.
- Decorate with gummy worms and candy pumpkins. Serve and enjoy!
Notes
- Use any gummy candies for decoration.
- Substitute homemade whipped cream for Cool Whip if preferred.
- Chill pudding mixture well for best texture.
- Prep Time: 15 minutes
- Cook Time: 0 minutes
- Category: Dessert
- Method: No-Bake
- Cuisine: American
- Diet: Vegetarian
Nutrition
- Serving Size: 1 cup
- Calories: 250
- Sugar: 25g
- Sodium: 180mg
- Fat: 10g
- Saturated Fat: 5g
- Unsaturated Fat: 4g
- Trans Fat: 0g
- Carbohydrates: 35g
- Fiber: 1g
- Protein: 3g
- Cholesterol: 10mg
Tips for the Best Halloween Dirt Cups
After years of making these for everything from classroom parties to grown-up Halloween potlucks, I’ve picked up some tricks (and treats!) to make your dirt cups unforgettable. Here are my can’t-live-without secrets:
Chill like you mean it
That 20-minute chill time? Non-negotiable. But if you’ve got time, pop the assembled cups in the fridge for an extra hour – the layers set up beautifully and won’t mush together when little hands grab them. I once forgot mine overnight (oops!) and they were actually better – the Oreos softened just enough while staying crunchy.
The cup matters more than you think
Clear plastic cups show off those creepy layers best, but don’t stop there! Hit the dollar store for Halloween-themed vessels – miniature cauldrons, test tubes, or even tiny flower pots take these from cute to spooky spectacular. Just avoid anything taller than 4 inches or your guests will need a shovel to reach the bottom.
Crumb control is key
Wanna know my dirt cup hack? Reserve about ¼ cup of crushed Oreos before assembling. After decorating, sprinkle this fresh “dirt” on top – it hides any icing smudges and makes the worms look freshly burrowed. Bonus: The contrast between the fresh crunchy topping and softer lower layer is downright magical.
Timing is everything
Write those tombstone messages before sticking them in! Nothing’s sadder than watching “RIP” turn into “blurgh” as wet pudding smears your careful lettering. Let the icing dry fully (about 5 minutes) before planting them in your edible graveyard. And if you’re serving outdoors? Skip the Cool Whip and use stabilized whipped cream – it holds up better against warm weather.
There you have it – my hard-earned dirt cup wisdom. Now go forth and terrify tastebuds!
Ingredient Substitutions & Variations
Listen, I’ve made these dirt cups with everything from pantry scraps to fancy ingredients – they’re basically impossible to mess up! Here’s my cheat sheet for when you need to switch things up (or just use what’s already in your kitchen):

Pudding Power Plays
Chocolate pudding is classic, but vanilla makes a killer “ghost graveyard” version – just add a drop of black food coloring to make it look eerie. Butterscotch pudding? Suddenly you’ve got “haunted hayfield” cups. My niece once demanded strawberry pudding with crushed golden Oreos – called them “zombie brains” and the kids went nuts for them!
Cookie Crumbles
Out of Oreos? Any chocolate sandwich cookie works (I’ve even used those Halloween-colored ones!). Gluten-free friends? Nabisco’s GF Oreos are shockingly good here. For a nutty twist, try crushed chocolate graham crackers or even those chocolate Teddy Grahams – they make adorable edible “rocks.”
Whipped Cream Wonders
Cool Whip’s convenient, but homemade whipped cream takes these to another level. Just beat 1 cup heavy cream with 2 tbsp powdered sugar until stiff peaks form. Vegan? Coconut whipped cream works beautifully – the slight tropical note pairs weirdly well with the chocolate!
Candy Creature Features
Gummy worms are the MVPs, but don’t stop there! Sour gummy bats, candy bones, or even those creepy-crawly spider candies all work. One year I used green sour patch kids as “zombie fingers” poking out of the dirt – the kids still talk about it. Pro tip: Dust gummies with cocoa powder for extra “dirty” realism!
The beauty of these cups? They’re a blank (dirty) canvas for your Halloween imagination. Last-minute swap? Accidentally ate half the Oreos? No judgment here – improvise and make it your own spooky signature!
Serving and Storage Tips for Halloween Dirt Cups
Here’s the dirt on keeping your creepy creations fresh and fabulous! These cups are best served cold—I like to pull them from the fridge about 5 minutes before serving so the flavors wake up a bit. That quick rest lets the chocolate pudding soften just enough while keeping the gummy worms delightfully chewy.
Need to make them ahead? No problem! Assemble everything except the final decorations up to 24 hours in advance. Just cover tightly with plastic wrap (press it right against the pudding surface to prevent crusty edges) and stash in the fridge. Add your tombstones and worms right before serving—nobody likes a soggy gummy worm!
Leftovers (ha! As if!) keep surprisingly well for 2 days refrigerated, though the Oreo crumbs will soften into more of a cakey texture. Pro tip: If you’ve got undecorated leftovers, stir everything together the next day—it makes an incredible chocolate mousse parfait with bonus crunch! Just don’t tell the kids you’re recycling their Halloween treats.
One warning though—these don’t freeze well. I learned the hard way when my “brilliant” batch turned into icy, weepy pudding puddles. Stick to fridge storage and enjoy within that 48-hour window for peak deliciousness. Now go scare up some dessert!
Halloween Dirt Cups FAQs
Over the years, I’ve gotten every question imaginable about these dirt cups – here are the ones that pop up most at parties (along with my hard-earned answers!):
“Can I make Halloween dirt cups ahead of time?”
Absolutely! The pudding mixture actually benefits from some chill time. Assemble the cups without decorations up to 24 hours in advance – just keep them covered in the fridge. Add your tombstones and gummy worms right before serving so they stay fresh-looking. I once prepped three batches on Wednesday for a Friday school party and they were perfect!
“How do I keep the Oreo crumbs crunchy?”
Two tricks: First, make your crumbs right before assembling (stale crumbs turn soft fast). Second – and this is my secret – sprinkle a thin layer of crushed Oreos on top right before serving. The bottom layers will soften into delicious cakeyness, but that fresh top crunch makes everyone think they’re all perfectly crisp!
“What can I use instead of gummy worms?”
Oh honey, let your Halloween flag fly! Some favorites from my test kitchen:
- Sour gummy bats or spiders (dusted with cocoa for extra “dirt”)
- Candy bones or skeleton parts (perfect for a pirate graveyard)
- Swedish Fish as “undead creatures” with icing Xs for eyes
- Peach rings as “pumpkin guts” when you cut them into strips
The only limit is your candy aisle imagination!
“Can I make these gluten-free or vegan?”
Easy peasy! Gluten-free Oreos work just like regular ones, and most pudding mixes are naturally GF (just check labels). For vegan versions, use almond milk with the pudding and coconut whipped cream. Even the tombstones can be swapped for GF vanilla cookies. My vegan niece declared them “just as creepy-delicious” as the original!
“Why did my pudding layer separate?”
Ah, the dreaded pudding break-up! Usually means the milk was too warm or you overmixed after adding Cool Whip. Next time: 1) Use ice-cold milk, 2) Fold gently until just combined, and 3) Don’t skip that 20-minute chill before layering. If it happens anyway? Stir it all together, call it “swamp sludge,” and add extra worms – no kid will complain!
Nutrition Information
Nutritional values are estimates and vary based on ingredients used. Here’s the scoop on what’s lurking in each spooky serving:
- Calories: 250 – Perfect for fueling trick-or-treat adventures
- Sugar: 25g – Mostly from those sneaky gummy worms (worth it!)
- Fat: 10g – The good kind that makes pudding extra dreamy
- Saturated Fat: 5g – Blame the Oreos (no regrets)
- Protein: 3g – Basically a health food if you squint hard enough
For More recipes, Follow me on Facebook!