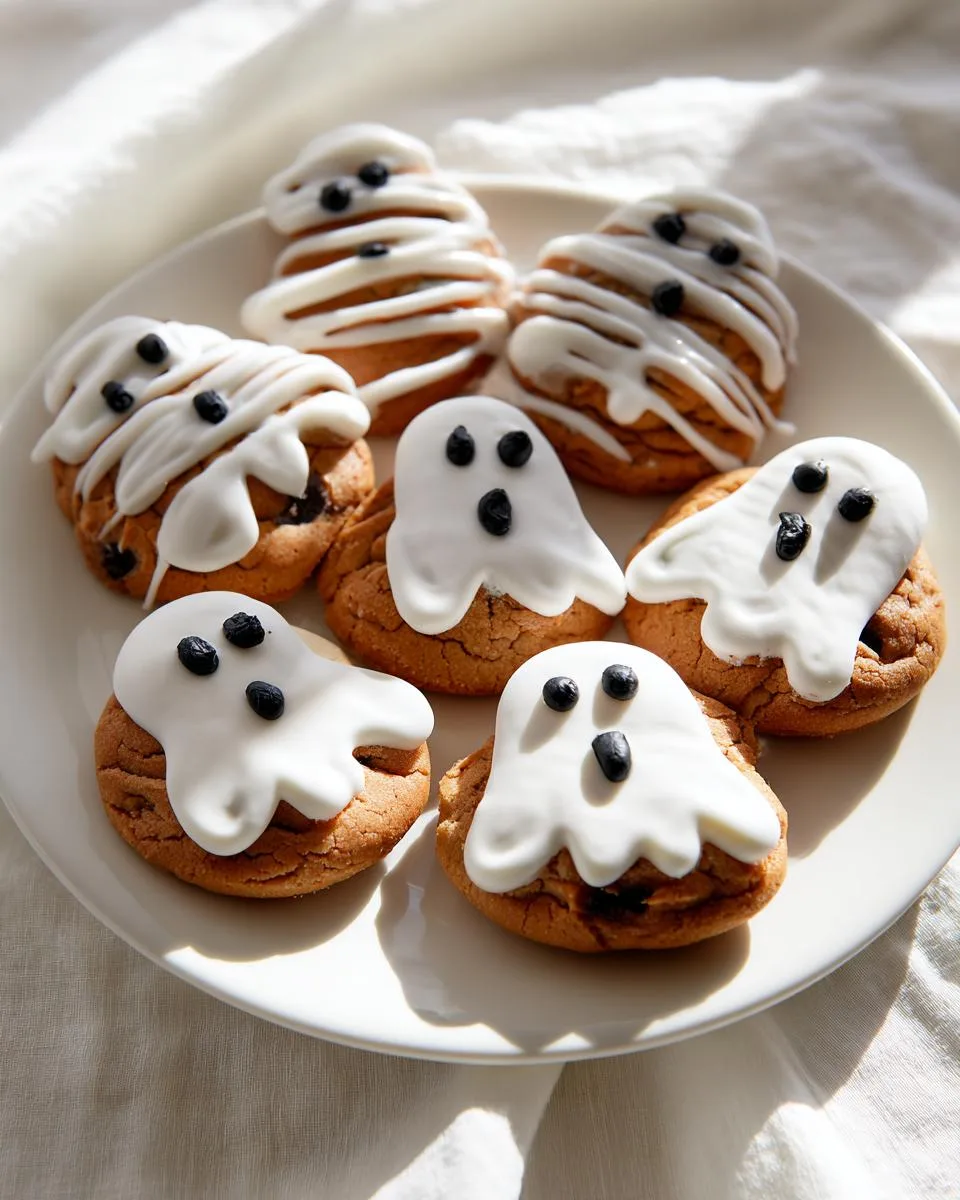
Oh my gosh, you guys – Halloween baking just got way more fun (and way less messy) with these adorable ghost cookies! I first made these last year with my niece and nephew, and let me tell you, their little faces lit up brighter than jack-o’-lanterns when we decorated the marshmallow ghosts. The best part? You don’t even need to turn on the oven – just some simple ingredients, a bit of icing magic, and boom – you’ve got the cutest Halloween treats that’ll have all the neighborhood kids (and let’s be honest, adults too) going “Boo!” for more.
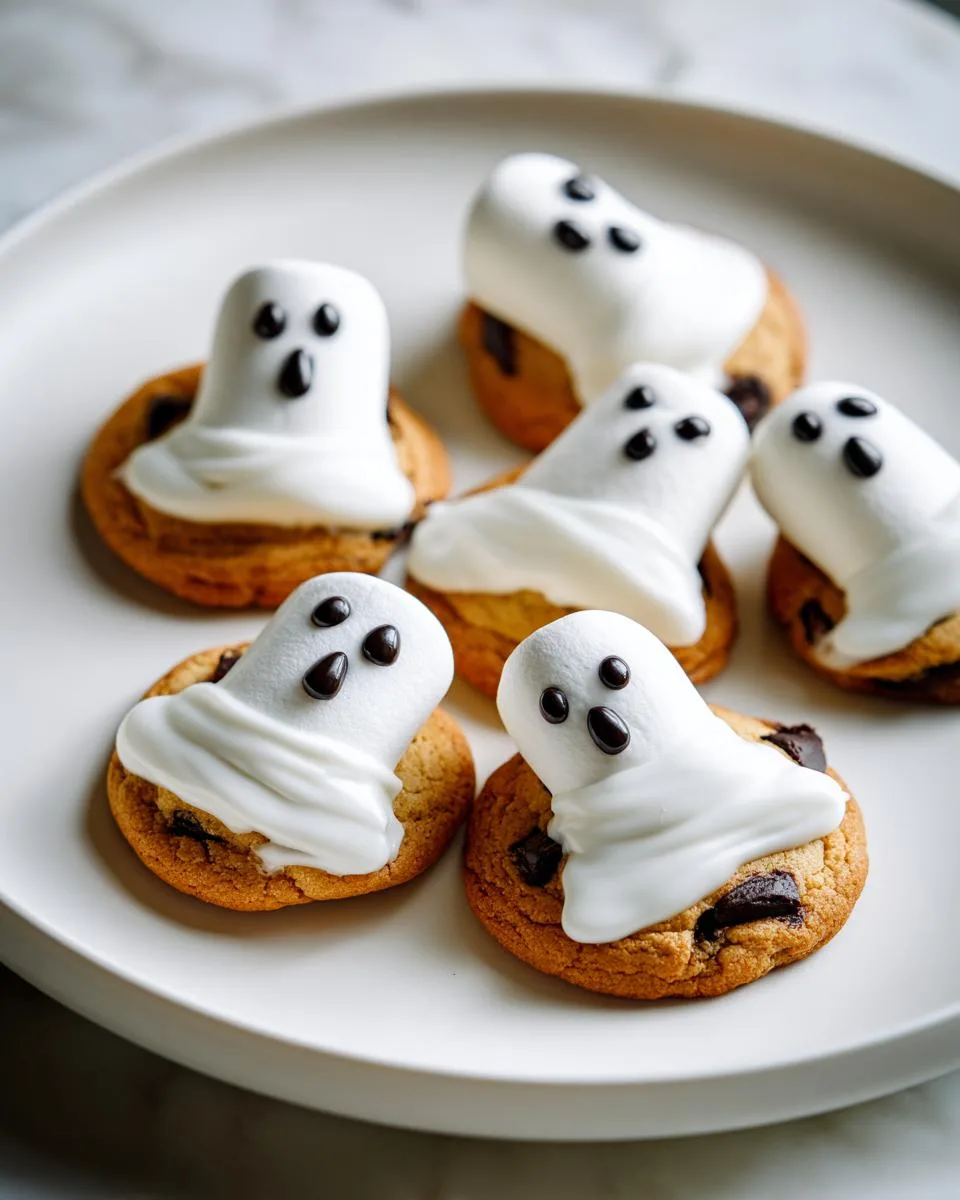
Table of Contents
Table of Contents
What I love most about this ghost cookies recipe is how it turns basic pantry staples into something totally spooktacular. We’re talking chocolate chunk cookies transformed into little ghostly canvases with just marshmallows, icing sugar, and some creative faces. Even if you’re not usually a baker, you can whip these up in about 20 minutes flat – perfect for those last-minute “Mom, I need treats for school tomorrow!” emergencies. Trust me, these little ghosts will haunt your cookie jar in the best possible way!
Why You’ll Love This Ghost Cookies Recipe
These ghost cookies are absolute game-changers for Halloween, and here’s why:
- No oven required – Seriously, just mix, dip, and decorate! Perfect for hot October days when baking sounds miserable.
- Kid-approved fun – Let little hands drizzle icing and draw silly ghost faces. (Mine always end up looking more “derpy” than scary, and that’s half the charm!)
- Instant Halloween vibes – One bite and you’re immediately in the spooky spirit. The marshmallow ghosts practically float off the cookies!
- Forgiving recipe – Mess up the icing? Just call it “ectoplasm.” Ghosts aren’t supposed to be perfect anyway!
Ingredients for Ghost Cookies
Okay, let’s talk ingredients – and I promise you probably have most of this already! The magic happens with just four simple things:
- 175g icing sugar (sifted – trust me, skip this step and you’ll get lumpy ghosts!)
- 1 pack (200g) chocolate chunk cookies – the chunkier the better for texture contrast!
- 9 regular-sized marshmallows – fresh ones stick best (stale ones get stubborn)
- Black writing icing – non-negotiable for those adorable spooky faces!
That’s it! Well… plus water for the icing, but that doesn’t count as an ingredient, right? I tried substituting food coloring once – big mistake. Stick with the writing icing for crisp ghost expressions!
Equipment You’ll Need
Good news – you don’t need any fancy gadgets for these ghost cookies! Just grab:
- A medium mixing bowl (anything from your cabinet will do)
- Baking paper or a clean cutting board
- A regular spoon for stirring
That’s it – no stand mixers, no piping bags, just simple tools you already own. See? Spooky can be stress-free!
How to Make Ghost Cookies
Alright, let’s bring these little spookies to life! I’ve made these ghost cookies more times than I can count (okay, maybe like 47 times last October alone), and here’s my foolproof method:
Step 1: Prepare the Icing
First things first – sift that icing sugar! I know it’s tempting to skip this step, but lumpy ghost icing is just sad. Pour your 175g of icing sugar through a sieve into a bowl. Now, here’s the critical part – add exactly 5 teaspoons of water. I made the mistake once of eyeballing it and ended up with ghost soup. Mix until it’s thick but still pourable – think melted white chocolate consistency.
Step 2: Assemble the Cookies
Lay out your chocolate chunk cookies on baking paper – this prevents ghostly casualties (aka stuck cookies). Now take each marshmallow and give its bottom a good dunk in the icing – not just a little dip, really coat it! Press it firmly onto a cookie and hold for 3 seconds. Pro tip: If marshmallows keep sliding off, your icing might be too thin – just add a tiny bit more sugar to thicken it up.
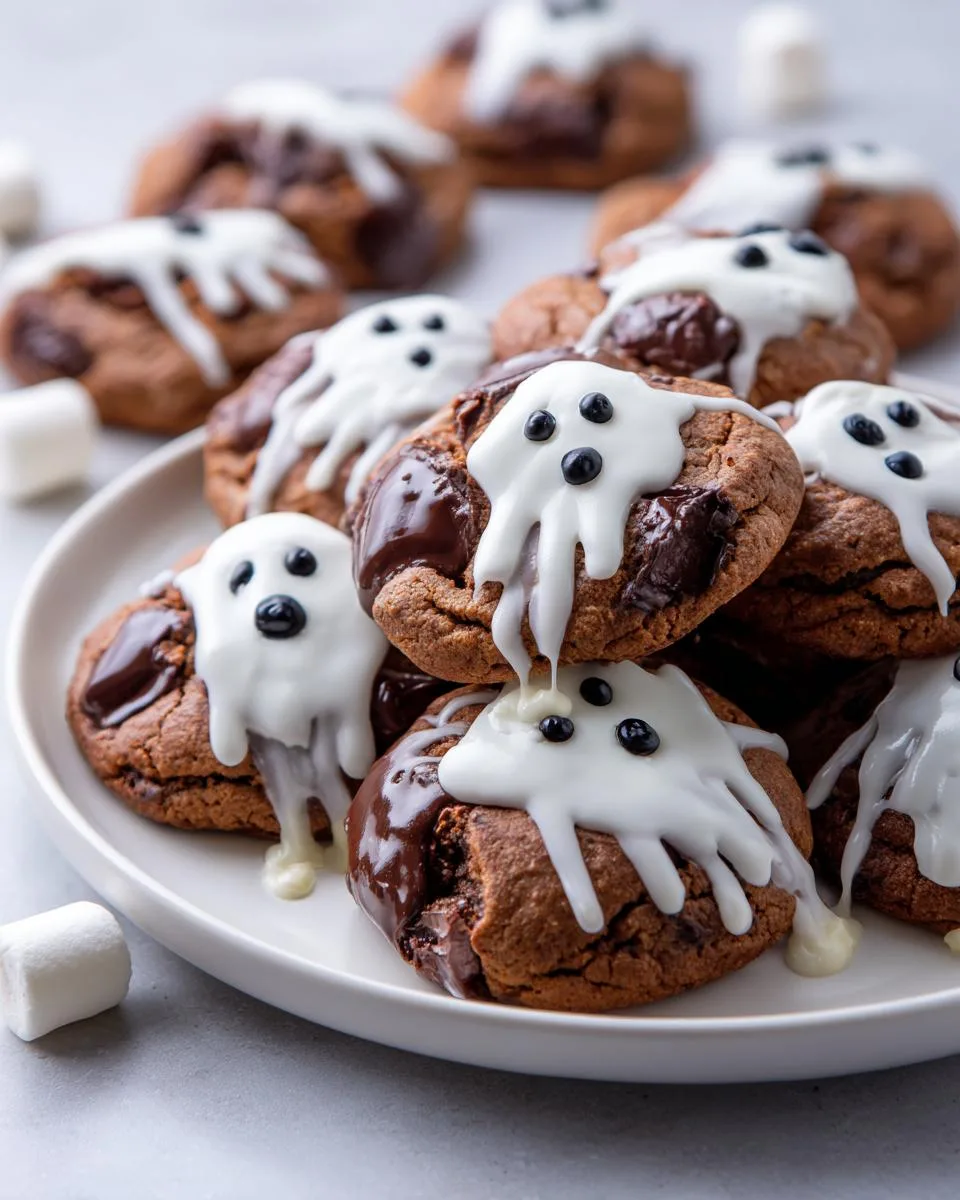
Step 3: Decorate the Ghosts
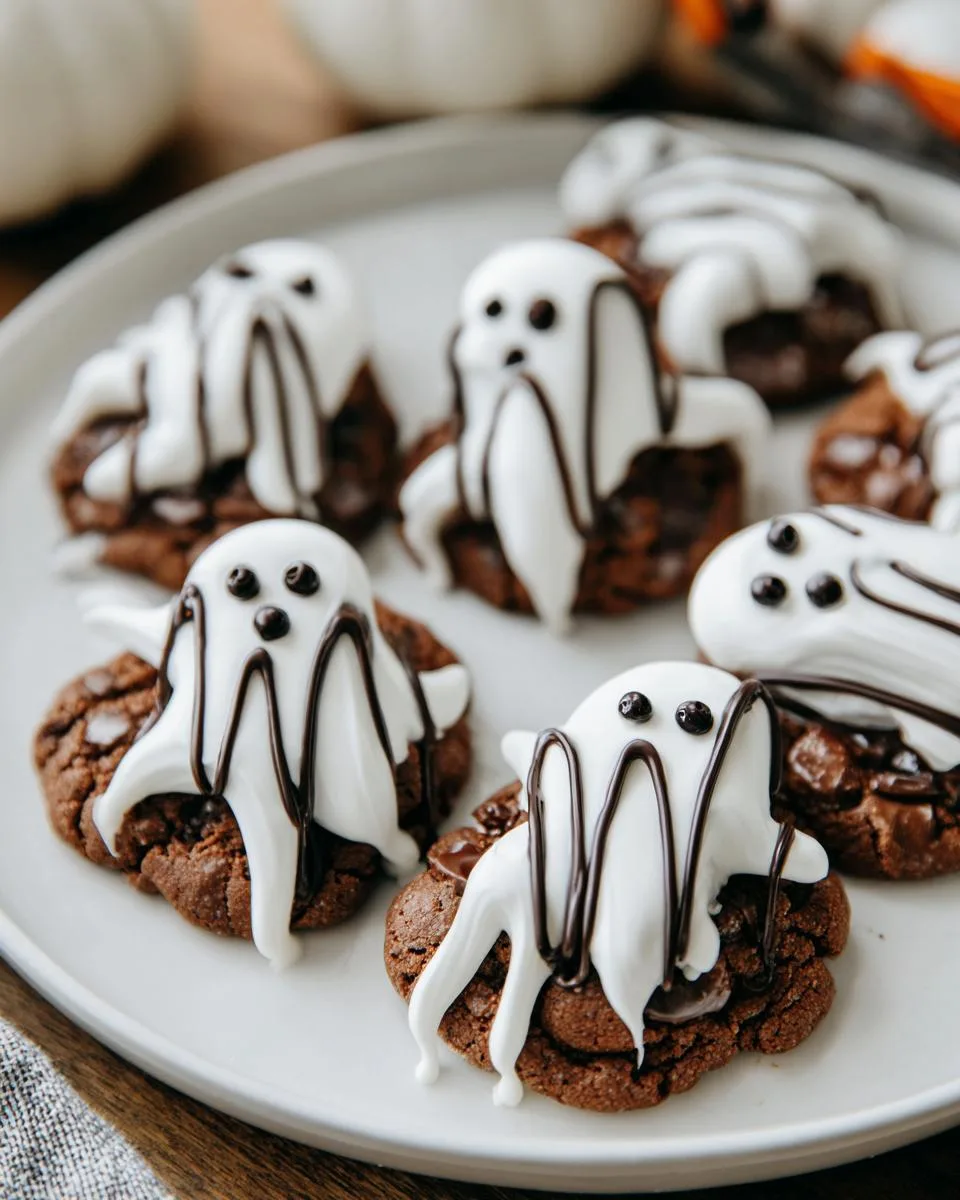
Here’s where patience is key! Wait at least 10 minutes for the icing to set before going all Picasso on your ghosts. I learned this the hard way when my ghost faces melted into blobs last year. Once set, use the black writing icing to give your ghosts personality – googly eyes, surprised mouths, even little fangs if you’re feeling fancy! The cookies firm up completely in about 20 minutes, but let’s be real – they rarely last that long in my house!
Print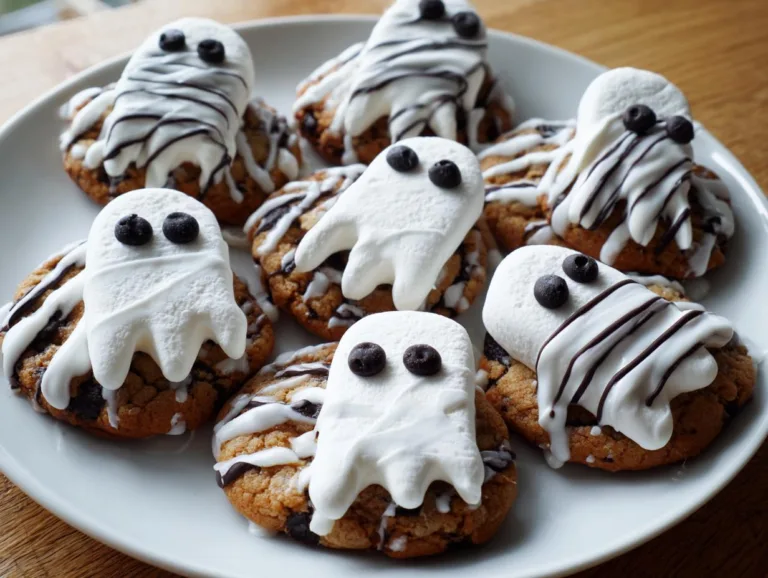
Spooky Ghost Cookies Recipe: 20-Minute Halloween Magic
Ghost cookies are a fun and easy Halloween treat made with chocolate chunk cookies, marshmallows, and icing.
- Total Time: 20 minutes
- Yield: 9 cookies 1x
Ingredients
- 175g icing sugar
- 1 x 200g pack chocolate chunk cookies
- 9 marshmallows (regular size)
- black writing icing
Instructions
- Sift the icing sugar into a large bowl and add 5 teaspoons water to give a thick but pourable icing.
- Set out the cookies on a sheet of baking paper, or on a wooden board.
- Dip the bottoms of the marshmallows into the icing and place onto the centres of a cookie to secure.
- Pour the white icing completely over each marshmallow, letting it drizzle onto the cookie.
- Leave to set, then make ghost eyes and a mouth using black writing icing.
Notes
- Use fresh marshmallows for best results.
- Allow icing to set fully before decorating.
- Prep Time: 10 minutes
- Cook Time: 0 minutes
- Category: Dessert
- Method: No-bake
- Cuisine: American
- Diet: Vegetarian
Nutrition
- Serving Size: 1 cookie
- Calories: 150
- Sugar: 12g
- Sodium: 80mg
- Fat: 6g
- Saturated Fat: 3g
- Unsaturated Fat: 2g
- Trans Fat: 0g
- Carbohydrates: 22g
- Fiber: 1g
- Protein: 2g
- Cholesterol: 5mg
Tips for Perfect Ghost Cookies
After making way too many batches of these ghost cookies (for research, obviously), here are my hard-earned secrets:
- Fresh marshmallows are non-negotiable – Stale ones won’t stick properly and make sad, deflated ghosts.
- Work fast with the icing – It starts setting quickly, so have your cookies lined up and ready to go.
- Let the ghosts “set” completely – I know it’s tempting, but wait those full 10 minutes before decorating!
- Keep extra icing sugar handy – If your icing gets too thin, just sprinkle in a bit more to thicken it up.
Remember – imperfect ghosts are the spookiest anyway, so don’t stress!
Variations for Ghost Cookies
Want to mix things up with your ghost cookies? Here are some fun twists I’ve tried (usually at 11pm when my Halloween creativity kicks in):
- Glow-in-the-dark ghosts – Add a tiny bit of edible glow powder to your icing for cookies that literally haunt your kitchen at night!
- Spooky sprinkles – Press orange and black sprinkles into the wet icing for “fairy dust” ghosts (my niece’s brilliant idea).
- Mocha ghosts – Stir 1/2 tsp instant coffee into the icing sugar for deliciously eerie brown ghosts – perfect for grown-up Halloween parties!
The best part? However you decorate them, they’ll still disappear just as fast!
Storing and Serving Ghost Cookies
Here’s the spooky truth – these ghost cookies rarely last long enough to store! But if you somehow resist eating them all (impressive), pop them in an airtight container at room temperature. They’ll stay perfectly haunted for up to 3 days. Just don’t stack them – ghost faces smudge easily, and nobody wants a crying cookie ghost! For parties, I like to arrange them on a black platter with some candy corn “graves” for extra Halloween drama.
Nutritional Information
Okay, let’s be real – we’re not eating ghost cookies for their health benefits! But for those curious, each cookie clocks in around 150 calories (mostly from marshmallow happiness). Remember – these values are estimates and can vary based on your specific ingredients. My ghost cookies might be slightly more “generous” with the icing than strictly necessary… whoops!
Frequently Asked Questions
I’ve gotten so many fun questions about these ghost cookies over the years – here are the ones that pop up most often:
Can I use mini marshmallows instead? You totally can, but they make more “baby ghost” cookies! Just use two mini marshmallows per cookie and adjust your icing faces accordingly. They’re adorable, but regular-sized give that classic floating ghost look.
How long until the icing fully sets? The ghosts firm up enough to decorate in about 10 minutes, but for full “no-smudge” security, wait 20 minutes. If you’re impatient like me, pop them in the fridge for 5 minutes to speed things up!
Can I make these ghost cookies ahead of time? Absolutely! Assemble them the day before and store in an airtight container. Just wait to add the faces until you’re ready to serve – the black icing can bleed if left too long.
Help! My icing is too thin/thick! No panic! Too thin? Add more sifted sugar a teaspoon at a time. Too thick? Add water drop by drop. I’ve rescued many a ghost batch this way!
For More recipes, Follow me on Facebook!