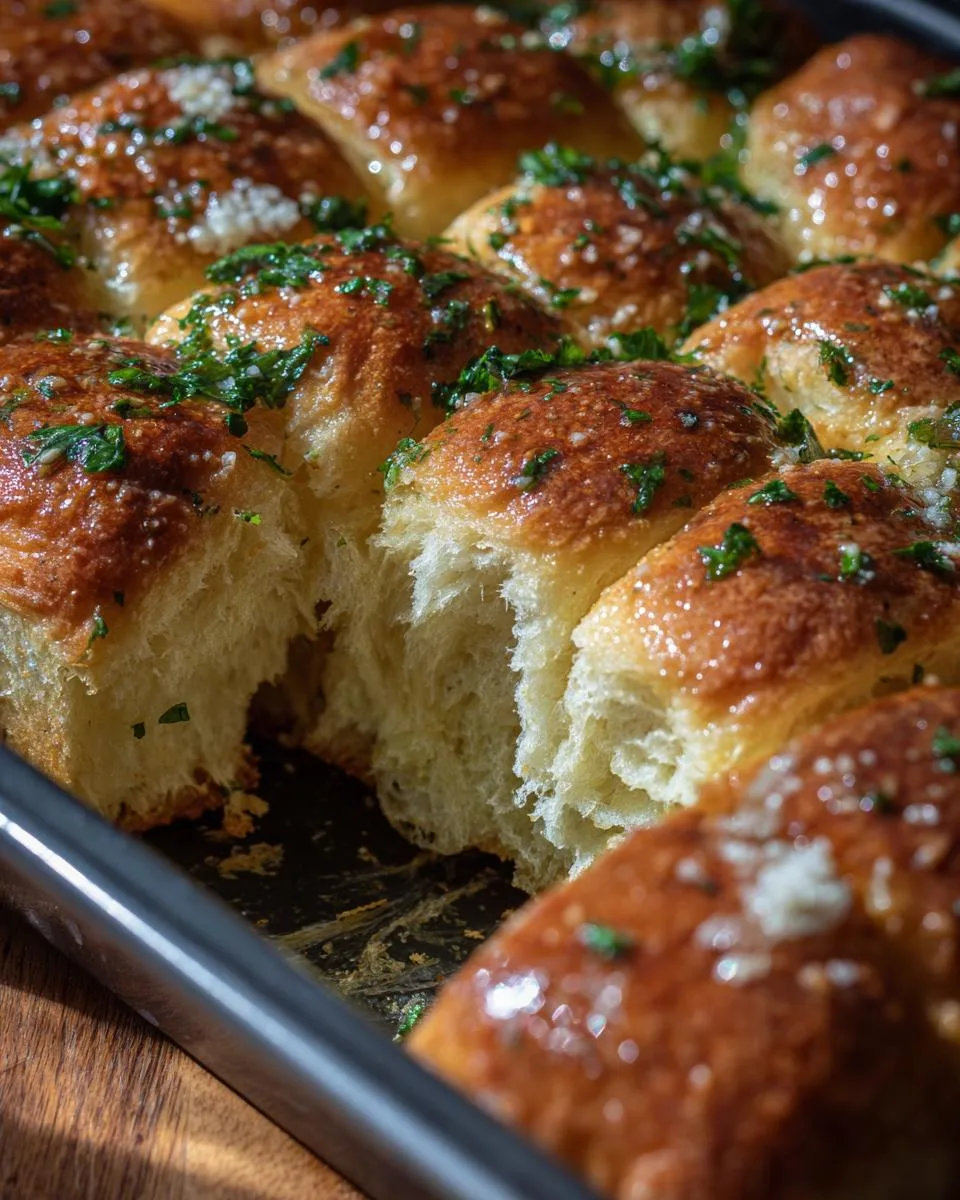
There’s something magical about pulling a tray of golden, buttery garlic bread rolls from the oven—that first whiff of roasted garlic and fresh parsley makes my stomach growl every time. I’ve tested this recipe dozens of times in my professional kitchen (and at home for very eager taste-testers) to nail that perfect balance: fluffy interior, crisp exterior, and just enough garlic to make you go “wow” without overwhelming. These aren’t your average dinner rolls—they’re little clouds of joy with a garlic butter glaze that soaks into every nook. Trust me, once you try homemade garlic bread rolls, the store-bought version just won’t cut it anymore.
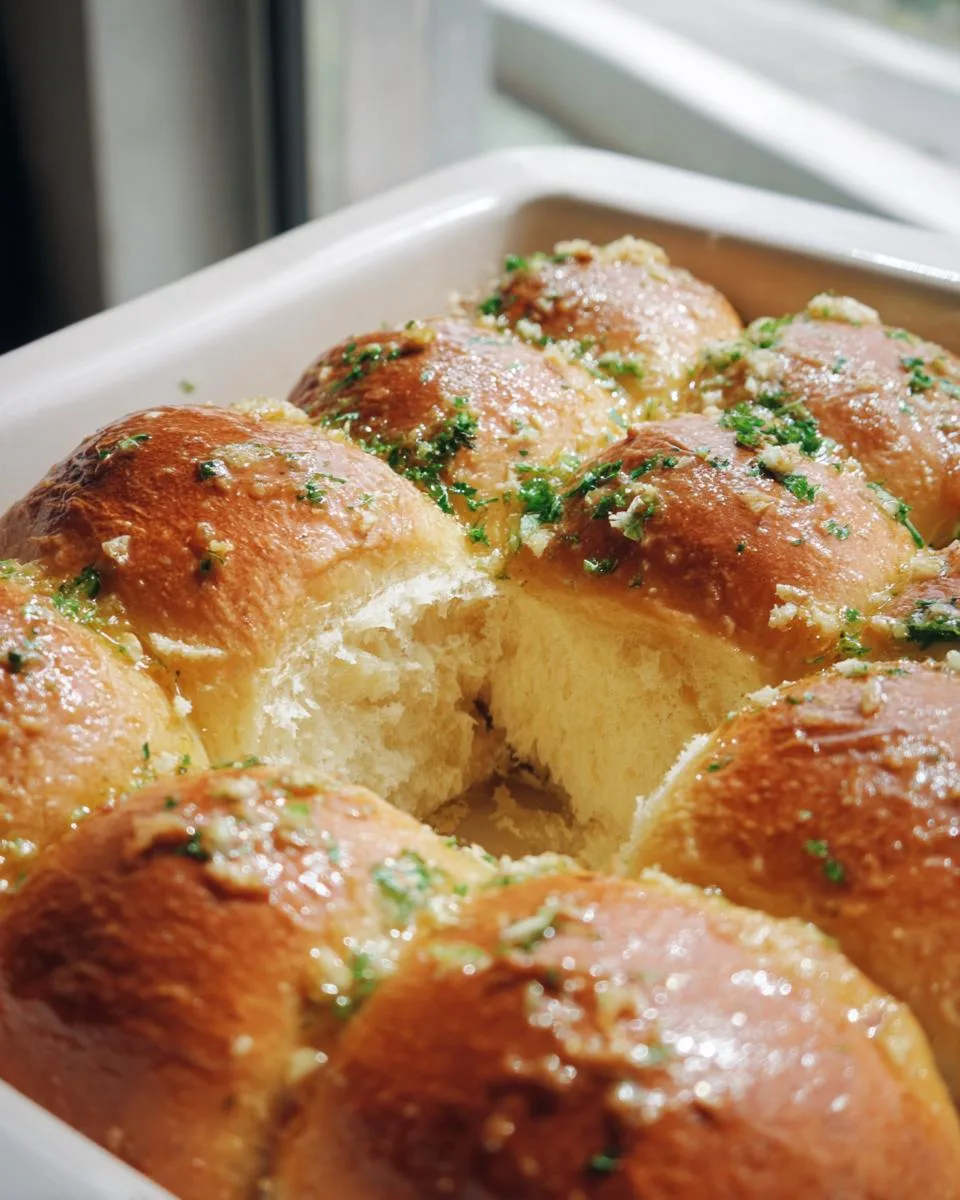
Table of Contents
Table of Contents
Why You’ll Love These Garlic Bread Rolls
Let me tell you why these garlic bread rolls will become your new obsession – I’ve seen it happen time and again with friends and family! Here’s what makes them so special:
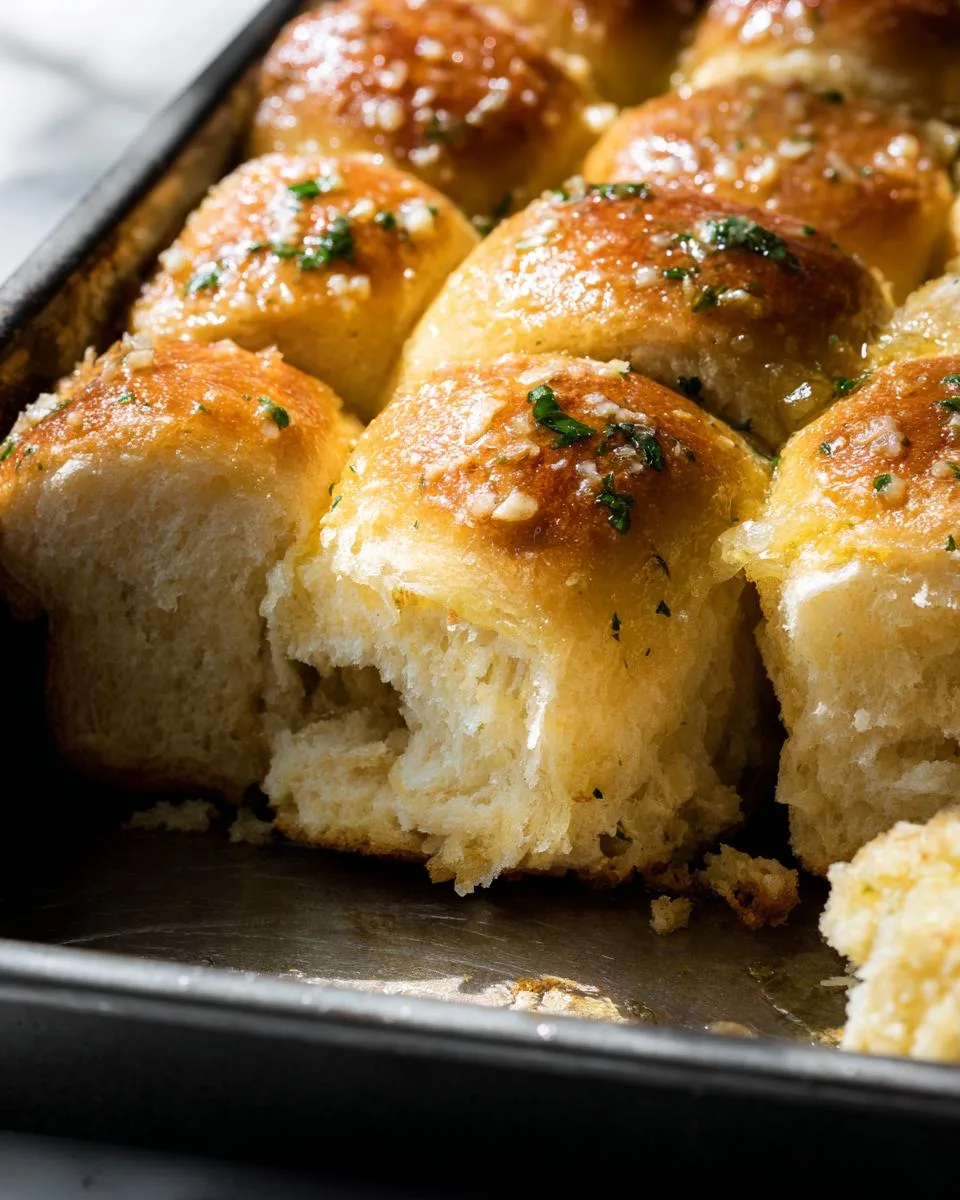
- Fluffy cloud texture – That perfect balance of tender crumb and slight chew comes from our careful kneading and rising process. No hockey pucks here!
- Savory garlic punch – We use garlic two ways (in the dough AND the butter topping) for layers of flavor that’ll make your taste buds dance.
- Surprisingly easy – No fancy techniques, just simple steps anyone can follow. Even my 10-year-old niece makes these now!
- Crowd-pleasing magic – I’ve yet to meet anyone who can resist these warm from the oven. They disappear faster than I can say “seconds please!”
- Versatile sidekick – Equally at home next to spaghetti, soup, or just standing alone as your main carb event (no judgment).
Seriously, once you taste that first buttery, garlicky bite, you’ll understand why I make these at least twice a week. They’re that good!
Ingredients for Garlic Bread Rolls
Let’s talk ingredients – because great garlic bread rolls start with the right stuff in your bowl. I’ve learned through trial and error (and many happy accidents) that these exact measurements make all the difference between “good” and “oh-my-goodness-I-need-another-one” rolls.
For the dough:
- 4½ tablespoons unsalted butter (melted and slightly cooled – trust me, hot butter will kill your yeast)
- 2 tablespoons minced garlic (fresh is best, but 2 teaspoons garlic powder works in a pinch)
- 3½ cups + 1 tablespoon all-purpose flour (spoon and level it – don’t scoop!)
- 3 tablespoons chopped fresh parsley (packed tight – stems removed)
- 1 tablespoon granulated sugar (just enough to feed the yeast without making it sweet)
- 2¼ teaspoons instant yeast (that’s one standard packet if you’re measuring from there)
- 1 teaspoon fine sea salt (I like Morton’s for consistent texture)
- 1 cup whole or 2% milk (warmed to 110°F – baby bottle warm, not hot)
- 1 large egg at room temperature (take it out when you start measuring ingredients)
For that glorious garlic butter finish:
- 2 tablespoons unsalted butter (the real stuff only – no margarine here)
- 1 tablespoon minced garlic (yes, more garlic!)
- 1 tablespoon chopped fresh parsley (for that fresh pop of color)
- Flaky sea salt for sprinkling (Maldon is my secret weapon)
And don’t forget the beaten egg for brushing – it’s what gives those rolls their gorgeous golden sheen. Now let’s get mixing!
How to Make Garlic Bread Rolls
Alright, let’s roll up our sleeves and get to the fun part – turning those simple ingredients into golden, garlicky clouds of joy! I promise it’s easier than you think, especially when you follow these steps exactly how I’ve tested them. Just wait until that garlic aroma fills your kitchen – pure happiness!
Prepare the Dough
First, grab your favorite mixing bowl (or stand mixer if you’ve got one – the dough hook will be your best friend here). Start by combining that melted butter with your minced garlic – give it a little cook in the pan first to take the raw edge off, then let it cool slightly so it doesn’t murder your yeast.
Now, add your flour (remember – spoon and level!), parsley, sugar, yeast, and salt. Give it a quick whisk to distribute everything evenly. Pour in the warm milk and crack in that room temperature egg. Here’s my pro tip – mix until it just comes together, then let it rest for 5 minutes. This autolyse period makes kneading way easier!
Knead for about 10 minutes by hand (or 6-7 with a stand mixer) until the dough transforms from shaggy mess to smooth, elastic perfection. You’ll know it’s ready when it passes the windowpane test – stretch a small piece between your fingers and if you can see light through it without tearing, you’re golden. Let it rise in a greased bowl, covered with a damp towel, until doubled – about 1-2 hours depending on your kitchen’s warmth.
Shape and Bake the Rolls
Punch down that fluffy dough (so satisfying!) and turn it out onto a lightly floured surface. Here’s where my kitchen scale comes in handy – portion the dough into 12 equal 67g balls. Roll each between your palms until smooth, then arrange them snugly in your buttered 9×13 pan. Cover and let them puff up again for about 45 minutes – they should look like little pillows and just barely spring back when gently pressed.
Preheat your oven to 350°F (180°C) while you wait. Right before baking, gently brush each roll with beaten egg – this gives them that beautiful bronzed glow. Bake for 20-30 minutes until they’re deeply golden brown and sound hollow when tapped. If they’re browning too fast, just tent some foil over the top.
Add Garlic Butter Topping
While the rolls bake, make your garlic butter – melt the butter, add the fresh garlic, and let it sizzle just until fragrant (about 1-2 minutes). Stir in the parsley, then immediately brush this glorious mixture over the hot-from-the-oven rolls. The rolls will drink it right up! Finish with a generous sprinkle of flaky sea salt – that salty crunch against the soft interior is absolute perfection.
Now the hardest part – try to let them cool for at least 5 minutes before devouring. I won’t judge if you can’t wait though – that first warm bite is what dreams are made of!
Print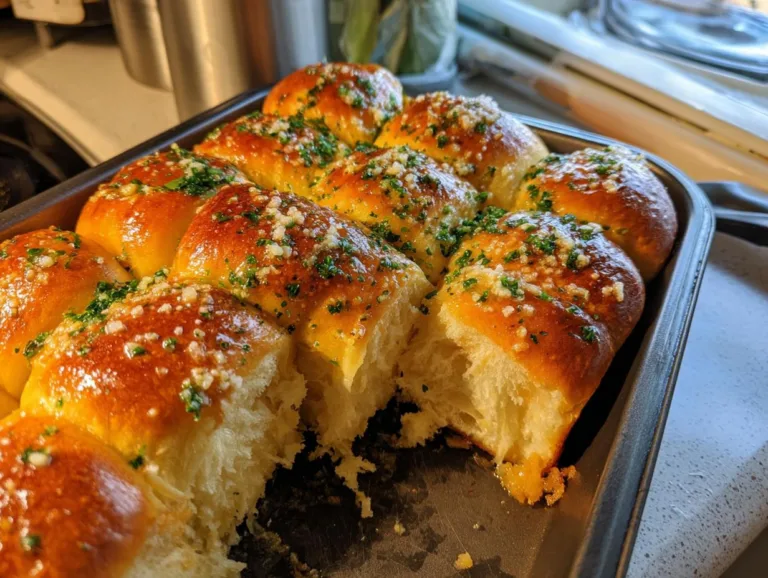
Gloryous 12 Garlic Bread Rolls That Steal Every Show
Fluffy garlic bread rolls with a buttery garlic topping, perfect for any meal.
- Total Time: 2 hours 50 minutes (includes rising)
- Yield: 12 rolls 1x
Ingredients
- 4 1/2 tablespoons unsalted butter
- 2 tablespoons minced garlic
- 3 1/2 cups + 1 tablespoon all-purpose flour
- 3 tablespoons chopped fresh parsley
- 1 tablespoon granulated sugar
- 2 1/4 teaspoons instant yeast
- 1 teaspoon fine sea salt
- 1 cup whole or 2% milk, warmed to 110°F
- 1 large egg, room temperature
- 1 beaten egg, for brushing the tops
- 2 tablespoons unsalted butter (for garlic butter)
- 1 tablespoon minced garlic (for garlic butter)
- 1 tablespoon chopped fresh parsley (for garlic butter)
- flaky sea salt, for finishing
Instructions
- Lightly butter a 9×13 pan and set aside.
- Melt butter in a small pot, add minced garlic, and cook for 1-2 minutes until fragrant. Cool slightly.
- Combine flour, parsley, sugar, yeast, salt, milk, egg, and garlic butter in a mixing bowl. Knead for 10-12 minutes until smooth.
- Divide dough into 12 equal portions (67g each), shape into balls, and place in the pan. Cover and let rise for 1-2 hours.
- Preheat oven to 350°F (180°C).
- Brush rolls with beaten egg and bake for 20-30 minutes until golden brown.
- Make garlic butter by melting butter, cooking garlic for 1-2 minutes, then stirring in parsley.
- Brush warm rolls with garlic butter and sprinkle with flaky sea salt.
Notes
- Measure flour accurately for best results.
- Use a scale to ensure even dough portions.
- Let dough rise in a warm place for even puffing.
- Serve warm for the best flavor.
- Prep Time: 20 minutes
- Cook Time: 30 minutes
- Category: Bread
- Method: Baking
- Cuisine: American
- Diet: Vegetarian
Nutrition
- Serving Size: 1 roll
- Calories: 210
- Sugar: 2g
- Sodium: 210mg
- Fat: 9g
- Saturated Fat: 5g
- Unsaturated Fat: 3g
- Trans Fat: 0g
- Carbohydrates: 28g
- Fiber: 1g
- Protein: 5g
- Cholesterol: 45mg
Tips for Perfect Garlic Bread Rolls
After burning my fair share of garlic bread rolls (and learning from every mistake), here are my hard-won secrets for guaranteed success:
- Flour is fickle – That extra tablespoon in the recipe? It’s your safety net. Always spoon flour into your measuring cup and level it off – packing it down gives you dense rolls.
- Rise right – Find the warmest spot in your kitchen (near the oven or on top of the fridge works great). No warm spot? Heat your oven to 200°F, turn it OFF, then let dough rise inside with the door slightly ajar.
- Portion perfectly – My $10 kitchen scale changed everything. Eyeballing leads to uneven baking – 67g portions mean all rolls finish at the same time.
- Watch like a hawk – At 20 minutes, start checking. Overbaked rolls lose that magical fluffiness. They should be golden, not dark brown.
- Garlic timing – Cook your garlic just until fragrant in both steps. Burnt garlic ruins everything – ask my 3rd test batch!
Follow these, and you’ll have garlic bread rolls worth bragging about every single time.
Garlic Bread Rolls Variations
Oh, the fun you can have with these rolls! When fresh parsley’s MIA, 1 teaspoon dried works (just add it with the dry ingredients). Cheese lovers – fold in ½ cup shredded parmesan or cheddar to the dough. Vegan? Swap the milk for almond or oat milk and use plant-based butter (the dough might be stickier, so add a touch more flour). For extra oomph, mix in ¼ teaspoon red pepper flakes with the garlic. My neighbor swears by adding a teaspoon of onion powder too – try it and see!
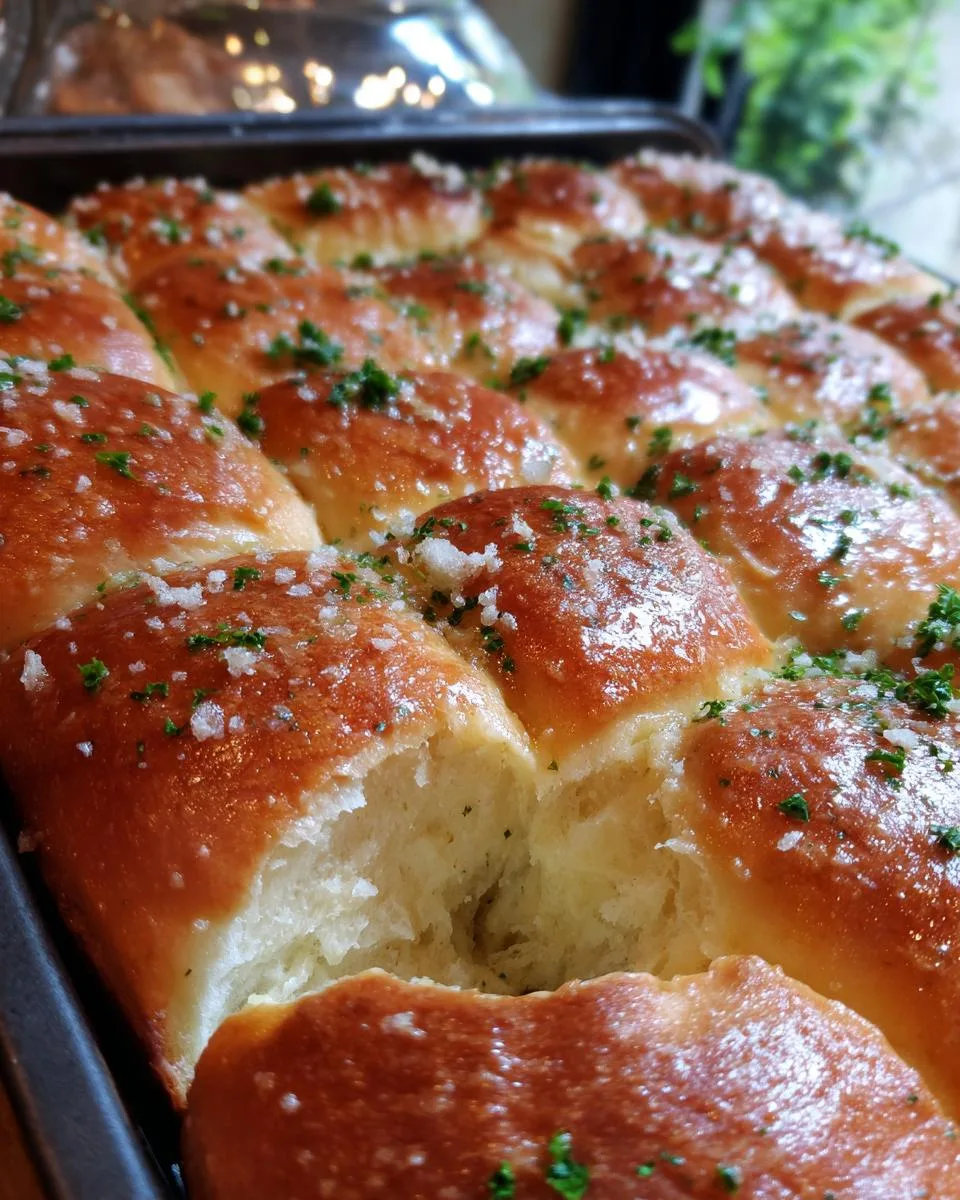
Serving Suggestions
These garlic bread rolls shine brightest when served warm – trust me, that’s when the butter and garlic flavors really sing! They’re absolute perfection alongside a steaming bowl of tomato soup or a hearty pasta dish (my lasagna nights wouldn’t be the same without them). For something lighter, pair them with a crisp Caesar salad – the garlic-on-garlic action is *chef’s kiss*. Just don’t expect leftovers once you put these on the table!
Storing and Reheating Garlic Bread Rolls
Now, I’ll let you in on my tricks for keeping these garlic bread rolls tasting fresh – because let’s be real, they rarely last long enough to need storing! For day-of serving, just wrap them in a clean kitchen towel to keep warm. Any leftovers (ha!) go in an airtight container at room temp for up to 2 days. To freeze, wrap cooled rolls individually in foil then slip into a freezer bag – they’ll keep beautifully for 3 months. When cravings strike, revive them by reheating in a 350°F oven for 10 minutes or popping in the toaster for a quick crisp-up. That first bite? Just like fresh from the oven!
Garlic Bread Rolls FAQs
Over the years, I’ve gotten some great questions about these garlic bread rolls – here are the answers to the ones that pop up most often in my kitchen and DMs!
Can I use active dry yeast instead of instant?
Absolutely! Just dissolve it in the warm milk with a pinch of sugar first and let it sit for 5-10 minutes until foamy. This “proofing” step ensures your yeast is alive and kicking. The rising times might be slightly longer with active dry yeast – just wait until your dough doubles, no matter how long it takes.
What’s the best way to freeze these rolls?
I like to freeze them after baking but before adding the garlic butter. Let them cool completely, then wrap tightly in plastic wrap followed by foil. When you’re ready to eat, thaw at room temperature, warm in a 300°F oven for 10 minutes, then add fresh garlic butter (always make this part new – frozen garlic butter tastes off).
Can I make the dough ahead?
Yes! After the first rise, punch down the dough, wrap tightly, and refrigerate overnight. The cold slows the yeast so you can shape and bake them fresh the next day. Let the dough come to room temperature for about 30 minutes before portioning – cold dough is stubborn to work with!
Why did my rolls come out dense?
Three likely culprits here: 1) You killed the yeast with too-hot liquid, 2) Didn’t let them rise fully (be patient!), or 3) Overworked the dough after adding flour. My mantra? Gentle hands make fluffy rolls!
Nutritional Information Note
Just a quick heads up – nutritional values can vary based on ingredient brands and exact measurements used. I always recommend calculating specifics if you’re tracking closely. That said, everything in moderation – especially when it comes to these irresistible garlicky bites!
Tag @Dishivia on Instagram if you make these!
I’d love to see your golden, garlicky creations – nothing makes me happier than seeing these rolls on your tables!
For More recipes, Follow me on Facebook!