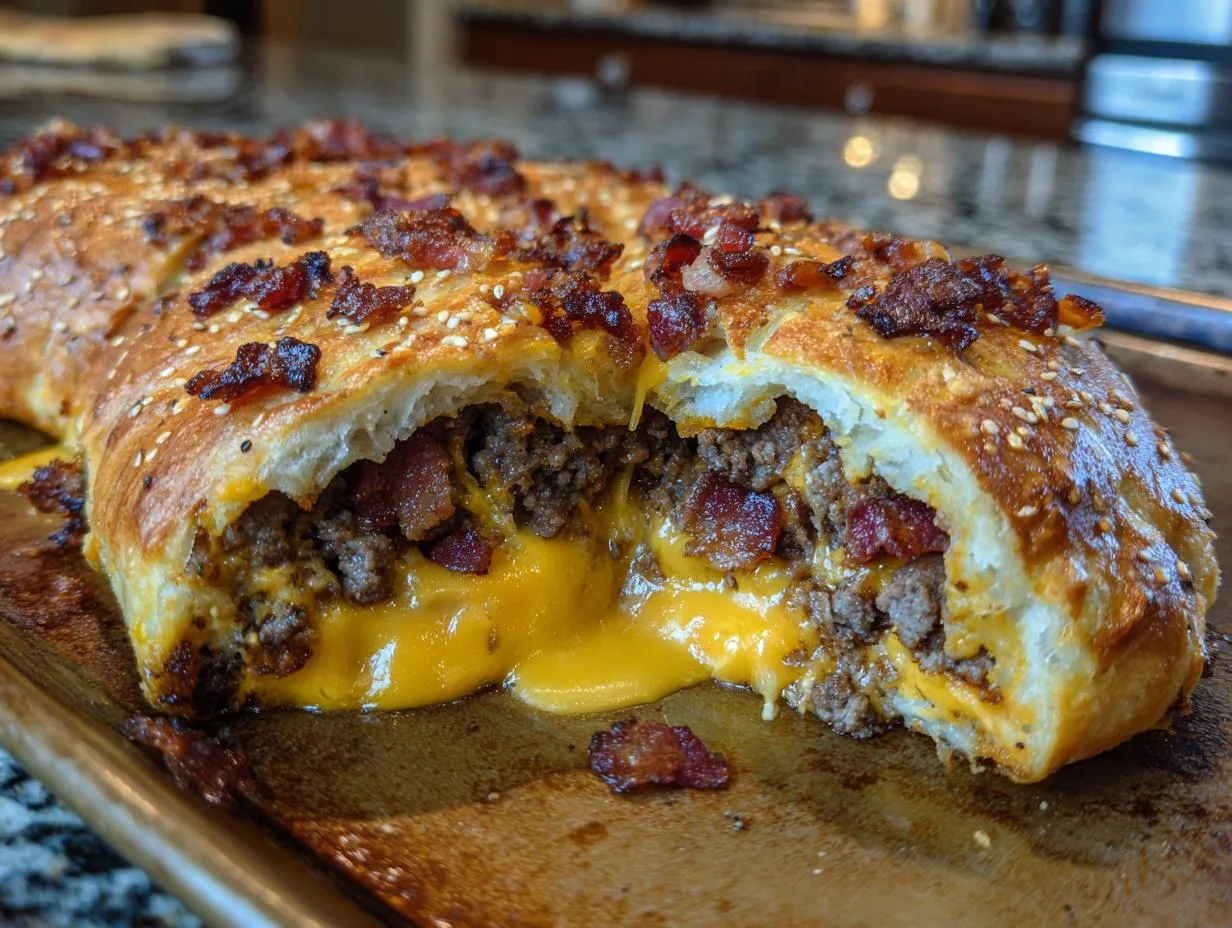
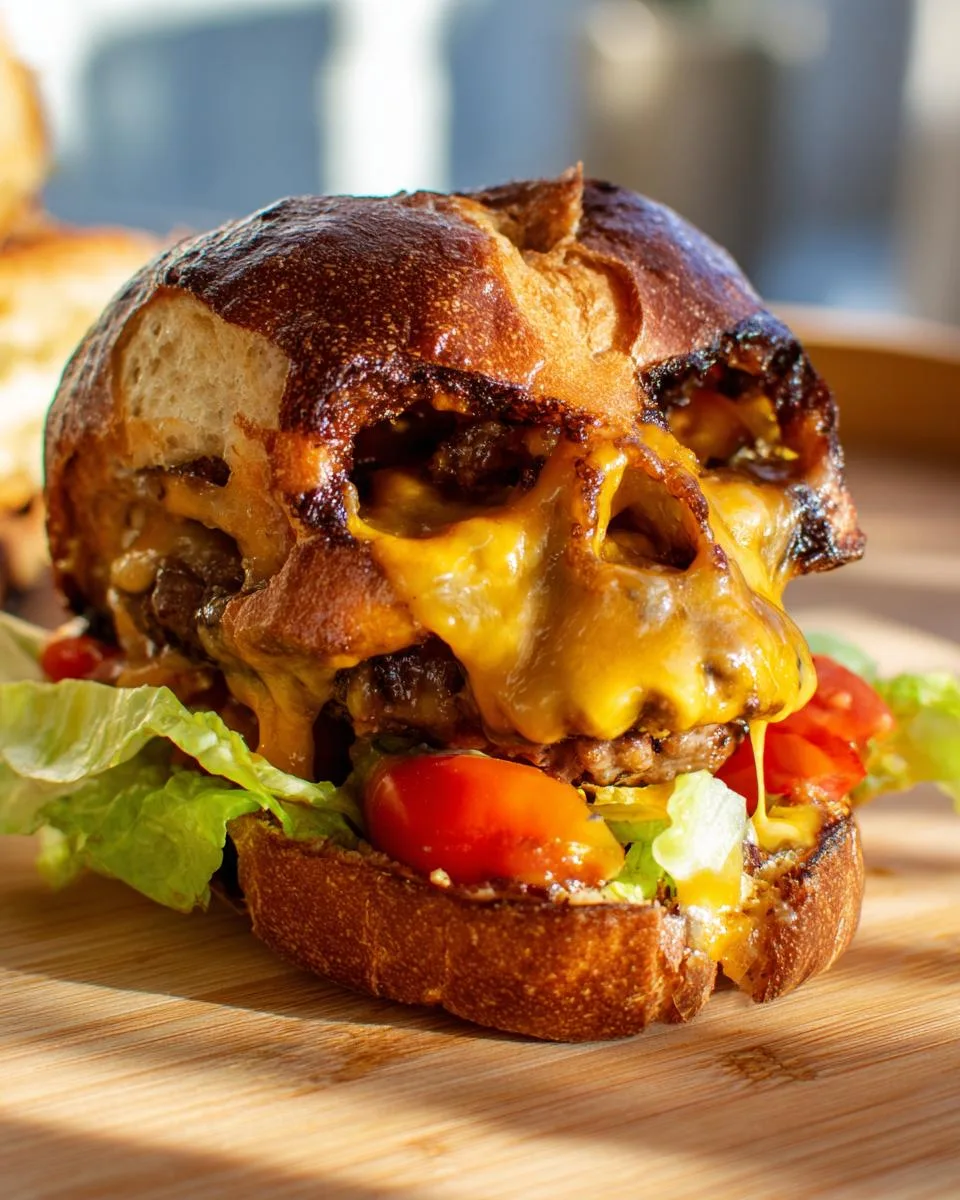
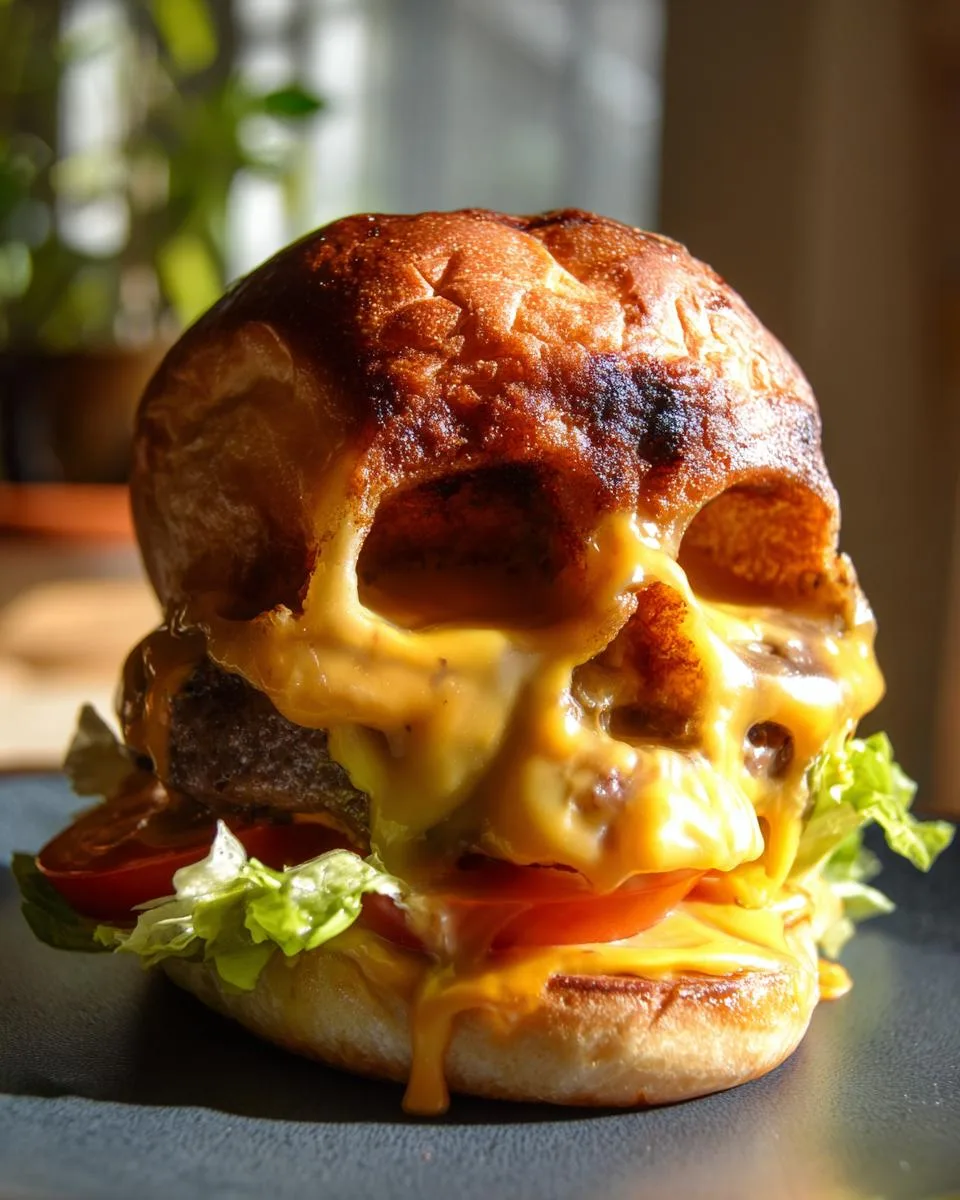
You know that moment when you see a dish that makes you stop mid-scroll and go “Wait—I need to make that”? That’s exactly what happened when I first dreamed up these cheeseburger skulls. Picture this: golden, buttery skull-shaped buns cradling juicy patties with melty cheese grinning right back at you. I’ve been a chef for over a decade, but my favorite recipes are always the ones that turn dinner into an event—especially around Halloween. Last year, I served these to my niece’s “spooky supper” party, and let’s just say the kids (and let’s be real, the adults) lost their minds. The best part? They’re shockingly simple to make once you know the tricks.
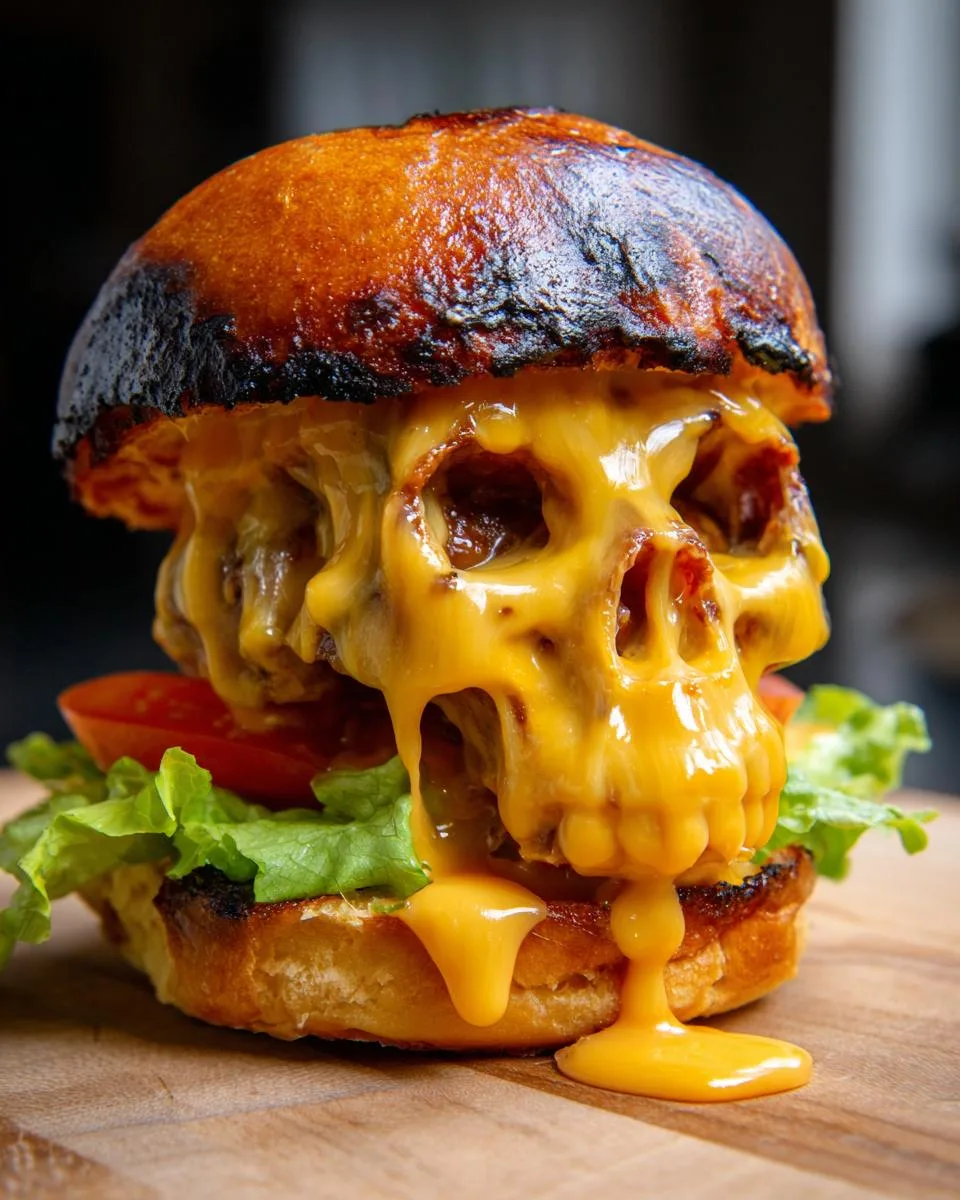
Table of Contents
Table of Contents
Why You’ll Love These Cheeseburger Skulls
Let me tell you why these skull burgers are about to become your new party staple:
- They’re downright showstopping – Nothing gets people talking like biting into a grinning cheeseburger. I’ve seen grown adults giggle pulling these out of the oven!
- Homemade buns make all the difference – Store-bought can’t compete with these buttery, slightly sweet skulls fresh from your oven. That golden crust? *Chef’s kiss*.
- Perfect for any spooky occasion – Halloween’s the obvious choice, but I’ve served these for horror movie nights, D&D parties—you name it. Instant mood setter!
- Surprisingly easy to pull off – Don’t let the fancy look fool you. If you can make burger buns, you can make these. My 8-year-year-old niece helps shape the dough!
Ingredients for Your Cheeseburger Skulls
Gather your ingredients, and let’s make some spooky magic happen! I’ve broken it down into two sections—the buns and the burgers—so you can stay organized and focused. Trust me, having everything prepped and ready makes the process so much smoother. Let’s dive in!
For the Skull-Shaped Buns
- 5 tablespoons (56 grams) salted butter, softened – This gives the buns that rich, buttery flavor and tender crumb. Don’t skip it!
- 3 ½ cups (420 grams) all-purpose flour – The backbone of your buns. Measure it right—too much flour makes them dense.
- 1 large egg – Adds structure and a beautiful golden color.
- ¼ cup (50 grams) granulated sugar – Just enough sweetness to balance the savory burgers.
- 1 teaspoon salt – Enhances all the flavors. Don’t skimp!
- 1 tablespoon (9 grams) instant yeast – This makes the buns rise beautifully. Check the expiration date!
- ¾ cup (170 grams) lukewarm water (100-110°F) – Too hot kills the yeast, too cold slows it down. Use a thermometer if you’re unsure.
For the Cheeseburger Patties & Assembly
- 32 ounces 80/20 ground beef – The fat keeps the burgers juicy. Trust me, it’s worth it!
- Salt and pepper – Simple seasonings to let the beef shine.
- 1 tablespoon butter, lard (bacon fat), or vegetable oil – For cooking the patties. Bacon fat adds amazing flavor!
- 8 slices white cheese (American, Cheddar, Provolone, Havarti, etc.) – Pick your favorite or mix it up. I love a sharp cheddar for extra flavor.
- Burger toppings – Go classic with tomato, lettuce, ketchup, mustard, mayonnaise, onions, and pickles, or customize to your taste!
Equipment You Need for Cheeseburger Skulls
Before we dive into the fun part, let’s make sure you’ve got the right tools for the job. Here’s what you’ll need to bring these spooky burgers to life:
- Nordic Ware skull pans – The star of the show! These give the buns their eerie shape. No skull pans? A muffin tin works in a pinch, but the effect won’t be quite as dramatic.
- Stand mixer with dough hook (or strong arms!) – For kneading that bun dough to perfection. I’ve done it by hand—it’s a workout, but totally doable.
- Cast iron skillet or heavy non-stick pan – For getting those burgers crispy-edged and juicy inside. My grandma’s cast iron never lets me down.
- Cooling rack – Lets your skull buns breathe so they don’t get soggy bottoms. Worth every inch of cabinet space it takes up!
That’s it! No fancy gadgets required—just good old-fashioned kitchen essentials with a spooky twist.
How to Make Cheeseburger Skulls: Step-by-Step Guide
Alright, let’s get spooky! Follow these steps, and you’ll have grinning cheeseburger skulls that’ll steal the show. I’ve broken it down into three easy parts—making the buns, baking them to golden perfection, and assembling your edible masterpieces.
Making the Skull Bun Dough
First things first—butter up those skull pans like you’re preparing for Halloween royalty. Use about a tablespoon of softened butter to coat every nook and cranny (those eye sockets need love too!). Set aside the rest for later—we’ll use it to make the buns extra golden and delicious.
Now, let’s make magic happen: toss the flour, sugar, salt, yeast, and those little butter pieces into your mixing bowl. Pour in the lukewarm water (think baby-bottle warm—too hot and you’ll murder the yeast). Mix until it comes together into a shaggy dough, then knead for 5-7 minutes. You’ll know it’s ready when it springs back like a happy little ghost when you poke it. Cover the bowl with plastic wrap and let it rise somewhere cozy (I like my oven with just the light on) until it doubles—about 1-2 hours depending on your kitchen’s mood.
Shaping and Baking the Buns
Punch down that puffy dough (so satisfying!) and divide it into 8 even balls—about 95 grams each if you’re weighing. Press each piece into your prepared skull pans, making sure to fill all the creepy details. Cover them with plastic again and let them rise for another hour—they should look nice and plump.
When they’re almost ready, preheat your oven to 375°F. Bake for 14-18 minutes (14 for lighter buns, 18 for that deep golden crunch), rotating the pans halfway because ovens lie about being even. The second they’re out, flip those skulls onto a cooling rack and brush them with the melted reserved butter. Do it twice if you’re feeling extra—it gives them that gorgeous bakery-style sheen.
Cook Your Cheeseburger Skulls
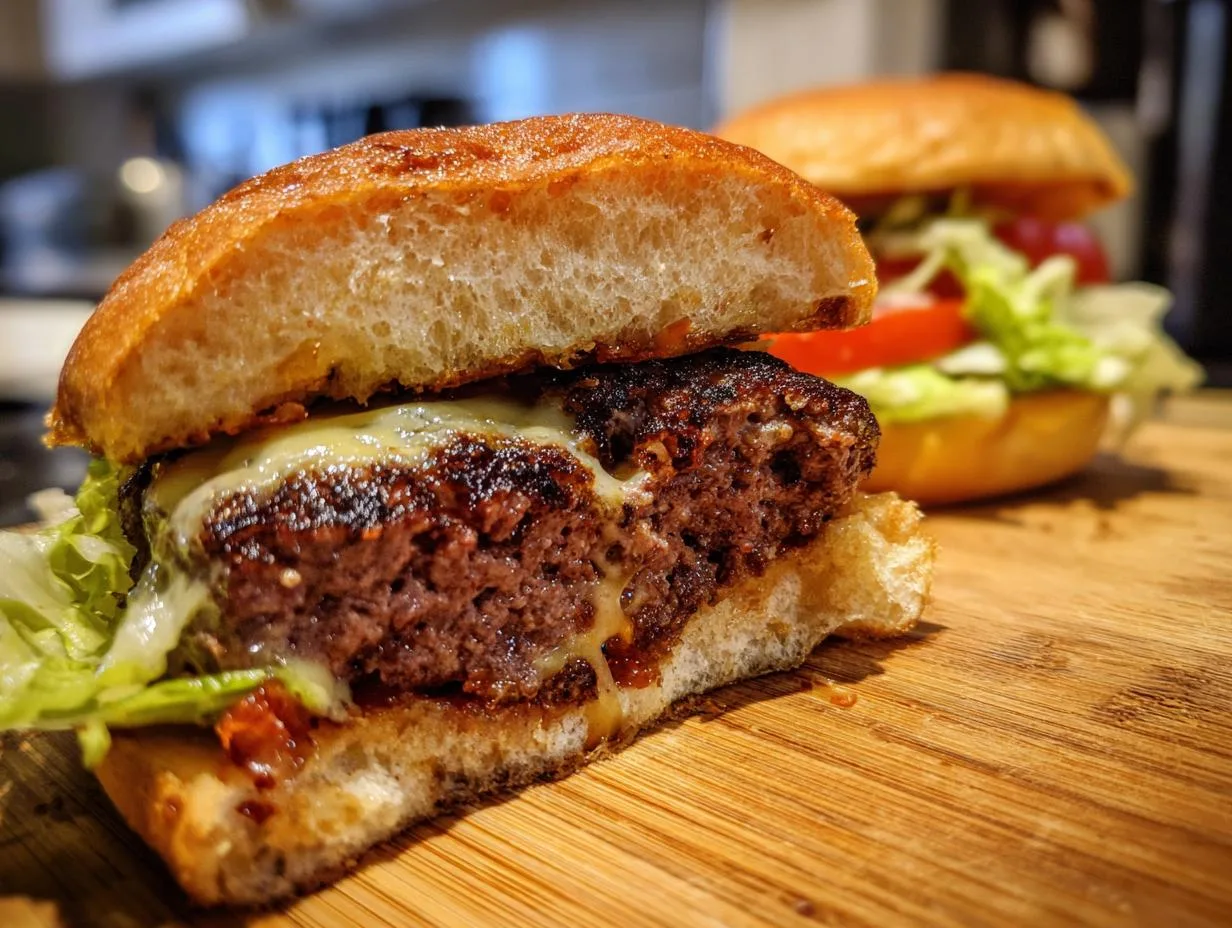
While the buns cool, shape your burger patties into skulls—either freehand or with a cookie cutter if you want them picture-perfect. Keep them chilled until the pan’s hot! Season generously with salt and pepper right before cooking—trust me, it makes a difference. Cook in batches in a smoking-hot skillet with a bit of fat (bacon grease = flavor town) for about 3 minutes per side for medium. Add cheese slices (cut into skull shapes if you’re extra like me) and cover just until melty. Slice your cooled buns, pile on the patties and toppings, and watch everyone’s faces light up when they see these grinning goodies!
Print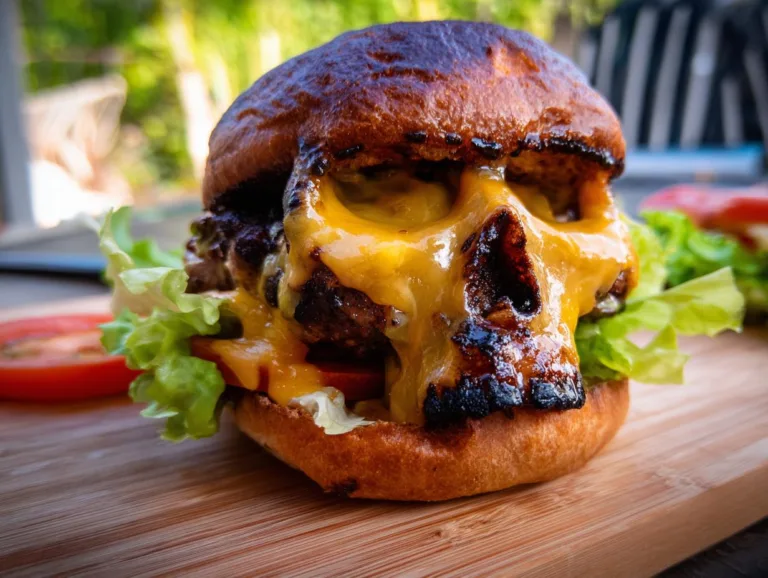
Spooky 8 Cheeseburger Skulls Recipe That Will Haunt You
Skull-shaped cheeseburgers with homemade skull buns, a fun and spooky twist on the classic cheeseburger perfect for Halloween or themed parties.
- Total Time: 4 hours
- Yield: 8 cheeseburgers 1x
Ingredients
- Skull-Shaped Hamburger Buns
- 5 tablespoons (56 grams) salted butter, softened
- 3 ½ cups (420 grams) all-purpose flour
- 1 large egg
- ¼ cup (50 grams) granulated sugar
- 1 teaspoon salt
- 1 tablespoon (9 grams) instant yeast
- ¾ cup (170 grams) lukewarm water, 100-110 degrees Fahrenheit
- Skull-Shaped Cheeseburgers
- 32 ounces 80/20 ground beef
- Salt and pepper
- 1 tablespoon butter, lard (bacon fat), or vegetable oil
- 8 slices white cheese (American, Cheddar, Provolone, Havarti, etc.)
- Burger toppings: tomato, lettuce, ketchup, mustard, mayonnaise, onions, pickles
Instructions
- Skull-Shaped Hamburger Buns
- Use one tablespoon of butter to liberally grease 8 skull cavities in your Nordic Ware skull pans.
- Reserve 2 more tablespoons of butter to use later to butter the tops of your hamburger buns.
- Cut the remaining two tablespoons of butter into small pieces and place in a mixing bowl along with the flour, egg, sugar, salt, and yeast.
- Pour the lukewarm water over the ingredients and mix until well blended. You can do this using a spoon or a dough hook in a stand mixer.
- Knead the dough using a stand mixer or by hand on a flour-dusted countertop for 5-7 minutes until the dough springs back when poked.
- Cover the mixing bowl with plastic wrap and let the dough rise until it doubles in size for 1-2 hours.
- Deflate the dough and divide it into 8 even pieces (about 95 grams each). Press the dough into the 8 greased skull cavities.
- Cover the skull pans with plastic wrap and allow the dough to rise for 1 hour.
- Preheat your oven to 375 degrees Fahrenheit (190° C).
- Bake the buns for 14 minutes for lighter buns and about 18 minutes for darker buns, rotating the pans midway through the baking process.
- Remove the pans from the oven and dump the skulls out onto a cooling rack.
- Melt the remaining 2 tablespoons of butter. Brush melted butter over the skull-shaped hamburger buns. Add a second layer of butter if desired.
- Let the buns cool completely before slicing them in half.
- Skull-Shaped Cheeseburgers
- Divide the ground beef into 8 portions. Gently shape the burgers into skull shapes. You can use a cookie cutter or just hand-shape them.
- Keep the burgers in the refrigerator until ready to cook.
- Season the burgers with salt and pepper just before cooking.
- Heat 1 teaspoon of butter, lard, or oil in a cast iron or non-stick skillet over medium-high heat until smoking.
- Place three burgers in the pan and cook for about 3 minutes on each side until cooked as desired (ex: 135 degrees F. for medium-rare).
- Place a slice of cheese over each burger. You can cut the cheese into a skull shape if desired.
- Remove the pan from the heat and cover with a lid allowing the cheese to melt.
- Repeat this process to cook more burgers.
- Alternatively, you can cook your burgers in an electric skillet, on a grill pan, or on an outdoor grill.
- Place a burger on a bun and add toppings.
- Serve and enjoy.
Notes
- For crispier buns, bake for the full 18 minutes.
- Let the dough rise in a warm place for best results.
- Customize toppings to your preference.
- Prep Time: 3 hours 30 minutes
- Cook Time: 30 minutes
- Category: Main Course
- Method: Baking, Stovetop
- Cuisine: American
- Diet: Halal
Nutrition
- Serving Size: 1 cheeseburger
- Calories: 520
- Sugar: 8g
- Sodium: 620mg
- Fat: 28g
- Saturated Fat: 12g
- Unsaturated Fat: 12g
- Trans Fat: 1g
- Carbohydrates: 42g
- Fiber: 2g
- Protein: 26g
- Cholesterol: 110mg
Expert Tips for Perfect Cheeseburger Skulls
Want your cheeseburger skulls to be next-level amazing? Here are my hard-earned tricks from years of baking disasters (and triumphs!):

- For crispier buns, bake the full 18 minutes—that extra time gives them a satisfying crunch that holds up to juicy burgers.
- Let dough rise in a warm spot—I use my oven with just the light on. Cold kitchens mean sad, flat skulls!
- Customize like crazy—Try ghost-shaped cheese slices, spicy sriracha mayo, or even black sesame “rotten teeth” for extra creepy flair.
Remember: the best Halloween recipes should taste as good as they look—and these deliver!
Cheeseburger Skulls Variations
Why stop at basic when you can get wild with these skull burgers? Here’s how I like to mix it up:
- Spooky cheese cutouts – Use Halloween cookie cutters to shape your slices into bats, ghosts, or pumpkins before melting.
- Fiery patties – Add 1 tsp smoked paprika and a pinch of cayenne to the beef for a devilish kick.
- Monster mash toppings – Swap lettuce for black kale “hair,” use purple onions as “veins,” or pickle slices as zombie eyes!
The fun part? No two batches ever look exactly alike—just like real skeletons!
Serving Your Cheeseburger Skulls
Timing is everything—serve these skull burgers hot off the griddle while the cheese is still oozy and the buns are slightly warm. I love piling them on a creepy platter with classic sides like sweet potato “witch finger” fries or a graveyard-themed salad. Pro tip? Add dry ice to a tray underneath for extra spooky drama (just don’t let it touch the food!). Watch your guests’ jaws drop—literally—when you bring these to the table.
Storing and Reheating Cheeseburger Skulls
Here’s the scoop—these burgers taste best fresh, but if you’ve got leftovers (rare in my house!), store the buns and patties separately. Keep buns in an airtight bag at room temp for 2 days, or freeze them for up to a month. Cooked patties go in the fridge for 3 days—reheat them gently in a skillet with a splash of water to keep them juicy. Never microwave the buns unless you want hockey pucks!
Cheeseburger Skulls Nutrition Information
Each cheeseburger skull clocks in at about 520 calories—hey, it’s a party food! Here’s the full breakdown per serving: 28g fat (12g saturated), 42g carbs (2g fiber, 8g sugar), and 26g protein. Sodium hits 620mg, so go easy if you’re watching salt. Remember, these numbers can wiggle a bit depending on your exact ingredients (bacon fat lovers, I see you!). It’s Halloween—live a little!
Frequently Asked Questions About Cheeseburger Skulls
Got questions? I’ve got answers! Here’s what readers ask me most about these spooky burgers:
- Can I use store-bought buns instead? Sure, but homemade skull buns make all the difference! If you’re pressed for time, look for round buns and carve spooky faces with a knife—it’s not quite the same, but still fun.
- Any pan alternatives if I don’t have skull molds? A muffin tin works in a pinch—just shape the tops into rounded “heads” and add eyes/mouths after baking with melted chocolate or food markers.
- Can I prep these ahead? Absolutely! The dough can rise overnight in the fridge (just let it warm up before shaping). Cooked patties reheat beautifully—just keep everything separate until assembly.
- Help—my cheese melted into the pan! Oh honey, we’ve all been there! Let the burgers rest 1 minute off heat before adding cheese, then cover. No lid? Tent with foil—steam works magic!
Share Your Creations
Did your cheeseburger skulls turn out spooktacular? I’d love to see! Nothing makes me happier than seeing your creepy creations. Got questions or wild topping ideas? Drop them below, and let’s keep the Halloween burger party going!
For More recipes, Follow me on Facebook!