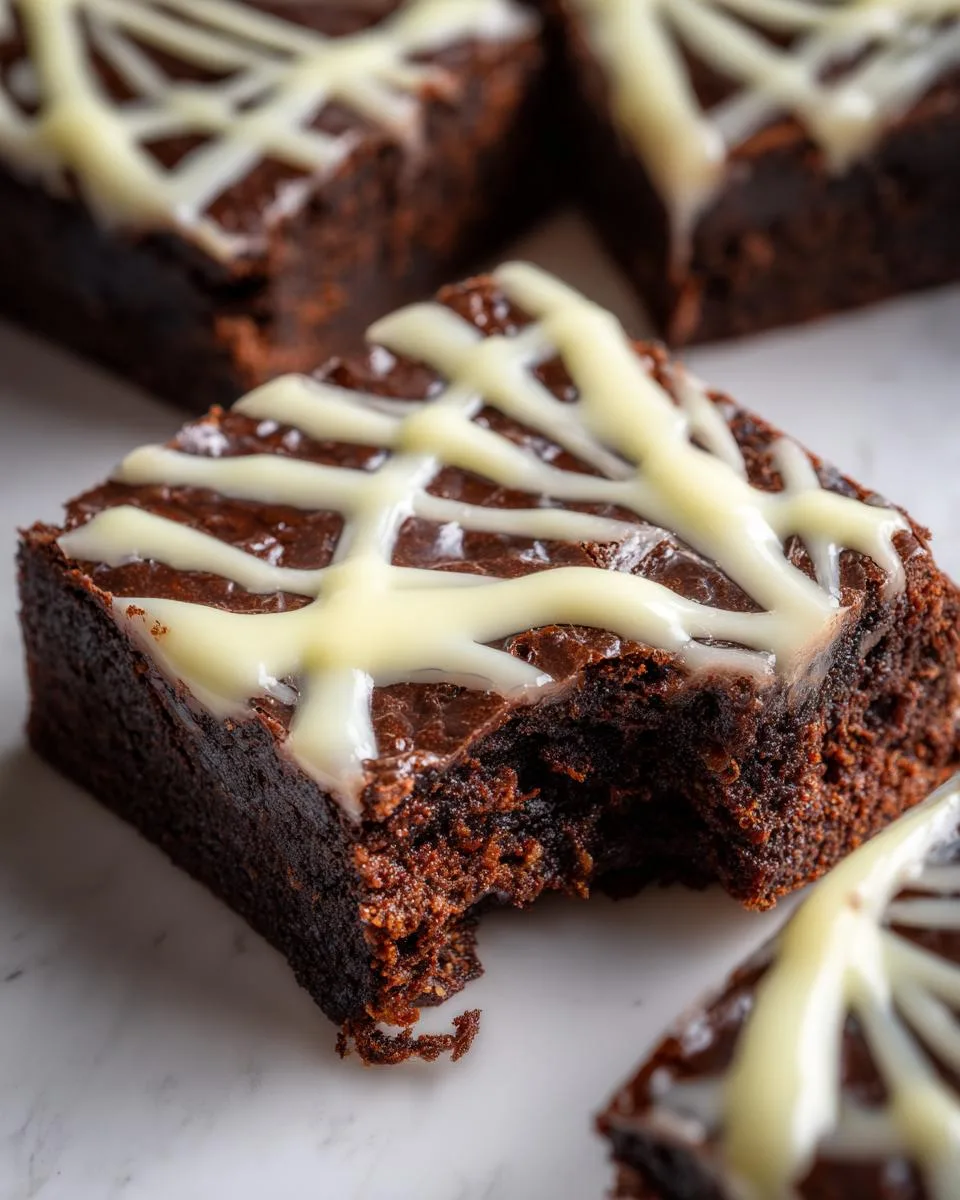
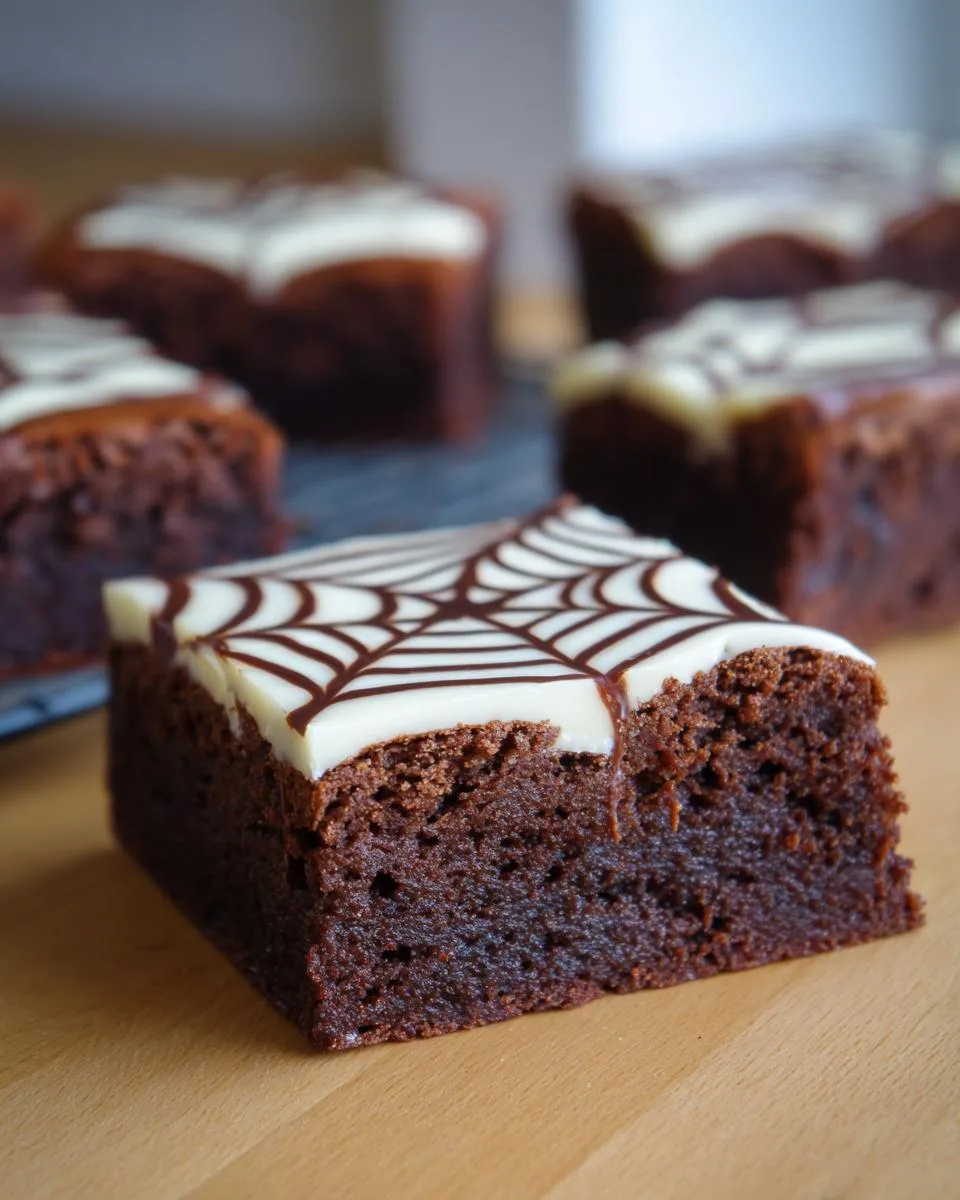
You know what’s better than regular brownies? White Chocolate Spiderweb Brownies that look as spooktacular as they taste! I’ve been making these for years—ever since my niece begged me to create a Halloween treat that wasn’t just candy. The rich, fudgy dark chocolate base pairs perfectly with the creamy white chocolate spiderweb design, and trust me, it’s way easier to pull off than it looks. Whether you’re hosting a party or just want to surprise the kids (or yourself—no judgment!), these brownies are my go-to festive dessert. Plus, they’re so simple, you’ll have extra time to work on your costume!
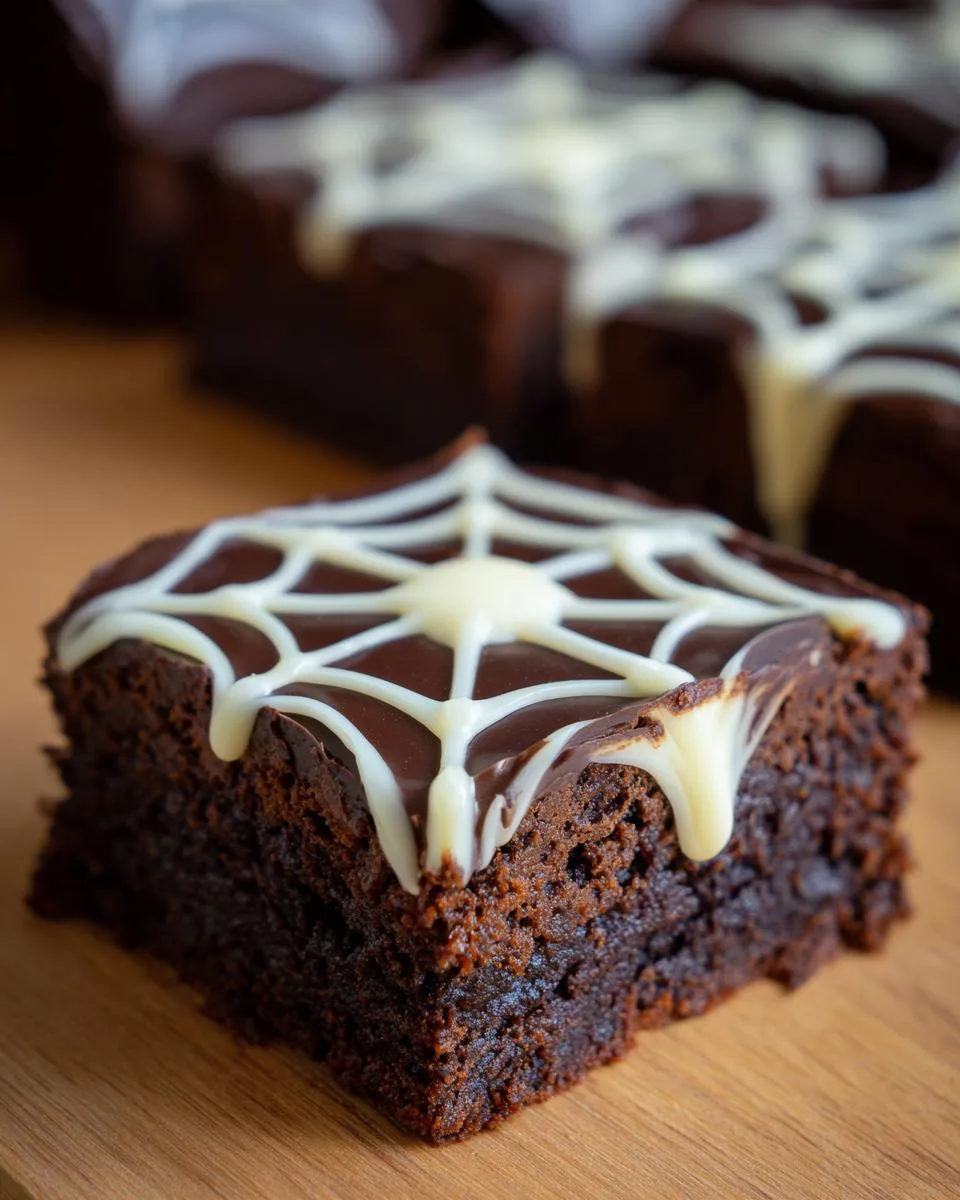
Table of Contents
Table of Contents
Why You’ll Love These White Chocolate Spiderweb Brownies
These brownies aren’t just delicious—they’re a total showstopper! Here’s why they’ll become your new favorite Halloween (or anytime) treat:
- Spooky & festive: The white chocolate spiderweb design looks impressive but takes minutes to create—no fancy skills needed!
- Rich, fudgy perfection: Dark chocolate brownies with a crackly top make the perfect base for the sweet white chocolate swirls.
- Easy enough for beginners: If you can melt chocolate and drag a spoon, you’ve got this. (My 8-year-old nephew helps me every year!)
- Crowd-pleaser magic: Kids adore the fun design, while adults sneak seconds for that decadent chocolate combo.
Seriously, these disappear faster than ghosts at sunrise.
Ingredients for White Chocolate Spiderweb Brownies
This recipe keeps things simple—just 8 pantry staples for brownies that’ll have everyone web-slinging compliments your way! Here’s what you’ll need:
- 1/2 cup unsalted butter – Melted (I like to brown mine slightly for extra flavor, but regular melted works great too)
- 4 oz high-quality dark chocolate – Chopped (my favorite trick? A serrated bread knife makes quick work of chopping!)
- 1 cup granulated sugar – The secret to that perfect crackly crust
- 2 large eggs – Room temperature—they’ll mix into the batter smoother
- 1 tsp vanilla extract – The good stuff, not imitation!
- 1/4 cup unsweetened cocoa powder – I use Dutch-processed for deeper flavor
- 1/4 tsp salt – Balances the sweetness perfectly
- 2 oz white chocolate – Chopped (for that gorgeous spiderweb—more if you want thicker webs!)
Ingredient Notes & Substitutions
Out of something? No worries—here are my tested swaps: Use milk chocolate if you prefer sweeter brownies, or coconut oil for butter in a pinch. For gluten-free, swap the cocoa with a GF blend (they’re already flourless!). And if white chocolate’s not your thing, try cream cheese frosting swirls instead—still creepy-cute!
How to Make White Chocolate Spiderweb Brownies
Ready to whip up these showstopping brownies? Follow these simple steps—I promise, even if you’re all thumbs in the kitchen, that spiderweb design is foolproof!

Step 1: Prep the Brownie Batter
First, melt your butter and dark chocolate together—I like using a double boiler (or a heatproof bowl over simmering water if you’re fancy). Stir until smooth, then let it cool slightly so you don’t scramble your eggs! Whisk in sugar, eggs, and vanilla like you’re making magic potion. In another bowl, mix cocoa powder and salt, then gently fold it into the chocolate mixture. Key tip: Stop mixing as soon as no dry spots remain—overmixing makes tough brownies!
Step 2: Bake and Cool
Pour that gorgeous batter into your lined 8×8-inch pan (trust me, parchment paper is your friend here). Bake at 350°F for 25-30 minutes—you’ll know they’re done when a toothpick comes out with a few moist crumbs. Walk away now—no peeking! Let them cool completely in the pan, or your spiderwebs will melt into sad puddles.
Step 3: Create the Spiderweb Design
Time for the fun part! Melt white chocolate (microwave in 15-second bursts, stirring between each), then transfer to a piping bag or zip-top bag with a tiny corner snipped off. Pipe 5-6 lines from the center outwards like sun rays. Now grab a toothpick and drag it through the lines in spiral motions to connect them—voilà, instant spiderweb! Troubleshooting: If the chocolate sets too fast, just pop the bag back in warm water for 10 seconds. Chill the whole pan 15 minutes to set your masterpiece before slicing.
Print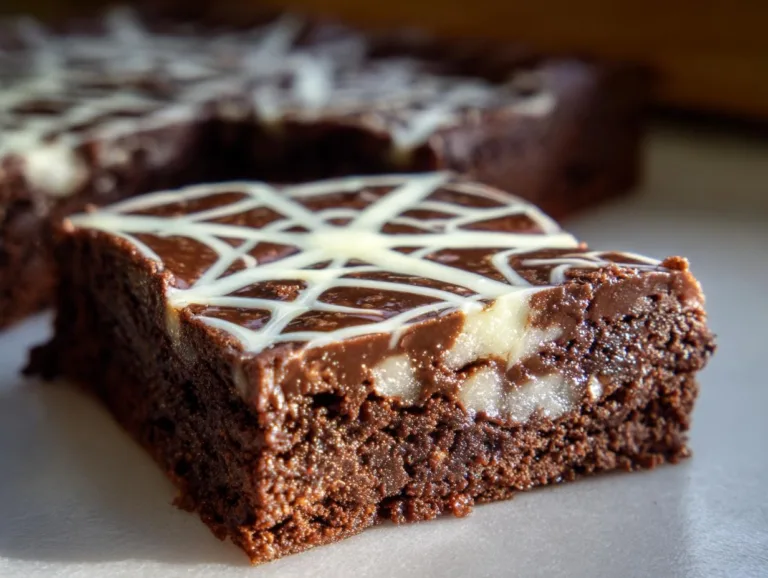
Spooky White Chocolate Spiderweb Brownies in Just 30 Minutes
Delicious brownies with a spiderweb design made from white chocolate. Perfect for Halloween or any festive occasion.
- Total Time: 45 minutes
- Yield: 9 brownies 1x
Ingredients
- 1/2 cup unsalted butter
- 4 ounces high-quality dark chocolate, chopped
- 1 cup granulated sugar
- 2 large eggs
- 1 teaspoon vanilla extract
- 1/4 cup unsweetened cocoa powder
- 1/4 teaspoon salt
- 2 ounces white chocolate, chopped
Instructions
- Preheat the oven to 350°F (175°C). Grease and line an 8×8-inch baking pan with parchment paper.
- Melt the butter and dark chocolate together until smooth. Allow it to cool slightly.
- Whisk in the granulated sugar, eggs, and vanilla extract into the chocolate mixture until well combined.
- In a separate bowl, whisk together the cocoa powder and salt. Gradually fold the dry mixture into the wet mixture until just combined.
- Pour the batter into the prepared baking pan and smooth the top. Bake for 25-30 minutes, or until a toothpick inserted into the center comes out with a few moist crumbs.
- Let the brownies cool completely in the pan.
- Melt the white chocolate and transfer it to a small piping bag or a zip-top bag with a small corner snipped off.
- Draw a spiderweb design by dragging lines from the center of the brownies to the edges, then connect them with wave-like lines.
- Chill the brownies in the refrigerator for 15-20 minutes to set the white chocolate.
- Cut into squares and serve.
Notes
- Use high-quality chocolate for the best results.
- Let the brownies cool completely before decorating to prevent the white chocolate from melting.
- Store leftovers in an airtight container at room temperature for up to 3 days.
- Prep Time: 15 minutes
- Cook Time: 30 minutes
- Category: Dessert
- Method: Baking
- Cuisine: American
- Diet: Vegetarian
Nutrition
- Serving Size: 1 brownie
- Calories: 220
- Sugar: 18g
- Sodium: 70mg
- Fat: 12g
- Saturated Fat: 7g
- Unsaturated Fat: 4g
- Trans Fat: 0g
- Carbohydrates: 25g
- Fiber: 2g
- Protein: 3g
- Cholesterol: 55mg
Tips for Perfect White Chocolate Spiderweb Brownies
Want bakery-level results every time? These are my tried-and-true tricks after making these brownies for a decade of Halloweens (and many “just because” days!):
- Splurge on good chocolate: Cheap white chocolate seizes up easily—look for brands with cocoa butter listed first.
- Room-temp eggs matter: Cold eggs make the batter thicken weirdly. No time to wait? Submerge them in warm water for 5 minutes!
- Slice cleanly with a hot knife: Run your knife under hot water and dry it between cuts for those Instagram-perfect edges.
- Practice piping on parchment first: Test your spiderweb technique on paper before decorating—it helps build muscle memory!
Bonus tip: If your kitchen’s warm, pop the brownies in the freezer for 10 minutes before slicing—no crumbly mess!
Storing and Serving Suggestions
These brownies keep their fudgy texture best in an airtight container at room temp—they’ll stay fresh for 3 days (if they last that long!). For extra fun, serve with cold milk for dunking or vanilla ice cream for a spooky sundae. Pro tip: Stack them on a cake stand with plastic spiders for a Halloween centerpiece that’ll vanish fast!
White Chocolate Spiderweb Brownies Nutrition
Let’s keep it real—these are a treat, not health food, but I believe in enjoying desserts without guilt! One brownie (about 1/9th of the pan) comes to roughly 220 calories with 12g fat. The exact numbers can vary based on your specific ingredients—like whether you use that fancy European butter I love or a different chocolate brand.
Fun fact: The dark chocolate actually offers some antioxidants, and those eggs add a protein boost. But let’s be honest, we’re here for that magical combo of fudgy brownie and sweet white chocolate—not a nutrition lecture! Just slice small if you’re watching portions… or go big and savor every bite. Your call!
FAQs About White Chocolate Spiderweb Brownies
Can I use milk chocolate instead of dark chocolate?
Absolutely! The brownies will be sweeter, but still delicious. My niece actually prefers them this way—just keep an eye on baking time since milk chocolate brownies can cook faster. The spiderweb design works the same!
Help! My spiderwebs look runny—how do I fix them?
No panic! If your white chocolate is too thin, let it cool slightly before piping. Too late? Pop the decorated brownies in the fridge for 5 minutes to firm up. Still messy? Call them “ghostly cobwebs” and lean into the spookiness—nobody will complain!
Can I make these ahead for a party?
You bet! Bake the brownies 1-2 days early (store airtight at room temp), then add the spiderwebs the day of. They’ll stay fresh-tasting, and the design won’t smudge. Bonus: The flavors deepen overnight—my secret for extra fudgy perfection!
For More recipes, Follow me on Facebook!