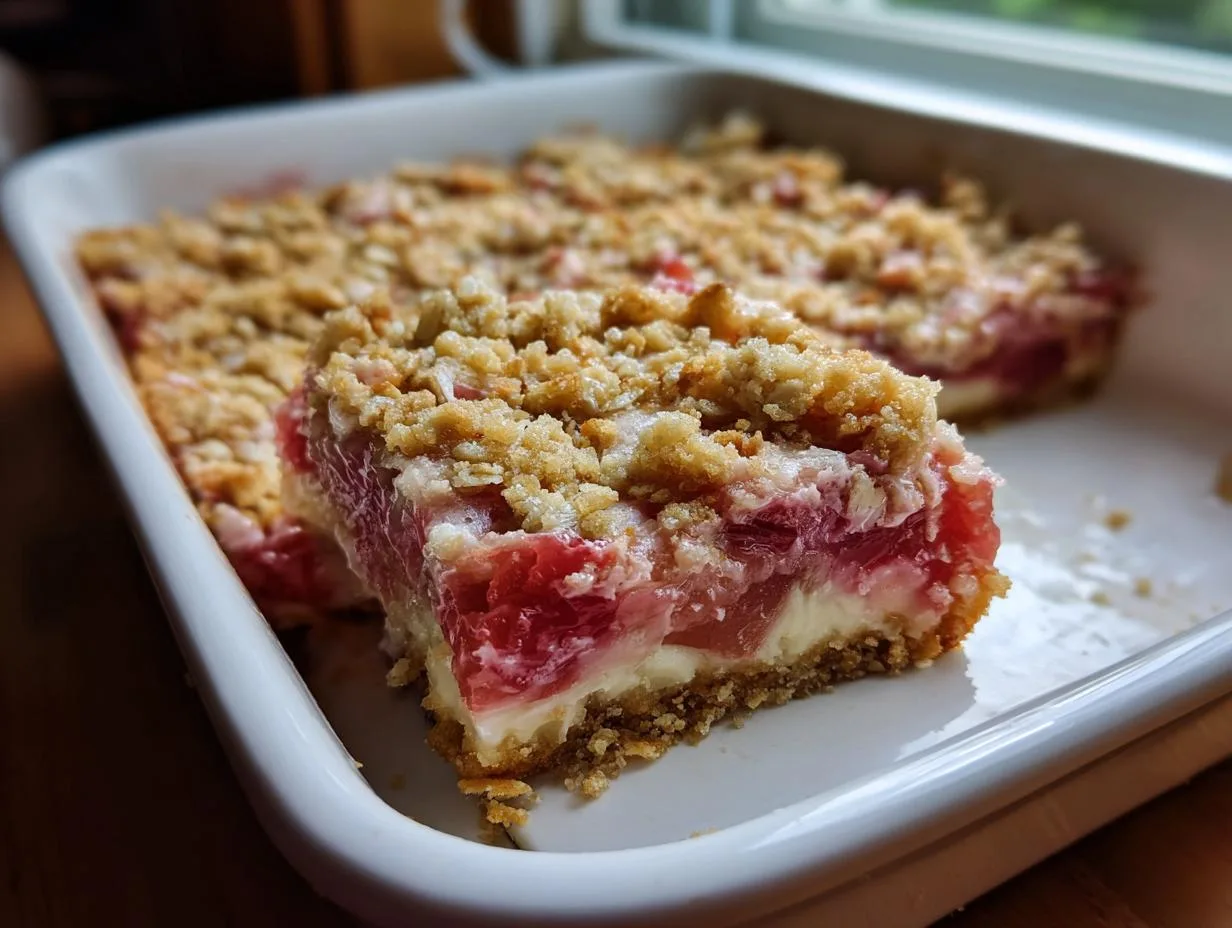
Nothing says summer quite like the sweet-tart magic of strawberry rhubarb pie. After years of testing recipes in professional kitchens and my own home, I’ve perfected this version that balances juicy strawberries with rhubarb’s bright tang in a buttery, flaky crust. It’s the dessert I make when I want to impress but don’t want to fuss – simple enough for weeknights yet special enough for celebrations.
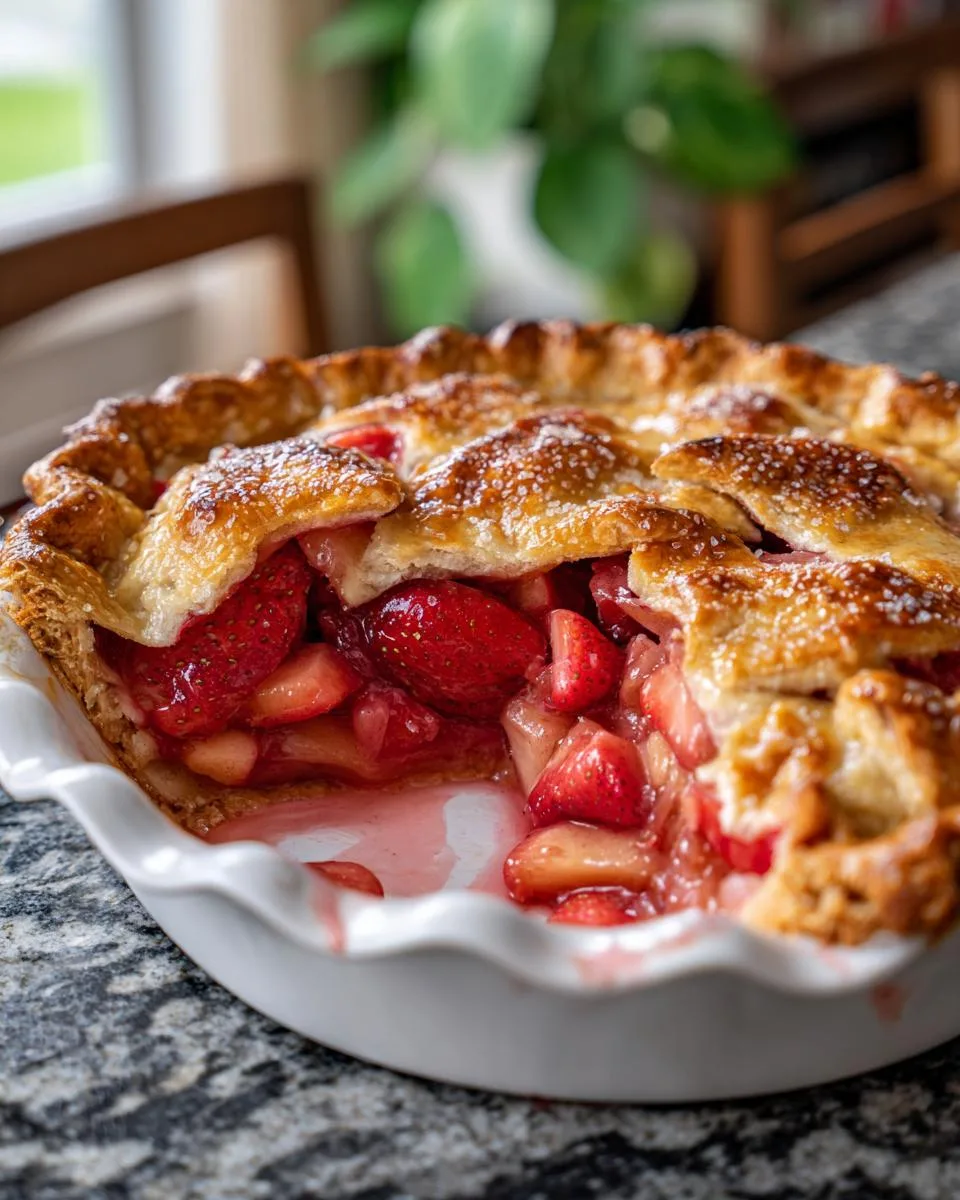
Table of Contents
Table of Contents
This recipe comes from my grandma’s notebook, updated with chef tricks I’ve learned along the way. The secret? Letting the fruit macerate with sugar before baking – it creates the most luscious, jammy filling that holds together beautifully when sliced.
That first bite takes me back to childhood summers picking rhubarb from our garden and sneaking strawberry slices while my mom wasn’t looking. Now it’s the pie my friends beg me to bring to every potluck and the one I promise will make you a pie legend in your own family.
Why You’ll Love This Strawberry Rhubarb Pie Recipe
This pie isn’t just delicious – it’s downright addictive. Here’s why:
- The perfect sweet-tart balance: Not too sugary, not too puckery – just the right harmony between strawberries’ sweetness and rhubarb’s zing. Trust me, it’ll make your taste buds dance!
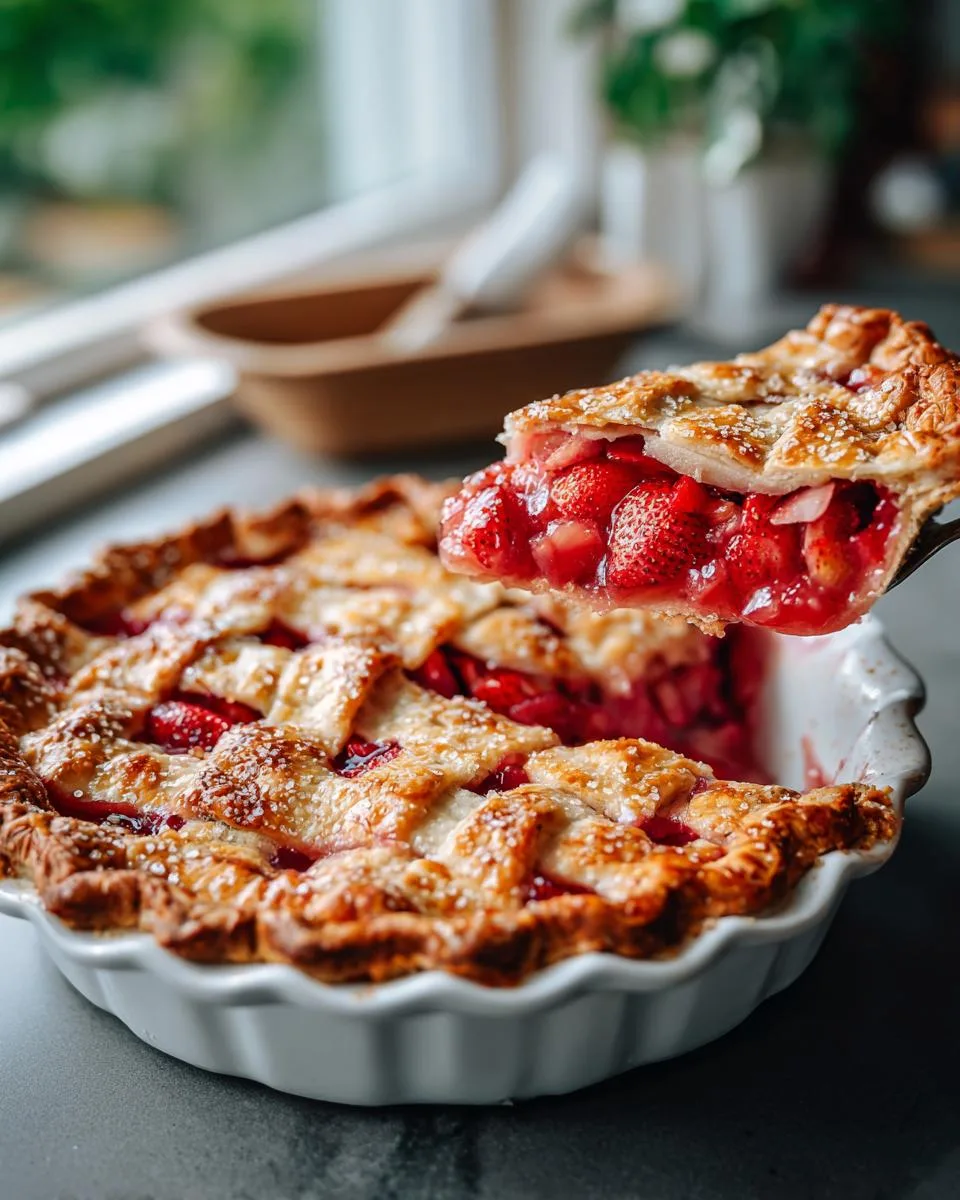
- Flaky, buttery crust: That golden-brown top crust shatters beautifully with every forkful, thanks to my grandma’s no-fail pastry technique.
- Simple steps, big wow factor: No fancy equipment needed – just toss, fill, and bake. Yet it looks and tastes like you spent hours in the kitchen.
- Crowd-pleasing magic: I’ve never brought this to a gathering without someone asking for the recipe. It’s the dessert that disappears first!
- Seasonal celebration: When spring rhubarb meets summer strawberries, magic happens. This pie captures that fleeting seasonal perfection in every slice.
Strawberry Rhubarb Pie Recipe Ingredients
Here’s everything you’ll need to make this showstopping pie – simple pantry staples that come together in the most magical way:
- 1 cup white sugar (not packed – just scoop and level it)
- ½ cup all-purpose flour (this thickens the juices beautifully)
- 1 pound fresh rhubarb, cut into ¼-inch slices (about 3 cups)
- 2 pints fresh strawberries, hulled and quartered (look for ripe but firm berries)
- 1 (14.1 ounce) package pastry for a double crust 9-inch pie (or homemade if you’re feeling ambitious!)
- 2 tablespoons cold butter, cubed (I always use salted for that extra flavor punch)
- 1 large egg yolk (save the white for breakfast – we only need the yolk here)
- 2 tablespoons white sugar for sprinkling (this creates that gorgeous sparkly crust)
Ingredient Notes & Substitutions
Rhubarb: Fresh is best, but frozen works in a pinch – just thaw and drain well first. If your rhubarb is extra tart, bump up the sugar by ¼ cup.
Butter: Margarine can substitute, but trust me – real butter makes the flavor sing. For dairy-free, coconut oil works surprisingly well.
Crust: Store-bought saves time, but cbefs note: homemade crust with ½ tsp cinnamon mixed in takes this pie next-level!
How to Make Strawberry Rhubarb Pie
Alright friends, let’s get to the fun part – making this gorgeous pie happen! Don’t let the flaky crust and perfect filling intimidate you. I’ll walk you through each step just like I do with my cooking students. You’ll be amazed how simple it is to create something that looks (and tastes!) straight from a bakery case.

Step 1: Preparing the Filling
First thing – preheat that oven to 400°F (200°C). While it’s heating up, grab your biggest mixing bowl and whisk together the sugar and flour. This isn’t just busy work – the flour keeps our filling from turning into soup when it bakes!
Now toss in those beautiful ruby-red rhubarb slices and strawberry quarters. Use your hands to gently mix everything together – I love how the fruit glistens with the sugar coating. Here’s my secret: let this sit for 30 minutes at room temperature. The fruit will release its juices and create the most incredible syrup. You’ll see the bowl getting juicier by the minute – that’s exactly what we want!
Step 2: Assembling the Pie
While your filling rests, roll out your bottom crust and fit it into a 9-inch pie plate. When the filling is ready (and gloriously juicy!), pour it right in – juices and all. Now take those cold butter cubes and scatter them over the top – these little pockets of butter will melt into the filling, making it extra rich.
Roll out your top crust and carefully place it over the filling. Here’s my trick for sealing the edges: wet your finger with a bit of water and run it along the rim before pressing the top and bottom crusts together. Crimp with a fork or your fingers – no need to be perfect, rustic is charming!
Beat that egg yolk with a teaspoon of water and brush it over the crust – this gives us that beautiful golden shine. Sprinkle generously with sugar (the more the merrier, I say!), then take a sharp knife and cut 4-5 slits in the top. These vents let steam escape so your crust stays crisp instead of soggy!
Step 3: Baking & Cooling
Pop your masterpiece into the preheated oven and bake for 35-40 minutes. You’ll know it’s done when the crust is deep golden brown and you see thick, bubbly juices peeking through the vents. Oh, that smell filling your kitchen? Pure heaven!
Now comes the hardest part – letting it cool completely on a wire rack. I know, I know – you want to dive right in! But trust me, this resting time lets the filling set up properly so you get clean slices instead of a delicious mess. About 2 hours should do it, but if you can’t wait (no judgment!), serve it slightly warm with a scoop of vanilla ice cream melting over the top. Absolute perfection!
Print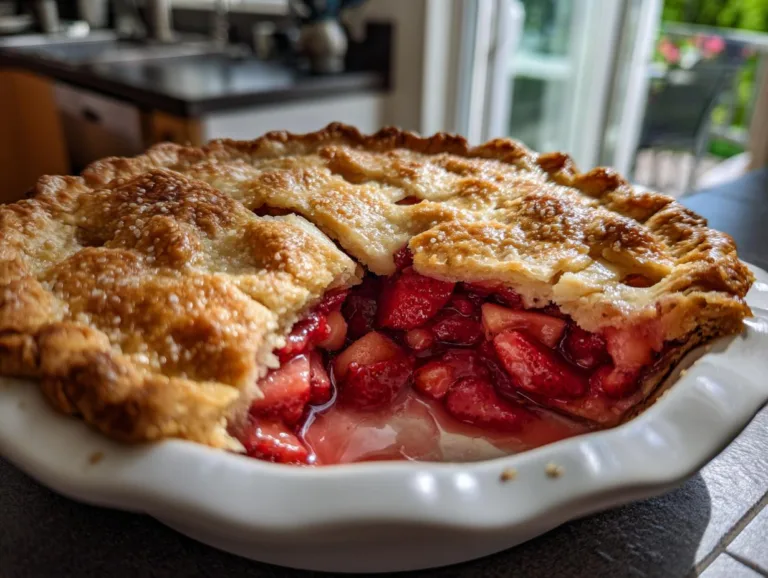
Irresistible Strawberry Rhubarb Pie Recipe in 5 Simple Steps
A delicious Strawberry Rhubarb Pie that combines sweet strawberries and tart rhubarb in a flaky crust.
- Total Time: 1 hour 20 minutes
- Yield: 1 9-inch pie 1x
Ingredients
- 1 cup white sugar
- ½ cup all-purpose flour
- 1 pound rhubarb, cut into ¼-inch slices
- 2 pints fresh strawberries, hulled and quartered
- 1 (14.1 ounce) package pastry for a double crust 9-inch pie
- 2 tablespoons butter
- 1 large egg yolk
- 2 tablespoons white sugar for sprinkling
Instructions
- Preheat the oven to 400 degrees F (200 degrees C).
- Mix flour and sugar together in a large bowl.
- Add strawberries and chopped rhubarb. Toss with sugar and flour and let stand for 30 minutes.
- Pour filling into prepared pie crust. Dot top with butter, and cover with top crust. Seal edges of top and bottom crust with water.
- Brush egg yolk on top of pie with a pastry brush.
- Sprinkle with sugar.
- Cut several slits in the top crust to allow steam to escape.
- Bake in the preheated oven until bubbly and brown, about 35 to 40 minutes.
- Cool pie on rack.
- Enjoy!
Notes
- Let the pie cool before slicing to set the filling.
- Adjust sugar to taste if rhubarb is very tart.
- Prep Time: 40 minutes
- Cook Time: 40 minutes
- Category: Dessert
- Method: Baking
- Cuisine: American
- Diet: Vegetarian
Nutrition
- Serving Size: 1 slice
- Calories: 320
- Sugar: 25g
- Sodium: 150mg
- Fat: 12g
- Saturated Fat: 5g
- Unsaturated Fat: 6g
- Trans Fat: 0g
- Carbohydrates: 50g
- Fiber: 3g
- Protein: 3g
- Cholesterol: 30mg
Tips for the Best Strawberry Rhubarb Pie
After making this pie countless times (and eating even more slices than I’ve baked!), I’ve picked up some tricks that make all the difference between a good pie and a knock-your-socks-off pie. Here are my absolute must-know tips:
- Chill your crust: If you’re making homemade pastry, pop the dough in the fridge for at least 30 minutes before rolling. Cold dough = flakier crust. Even store-bought crust benefits from 15 minutes in the fridge before filling!
- Don’t skimp on venting: Those steam slits aren’t just decorative – they prevent a soggy top crust. Make them bigger than you think – I do at least 1-inch cuts in a starburst pattern.
- Taste your rhubarb first: Some stalks are tarter than others. If your raw rhubarb makes you pucker, add an extra ¼ cup sugar to the filling. Better to adjust now than regret later!
- Bake on a sheet: Always place your pie plate on a baking sheet before putting it in the oven. Trust me – catching potential bubble-overs is way easier than cleaning your oven!
- The golden window: Pull the pie when juices bubble thickly through the vents – thin, watery bubbles mean it needs more time. But watch closely – that perfect moment can pass quickly!
Serving Suggestions for Strawberry Rhubarb Pie
Oh, the possibilities! While this pie stands gloriously on its own, here’s how I love to serve it:
- Classic à la mode: A scoop of vanilla ice cream melting over warm pie is pure bliss. The cold creaminess against the tart fruit? Chef’s kiss!
- Whipped cream clouds: Homemade whipped cream with a hint of vanilla or orange zest takes each bite to new heights.
- Breakfast mode: (Don’t judge!) Leftover pie slightly warmed with Greek yogurt makes a stellar brunch treat.
- Cheese pairing: For grown-up gatherings, serve slices with sharp cheddar or mascarpone – the combo sounds odd but tastes incredible!
Pro tip: Let guests customize their slices with toppings in little bowls – it makes serving effortless and fun! Check out all my other delicious recipes for more inspiration.
Storing and Reheating Your Strawberry Rhubarb Pie
Here’s the good news – this pie keeps beautifully if (somehow!) you have leftovers. I’ve perfected these storage tricks over years of pie-making:
Room temperature: Cover loosely with foil or a clean kitchen towel and keep at room temp for up to 2 days. The crust stays crispest this way – just pop a paper towel underneath to catch any condensation.
Refrigerator: For longer storage (up to 4 days), refrigerate covered with plastic wrap. But here’s my trick – always reheat slices before serving! Cold pie straight from the fridge loses its magic.
Freezing: Yes, you can freeze this pie! Bake completely, cool fully, then wrap tightly in plastic followed by foil. It’ll keep for 2-3 months. Thaw overnight in the fridge, then reheat at 350°F for 15 minutes to bring back that fresh-baked goodness.
Reheating: My favorite method? Place individual slices on a baking sheet at 350°F for 8-10 minutes until warmed through. The microwave works in a pinch (20-30 seconds per slice), but the crust won’t stay as crisp. For whole pies, tent with foil and bake at 325°F for 20 minutes.
Pro tip: If your refrigerated pie seems soggy, pop it under the broiler for 60-90 seconds – just watch closely! That quick blast of heat works wonders for reviving the crust’s texture.
Strawberry Rhubarb Pie Recipe FAQ
I get asked the same questions every time I serve this pie – and I love that people care enough to ask! Here are answers to the things everyone wants to know:
Can I use frozen fruit instead of fresh?
Absolutely! Thaw frozen rhubarb and strawberries completely first, then drain well in a colander (press gently to remove excess liquid). You might need to add an extra tablespoon of flour since frozen fruit releases more juice. The flavor will still be fantastic!
How do I prevent a soggy bottom crust?
Three tricks: 1) Make sure your fruit mixture rests the full 30 minutes so the flour can absorb juices, 2) Place your pie plate on a preheated baking sheet in the oven (the extra heat helps crisp the bottom), and 3) For extra insurance, brush the bottom crust with egg white before adding filling – it creates a moisture barrier!
Why is my filling so runny?
Usually means it didn’t bake long enough – those juices should bubble thickly. Next time, try baking 5-10 minutes longer. Also, let the pie cool completely (I know, torture!) which lets the pectin in the fruit set up properly.
Can I make this pie ahead?
You bet! Assemble up to 24 hours ahead and refrigerate unbaked (wrap tightly in plastic). Add 5-7 minutes to baking time since it’s going in cold. Or freeze unbaked pie for up to 2 months – bake straight from frozen, adding 15-20 minutes to the time.
Help! My crust edges are burning!
Happens to the best of us. Next time, use foil strips around the rim after 20 minutes of baking. For now? Carefully trim the burnt edges with kitchen shears (no one will notice under ice cream!).
Nutritional Information
Okay, let’s talk numbers – but don’t let them scare you! This pie is meant to be enjoyed as an occasional treat, and each glorious slice comes out to:
- Serving Size: 1 slice (1/8 of pie)
- Calories: 320
- Sugar: 25g
- Fat: 12g (5g saturated)
- Sodium: 150mg
- Carbohydrates: 50g
- Fiber: 3g
- Protein: 3g
Important note: These values are estimates based on standard ingredients. Your exact numbers might vary slightly depending on specific brands and any modifications you make. But honestly? When that perfect bite of sweet-tart fruit meets buttery crust hits your tongue, calories are the last thing on your mind. Life’s too short not to enjoy homemade pie!
For More recipes, Follow me on Facebook!