You know that moment when you crave takeout but don’t want to wait? That’s when my restaurant style fried rice swoops in to save the day! As a chef who’s cooked in busy restaurants and cozy home kitchens alike, I’ve perfected this quick version that tastes just like your favorite Chinese takeout – maybe even better. The secret? Cold rice, a screaming hot pan, and a few simple ingredients you probably have right now.
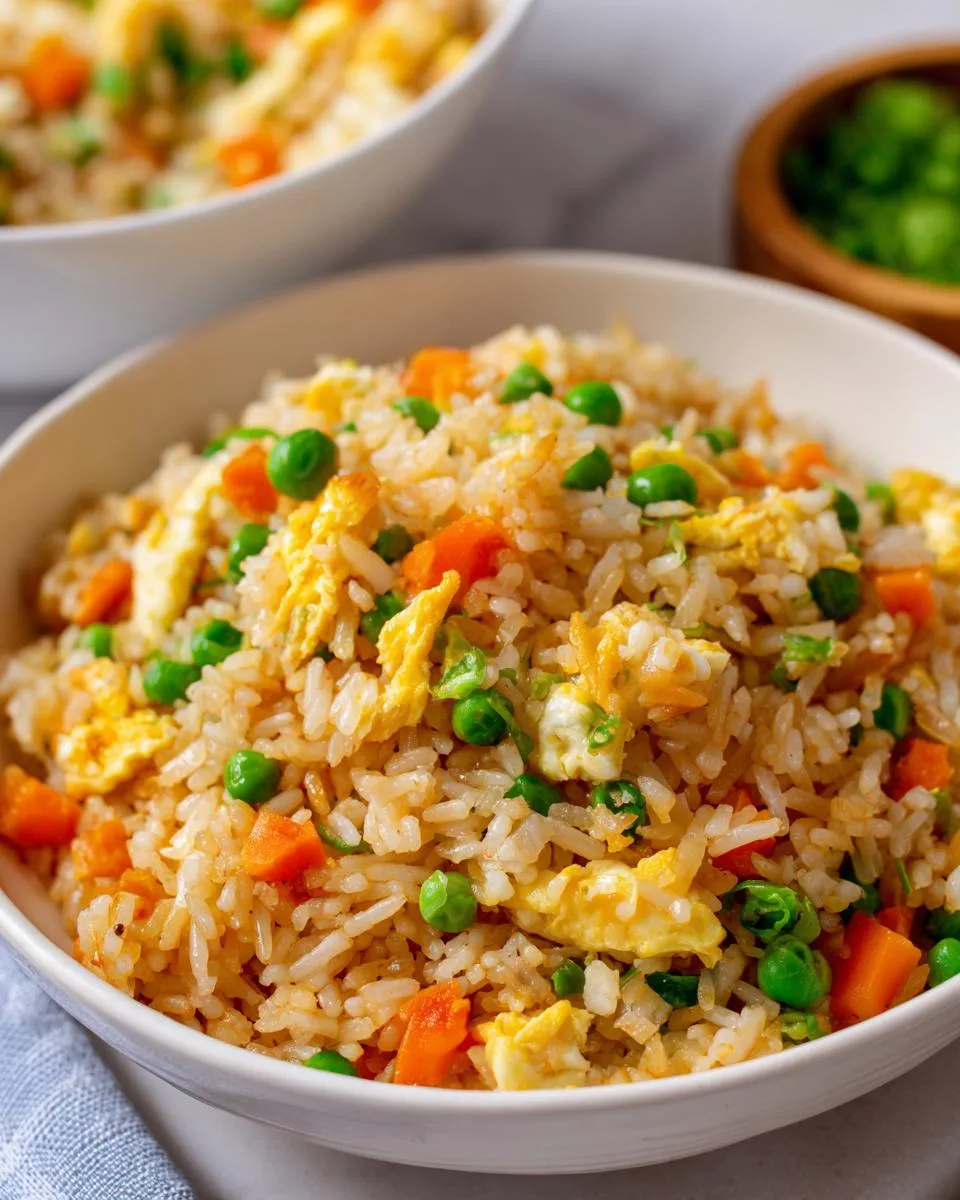
Table of Contents
Table of Contents
What I love most about this recipe (besides how fast it comes together) is how forgiving it is. Forget fancy techniques – we’re talking 20 minutes tops, one pan, and that magical savory-sweet flavor that makes restaurant style fried rice so addictive. My kids beg for this weekly, and honestly? I never mind making it because cleanup’s a breeze too. Let me show you how to turn basic pantry staples into something truly special.
Why You’ll Love This Restaurant Style Fried Rice
This isn’t just any fried rice—it’s the kind that makes you close your eyes and savor every bite. Here’s why it’ll become your go-to:
- Faster than takeout: 20 minutes start-to-finish (yes, really!)—perfect for those “I’m starving NOW” nights.
- Authentic flavor: That irresistible wok-charred taste, thanks to cold rice and high heat (no soggy grains here!).
- Crazy versatile: Swap veggies, add protein, or crank up the garlic—it’s your kitchen, your rules!
Trust me, once you taste this restaurant style fried rice, that takeout menu’s going straight in the recycle bin.
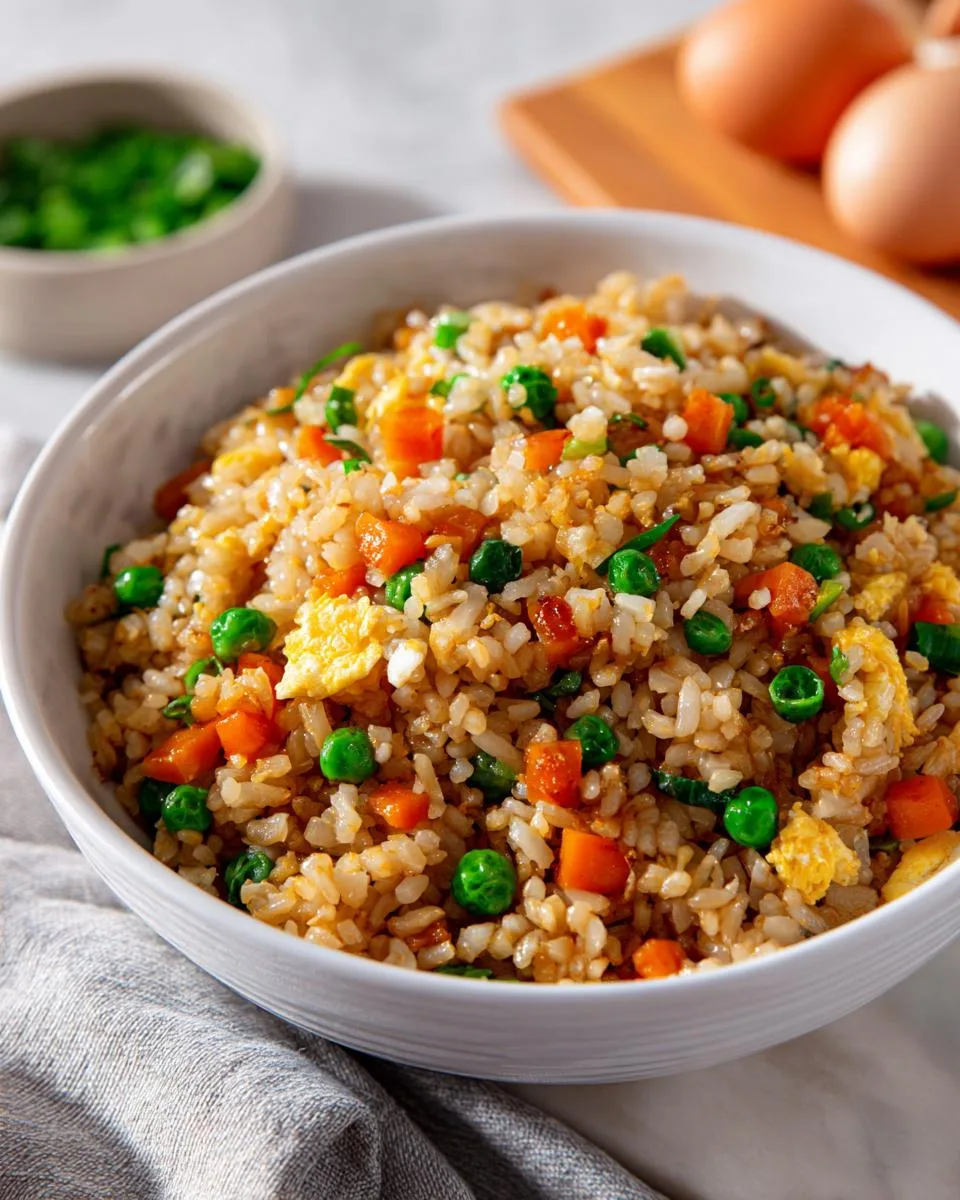
Ingredients for Restaurant Style Fried Rice
Gather these simple ingredients – I bet most are already in your kitchen! The magic happens when ordinary staples transform into something extraordinary:
- 4 cups cooked rice (long or short grain, must be cold – day-old works best)
- 2 Tablespoons butter (salted or unsalted, but salted adds nice depth)
- 2 large eggs, whisked (farm-fresh if you’ve got ’em!)
- ½ cup chopped onion (yellow or white – whatever’s hanging out in your fridge)
- ½ cup chopped carrots (little matchsticks or small dice – your call)
- ½ cup frozen peas (no need to thaw, they cook in seconds)
- 1-2 teaspoons minced garlic (fresh is best, but jarred works in a pinch)
- 3 Tablespoons lite soy sauce (start with this, then add more to taste)
- ½ teaspoon sesame oil or oyster sauce (both add umami – I’ll explain below)
- Salt and pepper to taste (go easy – the soy sauce brings saltiness)
Ingredient Notes & Substitutions
Sesame oil vs. oyster sauce: Sesame oil gives that classic takeout aroma, while oyster sauce adds richer depth (my personal favorite). For vegetarians, mushroom sauce makes a great swap.
Rice tip: If you’re in a rush, spread fresh-cooked rice on a baking sheet and pop it in the freezer for 15 minutes. Works like a charm!
Allergy-friendly: Use tamari instead of soy sauce for gluten-free, or coconut aminos for soy-free. The flavor changes slightly but still delicious.
Equipment Needed for Restaurant Style Fried Rice
You don’t need fancy gear to make amazing restaurant style fried rice—just these basics:
- Large skillet or wok (12-inch minimum—we need room to stir!)
- Wooden spoon or spatula (metal can scrape your pan)
- Measuring spoons (eyeballing soy sauce = salty disaster)
- Knife & cutting board (for quick veggie prep)
That’s it! My trusty cast-iron skillet works wonders, but any heavy-bottomed pan will do the trick.
How to Make Restaurant Style Fried Rice
Listen closely – the secret to perfect restaurant style fried rice isn’t just ingredients, it’s technique. Follow these steps and you’ll be tossing rice like a pro in no time! (Pro tip: Have everything prepped and ready before firing up the stove – this moves FAST.)
Step 1: Prepare the Rice
Cold rice is non-negotiable here – fresh, warm rice turns to mush. Spread cooked rice on a tray, fluff with a fork, and chill 30+ minutes (or use leftovers). You want dry, separate grains that’ll crisp up beautifully. Trust me, I learned this the hard way after my first gummy batch!
Step 2: Sauté Vegetables
Melt butter in your hottest pan over medium-high. Add onions and carrots first – they need more time. Stir 2 minutes until onions turn translucent but carrots still have crunch. Toss in peas and garlic last (garlic burns fast!). You’ll smell when it’s ready – that sweet onion aroma means go time.
Step 3: Scramble the Eggs
Push veggies to one side (I use my wooden spoon to make a little well). Pour in whisked eggs and let them set 10 seconds before scrambling. Once fluffy but still moist, mix everything together. The eggs should coat the rice like golden silk – overcooked eggs = rubbery surprises!
Step 4: Combine and Season
Gently fold in cold rice with a scooping motion (no smashing!). Drizzle soy sauce around the pan edges so it caramelizes – watch the magic happen! Taste after mixing and add more soy/sesame oil if needed. The rice should be savory but not salty, with every grain distinct and delicious.
Print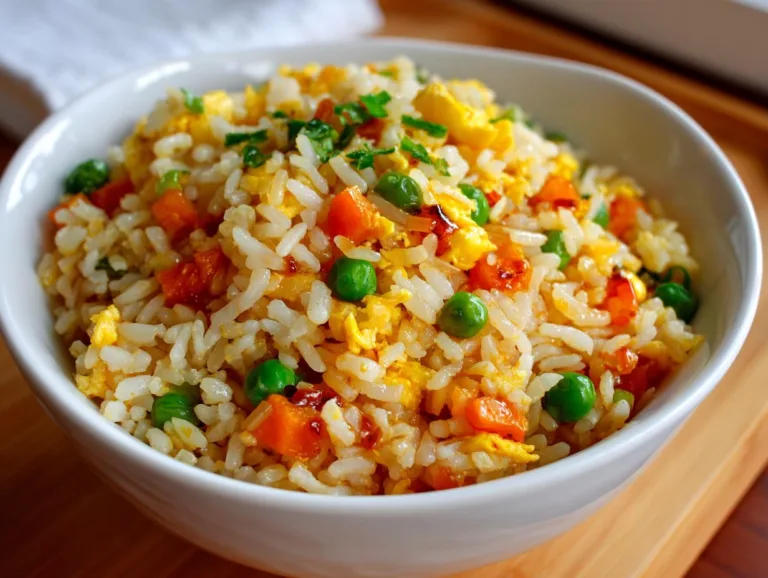
20-Minute Restaurant Style Fried Rice That Beats Takeout
A quick and easy restaurant-style fried rice recipe that brings the flavors of your favorite takeout right to your kitchen.
- Total Time: 20 mins
- Yield: 4 servings 1x
Ingredients
- 4 cups cooked rice, long or short grain
- 2 Tablespoons butter
- 2 large eggs, whisked
- ½ cup chopped onion
- ½ cup chopped carrots
- ½ cup frozen peas
- 1–2 teaspoons minced garlic
- 3 Tablespoons lite soy sauce, more if desired
- ½ teaspoon sesame oil, or oyster sauce
- Salt and Pepper, to taste
Instructions
- Place the cooked rice in the refrigerator to chill until ready to use.
- Place butter in a large skillet or wok. Add onion and carrots. Cook for 2 minutes.
- Stir in garlic and peas. Push to one side and add the eggs to the skillet. Scramble and then stir together.
- Gently stir in cooked rice.
- Add soy sauce and sesame oil and toss to coat. Salt and pepper to taste.
- Serve while warm.
Notes
- Use cold rice for best results.
- Adjust soy sauce to your taste.
- Add protein like chicken or shrimp if desired.
- Prep Time: 10 mins
- Cook Time: 10 mins
- Category: Main Dish
- Method: Stir Fry
- Cuisine: Asian
- Diet: Vegetarian
Nutrition
- Serving Size: 1 cup
- Calories: 250
- Sugar: 3g
- Sodium: 500mg
- Fat: 8g
- Saturated Fat: 4g
- Unsaturated Fat: 3g
- Trans Fat: 0g
- Carbohydrates: 35g
- Fiber: 2g
- Protein: 7g
- Cholesterol: 100mg
Tips for Perfect Restaurant Style Fried Rice
After making this dish hundreds of times (both in restaurants and at home), I’ve learned a few tricks that take restaurant style fried rice from good to “Oh wow, how’d you do that?” Here are my can’t-live-without tips:
- Pan screaming hot: That sizzle when rice hits the pan? Music to my ears. High heat = crispy edges and no mush.
- Don’t crowd the pan: If veggies are piled up, they steam instead of fry. Work in batches if needed.
- Soy sauce hack: Pour it down the sides of the pan – it caramelizes instantly for deeper flavor.
- Egg timing: Scramble just until set – they’ll finish cooking when mixed with hot rice.
One last secret? Let the rice sit untouched for 30 seconds at the end – that’s when the magic crispy bits form!
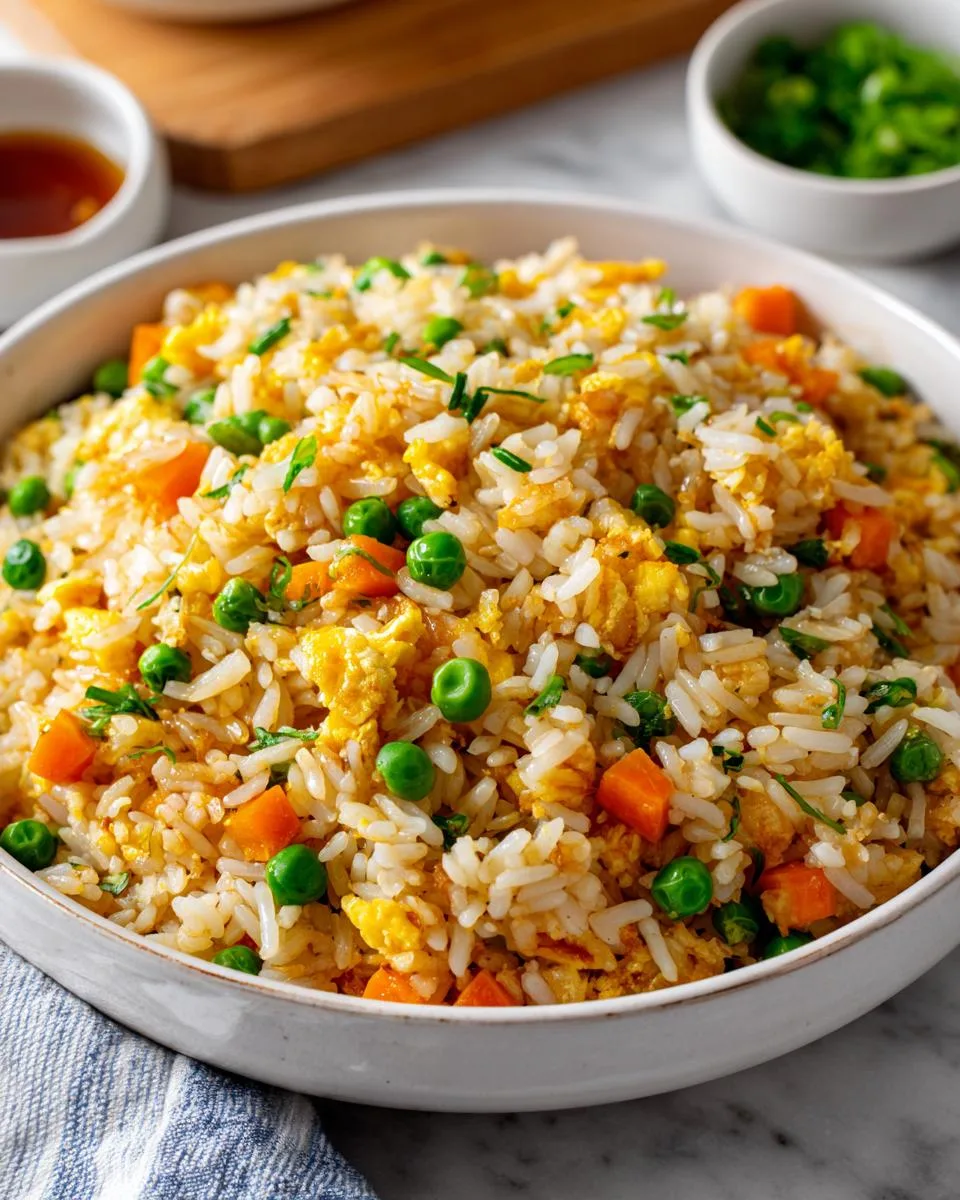
Variations of Restaurant Style Fried Rice
The beauty of restaurant style fried rice? It’s like a blank canvas waiting for your personal touch! Here are my favorite ways to mix it up – perfect for cleaning out the fridge or impressing dinner guests:
- Protein boost: Toss in cooked shrimp, diced chicken, or crumbled tofu during the last minute (leftover rotisserie chicken works great!).
- Extra veggies: Thinly sliced bell peppers, mushrooms, or bean sprouts add crunch and color.
- Spice it up: A teaspoon of chili garlic paste or sliced jalapeños gives it a nice kick.
- Breakfast twist: Swap soy sauce for a dash of fish sauce and top with a runny fried egg.
Pro tip: Keep add-ins small and quick-cooking – big chunks change the dish’s delicate balance. Once you’ve mastered the base recipe, the possibilities are endless!
Serving Suggestions for Restaurant Style Fried Rice
This restaurant style fried rice shines as a main dish, but oh how it loves company! My family always pairs it with crispy egg rolls or potstickers for that full takeout experience. For heartier meals, teriyaki chicken or honey walnut shrimp make perfect partners. A simple cucumber salad cuts through the richness beautifully.
Storing and Reheating Restaurant Style Fried Rice
Here’s the good news – this restaurant style fried rice keeps like a dream! Store cooled leftovers in an airtight container for 3-4 days in the fridge. (Mine never lasts that long though – my teenagers raid the fridge for midnight snacks!)
For reheating, skip the microwave unless you enjoy gummy rice. Instead, toss portions in a hot skillet with a teaspoon of oil for 2-3 minutes until piping hot and crispy again. If it seems dry, splash in a teaspoon of water and cover briefly to steam. Pro tip: Leftover rice makes killer fried rice balls – just shape, coat in panko, and pan-fry!
Nutritional Information for Restaurant Style Fried Rice
Let’s talk numbers – but remember, these are estimates based on my exact recipe. Your restaurant style fried rice might vary depending on ingredient brands or tweaks (extra soy sauce lovers, I see you!). Here’s the breakdown per generous 1-cup serving:
- Calories: 250 (perfect for a satisfying meal!)
- Protein: 7g (thanks to those protein-packed eggs)
- Carbs: 35g (mostly from the rice – complex carbs for energy)
- Fiber: 2g (those veggies add up!)
- Sugar: 3g (natural from the veggies – no added sugars here)
- Fat: 8g (mostly from the butter and eggs – the good stuff)
Quick note: Sodium content hovers around 500mg per serving thanks to the soy sauce – use low-sodium soy if you’re watching salt intake. Adding proteins or extra sauces will change these numbers, but that’s the beauty of homemade – you’re in control!
Frequently Asked Questions About Restaurant Style Fried Rice
Over the years, I’ve gotten so many great questions about my restaurant style fried rice recipe. Here are the ones that pop up most often – with my tried-and-true answers!
Can I use fresh rice instead of cold rice?
Oh honey, I know it’s tempting, but resist! Fresh rice steams up mushy in the pan. The cold rice trick is what gives restaurant style fried rice its perfect texture. If you’re in a pinch, spread hot rice on a baking sheet and pop it in the freezer for 15 minutes – works like a charm!
How do I make this gluten-free?
Easy peasy! Just swap regular soy sauce for tamari (my favorite gluten-free brand is San-J). All other ingredients are naturally gluten-free, so you’re good to go. The flavor stays wonderfully savory!
Why does my fried rice turn out soggy?
Three likely culprits: 1) Rice wasn’t cold/dry enough, 2) Pan wasn’t hot enough (listen for that sizzle!), or 3) You stirred too much. Let the rice sit undisturbed for bits to crisp up – patience is key!
Can I freeze leftover restaurant style fried rice?
Absolutely! Freeze in single portions for up to 2 months. Reheat straight from frozen in a hot skillet with a splash of water – comes out nearly as good as fresh. Perfect for emergency meals!
What’s the best rice to use?
I love jasmine for its floral aroma, but any long-grain white rice works. Avoid sticky rice varieties like sushi rice. Pro tip: Rinse rice before cooking to remove excess starch – makes grains extra separate!
For More recipes, Follow me on Facebook!