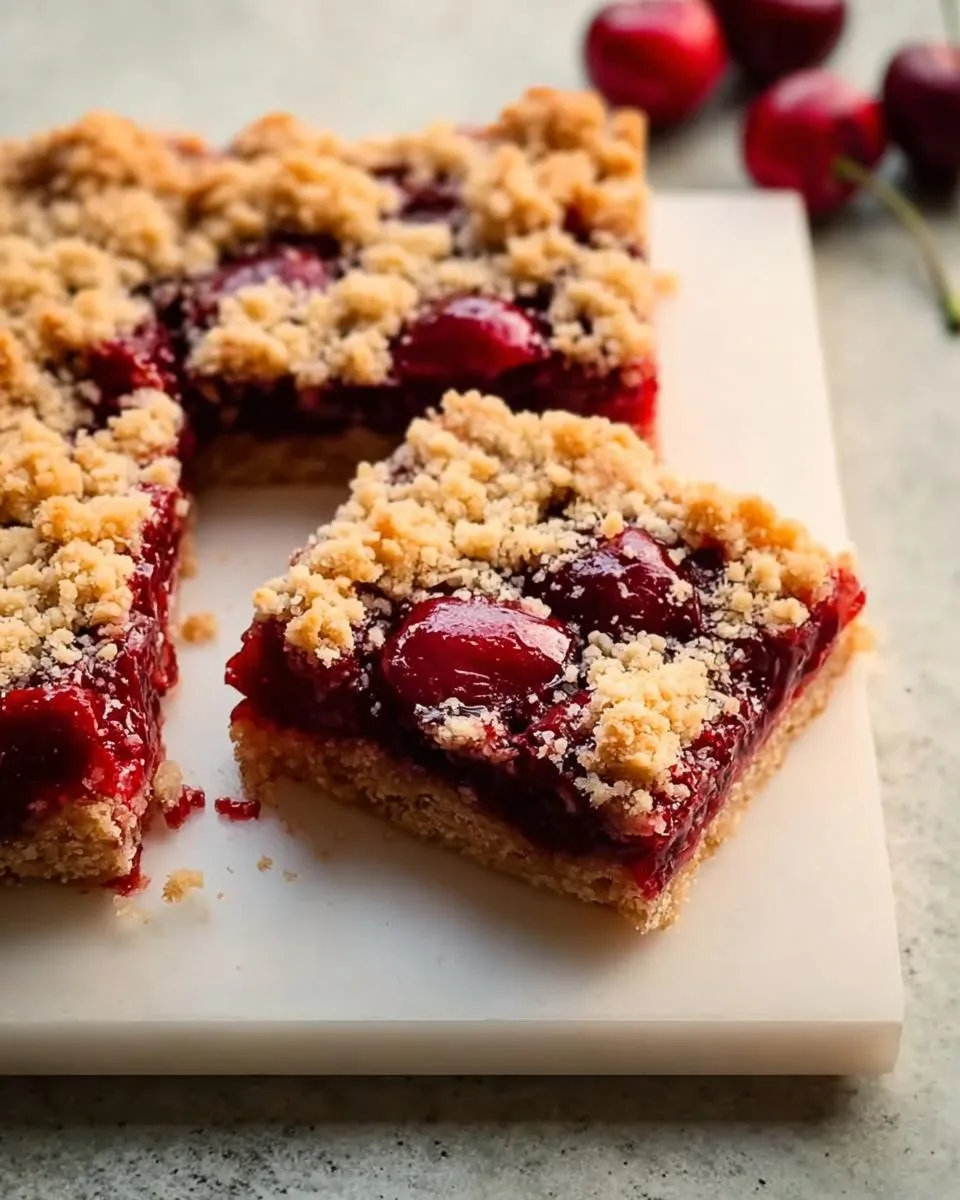
You know those days when you need something sweet now, but don’t want to fuss with complicated baking? That’s exactly why I created these Quick Cherry Crumble Bars. Picture this: buttery, crumbly layers hugging a pocket of juicy cherries—all ready in under an hour. No mixer, no fancy techniques, just pure comfort food magic.
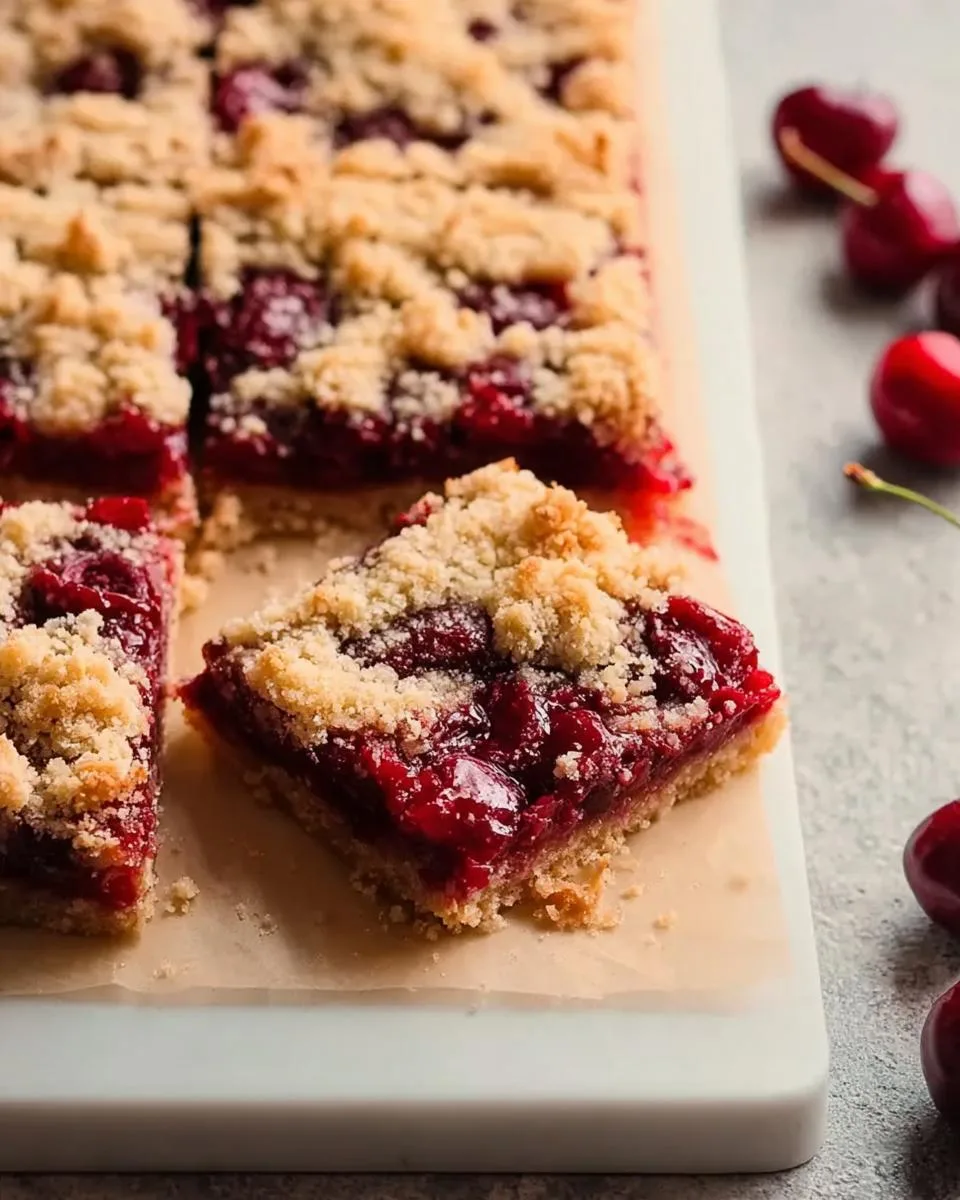
Table of Contents
Table of Contents
I first made these for my niece’s impromptu backyard picnic last summer. The kids were bouncing off the swings, begging for dessert, and voilà—30 minutes later, we had warm cherry bars that disappeared faster than the fireflies at dusk. That’s the beauty here: minimal prep, maximum joy. Whether you’re dodging a sugar craving or need a last-minute treat for guests, this recipe’s got your back. Fresh cherries star in the filling, but honestly? The crumble topping—with its golden edges and melt-in-your-mouth texture—might just steal the show.
Why You’ll Love These Quick Cherry Crumble Bars
Trust me, once you try these bars, you’ll wonder how you ever lived without them. Here’s why they’re my go-to dessert:
- Faster than running to the bakery – From bowl to plate in under an hour, no kidding!
- Minimal cleanup – One bowl, one baking dish, and that’s it – I hate dishes as much as you do
- Foolproof texture – The grated butter trick gives you perfect crumbles every single time
- Summer vibes all year – Use fresh cherries in season or frozen when you’re craving that bright cherry flavor
- Versatile as your favorite jeans – Breakfast with coffee? Afternoon snack? Fancy dessert with ice cream? Yes to all!
My neighbor Karen calls these her “emergency happiness bars” – and once you taste that buttery crust with the tart-sweet cherry filling, you’ll understand exactly why.
Ingredients for Quick Cherry Crumble Bars
Gather these simple ingredients – I bet you have most in your pantry already! The magic happens when ordinary things like butter and flour meet those gorgeous cherries. Here’s what you’ll need:
- 1/2 cup chilled unsalted butter – Cut into 1/2-inch cubes (or pop the whole stick in the freezer for 15 minutes if you’re grating it – my favorite lazy shortcut!)
- 2 tbsp milk – Any kind works, but whole milk makes the crust extra tender
- 1/4 tsp salt – Just enough to balance the sweetness
- 3/4 cup granulated sugar – For that perfect caramelized crunch
- 1/2 tsp baking powder – Our little rising helper
- 1 large egg – Room temperature, please! It blends better (I leave mine on the counter while prepping other ingredients)
- 1 3/4 cups all-purpose flour – Spooned and leveled, no packing!
- 2 tbsp cornstarch – The secret to keeping your cherry filling from becoming soup
- 2 1/4 cups fresh pitted cherries – About 1 lb unpitted, or frozen in a pinch (no need to thaw!)
- 3 tbsp granulated sugar – For sprinkling over the cherries – trust me, this makes them sing
See? Nothing fancy – just honest ingredients ready to transform into something magical. Now let’s get crumbling!
How to Make Quick Cherry Crumble Bars
Okay, let’s dive into the fun part – making these irresistible bars! Don’t let the layers fool you – this is one of those “looks fancy but couldn’t be simpler” recipes. Just follow these easy steps, and you’ll be snacking on cherry crumble goodness before you know it.
Step 1: Prepare the Dough
First things first – preheat that oven to 375°F (190°C). While it’s heating up, grab your favorite mixing bowl (I use my trusty yellow one with the chip on the rim – every baker’s got that one imperfect bowl, right?). Toss in the flour, 3/4 cup sugar, baking powder, and salt. Give it a quick whisk to say “hello” to all the dry ingredients.
Now for my favorite trick – grating the butter! Take that chilled butter and grate it right into the bowl using the large holes of your box grater. It should look like little butter snowflakes falling into the flour. Use your fingers to gently rub everything together until it resembles coarse sand with some pebble-sized bits – that’s when you know it’s perfect. Crack in the egg and drizzle the milk, then stir just until the dough comes together when you pinch it. Don’t overmix – we want tender crumbles, not tough pastry!
Step 2: Assemble the Bars
Line your baking dish (8×8 or 9×9 inch works great) with parchment paper, leaving some overhang – this’ll be your lifeline later when lifting out the bars. Lightly spray the exposed sides with nonstick spray – nobody wants cherry filling stuck to the pan!
Press about two-thirds of the dough into the bottom to form an even crust. I use the bottom of a measuring cup to really pack it down nicely. Now for the star – those gorgeous cherries! Mash them lightly with a fork (leave some chunks for texture!), then strain out about half the juice – we want flavor, not a swimming pool. Mix in the cornstarch and remaining 3 tbsp sugar – this combo thickens the filling beautifully.
Spread the cherry mixture over the crust, then take the remaining dough and crumble it over the top with your fingers. No perfection needed here – uneven clumps make the best golden-brown crispy bits!
Step 3: Bake and Cool
Pop your creation into the preheated oven and set a timer for 32 minutes. Peek at the 30-minute mark – you’re looking for golden edges and bubbling cherries. If it needs another 2-4 minutes, give it that time – ovens can be sneaky like that.
Here’s the hardest part – WAIT! Let the pan cool completely on a wire rack before slicing (about 1-2 hours). I know, I know – the smell is torture, but cutting warm crumble bars is like trying to slice soup. Patience rewards you with perfect squares that hold their shape. Pro tip: Use the parchment “handles” to lift the whole slab out before cutting – makes cleanup a breeze!
Print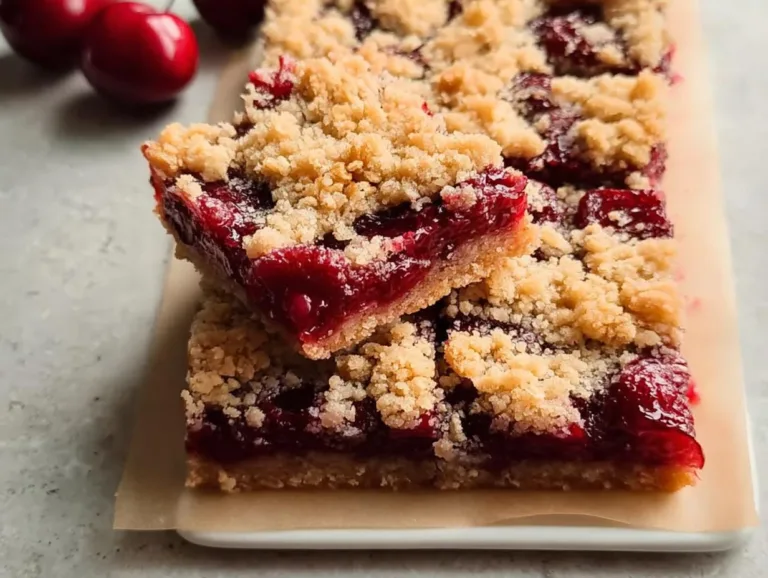
35-Minute Quick Cherry Crumble Bars Recipe – Heavenly Bliss!
Quick Cherry Crumble Bars are a delicious and easy-to-make dessert with a buttery crust and crumble topping, filled with sweet and tangy cherries.
- Total Time: 50 mins
- Yield: 9 bars 1x
Ingredients
- 1/2 cup chilled unsalted butter (cut into 1/2-inch cubes)
- 2 tbsp milk
- 1/4 tsp salt
- 3/4 cup granulated sugar
- 1/2 tsp baking powder
- 1 egg (large, room temperature)
- 1 3/4 cups all-purpose flour
- 2 tbsp cornstarch
- 2 1/4 cups fresh pitted cherries
- 3 tbsp granulated sugar
Instructions
- Preheat your oven to 375°F. Line a square 8×8 or 9×9 baking dish with parchment paper, leaving a 1″ overhang on each side. Spray the sides with nonstick spray.
- In a large bowl, combine flour, sugar, baking powder, and salt. Grate cold butter into the bowl and mix until it resembles small pebbles.
- Add egg and milk, stirring until well combined. The dough should hold together when pinched.
- Press 2/3 of the dough into the baking dish to form an even crust.
- Mash cherries until slightly chunky, then strain to remove excess liquid. Stir in sugar and cornstarch.
- Spread cherry mixture over the crust. Sprinkle remaining dough over the top.
- Bake for 32-36 minutes or until golden brown. Cool completely before slicing.
Notes
- Use room-temperature egg for better emulsion.
- Chill butter before grating for easier handling.
- Cool completely before slicing for cleaner cuts.
- Prep Time: 15 mins
- Cook Time: 35 mins
- Category: Dessert
- Method: Baking
- Cuisine: American
- Diet: Vegetarian
Nutrition
- Serving Size: 1 bar
- Calories: 220
- Sugar: 15g
- Sodium: 80mg
- Fat: 8g
- Saturated Fat: 5g
- Unsaturated Fat: 2g
- Trans Fat: 0g
- Carbohydrates: 33g
- Fiber: 1g
- Protein: 3g
- Cholesterol: 35mg
Tips for Perfect Quick Cherry Crumble Bars
After making these bars more times than I can count (okay, fine – it’s my secret midnight snack), I’ve picked up some foolproof tricks:
- Butter temperature is everything – Too soft? Your crumbles melt flat. Too cold? They won’t blend right. Aim for fridge-cold when grating – it should feel firm but still shave easily
- Strain those cherries – Save the juice for cocktails! Removing about half keeps the filling jammy without making the crust soggy
- Room-temp egg bonds better – 15 minutes on the counter makes it mix in smoothly without overworking the dough
- Cut cold, serve warm – For clean slices, refrigerate the cooled bars 20 minutes first. Then reheat individual pieces for that fresh-from-the-oven magic
Bonus tip: Keep extra crumble mix in the freezer – just sprinkle over yogurt or ice cream for instant dessert upgrades!
Ingredient Substitutions & Variations
Life happens – here’s how to adapt these cherry crumble bars when your pantry rebels:
- No fresh cherries? Frozen work beautifully (just pat dry) or try canned tart cherries in juice (drain well!). My cousin swears by blackberries when cherries vanish from stores
- Gluten-free? Swap the flour 1:1 with your favorite GF blend – I’ve had great results with almond flour too (just reduce butter slightly)
- Out of cornstarch? Tapioca starch or arrowroot powder thickens the filling just as well
- Want extra crunch? Toss 1/4 cup chopped almonds into the crumble topping – the nutty contrast with cherries is divine
Honestly? The base recipe forgives almost any tweak – I once used peaches when cherries were MIA, and my book club still begs for that version!
Serving & Storing Quick Cherry Crumble Bars
Oh, the possibilities with these bars! My absolute favorite way? Warm from the oven (okay, reheated – we waited those painful 2 hours, remember?) with a scoop of vanilla ice cream melting over the top. The cold creaminess against the tart cherries and buttery crumble? Pure magic. They’re also fantastic at room temperature with your morning coffee – no judgment here!
To store, let them cool completely first, then tuck them into an airtight container. They’ll keep happily on the counter for 2 days, or in the fridge for up to 5 days (if they last that long!). Pro tip: Freeze individual squares wrapped in parchment – pop one in the toaster oven whenever a cherry craving strikes!
Quick Cherry Crumble Bars FAQs
I get asked about these cherry crumble bars all the time—here are the answers to the questions that pop up most often:
Can I use canned cherries instead of fresh?
Absolutely! Just drain them really well (press gently with a paper towel) and reduce the added sugar to 2 tbsp since canned cherries are usually sweeter. Tart cherries in water work best—avoid the heavy syrup ones unless you want an extra-sweet treat.
Why does my crumble topping melt together?
Ah, the butter was probably too soft! Next time, try grating frozen butter—those little shreds hold their shape better during baking. Also, don’t pack the topping down; just scatter it loosely over the cherries.
Can I make these ahead?
You bet! They actually taste better on day two as the flavors meld. Bake them the night before, leave them covered at room temp, then slice in the morning. Or freeze the unbaked bars (wrap tightly) and bake straight from frozen—just add 5-7 extra minutes.
Help—my filling is too runny!
No panic! Next time, strain more juice from the cherries (save it for smoothies!) and make sure your cornstarch is fresh. If it’s already baked, pop slices in the fridge for 30 minutes—they’ll firm up nicely.
Nutritional Information
Okay, let’s talk numbers—but just the fun ones! Each of these quick cherry crumble bars packs in all the cozy vibes for about 220 calories. You’re looking at 15g of sugar (mostly from those gorgeous cherries!) and 8g of that glorious butterfat that makes the crumble so irresistible. They’ve got a little fiber (1g) and protein (3g) to keep you satisfied beyond just that sugar rush.
Remember: Nutrition varies based on ingredients—especially if you swap in different fruits or gluten-free flours. But honestly? When that cherry filling bursts in your mouth, I think we can agree these bars are worth every delicious bite!
Final Thoughts
There you have it—my foolproof recipe for Quick Cherry Crumble Bars that never fails to impress. Whether you’re baking them for a last-minute gathering or just because you deserve something sweet today, I hope these bars bring as much joy to your kitchen as they do to mine.
Don’t forget to tag me when you make them—I love seeing your crumbly masterpieces!
For More recipes, Follow me on Facebook!