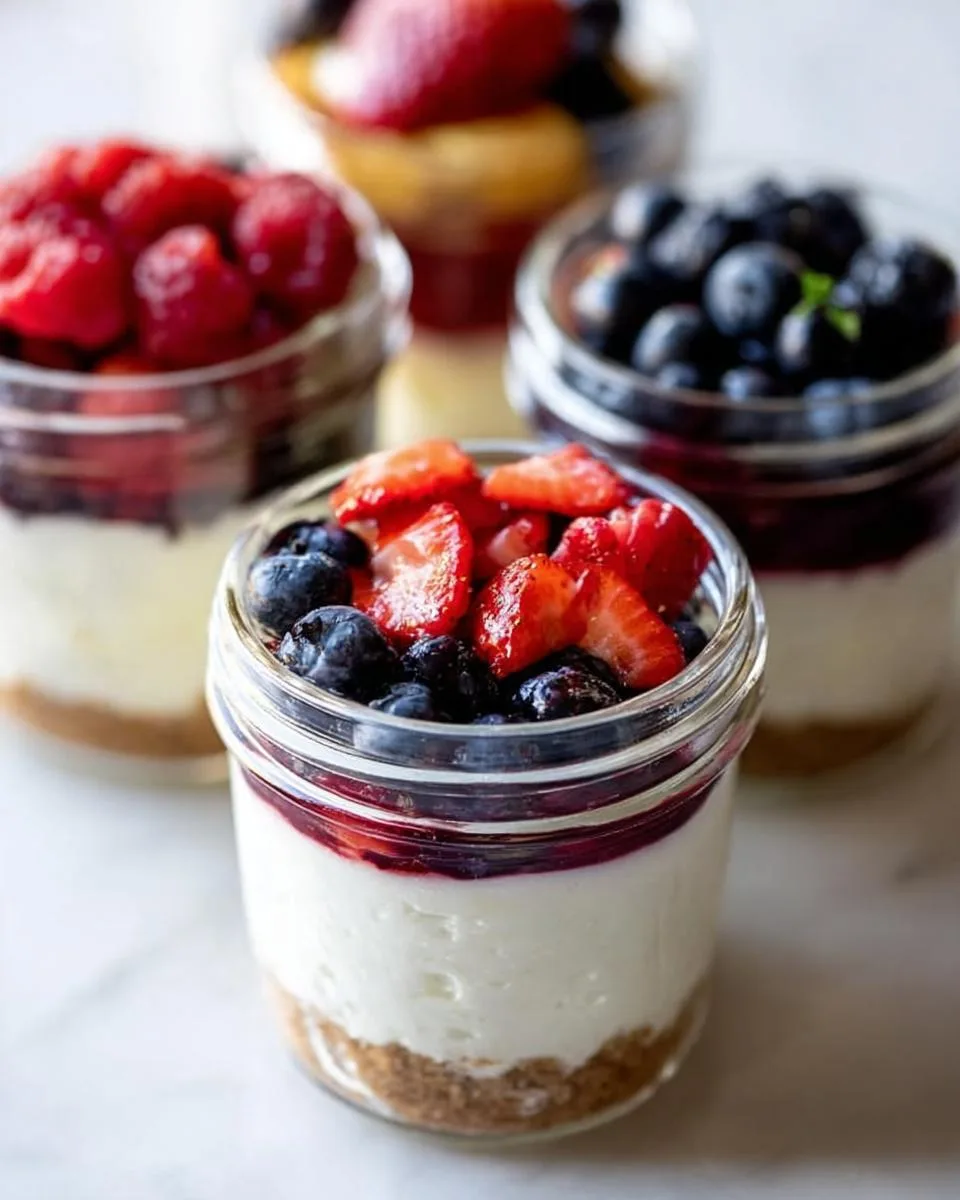
Oh my goodness, have I got the perfect treat for you! These no bake berry dessert cups are my go-to when I need something sweet, fresh, and ridiculously easy. Picture this: a buttery graham cracker crust, velvety cheesecake filling, and juicy berries on top—all without turning on your oven. I mean, come on!
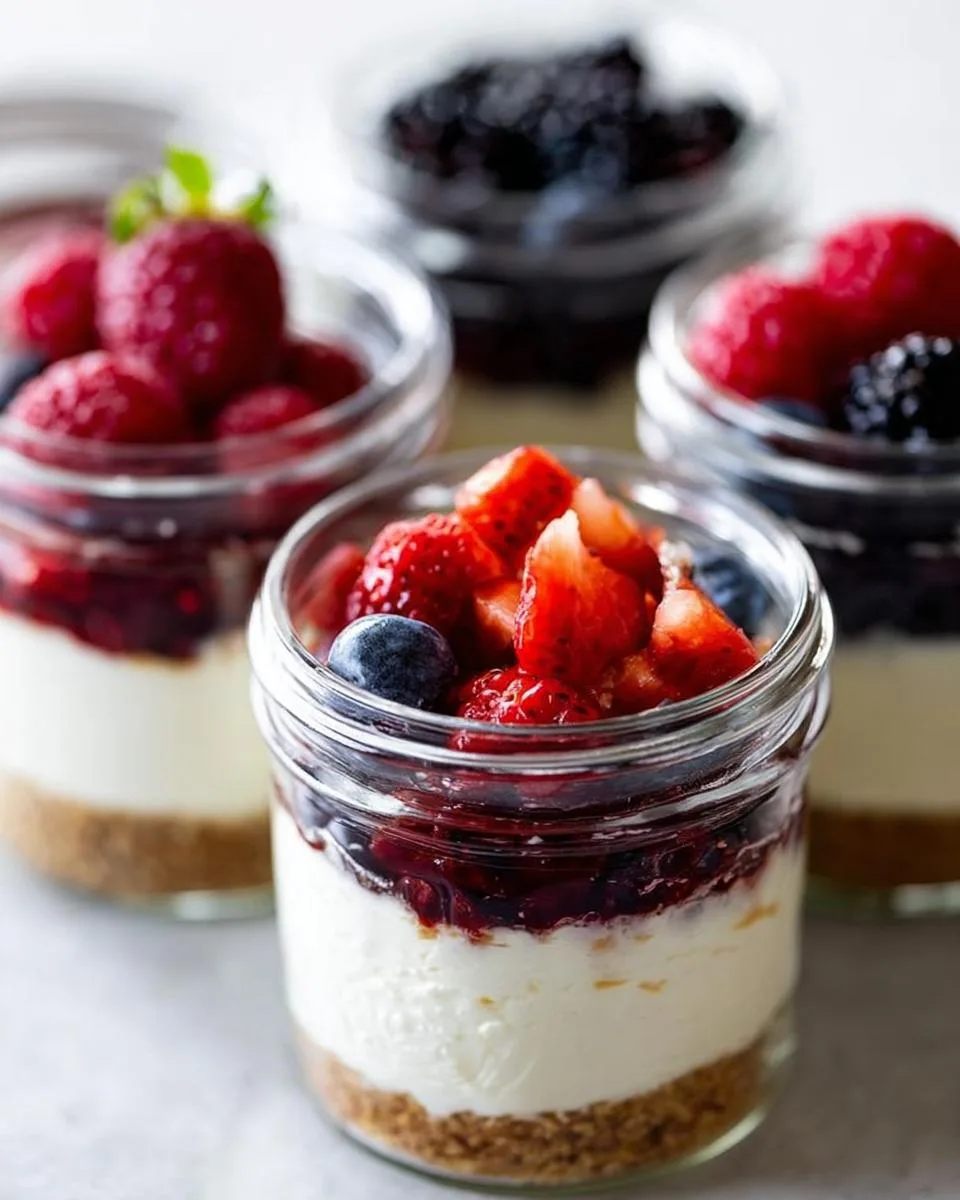
Table of Contents
Table of Contents
I first made these little jars of joy when my sister dropped by unexpectedly last summer. My kitchen was a disaster (as usual), but I whipped these up in minutes while we caught up. The best part? They taste like you spent hours, but really, it’s just some simple mixing and layering. Trust me, once you try these, you’ll be making them all season long for picnics, potlucks, or just because it’s Tuesday.
Why You’ll Love These No Bake Berry Dessert Cups
Let me count the ways these little jars will steal your heart:
- No oven required (perfect for hot summer days when baking sounds like torture)
- Ready in 15 minutes flat (seriously, faster than ordering dessert delivery)
- Fresh berry topping makes it feel fancy (but we’ll keep that our little secret)
- Creamy cheesecake filling that’s lighter than traditional baked versions
- Portable perfection—take them to picnics, parties, or just your couch
Honestly? The hardest part is deciding which berries to pile on top!
Ingredients for No Bake Berry Dessert Cups
Gather these simple ingredients – I promise you probably have most in your kitchen already! The magic happens when you combine them just right:
- 2 Tablespoons (28g) unsalted butter, melted – Not just softened, melted (I like to zap mine for 20 seconds and watch it bubble)
- 1 cup (100g) graham cracker crumbs – That’s about 8 full crackers crushed (bonus points if you smash them in a ziplock bag like I do when I need stress relief)
- 1 cup (240ml) heavy cream – Straight from the fridge, please! Cold cream whips up better (learned this the hard way after too many soupy attempts)
- 8oz (226g) full-fat cream cheese – Brick-style, softened at room temp for 30 minutes (if it’s still chilly, microwave 5 seconds at a time – no cheating with spreadable tubs!)
- 1/3 cup (65g) granulated sugar – Just enough sweetness to let the berries shine
- 2 Tablespoons (30g) sour cream – Room temp like the cream cheese (this little bit makes the filling extra dreamy)
- 1 teaspoon lemon juice – Fresh squeezed if you’re fancy, bottled if you’re me at 11pm craving dessert
- 1/2 teaspoon pure vanilla extract – The good stuff makes all the difference
- Your favorite berries for topping – I’m partial to strawberries and blueberries, but use whatever looks best at the market
See? Nothing crazy – just quality ingredients treated right. Now let’s make some magic!
Equipment You’ll Need
Don’t worry—you won’t need any fancy gadgets for these! Just grab:
- A medium mixing bowl (for that glorious graham cracker crust)
- A hand mixer or stand mixer (or strong arms if you’re feeling ambitious)
- 6-8 ounce jars or glasses (I’ve used everything from mason jars to cute thrift store finds)
- A silicone spatula (for gentle folding—no deflating that fluffy filling!)
That’s it! Now let’s get mixing.
How to Make No Bake Berry Dessert Cups
Alright, let’s dive in! These little jars come together faster than you can say “dessert first.” Follow these steps and you’ll have creamy, dreamy berry cups in no time.
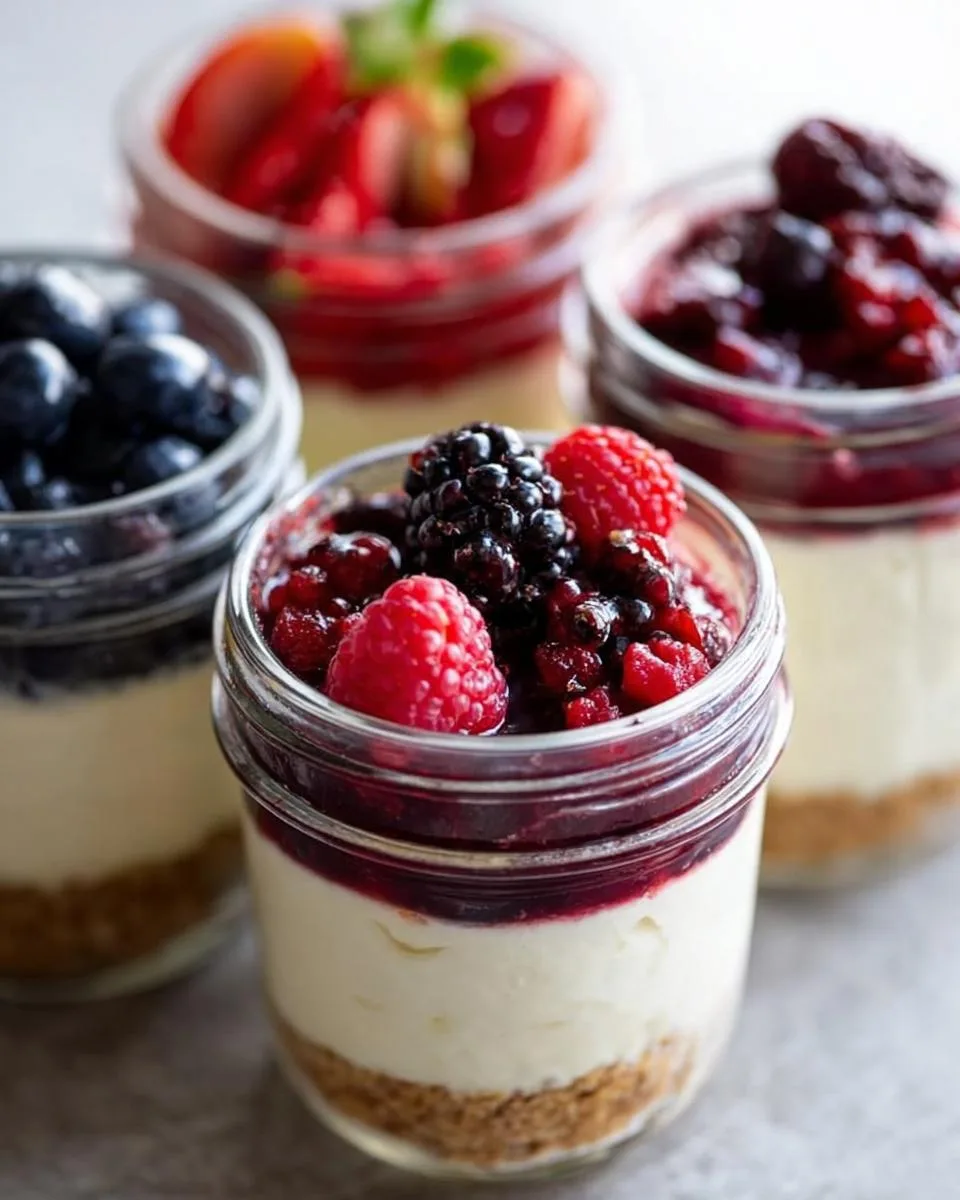
Step 1: Prepare the Graham Cracker Crust
First things first – line up your jars! This recipe makes about 6 eight-ounce jars or 10 six-ounce jars (depending on how generous you’re feeling). Melt your butter – I just pop it in the microwave for 20 seconds until it’s bubbly and golden.
Now, stir in those graham cracker crumbs until it looks like wet beach sand. You want it to hold together when you pinch it between your fingers. Spoon about 2 tablespoons into each 8-ounce jar (or 1.5 tablespoons for smaller jars). Press it down gently with the back of your spoon – not too hard, just enough to make a nice base.
Step 2: Whip the Cream Cheese Filling
Here’s where the magic happens! Whip that cold heavy cream until stiff peaks form – about 3-4 minutes on medium-high speed. Pro tip: tilt your bowl slightly while mixing to incorporate more air. Set this aside for a moment.
In another bowl, beat the cream cheese, sugar, sour cream, lemon juice, and vanilla until it’s completely smooth. No lumps allowed! If you find stubborn bits, keep beating – patience pays off here. Now, gently fold the whipped cream into the cheesecake mixture with a silicone spatula. Go slow – we’re making clouds here, not pancake batter!
Step 3: Layer and Chill
Time to assemble! Spoon about 1/4 to 1/3 cup filling into each 8-ounce jar (or 3 tablespoons for smaller ones). Leave about an inch at the top for berries. You can serve them right away, but I like to chill mine for at least 30 minutes – it firms up the filling beautifully.
Important: wait to add your berry toppings until just before serving! Trust me, I learned the hard way when my beautiful layers turned into a pink mush after sitting overnight. Fresh berries right before eating keeps everything picture-perfect.
Print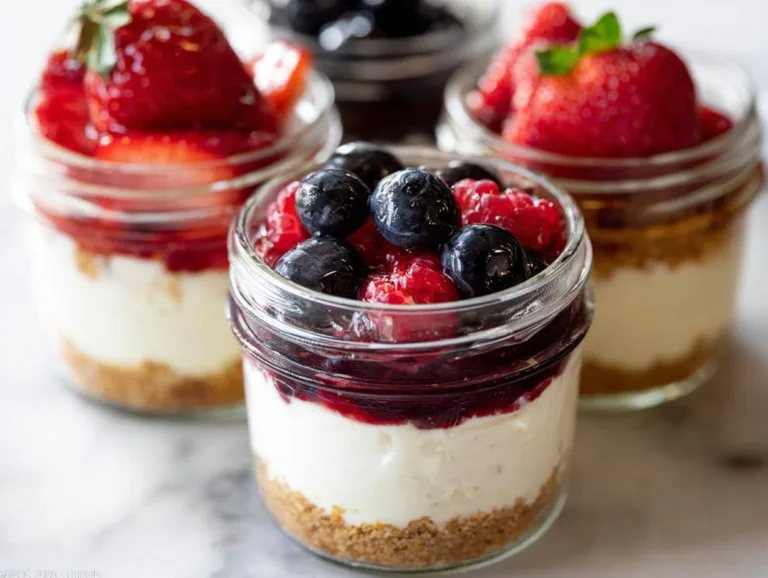
15-Minute No Bake Berry Dessert Cups – Heavenly Delight!
Easy no-bake berry dessert cups with graham cracker crust and creamy cheesecake filling.
- Total Time: 15 minutes
- Yield: 6–10 jars 1x
Ingredients
- 2 Tablespoons (28g) unsalted butter, melted
- 1 cup (100g) graham cracker crumbs (about 8 graham crackers)
- 1 cup (240ml) heavy cream or heavy whipping cream, cold
- 8 ounces (226g) full-fat brick cream cheese, softened to room temperature
- 1/3 cup (65g) granulated sugar
- 2 Tablespoons (30g) sour cream, at room temperature
- 1 teaspoon lemon juice
- 1/2 teaspoon pure vanilla extract
- toppings & garnishes
Instructions
- Have your jars ready to go and lined up. This recipe yields about 6 8-ounce jars or 10 6-ounce jars.
- Crust: Melt the butter in the microwave in a medium heat-proof bowl or use the stove. Stir in the graham cracker crumbs. The mixture will resemble wet sand. Spoon a generous spoonful into each jar, about 2 Tablespoons into the 8-ounce jars and 1 and 1/2 Tablespoons into the 6-ounce jars. If there’s any crust leftover, sprinkle into the jars to use up or discard. Set jars aside.
- Filling: Using a hand mixer or a stand mixer fitted with a whisk attachment, whip the cold heavy cream into stiff peaks on medium-high speed, about 3-4 minutes. Set aside.
- Using a hand mixer or a stand mixer fitted with a whisk or paddle attachment, beat the cream cheese, sugar, sour cream, lemon juice, and vanilla extract together on medium-high speed until smooth and creamy. Make sure there are no large lumps of cream cheese. If there are lumps, keep beating until smooth.
- Using your mixer on low speed or a silicone spatula, fold the whipped cream into the cheesecake filling until combined. This takes several turns of your silicone spatula. Combine slowly as you don’t want to deflate all the air in the whipped cream.
- Layer a couple large spoonfuls of filling on top of the crust in the jars. Use about 1/4 – 1/3 cup filling in the 8 ounce jars and 3 Tablespoons (or however much you can pack in!) into the 6 ounce jars. Make sure to leave room for the topping.
- The cheesecake jars are at room temperature at this point, but if you’d like to serve chilled, chill for at least 30 minutes and up to 3 days before adding the topping. (Cover if chilling for longer than 30 minutes.) I recommend adding the topping when serving or up to 2 hours in advance. The topping can seep down into the layers, so that’s why I recommend adding it soon before serving.
- Spoon topping and garnishes on top of filling, then serve.
- Cover and store leftover cheesecake jars in the refrigerator for up to 5 days.
Notes
- Add toppings just before serving to prevent sogginess.
- Chill jars before serving for best texture.
- Use fresh berries for topping if available.
- Prep Time: 15 minutes
- Cook Time: 0 minutes
- Category: Dessert
- Method: No Bake
- Cuisine: American
- Diet: Vegetarian
Nutrition
- Serving Size: 1 jar
- Calories: 320
- Sugar: 18g
- Sodium: 150mg
- Fat: 22g
- Saturated Fat: 13g
- Unsaturated Fat: 7g
- Trans Fat: 0g
- Carbohydrates: 28g
- Fiber: 1g
- Protein: 4g
- Cholesterol: 65mg
Tips for Perfect No Bake Berry Dessert Cups
After making these dozens of times (okay, maybe hundreds – don’t judge my sweet tooth), I’ve picked up some tricks:
- Keep everything cold – Chill your mixing bowl and beaters for 10 minutes before whipping the cream. Cold = fluffy!
- Don’t overfill jars – Leave about an inch at the top for berry toppings (and room to get your spoon in there).
- Patience with the cream cheese – Beat it until completely smooth before adding other ingredients. Lumpy filling = sad dessert.
- Fresh berries right before serving – Unless you want soggy crust (we don’t).
- Get creative with toppings – Try crushed cookies, chocolate shavings, or even a drizzle of caramel for fun variations!
Follow these simple tips and you’ll look like a dessert pro – even if you’re still in your pajamas!
Serving Suggestions for No Bake Berry Dessert Cups
Oh, the fun part! These little jars are basically blank canvases for your dessert dreams. My favorite way? Pile high with mixed berries—strawberries, raspberries, blueberries—the more colorful, the better! A sprig of fresh mint makes them look fancy (and tastes amazing with the creaminess). For extra pizzazz, dust with powdered sugar right before serving—it’s like edible fairy dust!
Storage and Reheating
These no bake berry dessert cups keep beautifully in the fridge for up to 5 days—just cover them tightly with lids or plastic wrap. The best part? No reheating needed! They’re actually better cold, straight from the fridge. Though let’s be honest—they rarely last more than a day in my house!
Nutritional Information
Each berry dessert cup packs about 320 calories – but who’s counting when it’s this delicious? Remember, these values are estimates and will vary based on your exact ingredients and toppings. The full-fat cream cheese and heavy cream make it rich, while fresh berries add natural sweetness!
FAQ About No Bake Berry Dessert Cups
I get asked about these little beauties all the time! Here are the most common questions—with my tried-and-true answers:
Can I use frozen berries instead of fresh?
Absolutely! Just thaw and drain them really well first—nobody wants a soggy dessert. Pat them dry with paper towels to remove excess moisture. Frozen berries actually work great for making quick compotes too!
What if I don’t have graham crackers?
No worries! Crushed vanilla wafers, shortbread cookies, or even digestive biscuits make delicious crusts. Just keep the same butter-to-crumb ratio. My neighbor once used crushed Oreos—life-changing!
How far ahead can I make these?
The jars (without toppings) keep beautifully for 3 days in the fridge. Just add fresh berries right before serving. The filling actually gets more flavorful as it chills—bonus!
Can I make these dairy-free?
Yes! Use vegan cream cheese and coconut cream instead of heavy cream. The texture will be slightly different, but still delicious. Just make sure everything is well-chilled before whipping.
Why did my filling turn out runny?
Oh honey, we’ve all been there! Usually it’s because the cream wasn’t cold enough or was overwhipped. Next time, chill your bowl and beaters first, and stop mixing as soon as stiff peaks form.
Share Your Creation
I’d love to see your berry dessert masterpieces! Tag me on Instagram or leave a comment below – your creations always inspire me.
For More recipes, Follow me on Facebook!