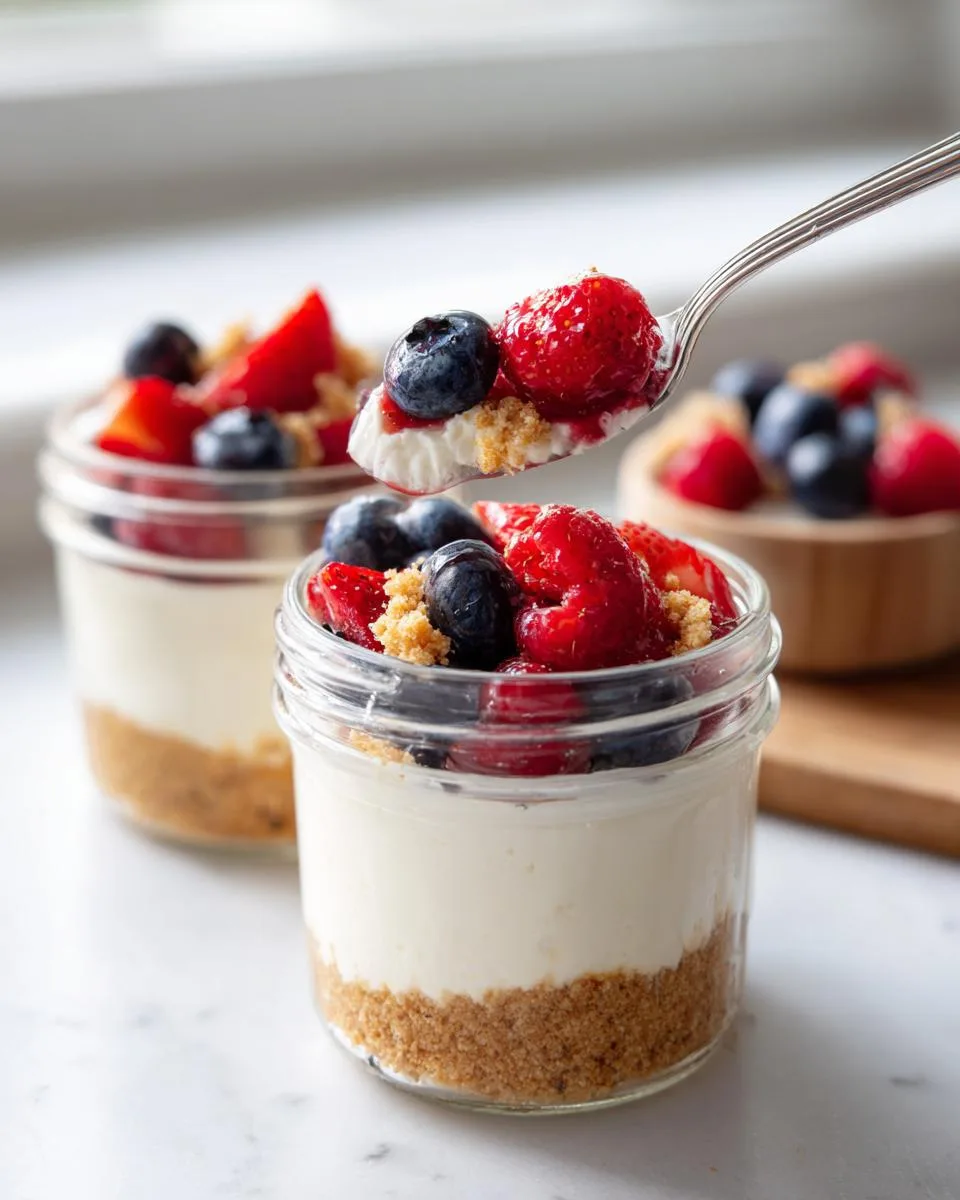
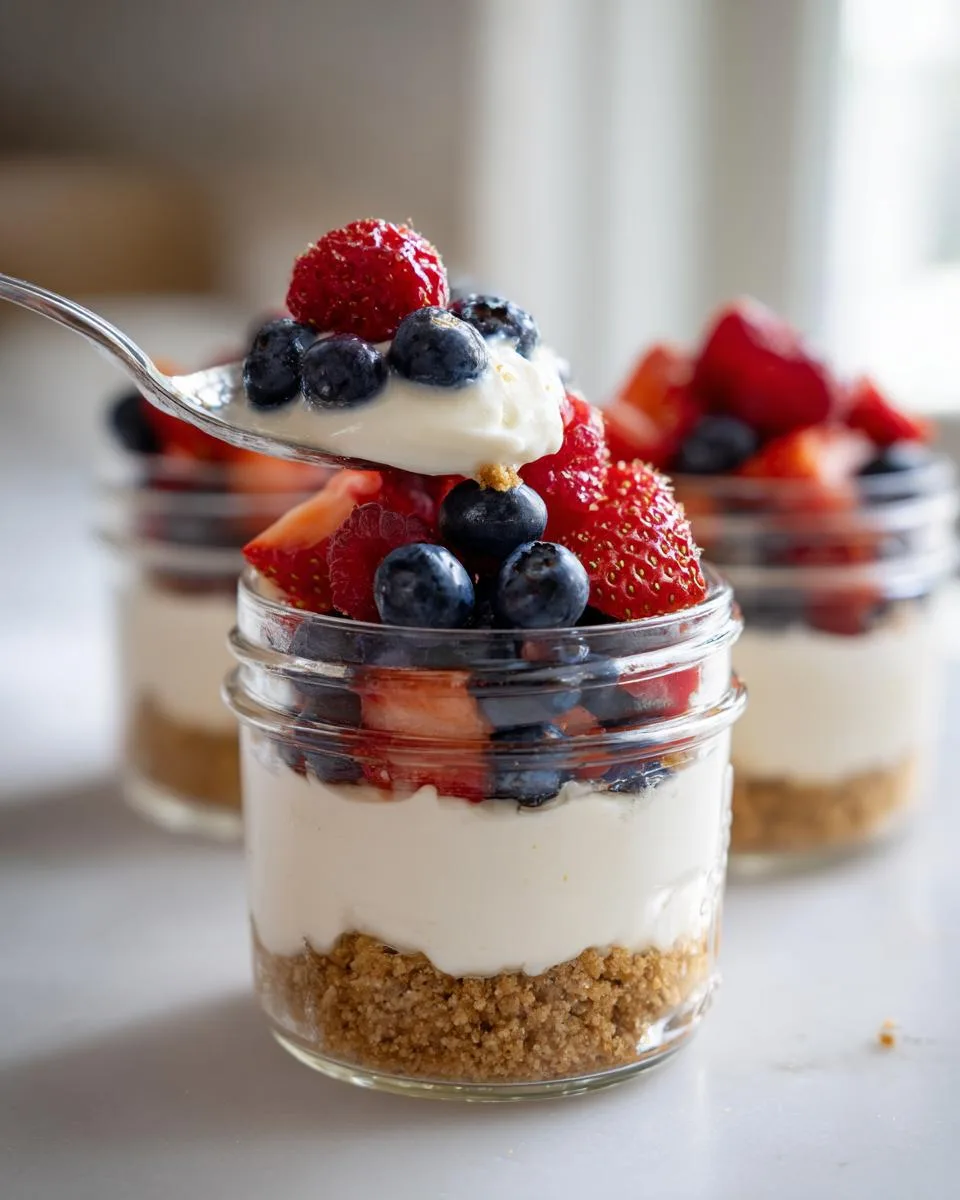
Oh, you’re going to love these No Bake Berry Cheesecake Cups! I first made them for a last-minute summer potluck when my oven decided to take a vacation (typical, right?). The moment I saw my friends’ faces light up after the first bite, I knew this recipe was a keeper. What’s not to adore? Creamy cheesecake filling, buttery graham cracker crumbs, and juicy fresh berries – all without turning on your oven. As a chef who’s made more cheesecakes than I can count, I can tell you these little jars deliver all the decadence of traditional cheesecake with none of the stress. Perfect for when you need something impressive but don’t want to fuss!
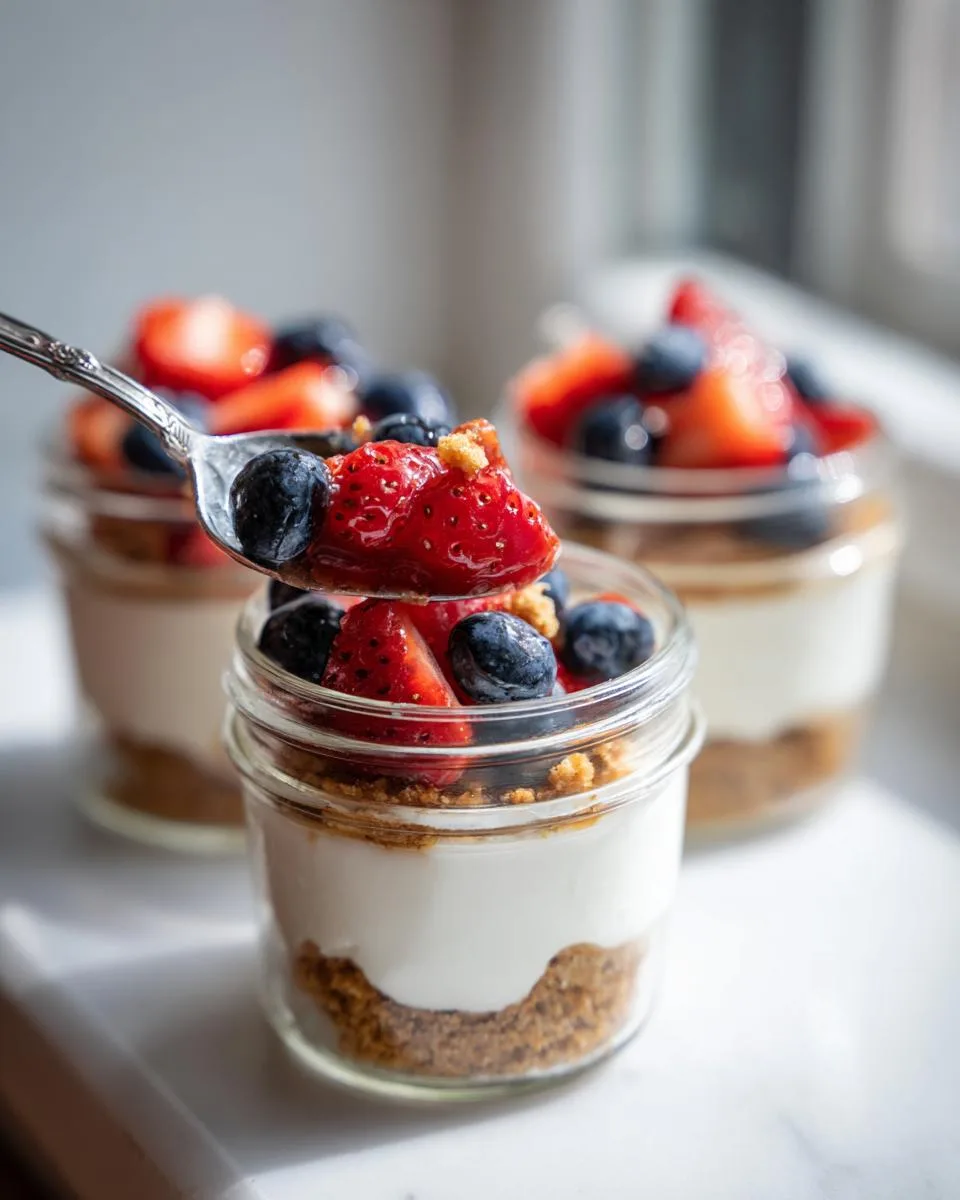
Table of Contents
Table of Contents
Why You’ll Love These No Bake Berry Cheesecake Cups
Let me count the ways these little jars of joy will steal your heart (and probably become your new go-to dessert):
- No oven required – perfect for hot summer days or when you just can’t be bothered to bake
- Ready in 20 minutes flat – from fridge to table before your guests finish their first drink
- Endlessly customizable – swap berries for whatever’s in season or your favorite fruit
- Individually portioned – no slicing mess, and everyone gets their own perfect little cup
- Creamy dreamy texture – that whipped cream folding technique? Absolute magic for lightness
Trust me, once you try these, you’ll be making excuses to whip them up all season long!
Ingredients for No Bake Berry Cheesecake Cups
Gathering your ingredients is the first step to cheesecake bliss! Here’s everything you’ll need for these dreamy little cups:
- 2 Tablespoons (28g) unsalted butter, melted (I always use the real stuff – no margarine shortcuts!)
- 1 cup (100g) graham cracker crumbs – about 8 whole crackers crushed (pro tip: blitz them in a bag for quick crumbs)
- 1 cup (240ml) heavy cream, ice cold (this whips up fluffier when it’s properly chilled)
- 8 ounces (226g) full-fat cream cheese, softened at room temperature (don’t rush this – lumps are the enemy)
- 1/3 cup (65g) granulated sugar (adjust to taste if your berries are extra sweet)
- 2 Tablespoons (30g) sour cream, room temp (this little touch makes the filling extra luxurious)
- 1 teaspoon lemon juice (fresh squeezed gives the brightest flavor)
- 1/2 teaspoon pure vanilla extract (imitation just won’t do it justice)
- Fresh berries for topping – whatever looks best at the market!
See? Nothing fancy – just quality ingredients handled right. Now let’s make some magic!
How to Make No Bake Berry Cheesecake Cups
Alright, let’s dive into making these dreamy little desserts! I’ll walk you through each step like we’re standing side by side in my kitchen. Don’t worry – it’s easier than you think, and the results are totally worth it.
Prepare the Crust
First things first – grab those cute jars! I line them up like little soldiers ready for duty. Melt your butter (microwave works fine, but watch it doesn’t pop!) and stir in the graham cracker crumbs until it looks like wet beach sand. Spoon about 2 tablespoons into each 8-ounce jar – just enough to cover the bottom with a nice layer. Pro tip: use the back of the spoon to gently press it down so it holds together when you take that first heavenly bite!
Whip the Cream
Now for the magic! Pour that ice-cold heavy cream into a chilled bowl (I pop mine in the freezer for 5 minutes first). Whip it on medium-high until you get stiff peaks – that’s when the cream holds its shape when you lift the beaters. Don’t walk away though! Overwhipping turns creamy dreams into buttery nightmares. Should take about 3-4 minutes.
Make the Cheesecake Filling
In another bowl, beat the softened cream cheese until it’s smooth as silk – no lumps allowed! Add sugar, sour cream, lemon juice, and vanilla, beating until everything’s perfectly combined. Now the fun part: gently fold in that gorgeous whipped cream with a silicone spatula. Fold, don’t stir! We’re keeping all that airy lightness intact. The mixture should look like fluffy clouds when you’re done.
Assemble and Chill
Time to layer! Spoon about 1/4 cup filling over each crust, leaving room for berries. Here’s my secret: if you’re serving these later, wait to add toppings until just before serving (up to 2 hours max) to keep that crust crisp. Otherwise, the berry juices can make things soggy. Chill for at least 30 minutes if you can wait – the texture gets even better as it sets!
Print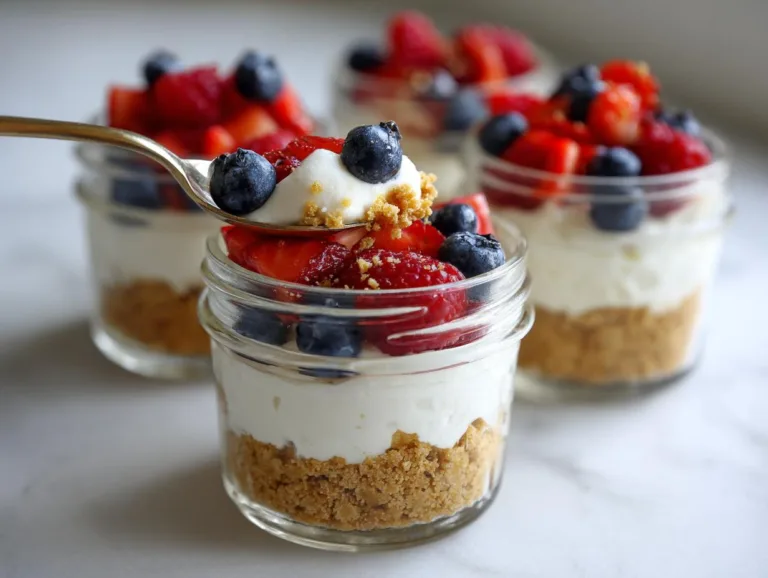
Irresistible No Bake Berry Cheesecake Cups Recipe
No Bake Berry Cheesecake Cups are a delightful, easy-to-make dessert perfect for any occasion. These individual servings feature a graham cracker crust, creamy cheesecake filling, and fresh berry toppings.
- Total Time: 20 minutes
- Yield: 6–10 servings 1x
Ingredients
- 2 Tablespoons (28g) unsalted butter, melted
- 1 cup (100g) graham cracker crumbs (about 8 graham crackers)
- 1 cup (240ml) heavy cream or heavy whipping cream, cold
- 8 ounces (226g) full-fat brick cream cheese, softened to room temperature
- 1/3 cup (65g) granulated sugar
- 2 Tablespoons (30g) sour cream, at room temperature
- 1 teaspoon lemon juice
- 1/2 teaspoon pure vanilla extract
- toppings & garnishes (see note)
Instructions
- Have your jars ready to go and lined up. This recipe yields about 6 8-ounce jars or 10 6-ounce jars.
- Crust: Melt the butter in the microwave in a medium heat-proof bowl or use the stove. Stir in the graham cracker crumbs. The mixture will resemble wet sand. Spoon a generous spoonful into each jar, about 2 Tablespoons into the 8-ounce jars and 1 and 1/2 Tablespoons into the 6-ounce jars. If there’s any crust leftover, sprinkle into the jars to use up or discard. Set jars aside.
- Filling: Using a hand mixer or a stand mixer fitted with a whisk attachment, whip the cold heavy cream into stiff peaks on medium-high speed, about 3-4 minutes. Set aside.
- Using a hand mixer or a stand mixer fitted with a whisk or paddle attachment, beat the cream cheese, sugar, sour cream, lemon juice, and vanilla extract together on medium-high speed until smooth and creamy. Make sure there are no large lumps of cream cheese. If there are lumps, keep beating until smooth.
- Using your mixer on low speed or a silicone spatula, fold the whipped cream into the cheesecake filling until combined. This takes several turns of your silicone spatula. Combine slowly as you don’t want to deflate all the air in the whipped cream.
- Layer a couple large spoonfuls of filling on top of the crust in the jars. Use about 1/4 – 1/3 cup filling in the 8 ounce jars and 3 Tablespoons (or however much you can pack in!) into the 6 ounce jars. Make sure to leave room for the topping.
- The cheesecake jars are at room temperature at this point, but if you’d like to serve chilled, chill for at least 30 minutes and up to 3 days before adding the topping. (Cover if chilling for longer than 30 minutes.) I recommend adding the topping when serving or up to 2 hours in advance. The topping can seep down into the layers, so that’s why I recommend adding it soon before serving.
- Spoon topping and garnishes on top of filling, then serve.
- Cover and store leftover cheesecake jars in the refrigerator for up to 5 days.
Notes
- Use fresh berries for the best flavor.
- Chill the cheesecake cups for a firmer texture.
- Adjust sweetness to taste by varying the sugar amount.
- Prep Time: 20 minutes
- Cook Time: 0 minutes
- Category: Dessert
- Method: No Bake
- Cuisine: American
- Diet: Vegetarian
Nutrition
- Serving Size: 1 jar (8 oz)
- Calories: 320
- Sugar: 20g
- Sodium: 180mg
- Fat: 22g
- Saturated Fat: 13g
- Unsaturated Fat: 7g
- Trans Fat: 0g
- Carbohydrates: 28g
- Fiber: 1g
- Protein: 4g
- Cholesterol: 65mg
Tips for Perfect No Bake Berry Cheesecake Cups
Want to take these from good to “Oh wow, can I have the recipe?” levels? Here are my tried-and-true tricks:
- Chill that cream! Cold heavy cream whips up fluffier – I sometimes even chill my mixing bowl.
- Patience with cream cheese – let it soften completely to avoid lumpy filling (30 minutes on the counter usually does it).
- Fresh is best – use seasonal berries at their peak for that burst of natural sweetness.
- Timing is everything – add toppings right before serving to keep textures perfect.
- Make ahead magic – these actually taste better after 2-3 hours in the fridge as flavors meld.
Follow these simple tips, and you’ll be the berry cheesecake cup hero every time!
Ingredient Substitutions & Variations
One of the best things about these cheesecake cups? You can tweak them to fit whatever you’ve got on hand! Here are my favorite swaps that still deliver amazing results:
- Gluten-free? Use gluten-free graham crackers or even crushed gluten-free cookies for the crust.
- Dairy-free version works great too – swap the cream cheese for vegan cream cheese and use coconut cream instead of heavy whipping cream.
- Berry alternatives? Try diced mangoes, caramelized peaches, or even chocolate shavings if you’re feeling indulgent.
- Short on graham crackers? Digestive biscuits or vanilla wafers make a delicious crust alternative.
The possibilities are endless – have fun making these your own!
Serving and Storing No Bake Berry Cheesecake Cups
These little beauties are best served chilled – about 30 minutes in the fridge does wonders for setting that creamy texture. For peak freshness, add your berry toppings right before serving (up to 2 hours ahead at most). Leftovers? Just pop the lids on tight and refrigerate for up to 5 days – though I doubt they’ll last that long!
Nutritional Information
Keep in mind – nutrition varies based on your specific ingredients. But just to give you an idea, each 8-ounce jar clocks in around 320 calories, with 22g fat (13g saturated), and 28g carbs. Not bad for such a decadent treat!
FAQs About No Bake Berry Cheesecake Cups
Can I freeze these cheesecake cups?
You sure can! Just assemble without the fresh toppings and freeze for up to 1 month. Thaw overnight in the fridge and add berries right before serving. The texture stays surprisingly creamy!
How long do they last in the fridge?
These keep beautifully for about 5 days covered in the refrigerator. Though honestly, in my house they never make it past day two before being devoured!
Can I use frozen berries instead of fresh?
Fresh is best for topping, but thawed frozen berries work in a pinch! Just pat them dry first so they don’t make your cheesecake soggy.
Why is my filling lumpy?
Ah, rookie mistake! Your cream cheese needs to be properly softened at room temperature before mixing. No shortcuts here – patience makes perfect cheesecake!
Can I make these alcoholic?
Absolutely! A splash of Chambord in the filling or a drizzle of berry liqueur over the top takes these from family-friendly to fancy adult dessert in seconds.
Share Your No Bake Berry Cheesecake Cups!
Did you make these adorable cheesecake cups? I’d love to see your creations! Snap a photo, leave a comment, or tag me on social media – let’s spread the berry cheesecake love!
For More recipes, Follow me on Facebook!