There’s something magical about turning summer’s bounty into jars of sweet, ruby-red goodness that lasts all year. My love affair with homemade strawberry rhubarb jam began in my grandmother’s kitchen, where the tangy-sweet scent of bubbling fruit would fill the air every June. She’d hand me a wooden spoon nearly as big as I was and let me stir the pot – though truth be told, I mostly just licked the spoon clean!
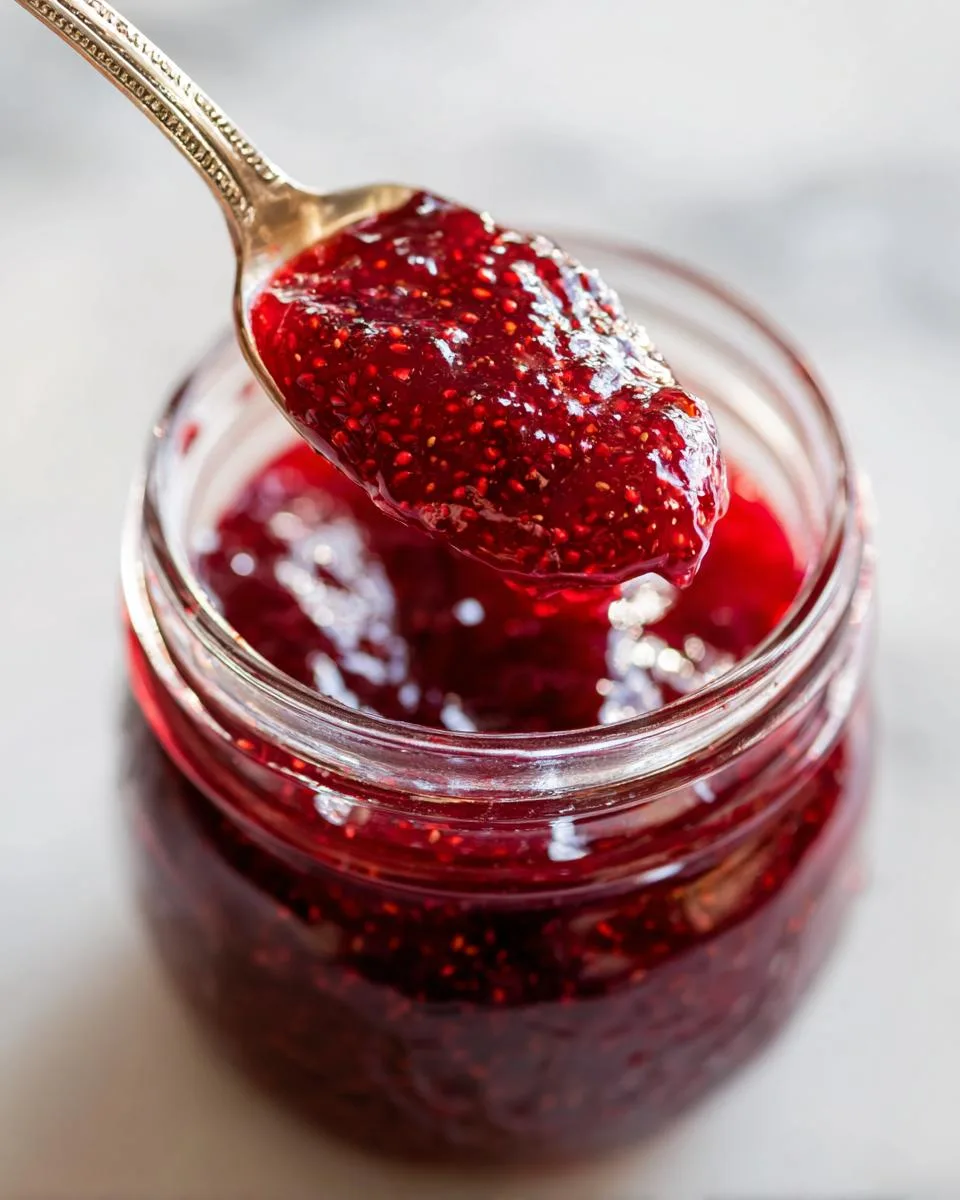
Table of Contents
Table of Contents
This recipe captures that perfect balance between strawberries’ sweetness and rhubarb’s bright tartness – just like Grandma used to make, but simplified for today’s busy cooks. You don’t need fancy equipment or days of work – just fresh fruit, sugar, and about an hour of your time. The reward? Twelve jars of sunshine that’ll make your morning toast feel special and your yogurt taste like summer, even in the depths of winter.
What I love most about this strawberry rhubarb jam is how it transforms humble ingredients into something extraordinary. That first pop of the sealing lid is pure kitchen triumph! Whether you’re new to canning or a seasoned preserver, this recipe delivers that old-fashioned homemade taste without fuss. Let’s make some memories (and delicious jam) together! Try this recipe and share your jam photos with us!
Why You’ll Love This Homemade Strawberry Rhubarb Jam
This jam isn’t just delicious – it’s downright addictive! Here’s why it’s become my go-to summer preserving project:
- That perfect sweet-tart balance – The rhubarb’s zing cuts through the strawberries’ sweetness in a way that makes store-bought jam taste flat by comparison
- Simpler than you think – No fancy techniques here! If you can stir a pot and boil water, you can make this jam (I promise)
- Summer in a jar – One bite transports me right back to Grandma’s kitchen, no matter what month it is
- Endless ways to enjoy it – Beyond toast, it’s incredible swirled into oatmeal, dolloped on pancakes, or even paired with savory cheeses
Trust me – once you taste homemade, you’ll never go back to the supermarket stuff!
Ingredients for Homemade Strawberry Rhubarb Jam
Okay, let’s talk ingredients! This is where the magic starts. You’ll need:
- 4 ¼ cups diced rhubarb – cut into ½-inch pieces (trust me, fresh is best here!)
- 4 ¼ cups sliced fresh strawberries – hulled and sliced (the riper, the better for flavor)
- 2 tablespoons lemon juice – fresh squeezed gives the brightest flavor
- 2 packages powdered fruit pectin – the 1.75 oz size (this is our gelling magic)
- ½ teaspoon butter – optional, but it really helps reduce foaming
- 10 cups white sugar – yes, exactly 10 cups – it’s crucial for proper setting
- 12 half-pint canning jars with lids and rings – sterilized and ready to go
That little bit of butter might seem odd, but it makes a huge difference in keeping the foam down. And don’t skimp on the sugar – it’s what makes the jam set properly and preserves it!
Equipment You’ll Need
Gathering your tools before starting makes jam-making so much smoother! Here’s what you’ll need:
- A large kettle or Dutch oven – At least 8 quarts to prevent boil-overs (learned that the messy way!)
- Canning jars (12 half-pint) with lids and rings – I always prep a few extra, just in case
- A jelly funnel – This $3 tool saves so much cleanup – worth its weight in gold!
- Stockpot with rack – For water bath processing (a cake cooling rack works in a pinch)
- Long-handled wooden spoon – Metal conducts heat too much and can scorch your jam
- Ladle and clean towels – For filling and wiping jars
That’s it! No fancy gadgets needed – just good old-fashioned kitchen basics.
How to Make Homemade Strawberry Rhubarb Jam
Alright, let’s get cooking! This part is my favorite – watching that beautiful ruby color develop and smelling that sweet-tart aroma fill the kitchen. Don’t be intimidated – just follow these steps and you’ll have perfect jam every time.
- Combine your fruit and pectin: Toss your diced rhubarb, sliced strawberries, lemon juice, pectin, and that little pat of butter into your big kettle. Turn the heat to medium and give it a good stir. You’ll want to keep stirring until it comes to a full boil – you’ll see bubbles all across the surface.
- Add the sugar slowly: Now here’s the important part – add your sugar one cup at a time, stirring constantly until each cup dissolves completely before adding the next. This prevents graininess and helps the juice start to form. It’ll take a few minutes, but trust me, it’s worth the patience!
- Bring to a rolling boil: Crank that heat up to medium-high and get it to a rolling boil that you can’t stir down. Set a timer for exactly 1 minute and keep stirring! You’ll see foam forming on top – just skim it off with a spoon (this is where that butter really helps).
- Fill your jars: Working quickly, use your ladle and jelly funnel to fill your hot sterilized jars, leaving about ¼ inch of space at the top. Run a clean knife or spatula around the inside to release any air bubbles – this keeps your jam from having weird gaps.
- Wipe and seal: Wipe the rims with a damp paper towel – any residue can prevent sealing. Place the lids on and screw the rings on firmly but not super tight.
- Process in water bath: Carefully lower your jars into the boiling water bath, making sure they’re covered by at least an inch of water. Bring back to a rolling boil and process for exactly 5 minutes.
- Rest and test: Remove the jars and let them sit undisturbed for 12-24 hours. You’ll hear that wonderful “pop” as they seal!
The key is that rolling boil timing – don’t guess, use a timer! And work efficiently once the jam is ready – it sets up quickly.
Sterilizing Jars Properly
Clean jars are non-negotiable! I submerge my jars and lids in boiling water for at least 5 minutes, then keep them in hot water until I’m ready to fill. This keeps them sterile and prevents breakage when you add the hot jam.
Sealing and Storing the Jam
After resting, press each lid’s center – if it doesn’t pop back, you’ve got a good seal! Remove the rings for storage and keep your beautiful jars in a cool, dark place. They’ll last about a year – if you can resist eating them all sooner!
Print
Magical Homemade Strawberry Rhubarb Jam in 12 Jars
A simple homemade strawberry rhubarb jam recipe that’s perfect for preserving summer flavors.
- Total Time: 50 minutes
- Yield: 12 half-pint jars 1x
Ingredients
- 4 ¼ cups diced rhubarb
- 4 ¼ cups sliced fresh strawberries
- 2 tablespoons lemon juice
- 2 (1.75 ounce) packages powdered fruit pectin
- ½ teaspoon butter (Optional)
- 10 cups white sugar
- 12 half-pint canning jars with lids and rings
Instructions
- Gather the ingredients.
- Place rhubarb, strawberries, lemon juice, pectin, and butter into a large kettle over medium heat. Stir and bring to a boil.
- Add sugar, 1 cup at a time, stirring constantly until sugar is dissolved and juice begins to form.
- Increase heat to medium-high, bring mixture to a rolling boil, and cook and stir for 1 minute. Skim off any foam that forms.
- Sterilize the jars and lids in boiling water for at least 5 minutes.
- Use a jelly funnel and soup ladle to pack jam into hot, sterilized jars, filling to within 1/4 inch of the top.
- Run a knife or thin spatula around the insides of the jars to remove any air bubbles.
- Wipe the rims with a moist paper towel to remove any food residue. Top with lids and screw rings on tightly.
- Place a rack in the bottom of a large stockpot and fill halfway with water.
- Bring to a boil over high heat, then carefully lower the jars into the pot.
- Leave a 2-inch space between the jars.
- Pour in more boiling water to cover jars by at least 1 inch.
- Bring to a rolling boil, cover, and process for 5 minutes.
- Remove the jars from the stockpot and let rest for 12 to 24 hours.
- Press the center of each lid to ensure proper sealing.
- Remove the rings for storage and store in a cool, dark area.
Notes
- Use fresh, ripe strawberries for best flavor.
- Adjust sugar according to taste preference.
- Proper sterilization prevents spoilage.
- Let jars cool completely before storage.
- Prep Time: 30 minutes
- Cook Time: 20 minutes
- Category: Preserves
- Method: Stovetop
- Cuisine: American
- Diet: Vegetarian
Nutrition
- Serving Size: 1 tablespoon
- Calories: 50
- Sugar: 12g
- Sodium: 0mg
- Fat: 0g
- Saturated Fat: 0g
- Unsaturated Fat: 0g
- Trans Fat: 0g
- Carbohydrates: 13g
- Fiber: 0g
- Protein: 0g
- Cholesterol: 0mg
Tips for Perfect Homemade Strawberry Rhubarb Jam
After making countless batches (and yes, a few flops!), I’ve learned these tricks make all the difference:
- Use the ripest strawberries you can find – They should smell sweet before you even slice them. Underripe berries mean bland jam!
- Don’t reduce the sugar unless you’re experienced – I know 10 cups seems wild, but sugar helps preserve and set the jam. Try reducing by 1 cup max if you must.
- Stir gently after adding pectin – Over-stirring can break down the pectin’s gelling power. Just enough to combine!
- Work fast once boiling – Jam sets quickly off heat, so have everything prepped and ready to go.
- Listen for the “pop” – That satisfying sound means your seal is good. No pop? Refrigerate that jar and use it first.
Oh, and wear an apron – strawberry jam stains are no joke!
Variations for Your Homemade Strawberry Rhubarb Jam
Once you’ve mastered the basic recipe, try these fun twists! My favorite is adding a split vanilla bean to the pot while cooking – it gives the jam this incredible depth. A cinnamon stick works wonders too, especially if you’re making holiday gifts.
Feeling adventurous? Swap half the rhubarb for peaches – the combo is unreal! Just remember to adjust sugar slightly since peaches are sweeter. The beauty of homemade jam is making it your own!
Serving Suggestions
Oh, the possibilities with this jam! Sure, it’s heavenly on warm toast, but don’t stop there. Spread it thick on buttery scones for afternoon tea, swirl it into your morning yogurt, or dollop it over vanilla ice cream for the easiest dessert ever. My favorite? Pairing it with sharp cheddar on a fancy cheese board – the sweet-tart combo is magic!
Nutritional Information
Here’s the scoop on what’s in each spoonful (but remember, nutrition varies by ingredients and brands – these are estimates per tablespoon):
- Calories: 50
- Sugar: 12g
- Carbs: 13g
Not bad for something that tastes like pure summer, right? Just don’t ask me how many tablespoons I’ve been known to eat in one sitting!
Frequently Asked Questions
Can I use frozen strawberries or rhubarb?
Absolutely! Frozen fruit works in a pinch – just thaw completely and drain any excess liquid first. The texture might be slightly softer, but the flavor will still be fantastic. I actually keep frozen rhubarb on hand for off-season jam emergencies!
How long does homemade strawberry rhubarb jam last?
Properly sealed jars will keep for about a year in a cool, dark place. Once opened, refrigerate and use within 3 months. Though let’s be real – mine never lasts that long!
Why didn’t my jam set properly?
Usually this means either not boiling long enough (that full 1 minute at rolling boil is crucial!) or not using enough sugar. If it’s too runny, don’t panic – just call it “strawberry rhubarb syrup” and pour it over pancakes!
Can I reduce the sugar?
You can try cutting back by 1 cup max, but sugar helps preserve and set the jam. For lower sugar versions, use special pectin formulated for reduced-sugar recipes.
Try this recipe and share your jam photos with us! There’s nothing more satisfying than seeing those beautiful ruby jars lined up on your counter – except maybe eating the results!
For More recipes, Follow me on Facebook!