Halloween just isn’t Halloween in our house without a batch of these ridiculously fun monster cupcakes taking over the kitchen counter. I started making them years ago when my niece begged for “something scary but yummy” for her class party – and let me tell you, these Halloween Monster Cupcakes stole the show! What I love most is how they transform basic cupcakes into playful little creatures with just some colorful frosting, candy eyes, and a bit of imagination.
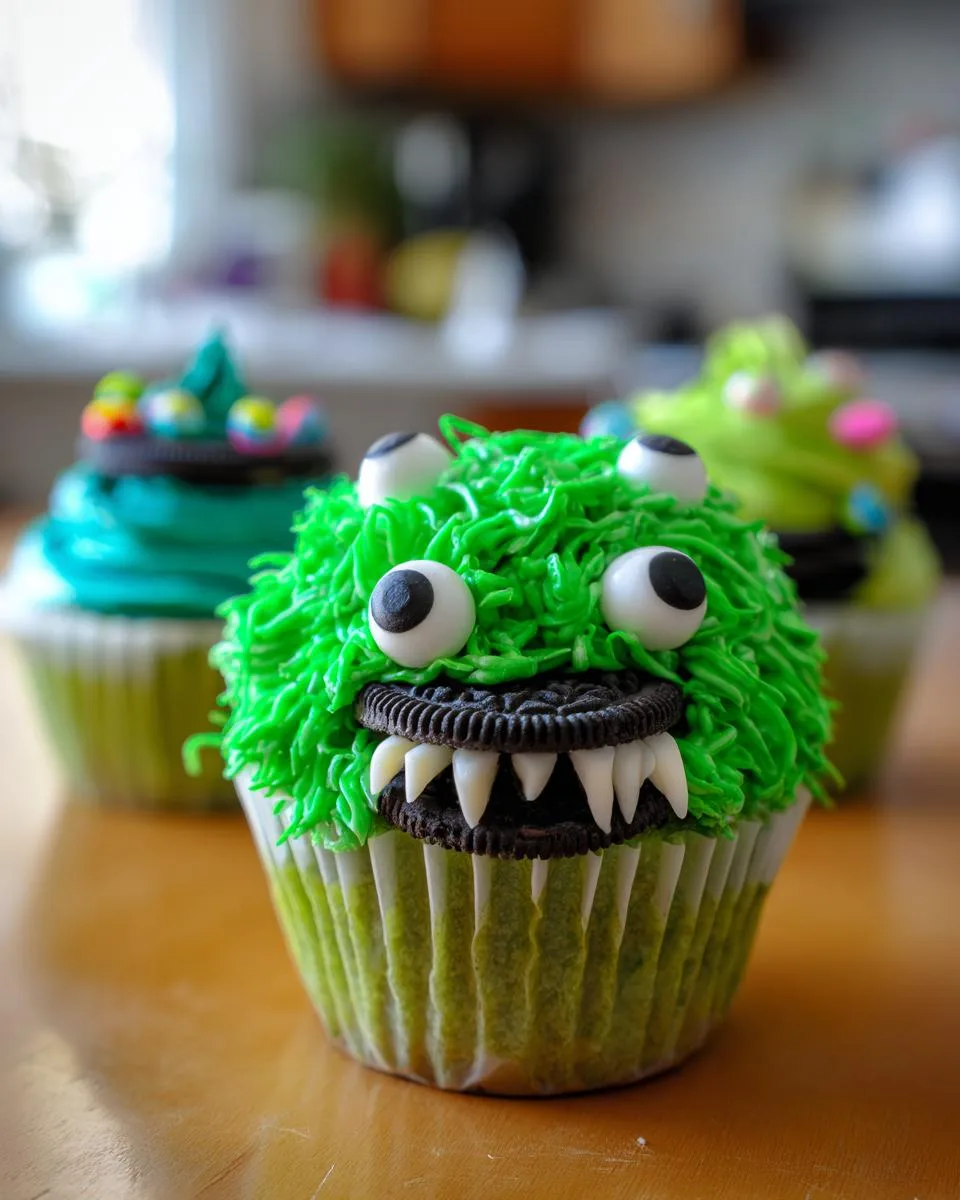
Table of Contents
Table of Contents
These became our family’s go-to Halloween treat because they’re impossible to mess up (seriously, the messier the “fur,” the better!) and kids go wild decorating them. Last year, my five-year-old nephew created a whole monster family – purple ones with three eyes, green ones with crooked Oreo mouths, you name it. That’s the magic of this recipe: it’s half baking, half craft project that ends with everyone laughing and licking frosting off their fingers.
Why You’ll Love These Halloween Monster Cupcakes
Trust me, these aren’t your average cupcakes—they’re a whole experience! Here’s why they disappear faster than ghosts at sunrise:
- So easy – Even if you can barely frost a regular cupcake, the messy “fur” technique hides all imperfections
- Kid magnet – My little cousins argue over who gets to place the eyeballs every time
- Endlessly creative – Go classic green, make rainbow monsters, or try glow-in-the-dark colors
- No fancy skills needed – That grass piping tip does all the textural magic for you
- Party perfect – They look incredible displayed together like a silly monster army
The best part? Watching kids’ faces light up when they see their edible creations come to life!
Halloween Monster Cupcakes Ingredients
Here’s the beautiful part – you probably have most of this stuff already! The real magic happens when these simple ingredients come together to create edible monsters. Just promise me one thing: don’t stress about perfection. Some of my best monsters were happy accidents!

- 1 cup buttercream frosting – Homemade or store-bought, I won’t judge! My quick cheat? A tub of vanilla frosting whipped with extra powdered sugar for stiffness
- 24 baked cupcakes – Your favorite flavor works here. We’re chocolate fiends, but vanilla lets those wild colors pop
- 1 small grass icing tip (Wilton #233) – This $3 tool is LIFE-CHANGING for perfect monster fur texture
- Gel food coloring – Go crazy with colors! Gel works better than liquid – trust me, I’ve made the mistake
- 1 package candy eyeballs – The crazier sizes the better! Mix tiny and giant ones for personality
- 12 OREO cookies – Split them carefully for gruesome mouths (snack on the broken ones – chef’s perk!)
Pro tip from my many monster-making marathons: Make extra frosting! When kids are decorating, they’ll inevitably “test” some…and you’ll want enough for touch-ups when Oreo mouths mysteriously disappear!
How to Make Halloween Monster Cupcakes
Okay, let’s make some monsters! The secret to these cupcakes is embracing the chaos – the wonkier they look, the more personality they have. Just follow these simple steps, and you’ll have a crew of silly creatures ready to party in no time!
Step 1: Prepare the Frosting
First things first – let’s make that monster fur pop with color! Scoop your buttercream into separate bowls (one for each monster color you’re creating). Now, here’s my trick: use toothpicks to add gel food coloring little by little. I learned the hard way that dumping in liquid coloring makes runny frosting – not great for piping! Mix until you get vibrant, monster-worthy shades. Pro tip: purple and teal always get compliments at parties!
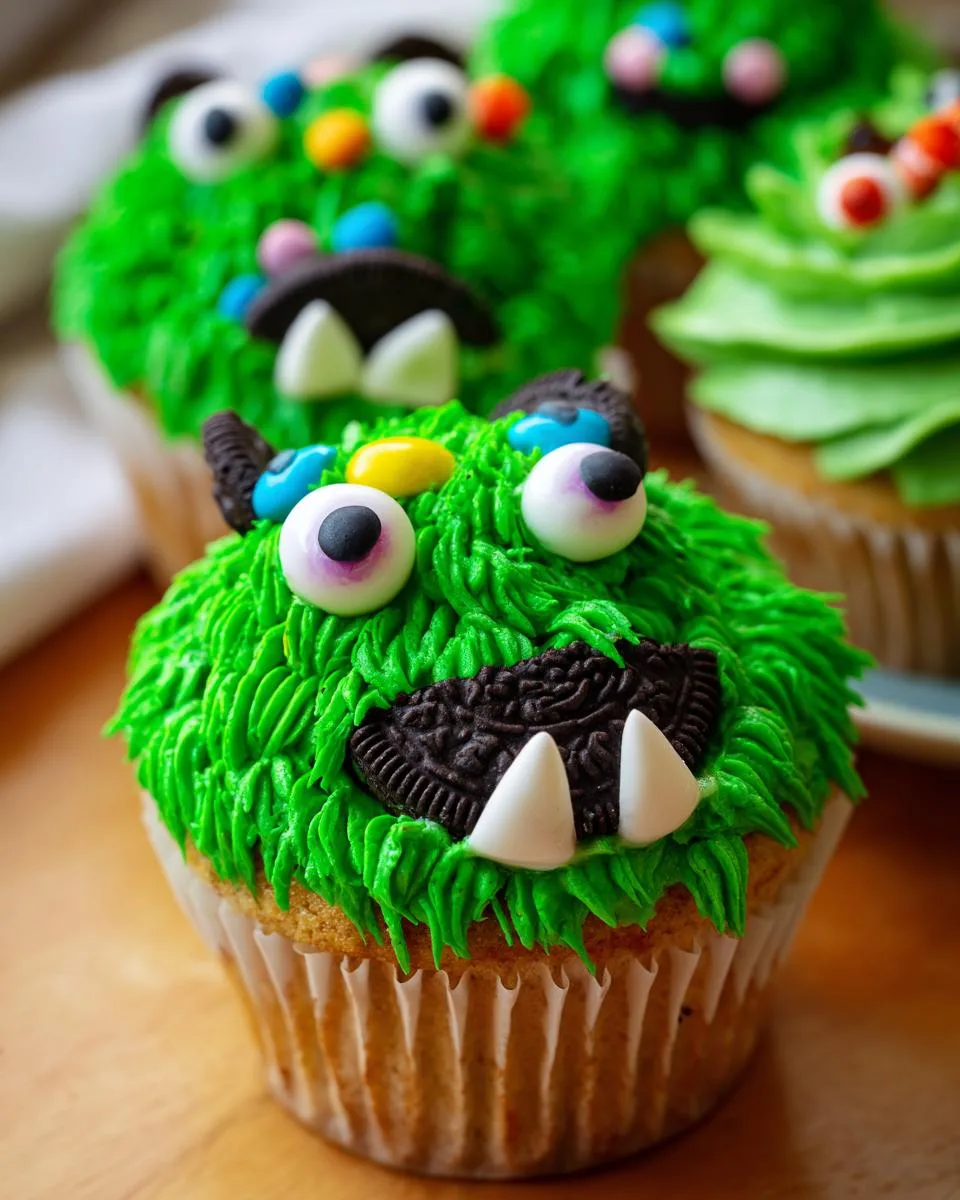
Step 2: Pipe the Fur
Time for the magic! Fit your piping bag with the grass tip (#233 is my go-to) and fill it with colored frosting. Hold the bag straight up about 1/2 inch above the cupcake. Now, squeeze firmly and pull up quickly to create those perfect fur strands. Start at the outer edge and work inward in circles – this gives you that awesome shaggy monster look. Don’t overthink it! Some of my best monsters happened when I got lazy and just went wild with the piping bag.
Step 3: Add Monster Faces
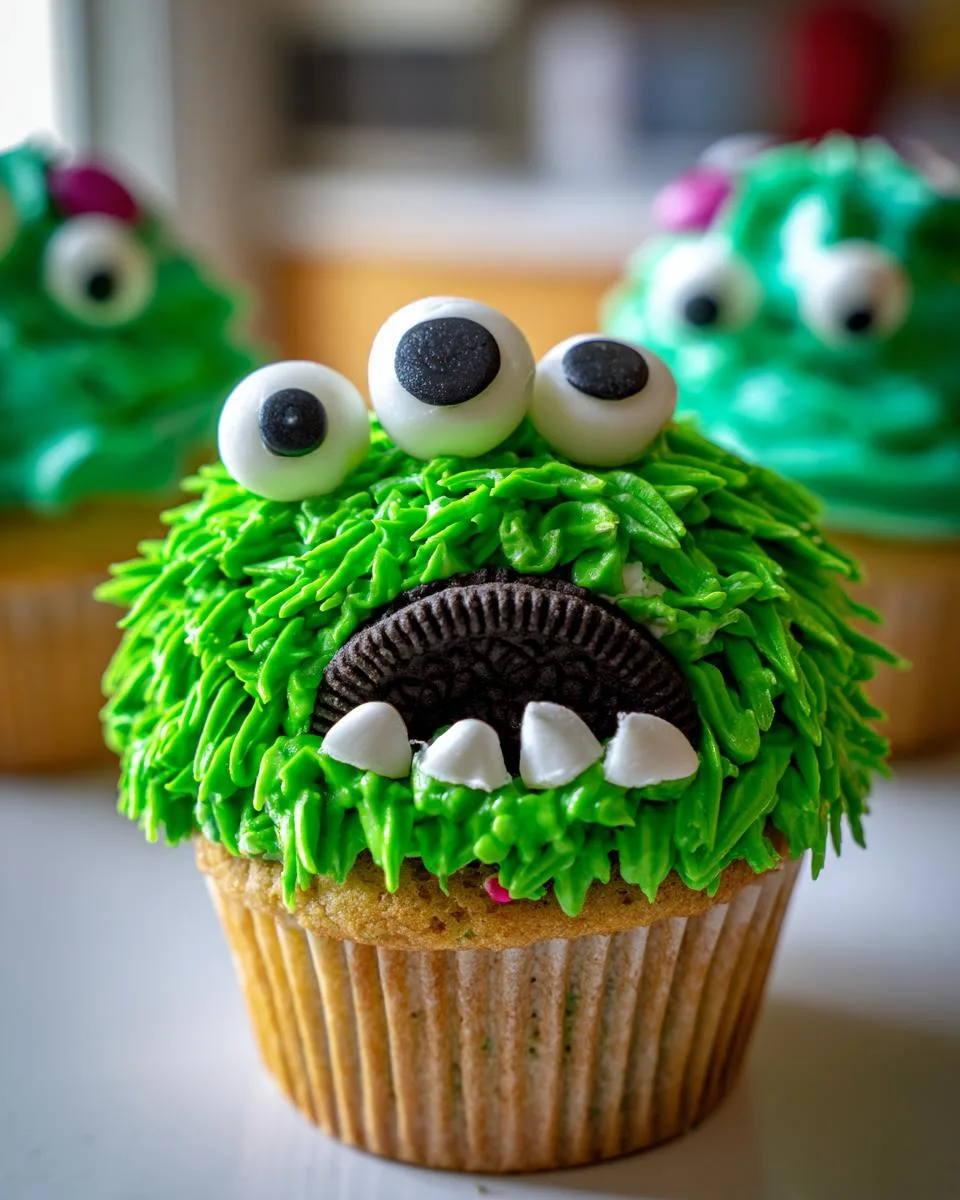
This is where the fun really begins! While the frosting is still soft, press in candy eyeballs (the more off-center, the better). For mouths, gently push halved OREOs into the fur at funny angles. Want teeth? Use a toothpick to dab on little white frosting fangs or crooked chompers. Last year, my nephew made a monster with three eyes and an upside-down mouth – it was terrifyingly adorable! Remember: there are no rules here. Let your inner monster-maker run free!
And that’s it! In about 20 minutes, you’ll have a whole squad of unique Halloween characters. Just try not to eat them all before the party starts – I can never resist at least one “quality control” monster!
Print
Scary-Easy Halloween Monster Cupcakes in Just 20 Minutes
Fun and spooky Halloween Monster Cupcakes that are easy to make and perfect for parties. Decorate with colorful fur, candy eyeballs, and Oreo mouths for a playful monster look.
- Total Time: 50 minutes
- Yield: 24 cupcakes 1x
Ingredients
- 1 Grass Icing Tip (Small star icing tip)
- 24 Cupcakes
- 1 cup Buttercream Frosting
- Food Coloring (of choice for monster “fur”)
- Candy Eyeballs
- 1 package OREOs (various sizes)
Instructions
- Mix frosting with food coloring of your choice for the monster “fur.”
- Place the grass icing tip in a piping bag to create the fur texture.
- Fill the piping bag with colored icing and pipe fur onto cupcakes, working from the outside in.
- Add candy eyeballs in various sizes for a fun effect.
- Use small OREOs or halved large OREO cookies for monster mouths.
- Add white frosting for teeth.
- Get creative and have fun with decorations!
Notes
- Use different food colors for variety.
- Experiment with different monster face shapes.
- Kids can help decorate for extra fun.
- Prep Time: 20 minutes
- Cook Time: 30 minutes
- Category: Dessert
- Method: Baking & Decorating
- Cuisine: American
- Diet: Vegetarian
Nutrition
- Serving Size: 1 cupcake
- Calories: 220
- Sugar: 18g
- Sodium: 150mg
- Fat: 10g
- Saturated Fat: 4g
- Unsaturated Fat: 5g
- Trans Fat: 0g
- Carbohydrates: 30g
- Fiber: 1g
- Protein: 2g
- Cholesterol: 15mg
Tips for Perfect Halloween Monster Cupcakes
After making these cupcakes more times than I can count (and surviving many Halloween baking disasters), here are my hard-earned secrets for monster-making success:
- Chill those cupcakes! Decorating warm cupcakes equals melty monster fur. I pop mine in the fridge for 15 minutes before frosting – it makes all the difference.
- Gel colors or bust – Liquid food coloring makes frosting runny. Spend the $3 on gel – your neon green monsters will thank you!
- Kid assembly line – Set up decorating stations: one for fur piping (adults), one for eyeballs (toddlers), one for mouths (big kids). Less chaos, more fun!
- Frosting too soft? Add powdered sugar 1 Tbsp at a time until it holds peaks. Too stiff? A tiny bit of milk loosens it up.
- Eyeball hack – If candy eyes won’t stick, dab a bit of frosting first. No more rolling eyeballs!
- OREO trick – Freeze cookies for 10 minutes before splitting – they crack cleaner for perfect monster mouths.
Most important tip? Have FUN with it! My “failed” monsters with crazy fur and crossed eyes always get the most laughs at parties.
Halloween Monster Cupcakes Variations
Oh, the monster possibilities are endless! Once you’ve mastered the basics, try these fun twists:
- Googly eyes – Mini marshmallows with chocolate chip pupils give that classic “monster movie” look
- Cookie swap – Use Nutter Butters for peanut butter monsters or chocolate chip cookies for extra crunch
- Color themes – Try all-black cupcakes with neon fur for a “night monster” vibe
- Furry friends – Mix coconut flakes into green frosting for a yeti-style texture
My personal favorite? Last-minute “zombie” versions with red gel “blood” dripping from Oreo mouths – the kids went wild!
Serving and Storing Halloween Monster Cupcakes
Alright, let’s talk about keeping these little monsters fresh and fabulous! I’ve learned through trial and error (and a few sad, droopy-eyed cupcakes) that storage makes ALL the difference with these guys.
Storing your monster crew: Pop them in an airtight container – I’m obsessed with those cupcake carriers with individual slots to prevent smushed fur. No container? A baking sheet covered tightly with plastic wrap works in a pinch. They’ll stay fresh at room temperature for up to 3 days (if they last that long!). Avoid the fridge unless your kitchen is super warm – refrigeration can dry out the cupcakes and make the frosting sweat.
Humidity is the enemy: Learned this the hard way during a particularly muggy Halloween! If you live somewhere humid, stash a couple silica packets (the kind that come in shoe boxes) in your storage container. This helps prevent the fur from getting limp and sticky.
Serving tip: Let them shine at room temperature! Cold frosting doesn’t show off that awesome fur texture. I usually pull mine out about 30 minutes before serving – just enough time for the buttercream to soften slightly but not so long that the eyeballs start sliding off!
Make-ahead magic: You can absolutely bake the cupcakes 1-2 days in advance and store them unfrosted. Just wrap them tightly in plastic once completely cooled. The decorating is so quick, I often do it the morning of the party while sipping my coffee – turns out piping monster fur is weirdly therapeutic!
Halloween Monster Cupcakes Nutritional Information
Now, let’s be real – nobody’s eating monster cupcakes for their health benefits! But since I know some of you like to keep track (or have curious kids asking “how many calories is THIS monster?”), here’s the nutritional scoop. Just remember – these numbers are estimates and can change based on your specific ingredients. My homemade buttercream will differ from store-bought, and those extra candy eyeballs your kid piled on? Yeah, they add up!
Per cupcake (approximate):
- Calories: 220
- Sugar: 18g
- Fat: 10g
- Saturated Fat: 4g
- Carbohydrates: 30g
- Protein: 2g
Want to lighten them up a bit? Here’s what I’ve tried over the years:
- Use Greek yogurt frosting (half buttercream, half yogurt) – cuts calories but keeps it pipeable
- Mini cupcakes make portion control easier – kids still get their monster fix!
- Dark cocoa powder in the batter adds richness so you can reduce sugar slightly
But honestly? Halloween comes once a year – let those little monsters enjoy their sugary creations! My philosophy? Bake with love, decorate with joy, and worry about the nutrition facts tomorrow.
FAQs About Halloween Monster Cupcakes
Over the years, I’ve gotten SO many questions about these crazy monster cupcakes – and I love helping bakers avoid the same mistakes I made! Here are the top things people ask me:
Can I use boxed cake mix for these?
Absolutely! I use box mixes more often than not – they’re reliable and let you focus on the fun decorating part. Just follow the package directions, but here’s my trick: replace the water with milk and add an extra egg for richer cupcakes that hold up to all that monster fur.
Help! My frosting keeps melting – what am I doing wrong?
Oh honey, been there! Two likely culprits: your buttercream was too soft to begin with (try chilling it for 15 minutes before piping), or your kitchen is too warm. If it’s a hot day, work in small batches and keep unused frosting in the fridge. Also – gel food coloring won’t thin your frosting like liquid does!
What’s the best way to transport these to a party?
After one tragic “monster massacre” in my car, I became a transport expert! Use a cupcake carrier with individual slots – the kind with lids that snap on. No carrier? A sturdy box with crumpled paper towels between cupcakes works in a pinch. Pro tip: decorate them AT the party if possible – just bring pre-colored frosting in piping bags!
Can I make these ahead of time?
You sure can! Bake the cupcakes 1-2 days early and store them unfrosted at room temp. The decorating only takes about 20 minutes, so I usually do that the morning of. Already decorated? They’ll keep beautifully for a day if stored properly – just avoid humid areas!
My candy eyeballs keep falling off – any tricks?
This used to drive me nuts! The secret is to press them in while the frosting is still fresh and slightly wet. If they won’t stick, dab a tiny bit of extra frosting first as “glue.” For really secure eyes, use mini marshmallows with chocolate chip pupils – they adhere better to the fur texture!
Got more monster dilemmas? Drop me a comment below – I’ve probably faced (and solved) every cupcake catastrophe imaginable! Remember – even “failed” monsters usually taste delicious, so don’t stress too much.
Final Thoughts
Well, there you have it – everything I’ve learned from years of creating these silly, spooky, and totally irresistible Halloween Monster Cupcakes! I can’t wait to see what kind of creatures you bring to life in your kitchen. The best part about this recipe? There’s no wrong way to do it – every monster has its own personality (just like the little monsters decorating them!).
When you make yours, promise me you’ll snap a photo of your craziest creation – I LIVE for seeing your edible monster masterpieces! Tag me @MartaviaMonsters or use #MonsterCupcakeMadness so I can cheer you on. Nothing makes me happier than seeing families having as much fun with these as we do. Now go forth and unleash your inner monster-maker – may your frosting be vibrant, your eyeballs bountiful, and your Halloween full of delicious scares!
For More recipes, Follow me on Facebook!