Oh my gosh, you HAVE to try these Halloween Mini Pizzas! Every October, my kitchen turns into a spooky pizza parlor—my nieces and nephews go wild decorating these little edible canvases. They’re seriously the easiest way to add festive fun to any Halloween party (or just a cozy movie night!).
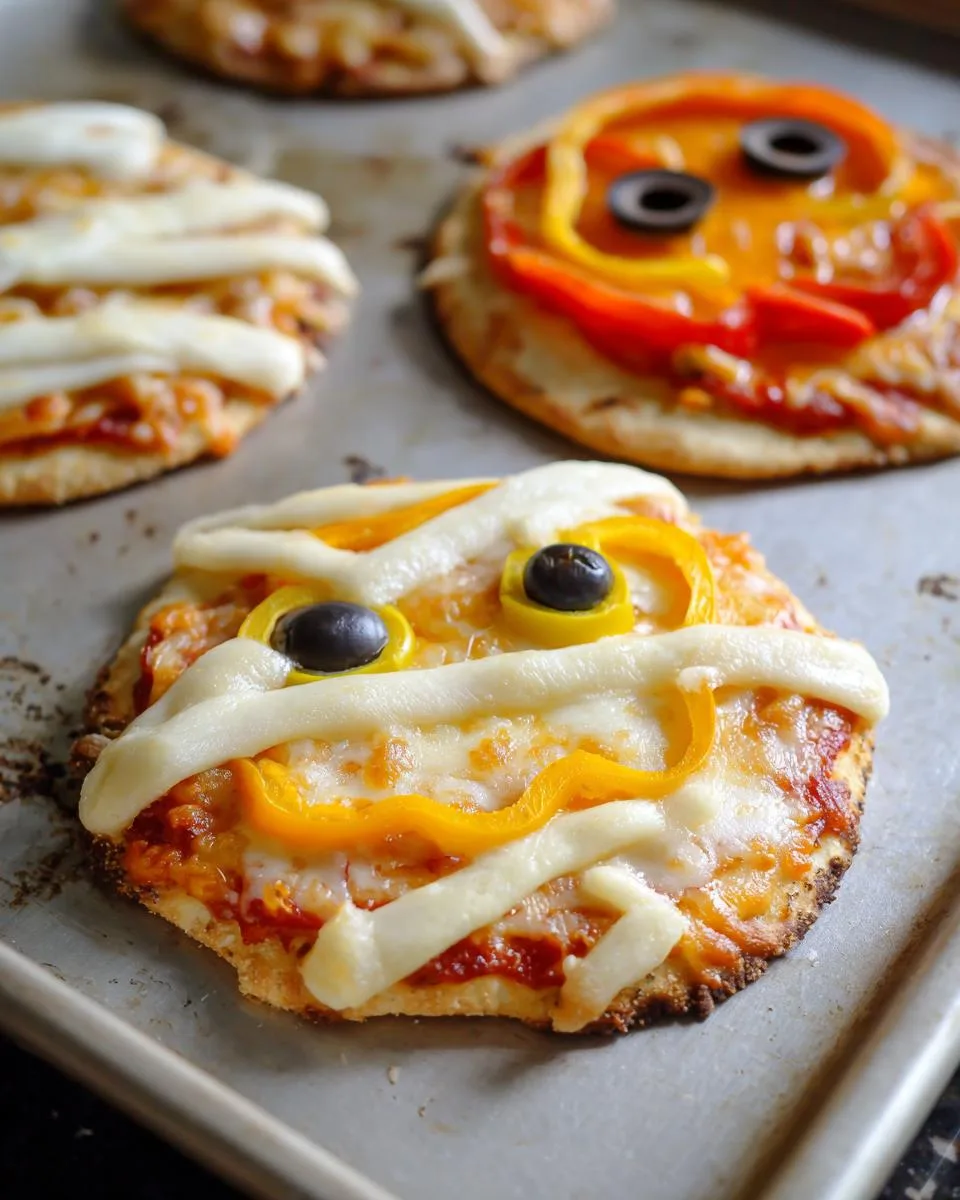
Table of Contents
Table of Contents
I started making these years ago when I needed a last-minute treat for my friend’s haunted house potluck. Fifteen minutes of prepping toppings, ten minutes baking—boom! Suddenly I was the “cool aunt” with the creepy-cute snacks. Now it’s our tradition.
The magic? Mini crusts become edible jack-o’-lanterns, mummies, and spiders with just sliced olives, bell peppers, and cheese. Even non-cooks can handle this one—promise!
Why You’ll Love These Halloween Mini Pizzas
Listen, these aren’t just snacks—they’re edible Halloween magic! Here’s why I’m obsessed (and why you will be too):
- Instant party mood: Nothing gets kids (or fun adults!) giggling faster than arranging olive spiders or pepper jack-o’-lantern grins.
- Crazy easy: We’re talking 15 minutes of playful decorating before these Halloween mini pizzas hit the oven—no fancy skills needed.
- Totally customizable: Got a kid who hates olives? Swap for cherry tomato eyes. Vegan? Use dairy-free cheese “bandages” on your mummies.
- Perfect portioning: Mini crusts mean no fighting over slices—just grab your favorite creepy creation!
Last year, my nephew proudly declared his spider pizza “too scary to eat”… then devoured three. That’s the Halloween mini pizza effect!
Ingredients for Halloween Mini Pizzas
Okay, listen up – the secret to these adorable little monsters is having everything prepped and ready to go. Here’s your shopping list for maximum Halloween cuteness:
- 8-10 mini pizza crusts – I use store-bought personal-size bases because, hello, we’ve got decorating to do!
- 3/4 cup pizza sauce – My go-to is the spicy Arrabiata for a little grown-up kick
- 1 cup shredded mozzarella – The melty foundation for all our spooky creations
- 1/4 cup sliced black olives – These become spiders, eyeballs, you name it
- 1/4 cup mini pepperoni (optional) – Great for bloody vampire bites or creepy cheeks
- Orange & green bell peppers – Thin strips for jack-o’-lantern faces and witchy accents
- 4 sticks part-skim string cheese – Pulled apart into perfect mummy “bandages”
- 2 tbsp fresh basil – Chiffonade cut for that final gourmet monster touch
- Olive oil spray – Just a quick mist to keep our baking sheet happy
Ingredient Substitutions & Variations
Listen, Halloween should be fun – not stressful! Here’s how to tweak these Halloween mini pizzas for any dietary need or what’s lurking in your fridge:
- Gluten-free? Swap in your favorite GF crusts – they crisp up beautifully.
- Vegan monsters? Dairy-free mozzarella melts perfectly for mummy “bandages.”
- Olive haters? Try cherry tomatoes or cucumber rounds for spooky eyes instead.
- Extra protein? Turkey pepperoni or crumbled sausage make great Frankenstein scars!
The beauty? However you adapt them, they’ll still disappear faster than ghosts at sunrise!
Equipment You’ll Need
Gather these kitchen basics before diving into your Halloween mini pizza creations:
- Baking sheet – The stage for our spooky masterpieces
- Cutting board & sharp knife – For slicing olives and peppers into ghoulish details
- Small bowls – To keep prepped toppings organized (and prevent olive juice disasters!)
That’s it – no fancy gadgets needed! Though I sometimes use cookie cutters for extra-fun crust shapes if I’m feeling ambitious.
How to Make Halloween Mini Pizzas
Alright, let’s turn these ingredients into spooky masterpieces! Trust me – if my 5-year-old niece can do this, so can you. Here’s how we bring these Halloween mini pizzas to life:
Step 1: Prep the Crusts and Sauce
First, crank that oven to 425°F (220°C) – we want it nice and toasty. While it heats, lay your mini crusts on a lightly oiled baking sheet. Now the fun begins! Spread about 1-2 tablespoons of sauce on each, leaving a tiny border (about 1/4 inch) so we don’t have saucy lava flows in the oven.
Step 2: Add Cheese and Toppings
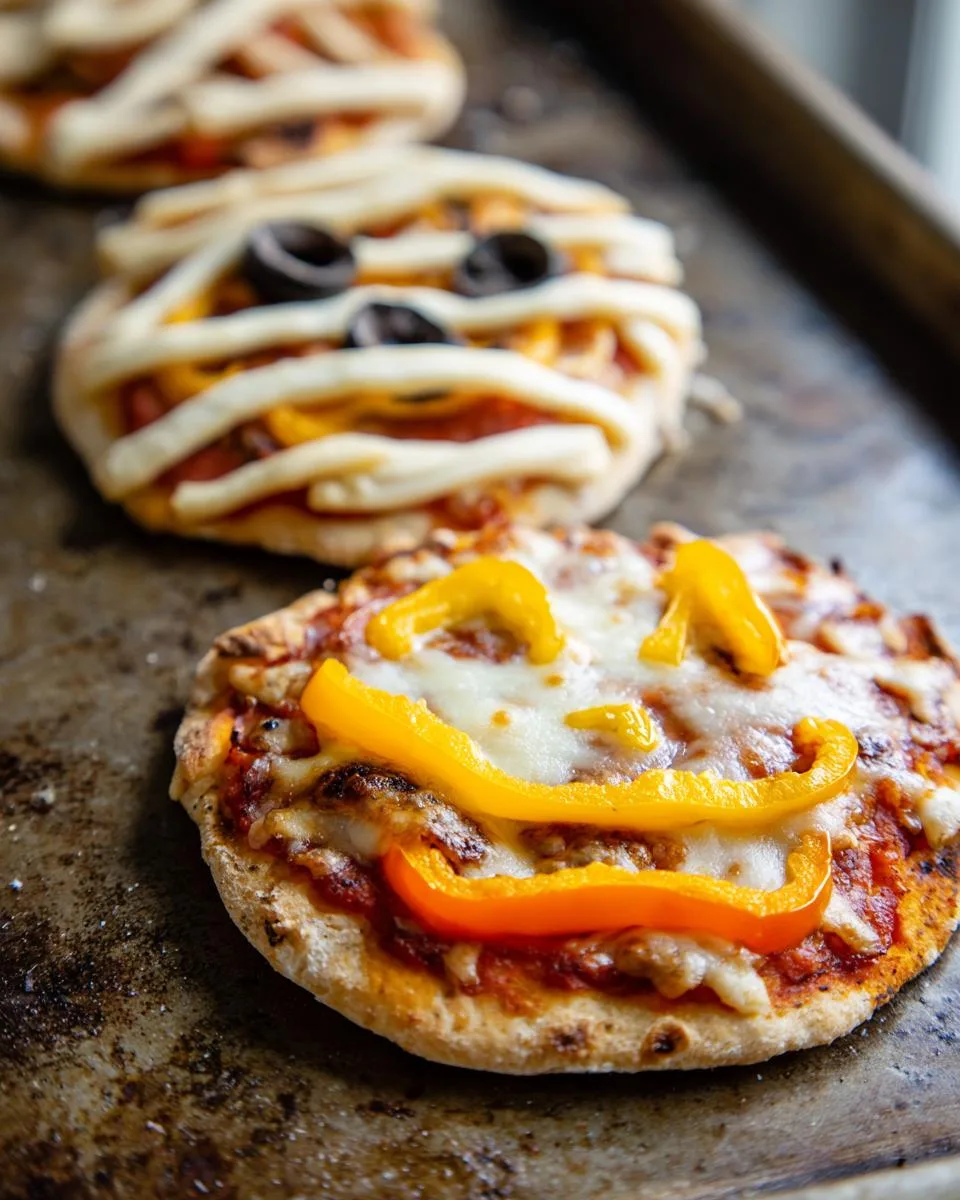
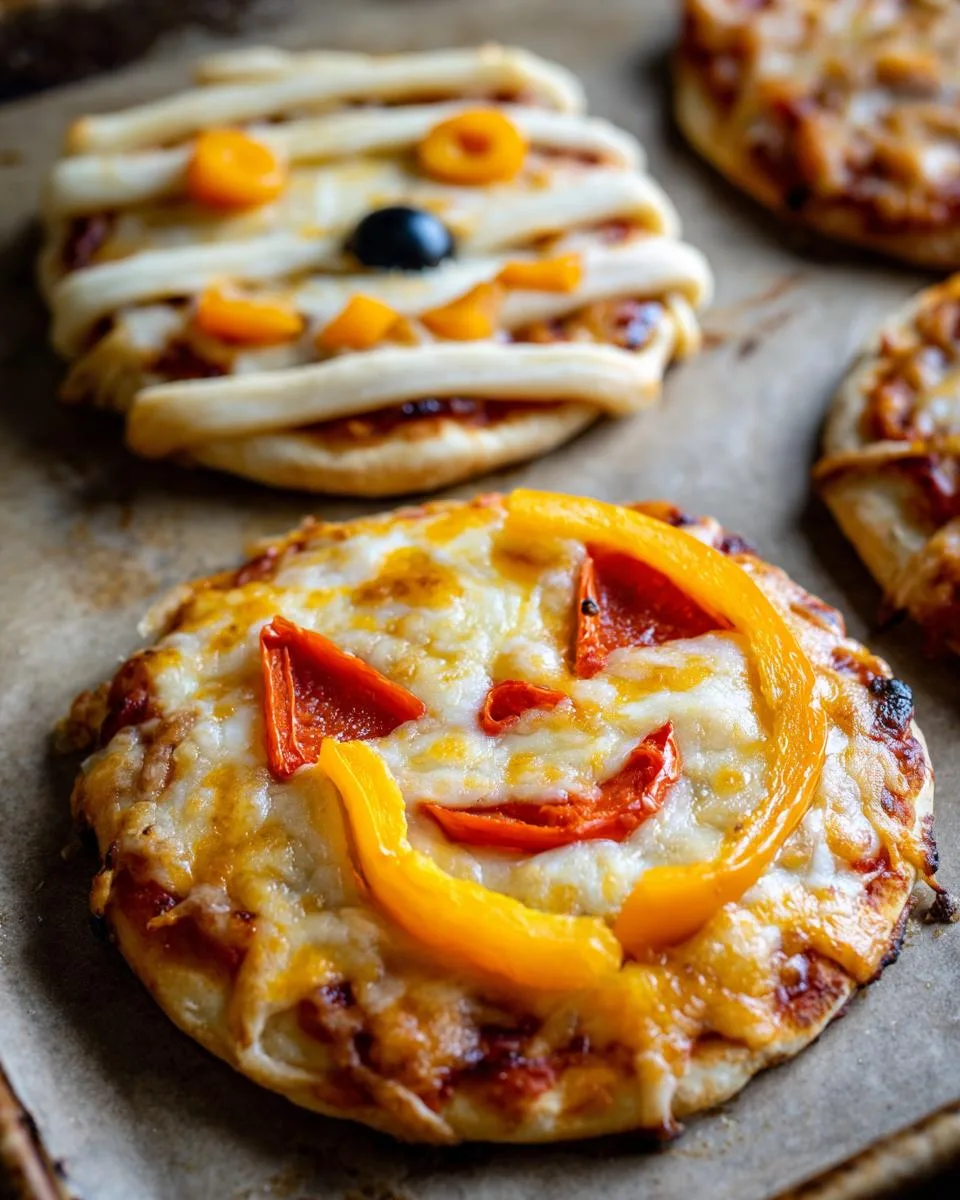
Time for monster-making! For mummy pizzas: sprinkle mozzarella first, then criss-cross string cheese “bandages,” leaving space for olive eyes. Jack-o’-lanterns get full cheese coverage with bell pepper faces. Olive halves make perfect spiders – arrange eight thin slices as legs with a whole olive center. Get creative with pepperoni ghoulish grins!
Step 3: Bake and Serve
Into the oven they go for 10-12 minutes – rotate the pan halfway for even browning. When the cheese bubbles and crusts turn golden, pull them out. Let cool just 2 minutes (melty cheese burns are scarier than ghosts!), then scatter fresh basil “monster fur” before serving warm. BOO-tiful!
Print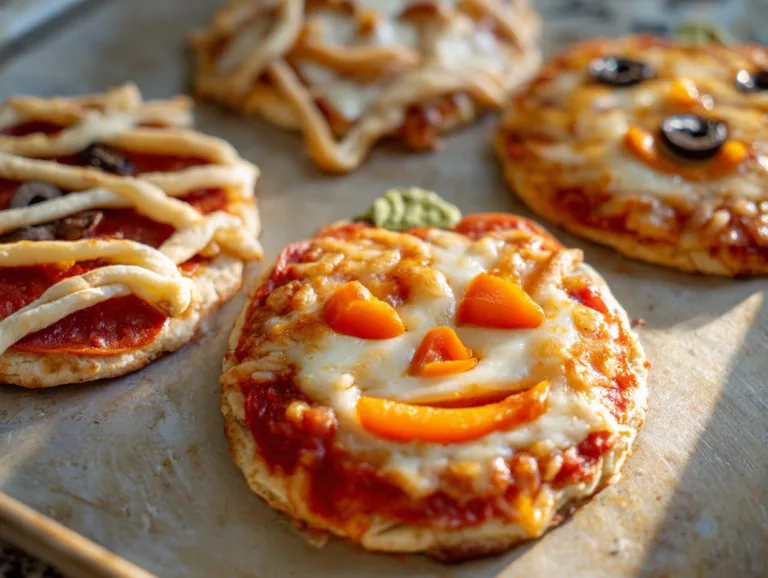
Spooky Halloween Mini Pizzas Ready in Just 15 Minutes
Easy-to-make Halloween-themed mini pizzas perfect for spooky snacking. Fun for kids and adults alike.
- Total Time: 27 minutes
- Yield: 8–10 mini pizzas 1x
Ingredients
- 8–10 Mini Pizza Crusts (personal-size bases)
- 3/4 cup Pizza Sauce
- 1 cup Mozzarella Cheese (shredded)
- 1/4 cup Black Olives (sliced)
- 1/4 cup Mini Pepperoni (optional)
- Orange & Green Bell Peppers (thin strips for jack-o’-lantern designs)
- 4 sticks Part-Skim String Cheese (pulled apart)
- 2 tbsp Fresh Basil (chiffonade)
- Olive Oil Spray (for misting baking sheet)
Instructions
- Preheat oven to 425 °F (220 °C). Lightly mist a baking sheet with olive-oil spray.
- Spread 1–2 tablespoons of pizza sauce on each mini crust, leaving a small border.
- Sprinkle shredded mozzarella over half the pizzas. For mummy faces, lay string-cheese strands in criss-cross “bandages.”
- Use olive slices for spider bodies/eyes, pepper strips for jack-o’-lantern mouths, and mini pepperoni for cheeks.
- Bake 10–12 minutes until crusts are golden and cheese is melted. Rotate pan halfway for even browning.
- Cool 2 minutes. Scatter fresh basil ribbons, then transfer to a platter for serving.
Notes
- Let kids decorate their own pizzas for extra fun.
- Customize toppings based on preference or dietary needs.
- Best served warm.
- Prep Time: 15 minutes
- Cook Time: 12 minutes
- Category: Appetizer
- Method: Baked
- Cuisine: American
- Diet: Vegetarian
Nutrition
- Serving Size: 1 mini pizza
- Calories: 120
- Sugar: 2g
- Sodium: 250mg
- Fat: 5g
- Saturated Fat: 2g
- Unsaturated Fat: 2g
- Trans Fat: 0g
- Carbohydrates: 15g
- Fiber: 1g
- Protein: 5g
- Cholesterol: 10mg
Tips for Perfect Halloween Mini Pizzas
After making dozens of these creepy-cuties, I’ve learned a few tricks to make your Halloween mini pizzas shine:
- Rotate that pan! Ovens have hot spots – a quick turn halfway through baking prevents some pizzas from getting too dark while others stay pale.
- Prep toppings assembly-line style – Kids go wild when they can grab pre-sliced olives and peppers to create their monster faces.
- Bake on parchment for easy cleanup when cheese inevitably oozes into spooky shapes.
- Keep wet toppings minimal – Too many fresh veggies can make crusts soggy. Pat peppers dry if needed!
My best tip? Have fun – wonky jack-o’-lantern smiles taste just as delicious as perfect ones!
Storing and Reheating Halloween Mini Pizzas
Here’s the spooky truth – these Halloween mini pizzas never last long in my house! But if you miraculously have leftovers (or want to prep ahead), just pop them in an airtight container in the fridge for 2-3 days. When snack time strikes again, revive them in a 350°F oven for 5-7 minutes until the cheese gets all gooey and delicious. My toaster oven works like magic too – just watch those olive spiders don’t get *too* crispy!
Halloween Mini Pizzas Nutrition Information
Now, I’m no nutritionist – these numbers are just estimates based on my ingredients. But for anyone counting, here’s the spooky scoop per mini pizza (about 1/10th of the recipe):
- 120 calories – Perfect for munching between trick-or-treating!
- 5g fat (2g saturated) – Mostly from that melty cheese goodness
- 15g carbs – Energy for all your Halloween shenanigans
- 5g protein – Little monsters need fuel too!
Remember – these vary based on your exact toppings (my olive spiders add a smidge more than just cheese!). The real magic? Seeing kids gobble up veggies disguised as monster parts!
Frequently Asked Questions
Can I make Halloween mini pizzas ahead of time?
Absolutely! Prep toppings and sauce up to a day ahead – just store separately in the fridge. Assemble right before baking so crusts stay crisp. Leftover baked pizzas reheat beautifully too – see my storage tips above!
What if I can’t find mini pizza crusts?
No problem! English muffins, pita rounds, or even tortillas cut into circles work great. Just adjust baking time since thinner bases cook faster. I’ve even used canned biscuit dough pressed thin – so fun for ghost shapes!
How do I keep the olive slices from sliding off?
Two tricks: First, pat olives dry with a paper towel. Second, press them gently into the cheese layer before baking. The melting mozzarella acts like edible glue to hold those creepy spider legs in place!
Can I freeze these spooky snacks?
You bet! Freeze unbaked decorated pizzas on a tray first, then transfer to bags. Bake straight from frozen, adding 2-3 extra minutes. They make perfect last-minute Halloween party savers!
What’s your favorite monster design?
Oh man, the mummy pizzas kill me every time! But last year’s pepperoni “zombie bite” pizzas with drippy red sauce were pretty epic too. Honestly though? Whatever the kids create ends up being my new favorite – their creativity always surprises me!
Share Your Creations!
I’d love to see your spooky masterpieces! Snap a pic and tag me – your creativity might inspire next year’s Halloween mini pizzas!
For More recipes, Follow me on Facebook!