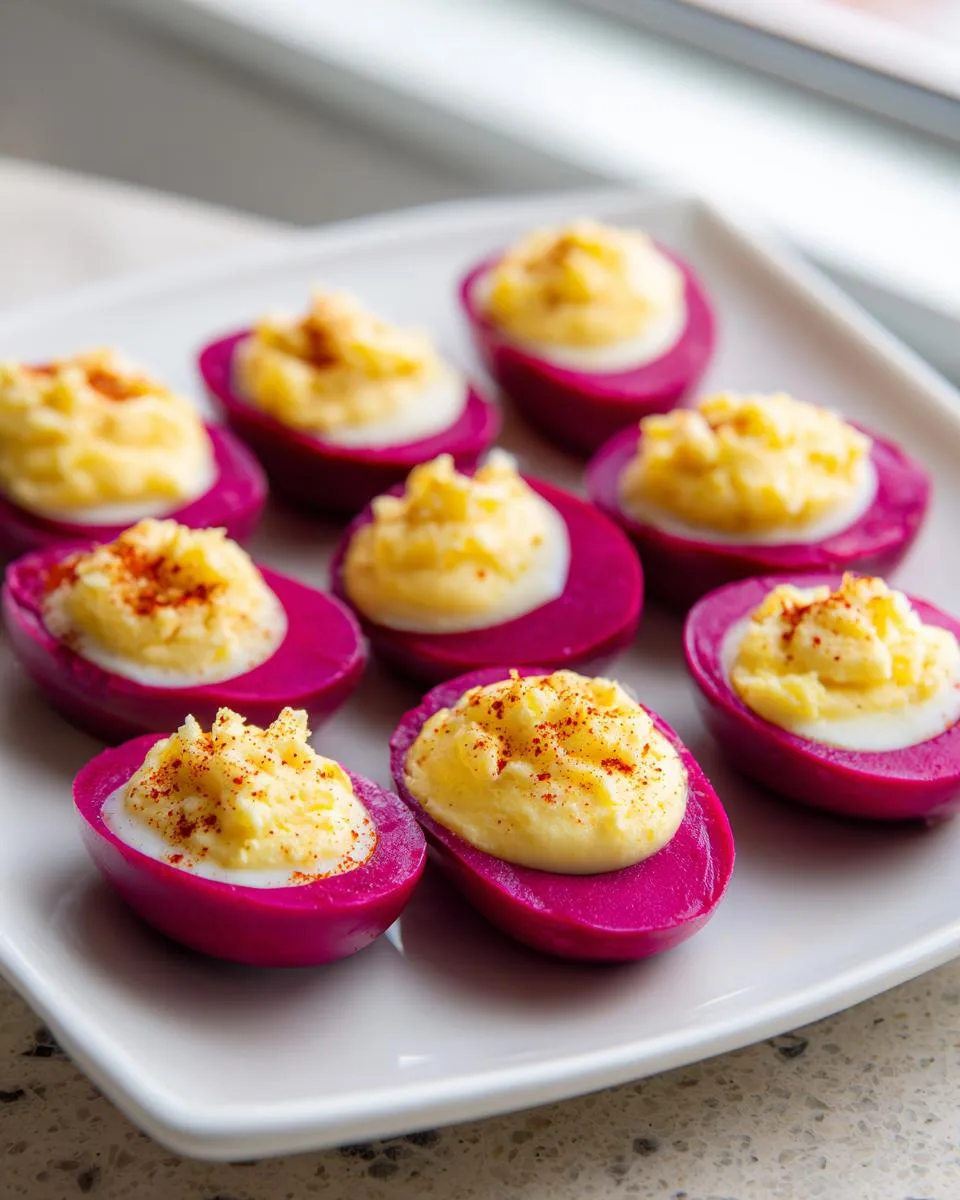
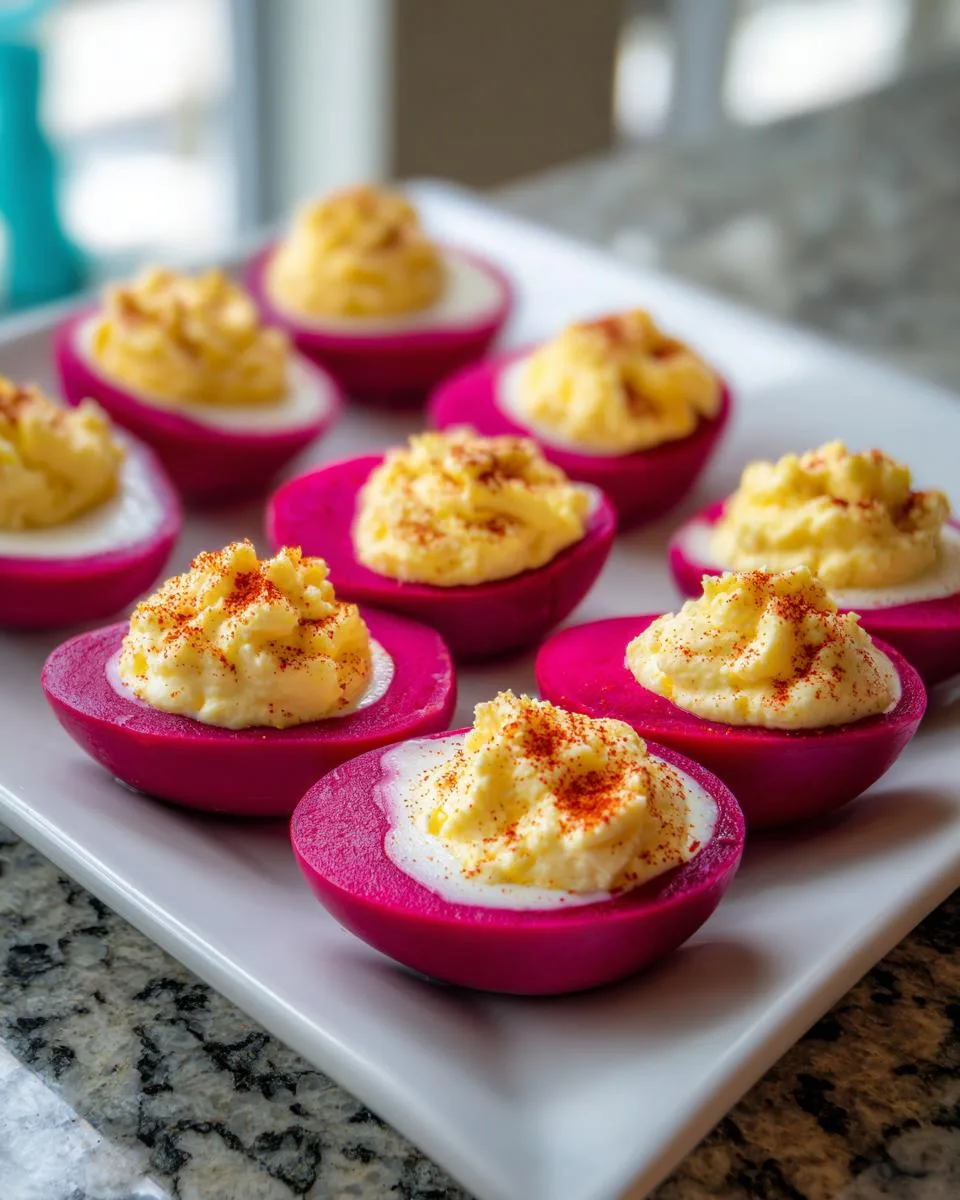
Oh, let me tell you about the first time I made these stunning deviled eggs with beet juice – my niece’s baby shower was coming up, and I wanted something that would make everyone gasp when the platter came out. Turns out, swirling hard-boiled eggs in ruby-red beet juice creates the most magical pink hue you’ve ever seen on an appetizer! As a chef who lives for simple-but-special touches, I fell hard for how the earthy sweetness of beets whispers through the creamy yolk filling. Now these vibrant gems are my go-to whenever I need a showstopper that comes together with barely any effort. Trust me, once you see how that natural color transforms ordinary deviled eggs, you’ll be hooked too!
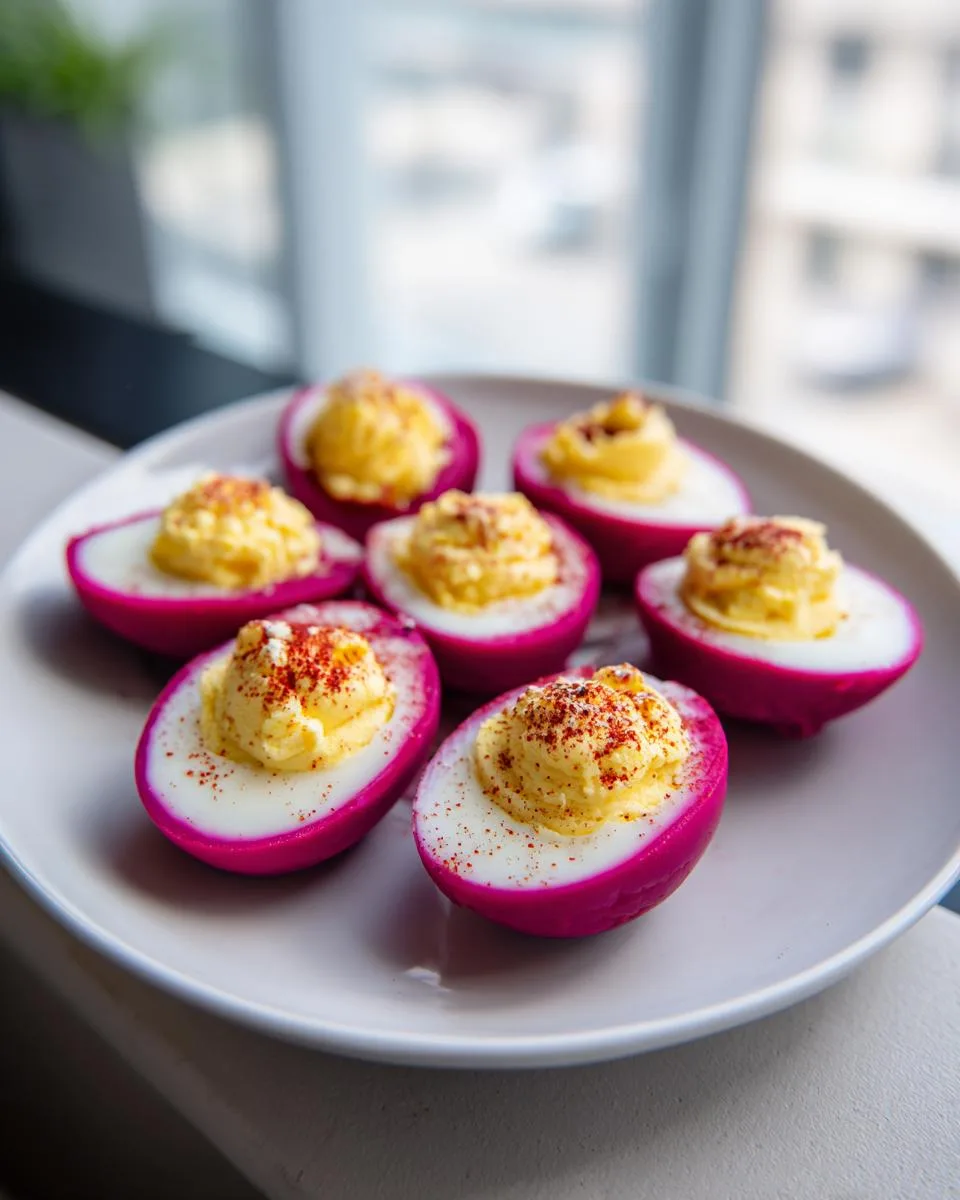
Table of Contents
Table of Contents
Why You’ll Love These Deviled Eggs With Beet Juice
These aren’t your ordinary deviled eggs—they’re little edible jewels that steal the show at every gathering! Here’s why they’ve become my signature party trick:
- The stunning pink hue makes people “ooh” before they even take a bite
- Prep is a breeze—just boil, peel, soak, and fill (no fancy skills needed)
- The subtle earthy sweetness from the beets elevates classic deviled egg flavor
- They disappear faster than any appetizer I’ve ever served
- Kids and adults alike go crazy for the colorful presentation
Honestly? The hardest part is waiting for that gorgeous color to develop—I always peek at them like an excited kid checking cookies in the oven!
Ingredients for Deviled Eggs With Beet Juice
Gather these simple ingredients – you probably have most in your kitchen already:
- 6 large eggs (trust me, fresh eggs peel easier!)
- 16 oz beet juice (freshly squeezed or from canned beets – both work great)
- Your favorite deviled egg mix-ins (I use mayo, mustard, salt & pepper)
Quick warning: beet juice stains everything it touches – your hands, countertops, favorite apron! I always wear gloves and put down parchment paper when handling the dyed eggs. That gorgeous pink color? Totally worth the extra precaution.
Equipment You’ll Need
Here’s all you’ll need – basic tools you probably already own:
- A medium pot (for boiling the eggs)
- Slotted spoon (to fish out those slippery eggs)
- Mixing bowl (for the beet juice bath)
- Sharp knife (makes clean egg halves)
That’s it! No fancy gadgets required – just everyday kitchen essentials.
How to Make Deviled Eggs With Beet Juice
Alright, let’s get to the fun part – transforming ordinary eggs into these pink beauties! I’ll walk you through each step with all my favorite tricks. Just imagine your friends’ faces when you bring these out at your next gathering!
Step 1: Hard-Boil the Eggs
First things first – we need perfectly cooked eggs! Here’s my no-failail method:
- Gently place your eggs in a pot and cover them with cold water by about an inch (this prevents cracking!).
- Bring to a rolling boil over medium-high heat, then immediately turn off the heat off.
- Let them sit in the hot water for exactly 15 minutes – set a timer! This gives you creamy yolks without that icky gray ring.
- Drain and shock in ice water for 5 minutes – this makes peeling SO much easier.
Pro tip: Older eggs actually peel easier than super fresh ones. If you can plan ahead, use eggs that have been in your fridge for about 5-7 days.
Step 2: Dye the Eggs in Beet Juice
Now for the magic! This is where the transformation happens:
- Carefully peel your cooled eggs (I run them roll on the counter first to crackle the shell all over).
- Place them in a bowl and pour in enough beet juice to completely submerge them.
- Let them soak for at least 1 hour – the longer they sit, the deeper the pink color!
Warning: Beet juice stains like testo! I always:
- Wear rubber gloves
- Put down parchment paper
- Use a designated “beet bowl” (mine has permanent pink splatters now!)
Step 3: Prepare the Filling
While your eggs are turning gorgeous, let’s make the filling:
- Once dyed, cut eggs in half lengthwise and pop the yolks into a bowl.
- Mash yolks with 3 tbsp mayo, 1 tsp mustard, salt and pepper to taste (I like mine a bit chunky).
- Want to get fancy? Add a squeeze of lemon juice or dash of hot sauce!
Step 4: Assemble and Serve
The grand finale:
- Pipe or spoon the yolk mixture back into the pink egg halves.
- Top with paprika, chives, or even crumbled bacon for contrast.
- Arrange on a platter with lettuce leaves – the green makes the pink POP!
See? Told you it was easy! Now try not to eat them all before your guests arrive (I never manage this part).
Print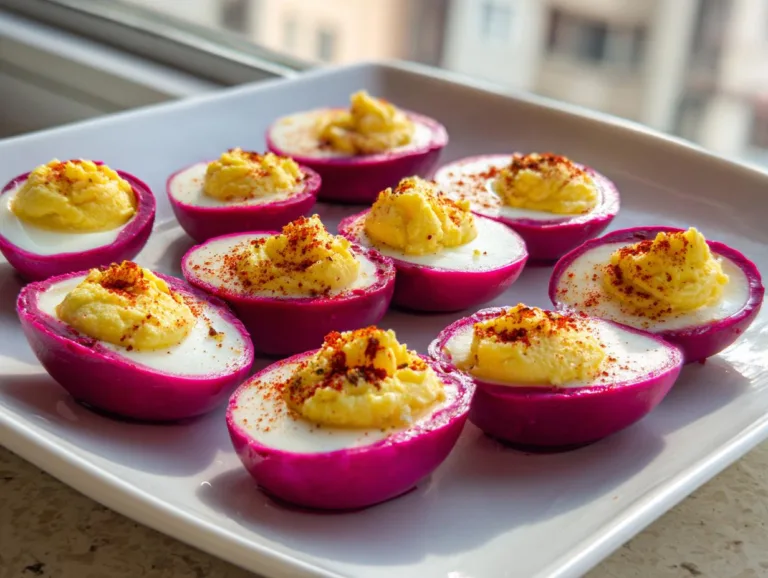
Magical Deviled Eggs With Beet Juice – 6 Simple Steps
A simple and vibrant recipe for deviled eggs dyed with beet juice, adding a pop of color and subtle flavor to a classic dish.
- Total Time: 1 hour 35 minutes (includes dyeing time)
- Yield: 12 deviled egg halves 1x
Ingredients
- 6 eggs
- 16 oz beet juice (fresh or from canned beets)
Instructions
- Place eggs in a large pot filled with water, ensuring they are fully submerged.
- Bring the water to a boil over medium-high heat.
- Once boiling, turn off the heat and remove the pot from the burner.
- Let the eggs sit in the hot water for at least 15 minutes to hard boil.
- Peel the eggs carefully.
- Immerse the peeled eggs in beet juice for one hour to dye them.
- Cut the eggs in half and remove the yolks.
- Mix the yolks with your preferred deviled egg ingredients.
- Refrigerate overnight if desired, then assemble before serving.
Notes
- Beet juice stains easily—handle with care and protect surfaces.
- For a stronger color, leave the eggs in beet juice longer.
- Use fresh beet juice for the best results, but canned beet juice works too.
- Prep Time: 20 minutes
- Cook Time: 15 minutes
- Category: Appetizer
- Method: Boiling
- Cuisine: American
- Diet: Vegetarian
Nutrition
- Serving Size: 2 halves
- Calories: 120
- Sugar: 1g
- Sodium: 150mg
- Fat: 8g
- Saturated Fat: 2g
- Unsaturated Fat: 5g
- Trans Fat: 0g
- Carbohydrates: 2g
- Fiber: 0g
- Protein: 6g
- Cholesterol: 190mg
Tips for Perfect Deviled Eggs With Beet Juice
After making these dozens of times (yes, I’m obsessed!), I’ve learned a few tricks for flawless beet-dyed eggs every time:
- Start with room-temperature eggs – they peel like a dream compared to cold ones
- Chill boiled eggs before dyeing – the cold helps them absorb the color faster
- Pat eggs dry before the beet bath – wet shells resist the dye
- Rotate eggs halfway through soaking – ensures even color saturation
- Use a toothpick to create marble effects – swirl patterns make them extra fancy
The best part? These tips take almost no extra effort but make a HUGE difference in results. Your pink eggs will be the envy of every potluck!
Variations for Deviled Eggs With Beet Juice
Once you’ve mastered the basic recipe, try these fun twists to keep things interesting:
- Spicy Kick: Mix in a teaspoon of prepared horseradish – the heat plays so nicely with the earthy beet flavor
- Creamy Avocado: Swap half the mayo for mashed avocado – makes the filling extra lush
- Tangy Twist: Top with quick-pickled red onions – that vinegary crunch is divine
- Smoky Touch: Add crumbled crispy bacon right into the yolk mixture
My favorite part? You can do interruption different fillings in one batch – arrange them by color on the platter for maximum wow factor!
Serving Suggestions
These pink beauties deserve a proper showcase! I love arranging them on a slate board surrounded by crispy crudités – the contrast makes the eggs pop. They’re also fabulous with buttery crackers or as part of a charcuterie spread. Want to really impress? Nestle them in crushed ice for a glamorous chilled presentation that keeps them perfectly cool.
Storage and Reheating
Here’s my golden rule with these pink beauties – assemble them no more than 2 hours before serving to keep that gorgeous color bright! If you must prep ahead, store the dyed egg whites and yolk filling separately in airtight containers. The filling stays fresh for 2 days chilled, while the pink eggs hold their color for 3 days. Never freeze them though – trust me, Recap frozen deviled eggs turn into rubbery disappointments! For best texture, let everything come to room temperature在老友记 for 15 minutes before assembling.
Nutritional Information
Each serving (2 halves) packs about 120 calories with 6g protein – not bad for such a pretty party bite! Keep in mind nutrition varies based on your exact filling ingredients. The beet juice adds negligible calories but major visual impact!
Frequently Asked Questions
Can I use pickled beet juice instead of fresh?
Absolutely! Pickled beet juice works wonderfully and adds a nice tangy twist. Just know the vinegar might make the color slightly less vibrant than fresh juice. My grandma’s tip? Add a pinch of sugar to balance the acidity.
How do I prevent overcooking the eggs?
That dreaded green yolk ring is the worst! My foolproof method is turning off the heat as soon as boiling starts, then letting them sit covered for exactly 15 minutes. Immediately transfer to ice water – this stops the cooking dead in its tracks.
Why won’t my eggs peel cleanly?
Oh honey, we’ve all been there! Older eggs peel easier than fresh ones. Also, shocking them in ice water helps separate the membrane from the white. My weird but effective trick? Gently roll each boiled egg on the counter to crackle the shell all over before peeling.
Can I make these ahead of time?
You bet! The dyed egg whites keep their color beautifully for 3 days in the fridge. Just store them separately from the filling and assemble right before serving. The filling actually tastes better after chilling overnight!
Ready to wow your friends with these pink beauties? Grab those eggs and beet juice – I wanna see your colorful creations! Tag me @Dishivia so I can cheer you on!
For More recipes, Follow me on Facebook!