Oh, the magic of holiday baking! There’s nothing quite like the smell of chocolate cupcakes wafting through the house while you’re decking the halls. And let me tell you, these Christmas Tree Cupcakes are my absolute favorite way to spread cheer – they’re as fun to make as they are to eat! I’m Martavia, and at Dishivia, I’m all about simple recipes that bring big smiles. These adorable treats combine my love for easy baking with festive flair. Just wait until you see those little frosted trees topped with twinkling star sprinkles – they’ll make your dessert table the merriest spot in town!

Table of Contents
Table of Contents
Gathering Your Christmas Tree Cupcake Supplies
Okay, let’s talk ingredients! I know – staring at a grocery list can be overwhelming, but trust me, these Christmas Tree Cupcakes come together with mostly pantry staples. The secret is in the little details that make them extra special. Here’s exactly what you’ll need:
- 1 box chocolate cake mix (I swear by Betty Crocker for consistent results, but use your favorite brand!)
- ½ cup vegetable oil – this keeps our cupcakes beautifully moist
- 3 large eggs at room temperature – take them out about 30 minutes before baking
- 1 cup water – simple, but don’t skip it!
Now for the showstopper – that gorgeous green frosting:
- 2 cups (4 sticks) butter, softened – yes, it’s a lot, but we’re making fluffy clouds of deliciousness here
- 10 cups powdered sugar – I know it sounds crazy, but this makes enough to generously frost all 24 cupcakes
- 2 tablespoons vanilla extract – the good stuff makes a difference
- 10 tablespoons heavy cream – this gives our frosting that perfect pipe-able texture
- Pinch of salt – balances all that sweetness
- Green gel food coloring – liquid coloring will make your frosting runny, so gel is a must for vibrant trees
And the festive finishing touches:
- Star sprinkles – for the perfect tree toppers
- Christmas pearls or assorted sprinkles – these are our “ornaments”!
See? Nothing too fancy – just good ingredients that come together to make something magical. Now let’s get baking!
Ingredient Substitutions & Variations
Listen, I get it – sometimes you’re halfway through a recipe and realize you’re out of something! No stress – here are my favorite swaps that still give you adorable Christmas Tree Cupcakes. First, if you’d rather skip the box mix, use your favorite homemade chocolate cake recipe – just make sure it yields about 24 cupcakes.
For dietary needs: vegan butter and coconut cream work beautifully in the frosting (just chill it longer before piping). Out of heavy cream? Whole milk works in a pinch, though your frosting might be slightly less fluffy. And if you can’t find star sprinkles, pipe a little frosting star instead – it’s charmingly homemade!
Want to mix it up? Try peppermint extract instead of vanilla for a cool twist, or use different colored sprinkles to match your holiday decor. The possibilities are endless!
How to Make Christmas Tree Cupcakes
Alright, let’s dive into the fun part – turning these simple ingredients into adorable edible Christmas trees! I’ll walk you through each step, from mixing the batter to creating those picture-perfect frosted trees. Don’t worry if you’re new to decorating – my tips will have you piping like a pro in no time!
Baking the Cupcakes
First things first – preheat that oven to 325°F (165°C). Trust me, starting with the right temperature makes all the difference. While it’s heating up, line your muffin tin with festive cupcake liners – I love using red and green ones for extra holiday cheer!
Now for the batter: In a large bowl, whisk together the oil, eggs, and water until they’re best friends. Then gently stir in the chocolate cake mix until just combined – no overmixing here! A few small lumps are totally fine. Use a ¼ cup measure to fill each liner about ⅔ full (this prevents overflow disasters).
Here’s my secret: bake all the cupcakes on the same oven rack for even cooking. Pop them in for 15 minutes, then do the toothpick test – it should come out clean when they’re done. Let them cool in the pan for 5 minutes (patience is hard, I know!), then transfer to a wire rack to cool completely. Warm cupcakes + frosting = melty mess, so resist temptation!
Preparing the Frosting
While those beauties cool, let’s make the frosting that’ll transform them into little trees. Start by beating the softened butter in a large bowl until it’s light and fluffy – about 3 minutes with a hand mixer. Now gradually add the powdered sugar, alternating with splashes of heavy cream. This prevents sugar clouds from exploding everywhere (learned that the hard way!).
Mix in the vanilla and that pinch of salt – this cuts the sweetness just right. Now for the magic: add the green gel food coloring a little at a time until you get that perfect pine tree color. I usually start with about ½ teaspoon and adjust from there. The gel coloring gives us that vibrant hue without thinning out our frosting.
Decorating Christmas Tree Cupcakes
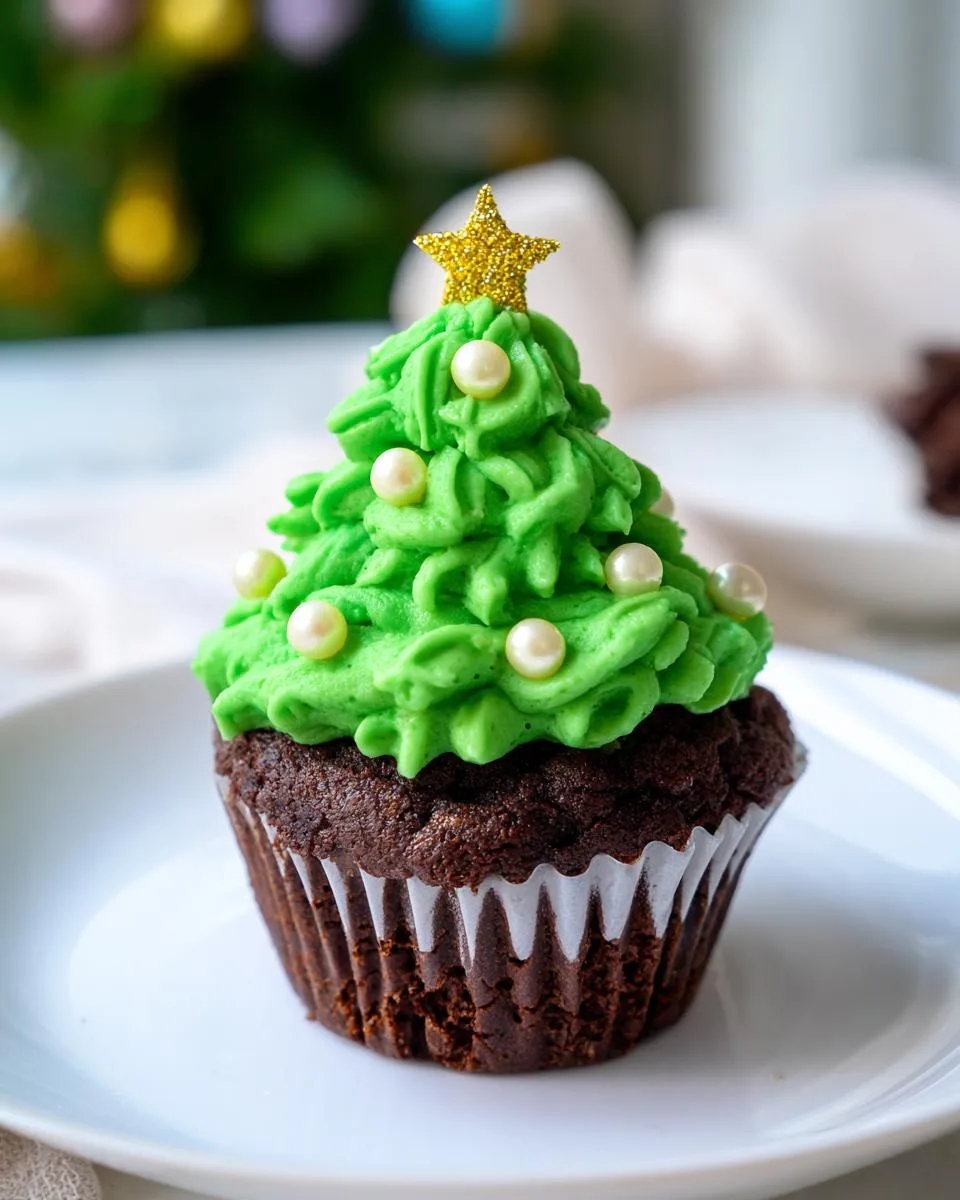
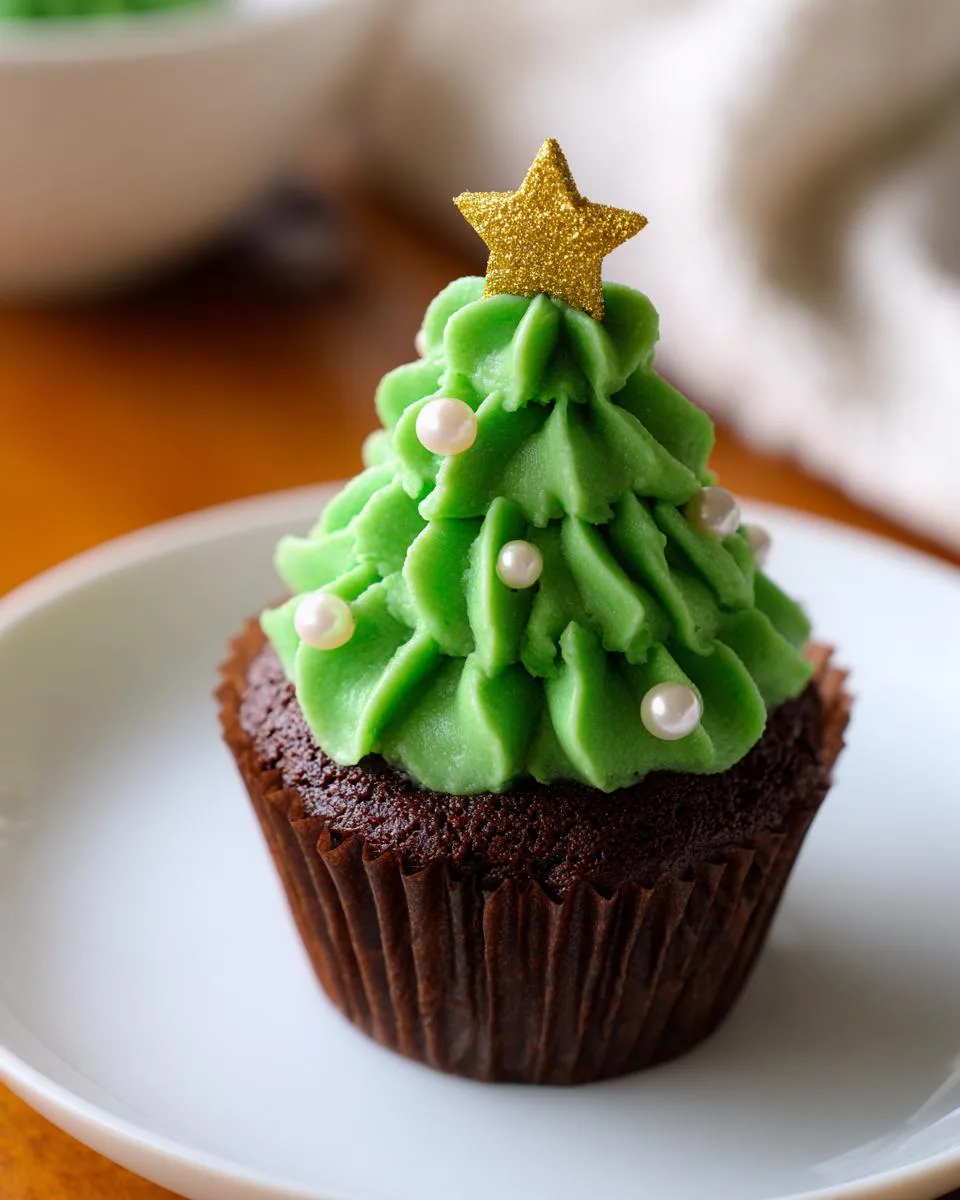
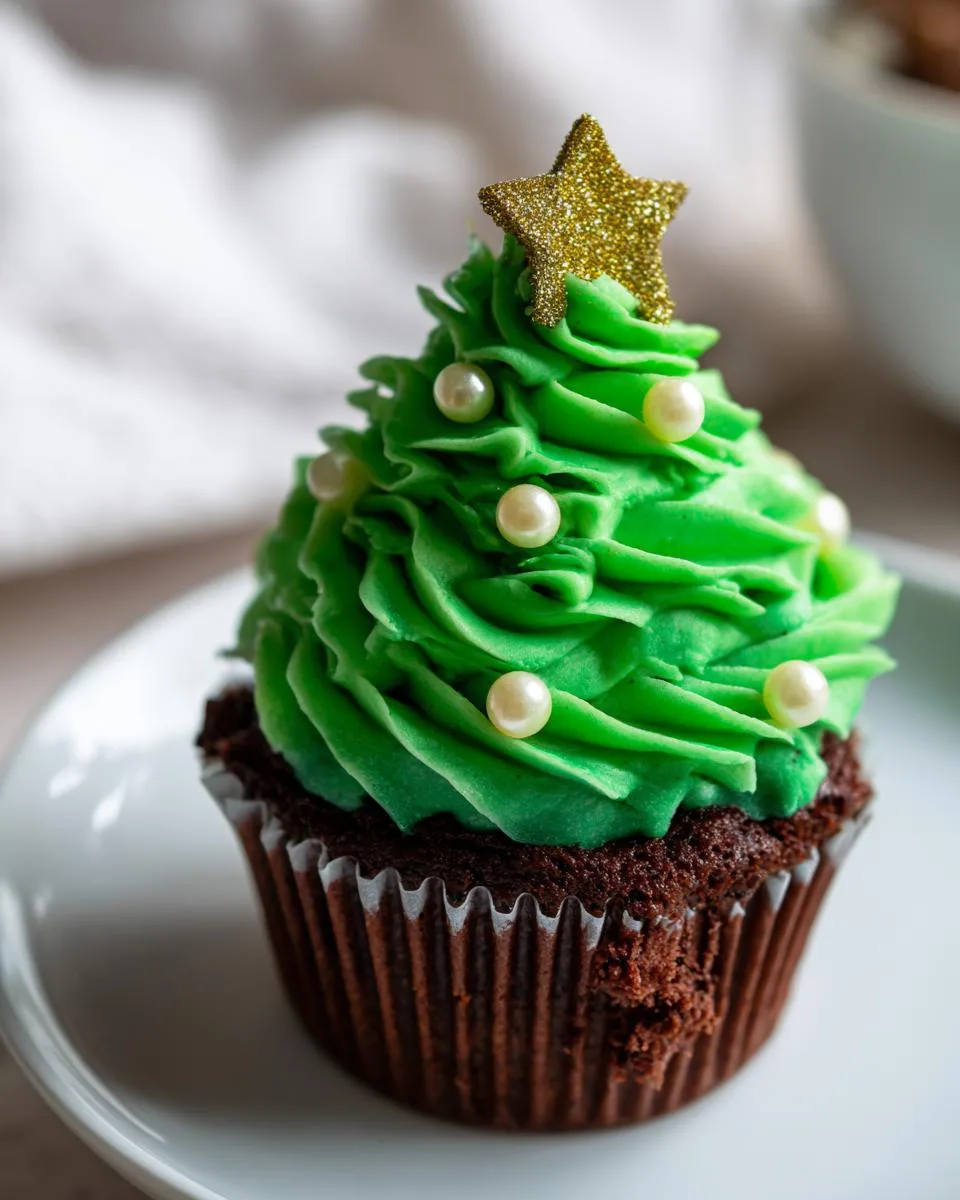
Time for the most fun part! Fit a piping bag with a star tip (Wilton 1M works great) and fill it with your green frosting. Starting at the outer edge of a cooled cupcake, pipe in a tight spiral motion, working your way up to create a cone shape – voila, instant Christmas tree!
Top each one with a star sprinkle (I like the gold ones for extra sparkle) and decorate with pearl sprinkles or colorful dots as ornaments. Pro tip: use tweezers for precise sprinkle placement if you’re feeling fancy! Step back and admire your edible forest – aren’t they just the cutest?
Print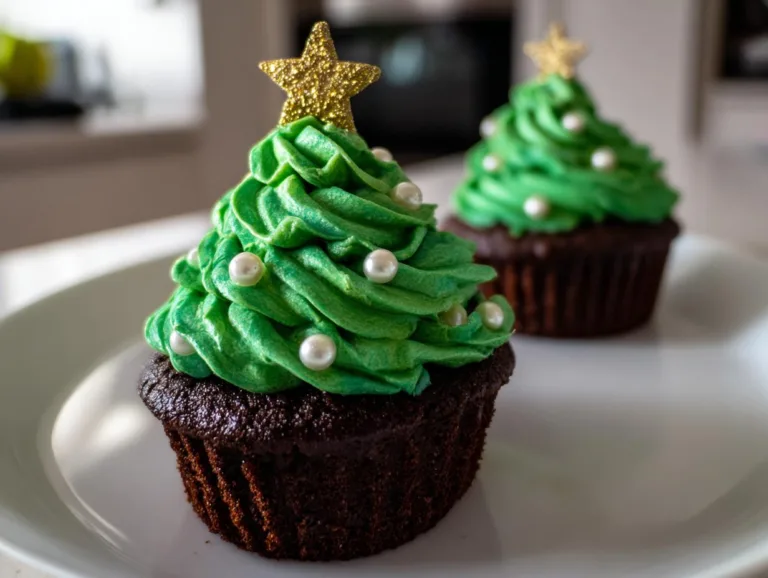
A Magical Christmas Tree Cupcakes Your Family Will Crave
Delicious chocolate cupcakes decorated like Christmas trees with green frosting and festive sprinkles.
- Total Time: 35 minutes
- Yield: 24 cupcakes 1x
Ingredients
- 1 box chocolate cake mix (Betty Crocker Brand)
- ½ cup vegetable oil
- 3 eggs
- 1 cup water
- 2 cups butter, softened
- 10 cups powdered sugar
- 2 tbsp vanilla
- 10 tbsp heavy cream
- Pinch of salt
- Green gel food coloring
- Star sprinkles
- Christmas pearls/sprinkles
Instructions
- Preheat oven to 325°F. Line cupcake pan with liners.
- Mix oil, eggs, and water in a bowl. Add cake mix and combine well.
- Scoop batter into liners using a ¼ cup measure.
- Bake for 15 minutes or until a toothpick comes out clean.
- Cool for 5 minutes, then transfer to a wire rack to cool completely.
- For frosting, beat butter until fluffy. Gradually add powdered sugar and heavy cream, alternating.
- Mix in vanilla, salt, and green food coloring.
- Pipe frosting in a circular motion to form tree shapes.
- Top with a star sprinkle and decorate with additional sprinkles.
Notes
- Use gel food coloring for vibrant green frosting.
- Bake all cupcakes on the same oven rack for even cooking.
- Let cupcakes cool fully before frosting to prevent melting.
- Prep Time: 20 minutes
- Cook Time: 15 minutes
- Category: Dessert
- Method: Baking
- Cuisine: American
- Diet: Vegetarian
Nutrition
- Serving Size: 1 cupcake
- Calories: 320
- Sugar: 25g
- Sodium: 180mg
- Fat: 14g
- Saturated Fat: 7g
- Unsaturated Fat: 5g
- Trans Fat: 0g
- Carbohydrates: 45g
- Fiber: 1g
- Protein: 2g
- Cholesterol: 45mg
Tips for Perfect Christmas Tree Cupcakes
After making these cuties every holiday season, I’ve picked up some tricks that make all the difference! First – gel food coloring is non-negotiable. Liquid coloring makes your frosting runny, and nobody wants sad, droopy trees. Second, let those cupcakes cool completely before decorating – I stick them in the fridge for 15 minutes if I’m impatient (we’ve all been there).
When piping, hold the bag straight up and apply even pressure for perfect tree shapes. If your kitchen is warm, pop the frosted cupcakes in the fridge for 10 minutes to set before adding sprinkles. And here’s my best storage tip: keep them in an airtight container at room temperature – they’ll stay fresh for 3 days (if they last that long!).
Serving & Storing Christmas Tree Cupcakes
These little edible evergreens are happiest served at room temperature – the frosting stays perfectly fluffy and the chocolate flavor really shines. If you’ve refrigerated them (maybe to set the frosting faster), just let them sit out for about 20 minutes before serving. For storage, tuck them into an airtight container at room temperature – they’ll stay fresh for up to 3 days!
Planning ahead? You can freeze unfrosted cupcakes for up to 2 months – just wrap them tightly in plastic wrap first. When you’re ready to decorate, thaw overnight in the fridge and frost as usual. Though let’s be honest – these rarely last long enough to need storing in my house!
Nutritional Information
Okay, let’s talk numbers – because let’s be real, we all want to know what we’re biting into! Each of these festive Christmas Tree Cupcakes comes in at about 320 calories, with 14g fat (7g saturated) and 45g carbs. You’ll also get about 2g protein per cupcake – not bad for dessert!
Just a heads up – these values can vary depending on the specific brands you use (especially that cake mix and butter). I always say life’s too short to stress over every calorie during the holidays – enjoy every delicious bite of these merry treats!
Frequently Asked Questions
Can I use liquid food coloring instead of gel?
Oh honey, I’ve been there – staring at those little bottles of liquid coloring thinking “how different could it be?” But trust me, gel is the way to go for these Christmas Tree Cupcakes. Liquid coloring makes the frosting too runny, and then your beautiful trees start looking like the Leaning Tower of Pisa! Gel gives you that vibrant green without messing with the texture.
How do I keep my frosting from melting while decorating?
This is my number one tip – cool those cupcakes completely before you start piping! I usually let mine sit for at least an hour. If your kitchen is warm (hello holiday baking marathon!), pop them in the fridge for 15 minutes first. And if your hands get warm while piping, take breaks to rinse them with cold water.
Can I make these ahead of time?
Absolutely! The unfrosted cupcakes freeze beautifully for up to 2 months. For the frosting, you can make it 2-3 days ahead and keep it in the fridge – just let it come to room temperature and give it a quick whip before piping. Decorated cupcakes taste best within 3 days though – not that they’ll last that long!
Share Your Christmas Tree Cupcakes
I’d absolutely love to see your adorable cupcake creations! Snap a photo of your festive forest and tag me @Dishivia on Instagram – nothing makes me happier than seeing your holiday baking triumphs. And if you loved this recipe as much as I do, leave a review below! Your feedback helps me create more delicious treats to share.
For More recipes, Follow me on Facebook!