Oh, you’re in for a real treat! These Chocolate Chip Caramel Bars are my absolute weakness—because that gooey caramel center tucked between soft, chewy cookie layers is nothing short of pure magic. One bite and you’ll see exactly why they never last more than five minutes on a dessert table.
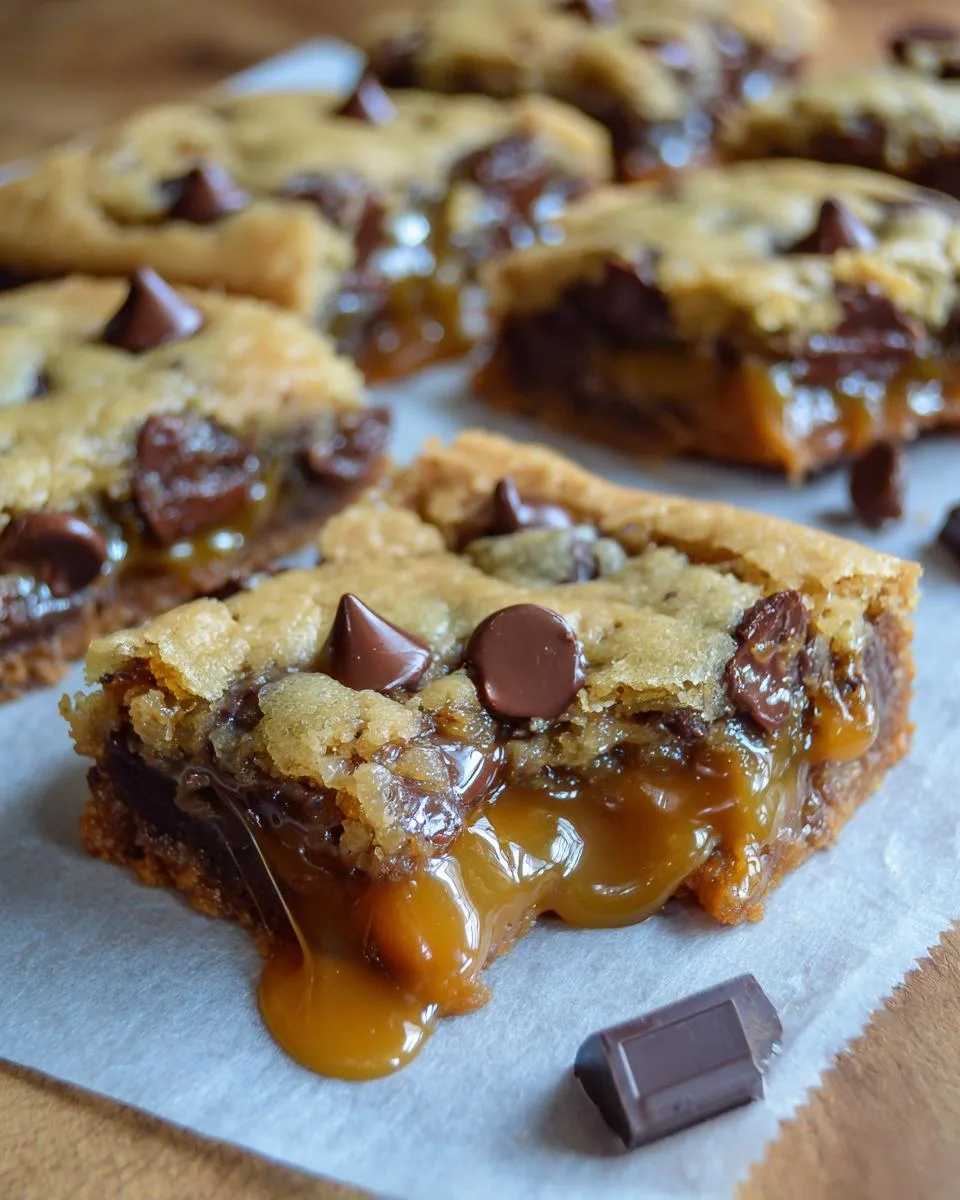
Table of Contents
Table of Contents
As a chef who’s baked more cookie bars than I can count, I can tell you this recipe hits every sweet spot: buttery, chocolatey, chewy on the edges, and melt-in-the-middle good. They’re the kind of dessert that vanishes at potlucks, gets “accidentally” cut into extra-big pieces, and leaves everyone hovering nearby hoping for another square.
And the best part? That caramel layer stays perfectly soft and gooey for days—if they manage to survive that long. Trust me, once you make these, they’ll become your go-to when you want something that feels extra special… without a lot of fuss.
Why You’ll Love These Chocolate Chip Caramel Bars
Listen, I don’t blame you if you’re already drooling—these bars are seriously addictive. Here’s why they’re a must-make:
- Effortless magic: Just mix, layer, and bake—no fancy skills needed!
- That caramel hug: The gooey center stays soft for days (good luck resisting).
- Party hero: One pan feeds a crowd, and trust me, nobody leaves without seconds.
- Texture heaven: Chewy cookie + melty chocolate + silky caramel = pure bliss.
Seriously, these bars are my secret weapon for happy kitchens and empty plates.
Ingredients for Chocolate Chip Caramel Bars
Gather these simple ingredients – I promise, every single one plays a starring role in creating that perfect texture we love. Measuring matters here, especially for that dreamy caramel layer!
- 1 cup (2 sticks or 226g) butter, room temperature – Yes, real butter! That slight give when you press it means it’s perfectly softened.
- 1 ½ cups (300 g) brown sugar, packed – Pack it in like you’re building a sandcastle – we want every bit of that molasses goodness.
- 1 teaspoon vanilla – My secret? A splash extra never hurts.
- 2 large eggs, room temperature – Cold eggs can make our dough sad and clumpy.
- 2 ¼ cups (282 g) all-purpose flour – Spoon and level it, don’t scoop!
- 1 teaspoon baking soda – Check your dates – fresh is best.
- 1 teaspoon kosher salt – The flaky kind dissolves perfectly.
- 2 cups semi-sweet chocolate morsels – I sometimes sneak in dark chocolate chips too.
- 5 ounces evaporated milk – Not sweetened condensed – that’s a whole different dessert!
- 1 package (11 ounces) caramel bits or wrapped caramels – Bits save unwrapping time, but either works.
Ingredient Notes & Substitutions
Life happens – here’s how to adapt without sacrificing that perfect gooey center:
- Caramel swap: No bits? Unwrap 35-40 regular caramels (about 11 oz). Sticky fingers guaranteed, but worth it!
- Milk alternative: Out of evaporated milk? Heavy cream thinned with a splash of water works in a pinch.
- Room temp rule: Forgot to take out eggs? Place them in warm water for 5 minutes. Cold butter? Grate it then let it sit – works like magic!
- Chocolate choices: Chopped chocolate bars work instead of chips, but they’ll melt more – which isn’t necessarily a bad thing!
Pro tip: Measure everything before starting – this recipe moves fast once the caramel gets involved!
How to Make Chocolate Chip Caramel Bars
Alright, let’s get baking! These bars come together in layers – first the cookie base, then that luscious caramel, and finally more cookie on top. I’ll walk you through each step so you get that perfect gooey center every time.
Just follow along and soon you’ll be biting into pure caramel-chocolate bliss!
Step 1: Prepare the Cookie Dough
First things first – preheat that oven to 350°F and line your 9×13-inch pan with parchment paper (trust me, this makes cleanup a breeze). Now, grab your room-temperature butter and brown sugar. Cream them together until the mixture looks light and fluffy – about 2 minutes with a mixer. This is where the magic starts – you’re creating those tiny air pockets that’ll make your bars tender.
Add the eggs one at a time, mixing well after each. Don’t rush this – we want each egg fully incorporated before adding the next. Then mix in your vanilla – I usually add an extra splash because, well, why not?
Now, gently mix in the flour, baking soda, and salt just until combined. Overmixing leads to tough bars, and nobody wants that! Finally, stir in those glorious chocolate chips by hand.
Step 2: Layer and Bake
Here’s where we start building those beautiful layers. Take about half of your dough (eyeballing is fine – no need to measure!) and press it evenly into the bottom of your prepared pan. I like to use slightly damp fingers to prevent sticking.
Pop this in the oven for exactly 10 minutes – we’re just giving it a head start, not fully baking it yet. While it bakes, keep that remaining dough nearby – we’ll need it soon!
Step 3: Make the Caramel Sauce
While the base bakes, let’s make that dreamy caramel layer. Combine the caramel bits (or unwrapped caramels) and evaporated milk in a small saucepan over medium-low heat. Stir constantly – I mean it, don’t walk away! – until it’s completely smooth, about 5-8 minutes. If you see any stubborn lumps, just keep stirring – they’ll melt eventually.
Pro tip: If your caramel starts looking too thick, add a teaspoon more evaporated milk to keep it pourable.
Step 4: Assemble and Finish Baking
Now for the fun part! Pull your partially baked cookie base from the oven – it should look slightly puffed but not browned. Immediately pour that gorgeous caramel sauce over the top, spreading it evenly with a spatula.
Then take pieces of the remaining cookie dough, flatten them slightly in your hands, and place them over the caramel layer. Don’t worry about covering every bit – the gaps let the caramel peek through beautifully.
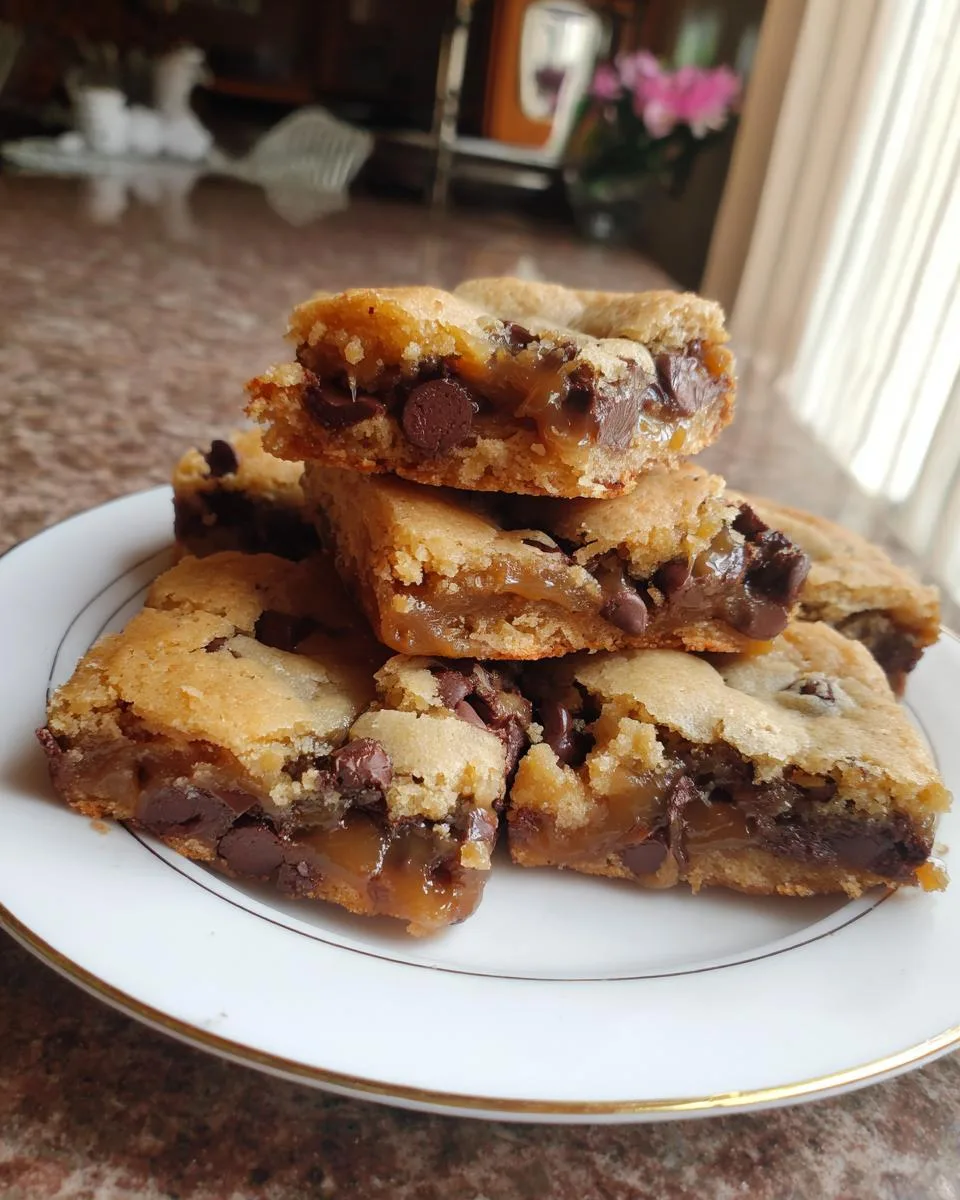
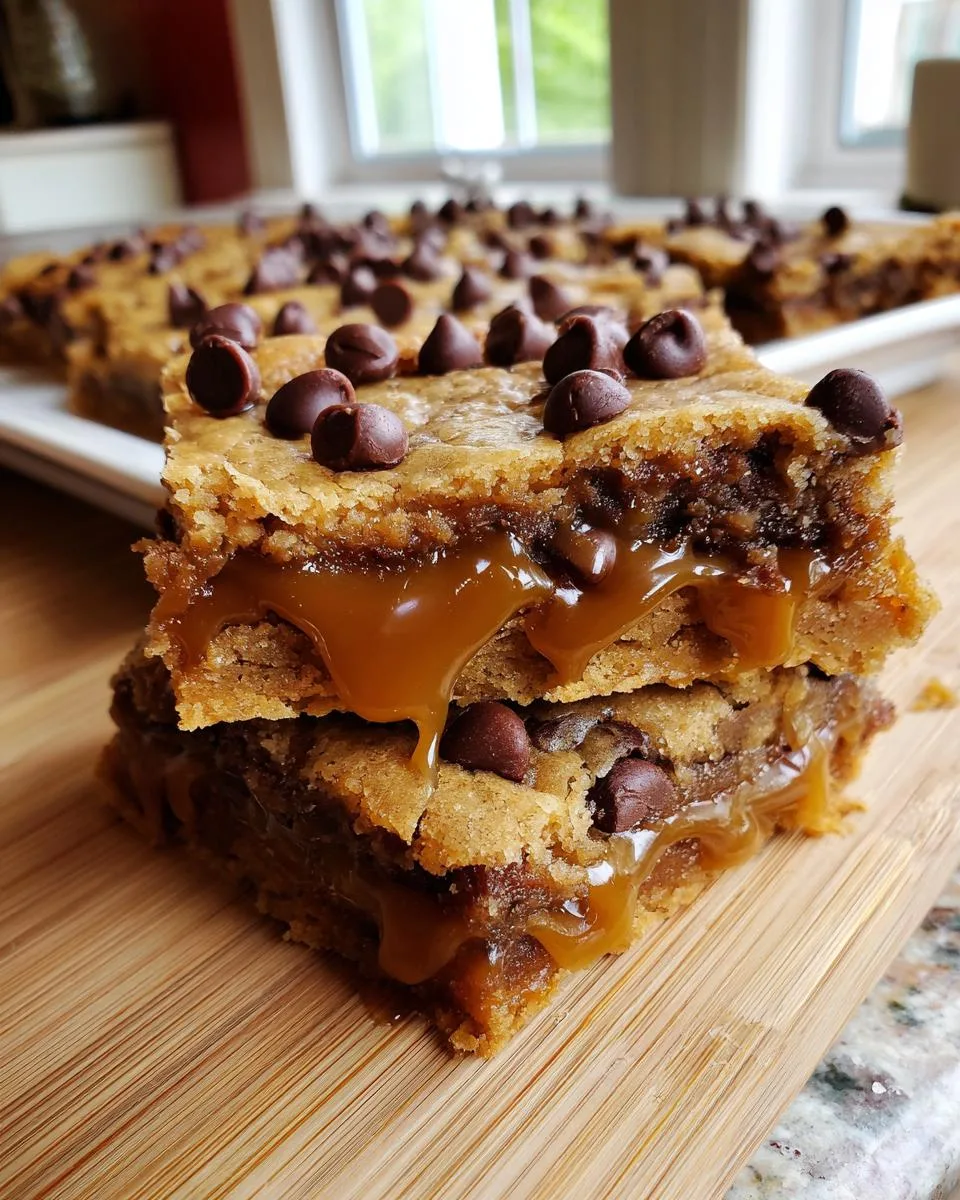
Bake for another 15-18 minutes until the top is golden brown and you see the caramel bubbling at the edges. Your kitchen will smell like heaven! Resist the urge to cut them right away – let them cool completely (I know, it’s hard!) so the caramel can set. Then slice and watch everyone’s eyes light up when they see that gorgeous caramel center.
Print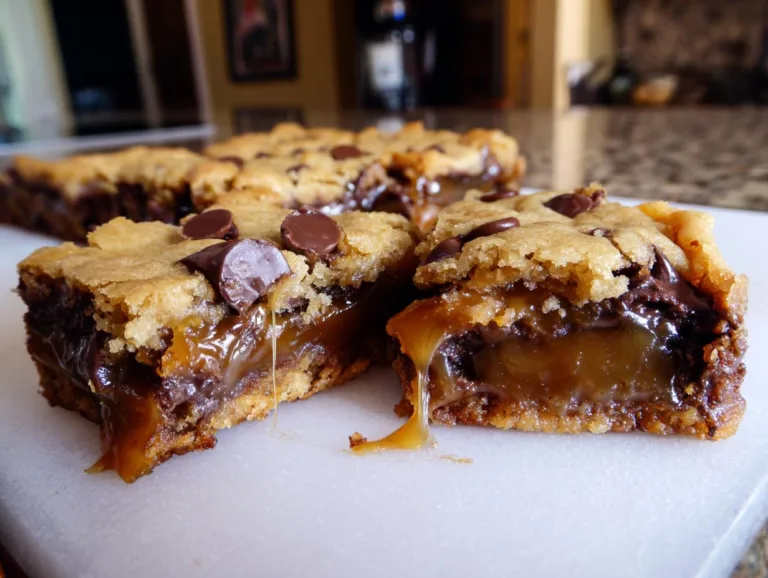
Irresistible Chocolate Chip Caramel Bars Recipe in 35 Min
Delicious chocolate chip caramel bars with a gooey caramel center and soft cookie layers.
- Total Time: 43 minutes
- Yield: 12 bars 1x
Ingredients
- 1 cup (2 sticks or 226g) butter, room temperature
- 1 ½ cups (300 g) brown sugar
- 1 teaspoon vanilla
- 2 large eggs, room temperature
- 2 ¼ cups (282 g) all-purpose flour
- 1 teaspoon baking soda
- 1 teaspoon kosher salt
- 2 cups semi-sweet chocolate morsels
- 5 ounces evaporated milk
- 1 package (11 ounces) caramel bits or wrapped caramels
Instructions
- Preheat oven to 350°F. Line a 9×13-inch baking dish with parchment paper or spray with nonstick cooking spray.
- Cream butter, brown sugar, and vanilla in a large bowl until light and fluffy.
- Add eggs one at a time, mixing well after each.
- Mix in flour, baking soda, and salt until combined. Stir in chocolate morsels.
- Press half the cookie dough into the baking dish in an even layer. Set aside remaining dough.
- Bake for 10 minutes.
- While baking, prepare caramel sauce by melting caramel bits with evaporated milk in a saucepan over medium heat for 8 minutes, stirring frequently.
- Remove cookie bars from oven and pour caramel sauce evenly over them.
- Flatten dollops of remaining cookie dough and place over the caramel.
- Bake for 15-18 more minutes until caramel bubbles and cookie is golden brown.
- Cool completely before cutting.
Notes
- Use room temperature ingredients for best texture.
- Let bars cool fully before cutting for clean slices.
- Store leftovers in an airtight container.
- Prep Time: 15 minutes
- Cook Time: 28 minutes
- Category: Dessert
- Method: Baking
- Cuisine: American
- Diet: Vegetarian
Nutrition
- Serving Size: 1 bar
- Calories: 320
- Sugar: 25g
- Sodium: 220mg
- Fat: 14g
- Saturated Fat: 8g
- Unsaturated Fat: 5g
- Trans Fat: 0g
- Carbohydrates: 45g
- Fiber: 2g
- Protein: 4g
- Cholesterol: 45mg
Tips for Perfect Chocolate Chip Caramel Bars
After making these bars more times than I can count (okay fine, I’ve lost track because I keep eating them!), I’ve picked up some tricks that guarantee bakery-worthy results every time. These little nuggets of wisdom will save you from common pitfalls and take your bars from good to “can I have the recipe?” amazing.
Patience is your secret ingredient
I know, I know – waiting is the hardest part when your kitchen smells like caramel heaven. But trust me, letting these bars cool completely before cutting makes ALL the difference. That caramel needs time to set up properly – at least 2 hours, though overnight is even better. Cutting too soon? You’ll get a delicious mess (been there!) instead of those clean, gooey slices we’re after.
The parchment paper trick
Listen, I’ve learned this the hard way – caramel sticks like crazy! Always line your pan with parchment paper, letting some hang over the edges. Not only does this prevent sticking disasters, but you can lift the whole slab out for easier cutting. Bonus? No scrubbing caramel-coated pans afterward – just peel off the paper and admire your handiwork.
Temperature matters more than you think
Here’s a pro tip I swear by: if your caramel layer seems too firm after baking, pop the pan back in the oven for just 2 minutes to rewarm it slightly. On the flip side, if it’s too runny, refrigerate for 30 minutes before serving. And speaking of temperature – these bars taste incredible slightly warmed (10 seconds in the microwave!) with a scoop of vanilla ice cream melting on top.
Storage secrets
These bars keep surprisingly well thanks to that moist caramel center. Store them in an airtight container at room temperature for up to 3 days, or refrigerate for up to a week (if they last that long!). Between layers, I like to use parchment or wax paper to prevent sticking. Want to freeze them? Wrap individual bars tightly in plastic wrap, then foil – they’ll keep for 3 months and taste just-baked when thawed.
One last tip from my kitchen to yours: always make a double batch. These disappear faster than you’d believe, and nothing beats having extras tucked away for when that sweet tooth strikes!
Serving and Storing Chocolate Chip Caramel Bars
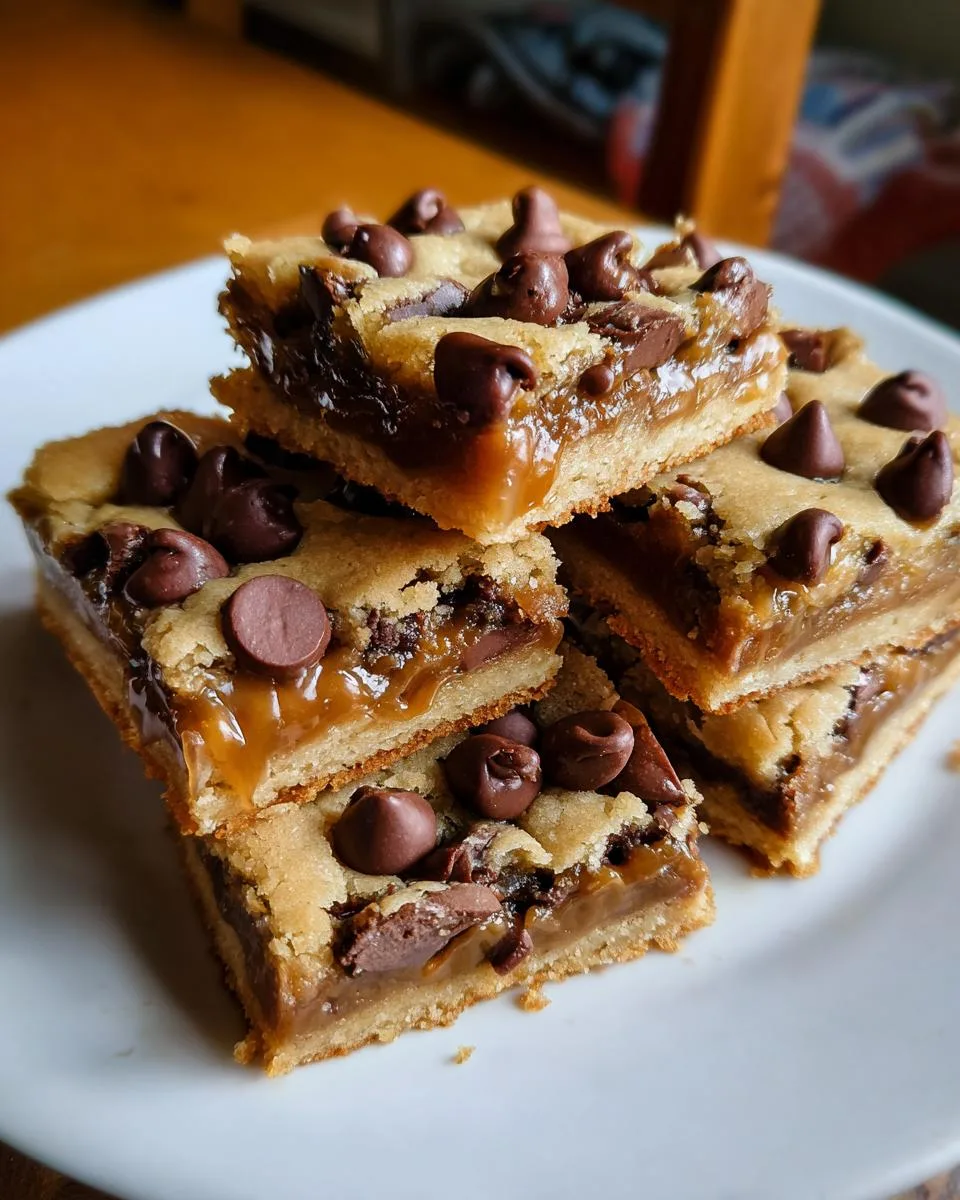
Oh, the joy of serving these beauties! Here’s how to make your Chocolate Chip Caramel Bars shine at any occasion. My personal favorite? Warm slices with a scoop of vanilla ice cream slowly melting over that gooey caramel center – pure bliss! But honestly, they’re just as delicious at room temperature when the caramel gets that perfect chewy texture.
For parties, I cut them into smaller squares – they’re rich enough that a little goes a long way (though no one ever stops at just one!). At home? Bigger slabs for that indulgent experience. Pro tip: Use a sharp knife dipped in hot water between cuts for picture-perfect edges – the caramel won’t stick that way.
Keeping them fresh (if there are leftovers!)
I’ll be honest – these rarely last more than a day in my house! But if you’ve got superhuman willpower, here’s how to store them properly:
- Room temperature: In an airtight container with parchment between layers, they’ll stay fresh for 3 days. The caramel actually gets better as it settles!
- Refrigerator: For longer storage (up to a week), pop them in the fridge – just let them come to room temp before serving for that perfect texture.
- Freezer magic: Individually wrap bars in plastic wrap, then foil. They’ll keep for 3 months! Thaw at room temp or warm gently in the oven.
A little secret? These bars actually travel really well – I often pack them for picnics or road trips. Just keep them out of direct sunlight unless you want molten caramel (actually… that sounds kind of amazing).
Nutritional Information
Okay, let’s be real – we’re not eating these Chocolate Chip Caramel Bars for their health benefits! But since I know some of you like to keep track (or need to share info with friends), here’s the breakdown per bar.
Remember, these are estimates – actual numbers can vary based on your specific ingredients and how big you cut those slices!
- Calories: 320 (worth every single one!)
- Sugar: 25g (mostly from that dreamy caramel and chocolate)
- Fat: 14g (8g saturated – thank you, butter and chocolate!)
- Carbohydrates: 45g (including 2g fiber)
- Protein: 4g (surprising little boost from the eggs and flour)
- Sodium: 220mg (that kosher salt does its job)
A quick note from my chef’s heart: Nutrition labels can’t measure joy, and these bars are packed with it! I always say life’s about balance – enjoy these treats mindfully alongside all the other good stuff. Now, who’s ready for seconds?
Frequently Asked Questions
I’ve gotten so many questions about these Chocolate Chip Caramel Bars over the years – here are the ones that pop up most often! If you don’t see your question answered, just shout in the comments and I’ll help you out.
Can I use homemade caramel sauce instead?
Absolutely! If you’ve got a favorite homemade caramel recipe, go for it. Just make sure it’s thick enough – about the consistency of pancake syrup after cooling. Thin caramel will make your bars too gooey (though some might argue that’s not a bad problem to have!). My tip? Let homemade caramel cool slightly before pouring over the cookie base.
Why do my bars fall apart when cutting?
Oh, I feel your pain! This usually happens when we skip the cooling step (I’m guilty too – that caramel smell is irresistible!). Let them cool completely – like, Netflix-an-entire-season completely. Also, using a sharp knife dipped in hot water between cuts helps tremendously. If they’re still crumbly, try refrigerating for 30 minutes before slicing.
Can I make these gluten-free?
You sure can! I’ve had great results using a 1:1 gluten-free flour blend. The texture might be slightly more delicate, but that caramel holds everything together beautifully. Just make sure your other ingredients (like chocolate chips) are GF-certified if that’s important for your diet.
How do I know when the caramel layer is done?
Look for little bubbles around the edges – that’s your sign! The caramel will still look soft when you take the bars out (don’t worry, it firms up as it cools). If you see big bubbles forming, that’s your cue to pull them from the oven – we want molten, not burnt!
Can I freeze these bars?
Freeze away! These actually freeze beautifully. Wrap individual bars tightly in plastic wrap, then foil, and they’ll keep for up to 3 months. Thaw at room temperature or pop them in the microwave for 15 seconds if you can’t wait. Pro tip: Freeze some before your next gathering – instant dessert emergency solved!
Final Thoughts
There you have it – my all-time favorite Chocolate Chip Caramel Bars that never fail to disappear fast! I can’t wait for you to experience that perfect bite of chewy cookie, melty chocolate, and gooey caramel. Make them for your next gathering or just because – then come back and tell me how they turned out. Happy baking, friends!
For more delicious recipes, check out our recipes section.
For More recipes, Follow me on Facebook!