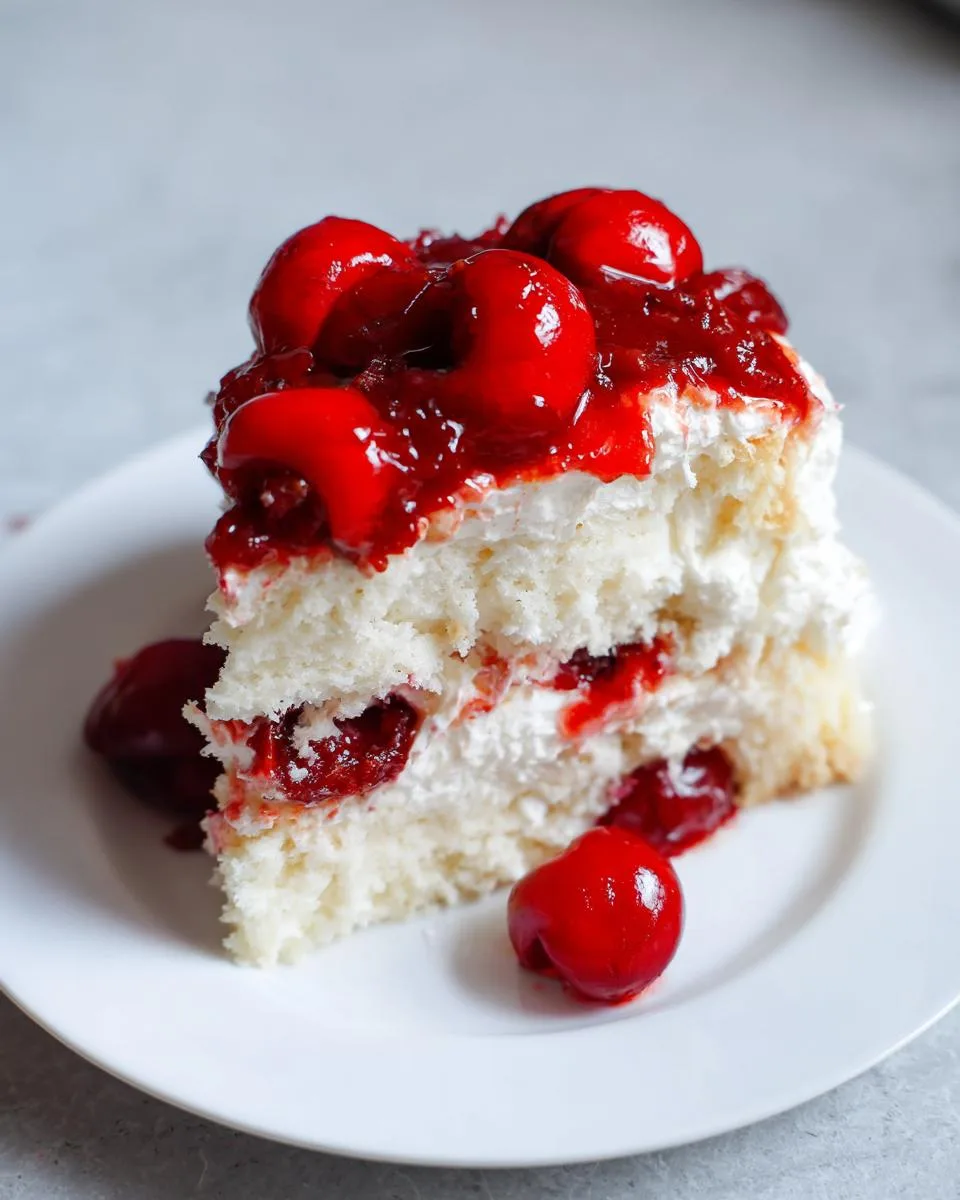
Oh, you’re in a treat! Cherries in the Snow Dessert is one of those magical recipes that takes me straight back to my grandma’s kitchen—cool, creamy, and just sweet enough to make everyone at the table smile. As a chef who adores simple yet showstopping desserts, I can tell you this no-bake beauty is my go-to when I need something quick but impressive.
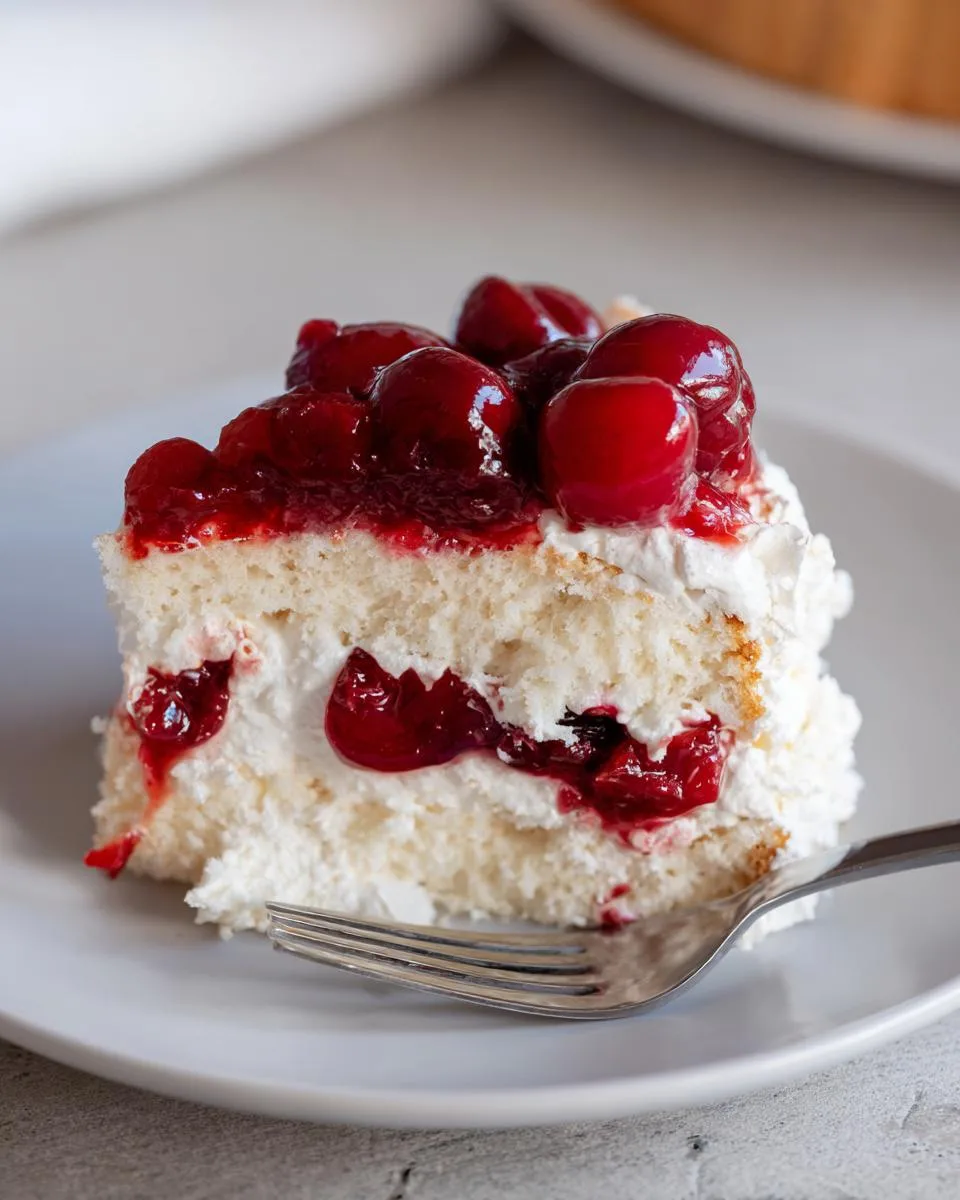
Table of Contents
Table of Contents
Light as a cloud with that tart cherry kick, it’s the kind of dessert that disappears fast at potlucks (trust me, I’ve seen it happen!). Best part? You probably have most of the ingredients sitting in your fridge right now. Let’s dive in—this one’s a keeper.
Why You’ll Love This Cherries in the Snow Dessert
Listen, I get it—life’s busy, but that doesn’t mean dessert should be complicated. This recipe? It’s like a little miracle in a dish. Here’s why it’ll become your new best friend:
- No oven required – Summer heat or tiny apartment kitchen? No problem! Just mix, layer, and chill.
- Ready in under an hour – From fridge to table faster than you can say “seconds please!”
- Fluffy meets fruity – That cloud-like cream cheese layer with tart cherries? Absolute magic.
- Crowd-pleaser alert – Kids adore it, grandparents request it, and potlucks demand it.
Honestly? The hardest part is waiting those 30 minutes while it chills. But ohhh, is it worth it!
Ingredients for Cherries in the Snow Dessert
Okay, let’s raid the pantry! Here’s what you’ll need for this dreamy dessert (and yes, I’ve made this enough times to tell you—don’t skip softening that cream cheese!):

- 1 pre-baked 9-inch angel food cake – Store-bought is totally fine here, but if you’ve got homemade? Even better!
- 8 oz. cream cheese, softened – Leave it out for 30 minutes, or microwave in 5-second bursts. Cold cream cheese = lumpy sadness.
- ½ cup powdered sugar – Sift it if you’re fancy, but a quick whisk works too.
- ½ cup milk – Whole milk makes it extra creamy, but 2% does the job.
- 1 tsp vanilla extract – The good stuff, please! That imitation vanilla has no place here.
- 12 oz. whipped topping – Thawed overnight in the fridge, or you’ll be fighting icy lumps.
- 2 (21 oz.) cans cherry pie filling – Look for the kind with plump, juicy cherries—not the sad, mushy ones.
- Chopped pecans for topping (optional) – Because crunch + cream = heaven.
See? Nothing weird or hard-to-find. Now let’s make some magic!
How to Make Cherries in the Snow Dessert
Alright, let’s get down to business! This dessert comes together so easily, but a few little tricks make all the difference. Follow these steps, and you’ll have a showstopper that looks like you spent hours (when really, it’s barely any work at all).
Step 1: Prepare the Angel Food Cake
First things first—let’s tackle that angel food cake. Now, here’s where I see people go wrong: they either leave the pieces too big (hello, uneven bites!) or pulverize them into dust. Aim for goldilocks-sized pieces—about 1-inch chunks. Just tear them with your hands (no knives needed!).
Pro tip: If the cake feels sticky, pop it in the freezer for 10 minutes first. Those slightly firmer pieces fold into the cream like a dream.
Step 2: Make the Cream Cheese Mixture
This is where the magic starts. Grab your handheld mixer (or a whisk if you’re feeling energetic) and beat that softened cream cheese until it’s smooth as silk. No lumps allowed! Then, add the powdered sugar—little by little—so you don’t end up in a sweet, powdery cloud.
Next, drizzle in the milk and vanilla while mixing. When it’s all combined, gently fold in the whipped topping. Don’t overmix here—we want fluffy, not flat! Finally, add those cake pieces and fold just until every last one is coated. Think “soft hugs,” not “rough squishes.”
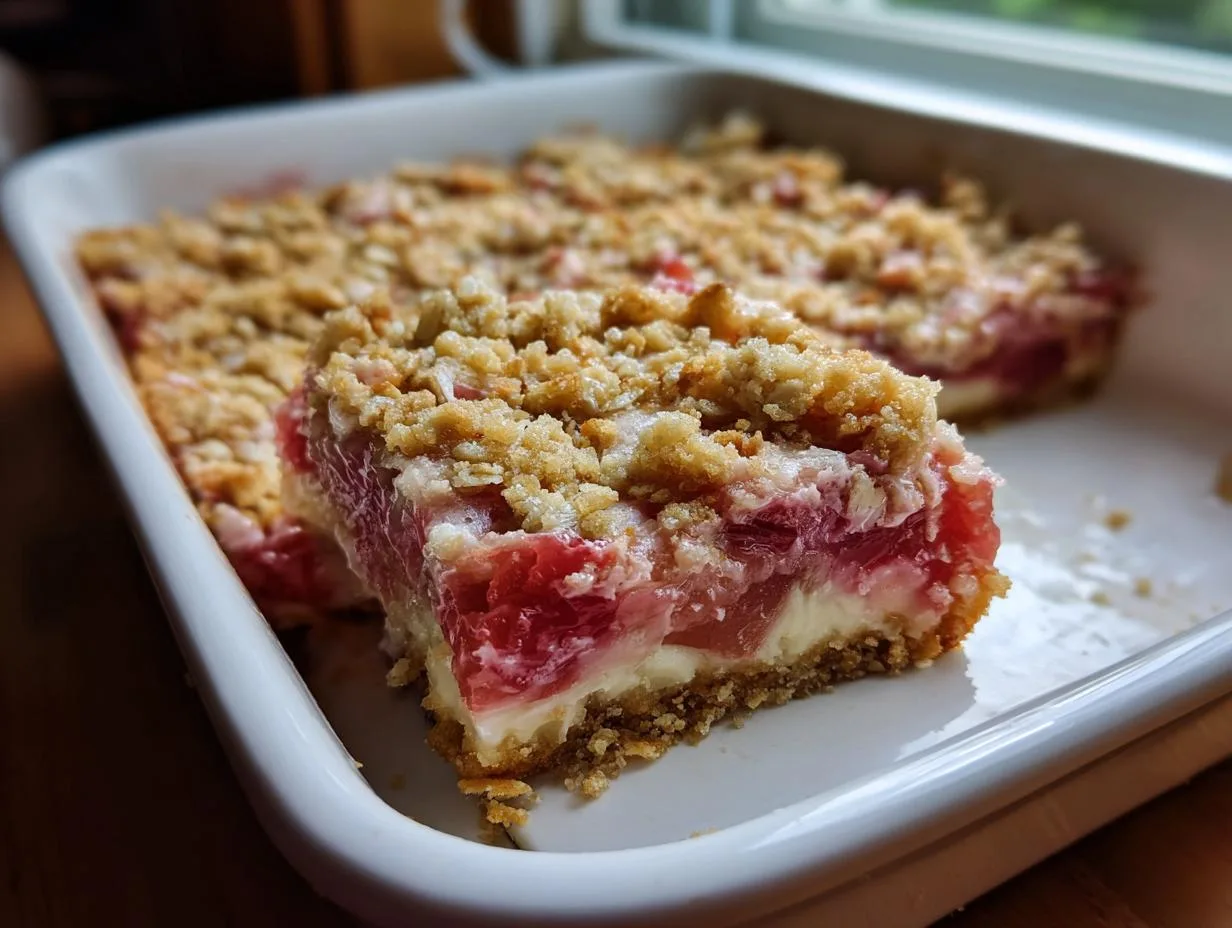
Step 3: Layer and Chill
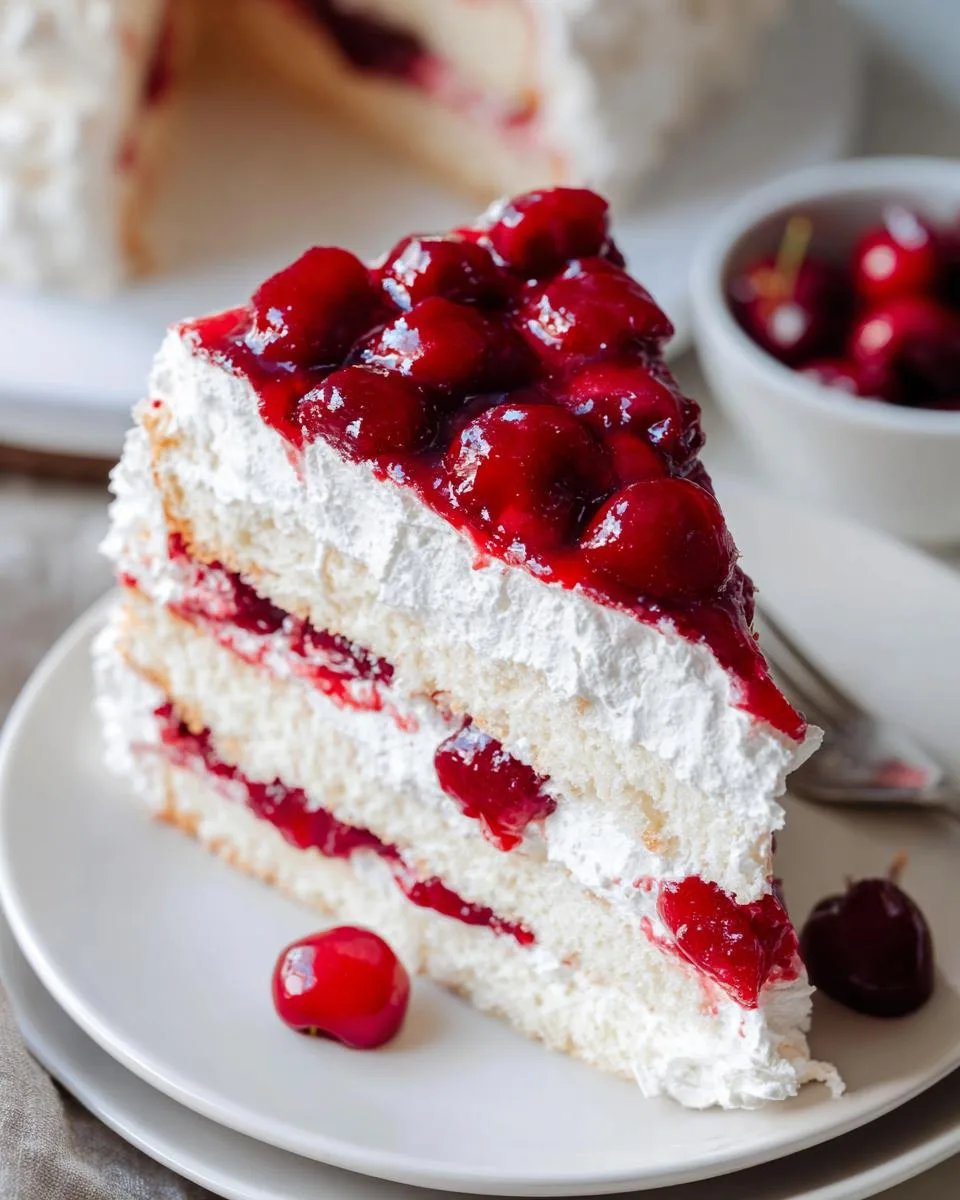
Spread your creamy mixture evenly in a 9×13 dish—I like to use an offset spatula for this—then comes the star of the show: those gorgeous cherries! Pour the pie filling over the top and spread it gently with a spoon. Want pretty swirls? Drag a toothpick through for marbled effects.
Now, the hardest part: walk away. Let it chill for at least 30 minutes (though an hour is even better). This waiting game lets the flavors meld and the texture set up perfectly. Trust me—it’s worth every second of anticipation!
Print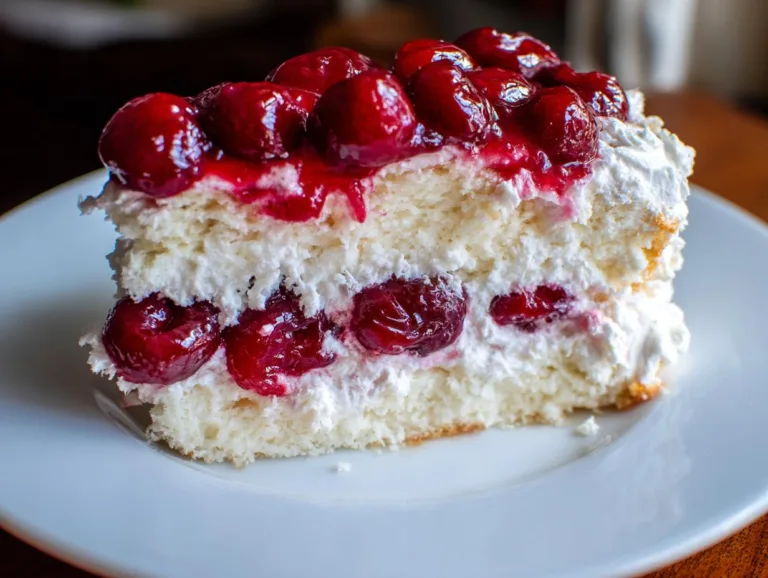
Magical 30-Minute Cherries in the Snow Dessert Perfection
A light and fluffy dessert with layers of creamy filling, angel food cake, and cherry topping.
- Total Time: 45 minutes
- Yield: 12 servings 1x
Ingredients
- 1 pre-baked 9-inch angel food cake
- 8 oz. cream cheese, softened
- ½ cup powdered sugar
- ½ cup milk
- 1 tsp vanilla extract
- 12 oz. whipped topping
- 2 (21 oz.) cans cherry pie filling
- Chopped pecans for topping (optional)
Instructions
- Tear the angel food cake into small, bite-sized pieces. Set aside.
- In a large bowl, whip cream cheese, powdered sugar, milk, and vanilla extract together with a handheld mixer.
- Gently mix in the whipped topping.
- Fold in the angel food cake pieces until fully combined.
- Spread the mixture evenly in a 9×13 inch dish.
- Pour cherry pie filling over the top and spread evenly.
- Refrigerate for at least 30 minutes before serving.
- Optionally, sprinkle chopped pecans on individual servings.
Notes
- Keep refrigerated until ready to serve.
- For a lighter version, use reduced-fat cream cheese and whipped topping.
- Prep Time: 15 minutes
- Cook Time: 0 minutes
- Category: Dessert
- Method: No-Bake
- Cuisine: American
- Diet: Vegetarian
Nutrition
- Serving Size: 1 slice
- Calories: 280
- Sugar: 32g
- Sodium: 180mg
- Fat: 9g
- Saturated Fat: 5g
- Unsaturated Fat: 3g
- Trans Fat: 0g
- Carbohydrates: 45g
- Fiber: 1g
- Protein: 4g
- Cholesterol: 20mg
Tips for Perfect Cherries in the Snow Dessert
Want to take your dessert from good to oh-my-goodness? These little tricks make all the difference:
- Cold bowl = happy whipped topping – Pop your mixing bowl in the freezer for 10 minutes before folding in the whipped topping. It’ll stay fluffier longer!
- Full-fat cream cheese is worth it – That extra richness makes the creamy layer practically melt in your mouth.
- Drain those cherries – If your pie filling seems extra juicy, give it a quick strain so your snow layer doesn’t get soggy.
- Make it ahead – This dessert actually tastes better after chilling overnight. The flavors cozy up together like old friends.
Oh, and one last thing—always lick the spoon. It’s practically a rule when making something this delicious!
Variations for Cherries in the Snow Dessert
Now here’s the fun part—making this dessert your own! While I adore the classic cherry version, sometimes it’s fun to mix things up. Try these easy swaps when you’re feeling adventurous:
- Berry bliss – Swap cherry pie filling for strawberry or blueberry. That ruby red strawberry sauce looks stunning against the white cream!
- Nutty twists – Toasted almonds or walnuts add fantastic crunch instead of pecans. Just chop ’em fine so they sprinkle evenly.
- Citrus zing – Add a teaspoon of lemon zest to the cream mixture for a bright, fresh flavor that cuts through the sweetness.
- Chocolate lover’s dream – Fold in mini chocolate chips with the cake pieces. Trust me—cherries and chocolate? Heavenly.
The beauty of this dessert is how easily it adapts. Whatever variation you choose, that fluffy cloud-like base makes everything taste amazing!
Serving and Storing Cherries in the Snow Dessert
Here’s the best way to enjoy this beauty – cold, cold, cold! I always serve it straight from the fridge, maybe with a little extra sprinkle of pecans if I’m feeling fancy. Use a big spoon to scoop down through those gorgeous cherry and cream layers – you want a bit of everything in each bite.
Leftovers? (As if!) Just cover the dish tightly with plastic wrap or transfer slices to airtight containers. It keeps beautifully in the fridge for about 2 days – though the cake pieces do start softening after that. One warning – don’t freeze it! That fluffy texture turns icy and sad. Better to share any extras with lucky neighbors!
Nutritional Information for Cherries in the Snow Dessert
Now, let’s be real—this isn’t health food, but everything’s fine in moderation, right? Here’s the scoop on what you’re enjoying (nutrition varies based on brands, so these are estimates per serving):
- Calories: 280 – Worth every single one when that creamy cherry goodness hits your tongue!
- Sugar: 32g – Mostly from the cherries and powdered sugar, so it’s naturally sweet.
- Fat: 9g – Thank the cream cheese and whipped topping for that luscious texture.
- Protein: 4g – Surprise! The angel food cake and dairy give you a little boost.
My philosophy? Life’s too short not to enjoy desserts like this—just maybe don’t eat the whole pan yourself in one sitting (though I won’t judge if you try!).
FAQs About Cherries in the Snow Dessert
I get asked about this dessert all the time—here are the answers to the questions that pop up most often:
Can I use homemade angel food cake?
Absolutely! In fact, homemade makes it extra special. Just make sure it’s completely cooled before tearing into pieces. Store-bought works perfectly fine too—no shame in that game!
How long does Cherries in the Snow keep in the fridge?
About 2 days max—after that, the cake pieces get too soft. Though honestly? It rarely lasts that long in my house. If you need to make ahead, prep the components separately and assemble the day you’re serving.
Can I use fresh cherries instead of pie filling?
You can, but you’ll need to cook them down with some sugar and cornstarch first. The canned pie filling gives that perfect thick, glossy topping with zero effort—my lazy baker’s dream!
Why is my cream cheese mixture lumpy?
Ah, the #1 mistake! Your cream cheese must be properly softened. If you’re impatient (like me sometimes), microwave it in 5-second bursts, stirring between each. And always beat it smooth before adding other ingredients.
Can I make this dessert gluten-free?
Yes! Just use a gluten-free angel food cake (many stores carry them now). All the other ingredients are naturally gluten-free, so you’re good to go.
Share Your Cherries in the Snow Dessert Experience
Okay, friend—now it’s your turn! Did your family go crazy for this dessert like mine always does? Snap a pic of that gorgeous cherry swirl and tag me—I live for your kitchen victories! Drop a comment below with your favorite variation or any brilliant tweaks you discovered.
And hey, if this recipe made someone’s day sweeter, give it a rating so other dessert lovers can find it too. Happy baking—can’t wait to hear your stories!
For More recipes, Follow me on Facebook!