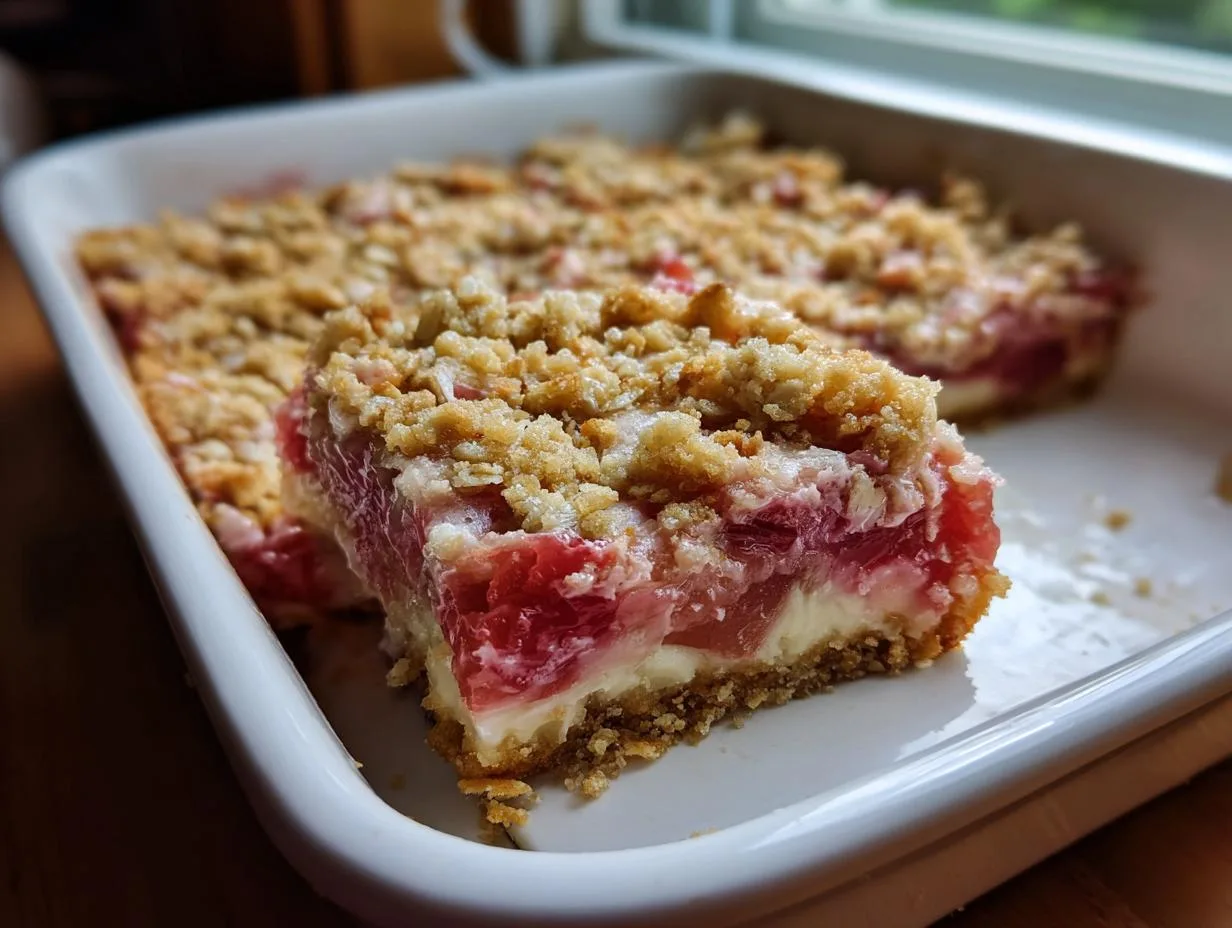
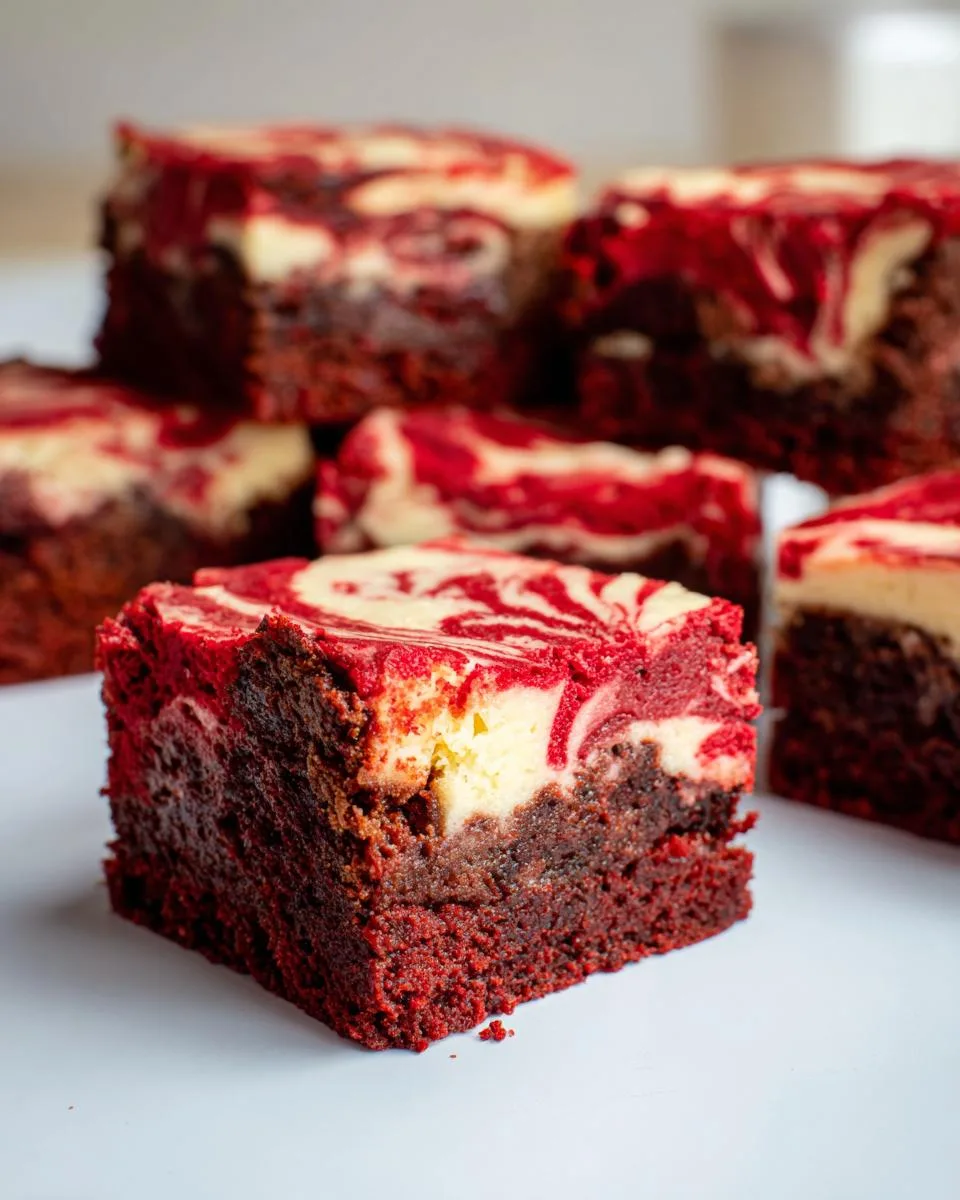
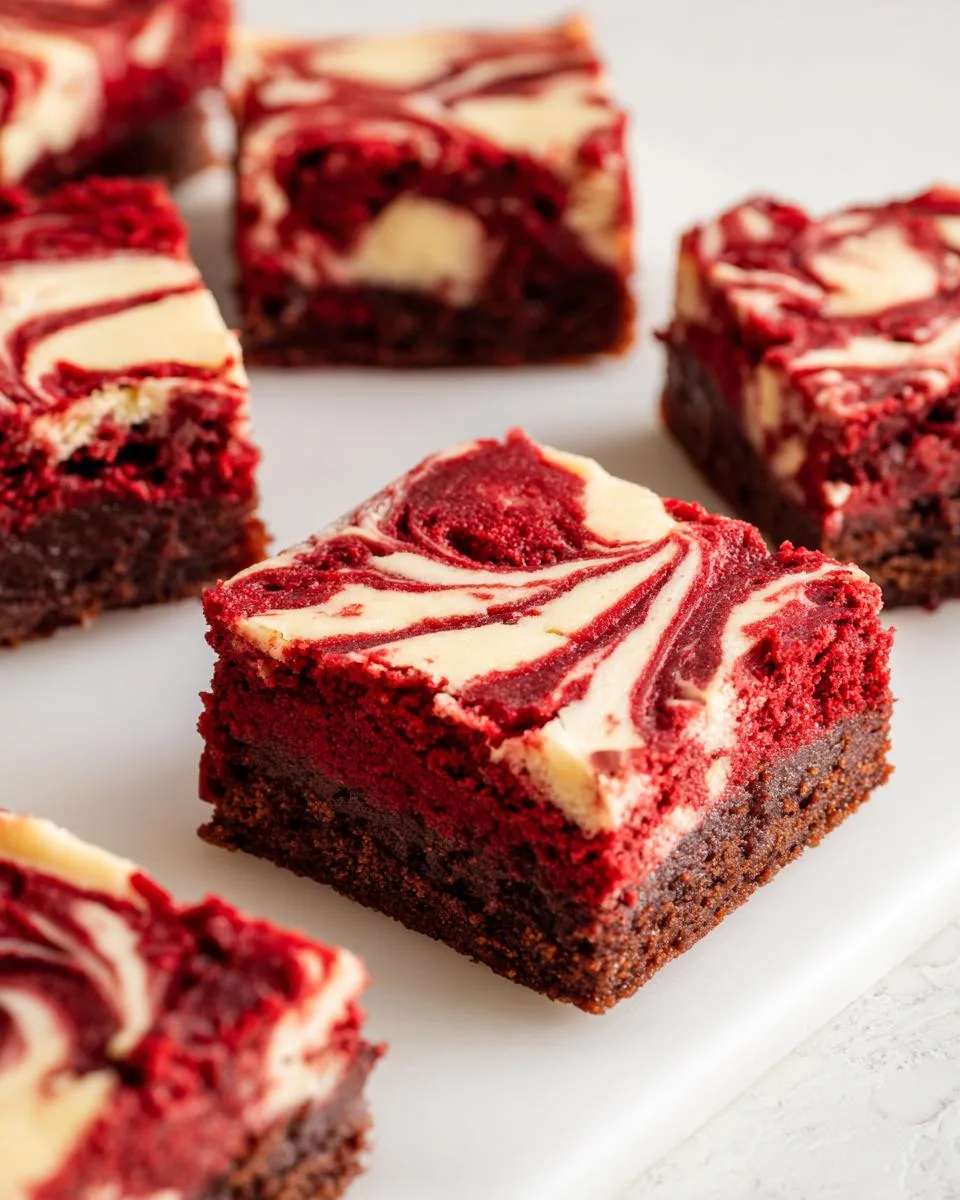
Listen, I don’t make promises lightly—but when I say these Better-Than-Crumble Red Velvet Cheesecake Brownies will change your dessert game forever, I mean it. Picture this: rich, velvety cocoa batter swirled with clouds of tangy cream cheese, baked into fudgy squares that practically melt on your tongue.
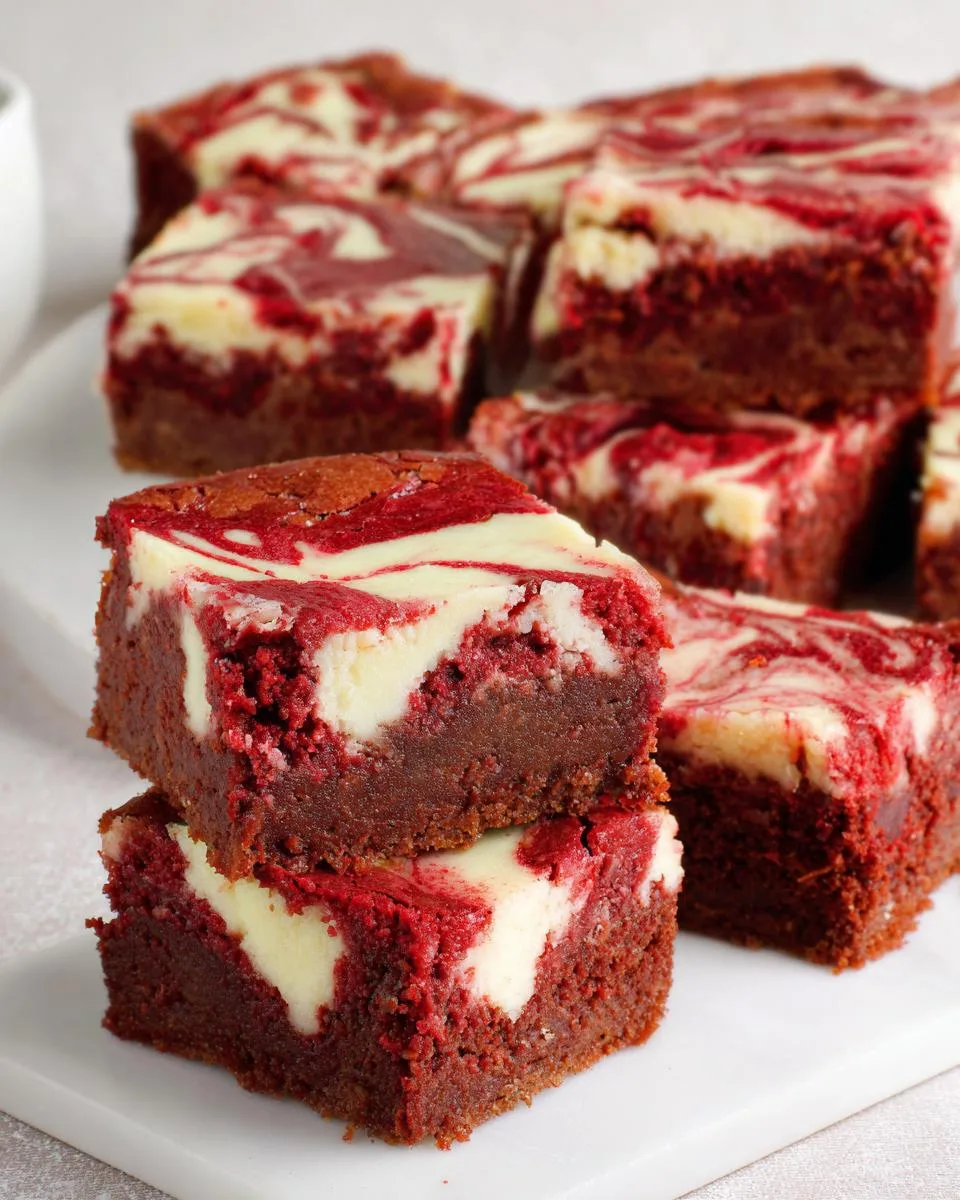
Table of Contents
Table of Contents
This recipe came to me during one of those “what-if” kitchen experiments (you know the kind—midnight, slightly sleep-deprived, and very determined). Turns out, combining my grandma’s red velvet cake secrets with New York-style cheesecake techniques creates pure magic. The result? A dessert so good, my family now requests it weekly—sometimes with dramatic pleading. And honestly? I get it.
Why You’ll Love These Better-Than-Crumble Red Velvet Cheesecake Brownies
Trust me, these aren’t just any brownies—they’re the kind that disappear before the plate even hits the table. Here’s why:
- Decadent meets dreamy: That rich cocoa-red velvet base swirled with creamy cheesecake? Pure bliss in every bite.
- Easy as pie (but better): No fancy techniques—just melt, mix, swirl, and bake. Even my 10-year-old niece nails this recipe.
- Crowd-pleaser magic: Bring these to potlucks and watch grown adults fight over the last square (true story).
Oh, and that crackly top? *Chef’s kiss*—it’s what dreams are made of.
Ingredients for Better-Than-Crumble Red Velvet Cheesecake Brownies
Now, let’s talk ingredients – because using the right stuff makes all the difference between “good” and “OH MY GOSH WHERE HAS THIS BEEN ALL MY LIFE” brownies. Here’s exactly what you’ll need:
- 1 cup granulated sugar – plain white sugar works perfectly here
- ½ cup unsalted butter, melted – and slightly cooled (we don’t want scrambled eggs!)
- 1 cup all-purpose flour – spooned and leveled, please – no packing it down
- ½ cup cocoa powder – unsweetened is crucial here (I like Hershey’s Special Dark for extra richness)
- 1 teaspoon baking powder – check the date on yours – old powder won’t give you that perfect rise
- ½ teaspoon salt – just trust me, it balances all that sweetness beautifully
- 2 large eggs – at room temperature (leave them out for 30 minutes or warm them in a bowl of water)
- 1 teaspoon vanilla extract – the real stuff, not imitation
- ½ cup red food coloring – gel works best for vibrant color without thinning the batter
- 8 ounces cream cheese – softened to room temperature (this is non-negotiable for smooth swirling)
- ¼ cup powdered sugar – sifted if yours is lumpy
Ingredient Notes & Substitutions
Okay, real talk – sometimes you’re halfway through a recipe and realize you’re missing something. Here’s how to adapt without sacrificing flavor:
- Cream cheese substitute: In a pinch, full-fat Greek yogurt works (but expect a tangier, less creamy swirl)
- Gluten-free option: Swap the all-purpose flour 1:1 with your favorite GF blend (I’ve had great results with King Arthur’s measure-for-measure)
- Food coloring: Use more or less depending on how vibrant you want your red – just know the color deepens as it bakes
- Egg-free: Try flax eggs (1 tbsp ground flax + 3 tbsp water per egg) though the texture will be slightly denser
- Butter alternative: Coconut oil works if you’re dairy-free, but the flavor will change slightly
One last pro tip – if your cream cheese isn’t softening fast enough, microwave it for 5-second bursts (lid off!) until it’s spreadable but not melted. Been there, done that!
Equipment You’ll Need
Here’s the beautiful part – you don’t need any fancy gadgets to make these showstopper brownies. Just grab these kitchen basics (I bet you already have most of them!):
- 9×13-inch baking pan – metal or glass both work, but metal gives you those crispier edges I adore
- 2 mixing bowls – one for the brownie batter, one for the cheesecake swirl (medium size is perfect)
- Whisk – my trusty wire whisk never fails me for getting that batter silky smooth
- Spatula – for scraping every last bit of that glorious red velvet batter into the pan
- Measuring cups & spoons – because eyeballing measurements leads to dessert heartbreak
That’s it! No stand mixer, no special tools – just good old-fashioned baking magic. Though I will say, if you’ve got a butter knife or toothpick handy for swirling, it makes those marbled patterns extra pretty.
How to Make Better-Than-Crumble Red Velvet Cheesecake Brownies
Alright, let’s get baking! I promise this is easier than it looks – just follow these steps and you’ll have the most gorgeous, marbled brownies in no time. Here’s exactly how I make them:
- Preheat that oven! Crank it to 350°F (175°C) and let it heat up while you prep. Grease your 9×13 pan really well – I use butter or baking spray, making sure to get into all the corners.
- Mix the wet ingredients: In your first bowl, whisk together the melted (but not hot!) butter and sugar until it looks like wet sand. Add eggs one at a time, whisking well after each. Now pour in that gorgeous red food coloring and vanilla – mix until you’ve got a vibrant red liquid that looks almost magical.
- Combine dry ingredients: In your second bowl, whisk together flour, cocoa powder, baking powder, and salt. Slowly add this to your wet ingredients, mixing just until combined – overmixing makes tough brownies, and we don’t want that!
- Make the cheesecake swirl: In a clean bowl (or rinse that first one!), beat the softened cream cheese and powdered sugar until smooth and lump-free. This should take about 1 minute with a whisk or hand mixer.
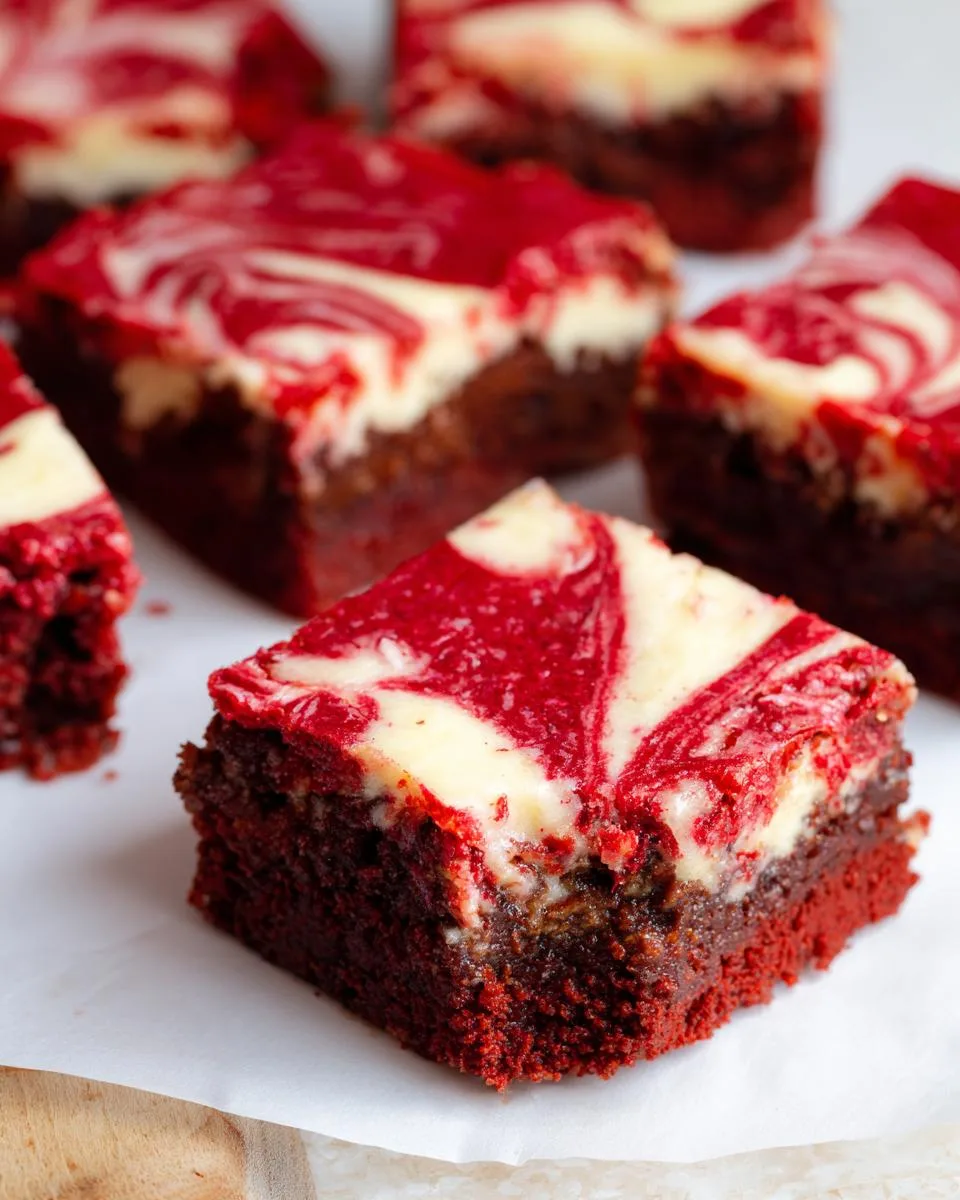
- Layer it up: Pour half the brownie batter into your prepared pan and spread evenly. Now dollop spoonfuls of the cream cheese mixture across the top – don’t worry about perfection here! Add the remaining brownie batter, then use a knife to gently swirl everything together in big, lazy figure-eights.
- Bake to perfection: Pop it in the oven for 30 minutes. At 25 minutes, start checking with a toothpick – you want a few moist crumbs clinging to it, not wet batter. The edges should pull away slightly from the pan.
- The hardest part – wait! Let the pan cool completely on a wire rack before slicing – about 2 hours. I know, torture! But cutting warm brownies leads to messy, crumbly slices (though no judgment if you sneak a corner piece early).
Tips for Perfect Brownies
After making these more times than I can count, here are my foolproof secrets for brownie success:
- Room temp is key: Cold eggs or cream cheese won’t incorporate smoothly – take them out 30 minutes before baking.
- Don’t over-swirl: Three or four passes with the knife is plenty – too much mixing and you’ll lose that beautiful marbling.
- Toothpick trick: Test in the center and near the edge – if both come out with moist crumbs, you’re golden.
- Chill for clean cuts: For picture-perfect squares, refrigerate for 30 minutes before slicing with a hot knife (run it under hot water and dry between cuts).
- Edge lover? Bake in a metal pan for crispier edges, glass for softer ones – your preference!
And remember – even “ugly” brownies taste incredible. If your swirls aren’t Instagram-perfect, just dust with powdered sugar – instant elegance!
Print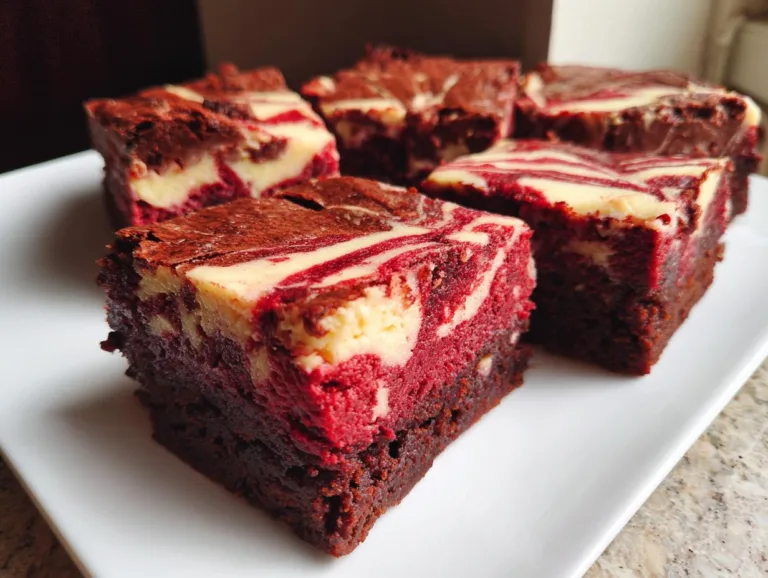
Yummy Better-Than-Crumble Red Velvet Cheesecake Brownies
Rich red velvet brownies with a creamy cheesecake swirl, combining classic flavors for a decadent treat.
- Total Time: 45 minutes
- Yield: 12 brownies 1x
Ingredients
- 1 cup granulated sugar
- 0.5 cup unsalted butter, melted
- 1 cup all-purpose flour
- 0.5 cup cocoa powder
- 1 teaspoon baking powder
- 0.5 teaspoon salt
- 2 large eggs
- 1 teaspoon vanilla extract
- 0.5 cup red food coloring
- 8 ounces cream cheese, softened
- 0.25 cup powdered sugar
Instructions
- Preheat your oven to 350°F (175°C). Grease a 9×13 inch baking pan.
- In a bowl, combine sugar, melted butter, and eggs. Mix well.
- Add in vanilla extract and red food coloring, mix until well combined.
- In another bowl, combine flour, cocoa powder, baking powder, and salt. Gradually mix into the wet ingredients.
- In a separate bowl, beat together the cream cheese and powdered sugar until smooth.
- Pour half of the brownie batter into the prepared pan. Spread with the cream cheese mixture, then top with the remaining brownie batter. Swirl to combine.
- Bake for 30 minutes or until a toothpick inserted comes out clean.
- Allow to cool before slicing into squares and serving.
Notes
- Use room temperature ingredients for best results.
- Adjust food coloring to achieve desired red hue.
- Store leftovers in an airtight container in the refrigerator.
- Prep Time: 15 minutes
- Cook Time: 30 minutes
- Category: Dessert
- Method: Baking
- Cuisine: American
- Diet: Vegetarian
Nutrition
- Serving Size: 1 brownie
- Calories: 280
- Sugar: 22g
- Sodium: 150mg
- Fat: 14g
- Saturated Fat: 8g
- Unsaturated Fat: 5g
- Trans Fat: 0g
- Carbohydrates: 35g
- Fiber: 2g
- Protein: 4g
- Cholesterol: 65mg
Serving Suggestions
Oh, let me tell you – these brownies are absolute showstoppers all on their own, but if you want to take them to the next level (and why wouldn’t you?), here are my favorite ways to serve them:
- À la mode: Warm up a square for 10 seconds and top with vanilla ice cream – the contrast of cold cream and fudgy brownie is heavenly.
- Berry bliss: Fresh raspberries or strawberries cut through the richness beautifully – plus they make it look fancy with zero effort.
- Coffee break: Serve with a dollop of whipped cream and dust with cocoa powder – my go-to when friends pop by unexpectedly.
- Midnight snack: Straight from the fridge, no plate, no shame – we’ve all been there.
Pro tip: If you’re feeling extra, drizzle with melted white chocolate before serving. You’re welcome.
Storage & Reheating
Okay, confession time – these brownies rarely last long enough to need storing in my house! But when they do (or if you’re miraculously disciplined), here’s how to keep them tasting fresh:
Room temp: If you’re serving them within 24 hours, just cover the pan with foil or transfer to an airtight container – no fridge needed. The cheesecake swirl stays perfect at cool room temperature.
Fridge life: For longer storage, pop them in the fridge in an airtight container. They’ll stay dreamy for up to 3 days – though the texture gets slightly denser (which I actually love!).
Freezer hack: Yes, you can freeze these! Wrap individual squares tightly in plastic wrap, then foil. They’ll keep for 2 months – thaw overnight in the fridge or 30 seconds in the microwave when that craving hits.
Reheating magic: Want that fresh-from-the-oven feel? Microwave a square for 10-15 seconds – just enough to take the chill off. Or pop it under the broiler for 30 seconds if you’re feeling fancy (watch closely!).
One last tip – if your brownies seem dry after storing (though with all that cream cheese, it’s unlikely!), place a slice of bread in the container overnight. The brownies will steal back moisture like little dessert thieves!
Nutritional Information
Now, I’m no dietitian, but let’s be real – when you’re indulging in these Better-Than-Crumble Red Velvet Cheesecake Brownies, you’re not exactly counting calories! Still, I know some folks like to know what they’re enjoying, so here’s the scoop per brownie (based on cutting into 12 generous squares):
- Calories: 280 (worth every single one!)
- Sugar: 22g (that’s the sweet spot, literally)
- Fat: 14g (makes them gloriously fudgy)
- Carbs: 35g (because happiness comes in carbohydrate form)
- Protein: 4g (cream cheese to the rescue!)
Important note: Nutrition varies by ingredients – using different brands of cocoa or cream cheese might tweak these numbers slightly. And hey, if you’re really concerned about the numbers… maybe just have half a brownie? (Said no one ever in my kitchen.)
Frequently Asked Questions
I’ve gotten so many questions about these brownies over the years – here are the ones that pop up most often (along with my tried-and-true answers!):
Can I freeze these brownies?
Absolutely! They freeze like a dream. Just wrap individual squares tightly in plastic wrap, then foil. They’ll keep for 2 months – thaw overnight in the fridge or zap for 30 seconds in the microwave when that sweet craving hits.
How can I make the red color more vibrant?
Two tricks: First, use gel food coloring instead of liquid – it’s more concentrated so you need less. Second, add a teaspoon of white vinegar to the batter – it helps stabilize the color (and don’t worry, you won’t taste it!).
What’s the best egg substitute?
For egg-free versions, I’ve had great luck with flax eggs (1 tbsp ground flax + 3 tbsp water per egg). The texture will be slightly denser but still delicious. Applesauce works too, but you’ll lose some richness.
Why did my cream cheese swirl sink?
This usually happens if the cream cheese mixture was too thin or the brownie batter too thick. Next time, make sure your cream cheese is properly softened (but not melted) and don’t overmix the brownie batter – it should be pourable but not runny.
Can I make these without the cheesecake swirl?
Of course! Just skip the cream cheese step – you’ll still get amazing red velvet brownies. Though I have to say… that tangy swirl is what makes them truly special!
Final Thoughts
Alright, my fellow dessert lovers – it’s time to grab that whisk and make some magic happen! These Better-Than-Crumble Red Velvet Cheesecake Brownies have been my pride and joy for years, and I can’t wait for you to experience that first bite of fudgy, marbled perfection.
Whether you’re baking them for a special occasion (or, let’s be real, just because it’s Tuesday), I promise they’ll bring smiles to everyone lucky enough to taste them.
Here’s my challenge to you: Make them this weekend. Take photos of your swirls (even the “imperfect” ones taste incredible!). Tag me if you share them online – I live for seeing your creations. And most importantly? Enjoy every messy, chocolatey, cream-cheesy moment of the process. Because that’s what baking’s really about – creating delicious memories along with the treats. You can find more delicious recipes on our recipe page.
Now go preheat that oven – your future self will thank you when that first warm brownie hits your tongue. Happy baking, friends!
For More recipes, Follow me on Facebook!