Oh my goodness, you’re about to fall in love with the easiest dessert ever—my creamy, dreamy no-bake cheesecake! As a chef who’s whipped up more cheesecakes than I can count, let me tell you—this one’s foolproof. No oven drama, no water baths, just silky-smooth filling and that perfect graham cracker crunch. My secret? Cold cream whipped into clouds of cream cheese goodness. Whether you’re craving classic cherry topping or something wild like salted caramel, this cheesecake’s your blank canvas. Trust me—after one bite, you’ll be making this every time summer hits or whenever your sweet tooth screams “now!”
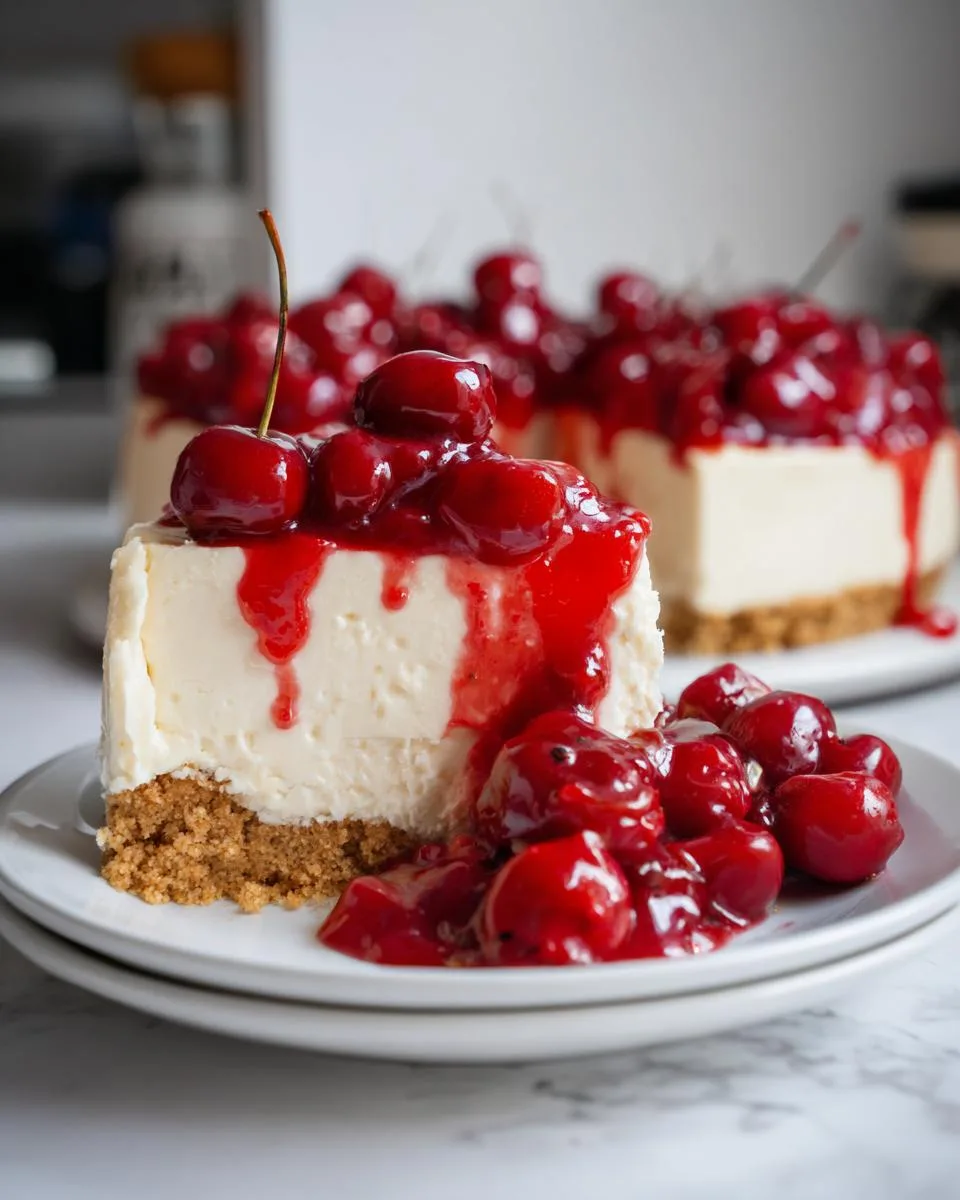
Table of Contents
Table of Contents
Why You’ll Love This No Bake Cheesecake
Let me count the ways this no-bake cheesecake will steal your heart:
- No oven stress! Skip the baking drama—this beauty sets up perfectly in your fridge while you relax
- Creamy dreamy texture that’ll have you licking the spoon (I do every time!)
- Customizable to the max—swap toppings with whatever fruit, sauce, or sprinkles make you happy
- Perfect for last-minute guests when you need an impressive dessert fast
- That graham cracker crust—buttery, crunchy, and oh-so-simple to make
Seriously, this is the dessert that makes people think you spent hours when really? Just 15 minutes of mixing and some patience while it chills!
Ingredients for No Bake Cheesecake
Grab these simple ingredients—I bet you’ve got most already!

- 1 1/4 cups graham cracker crumbs (about 9 full sheets)
- 6 tablespoons butter, melted (salted or unsalted both work)
- 16 oz cream cheese, softened (two 8 oz packages—must be room temp!)
- 1/2 cup granulated sugar
- 2 teaspoons vanilla extract
- 1 cup heavy cream, cold (straight from the fridge)
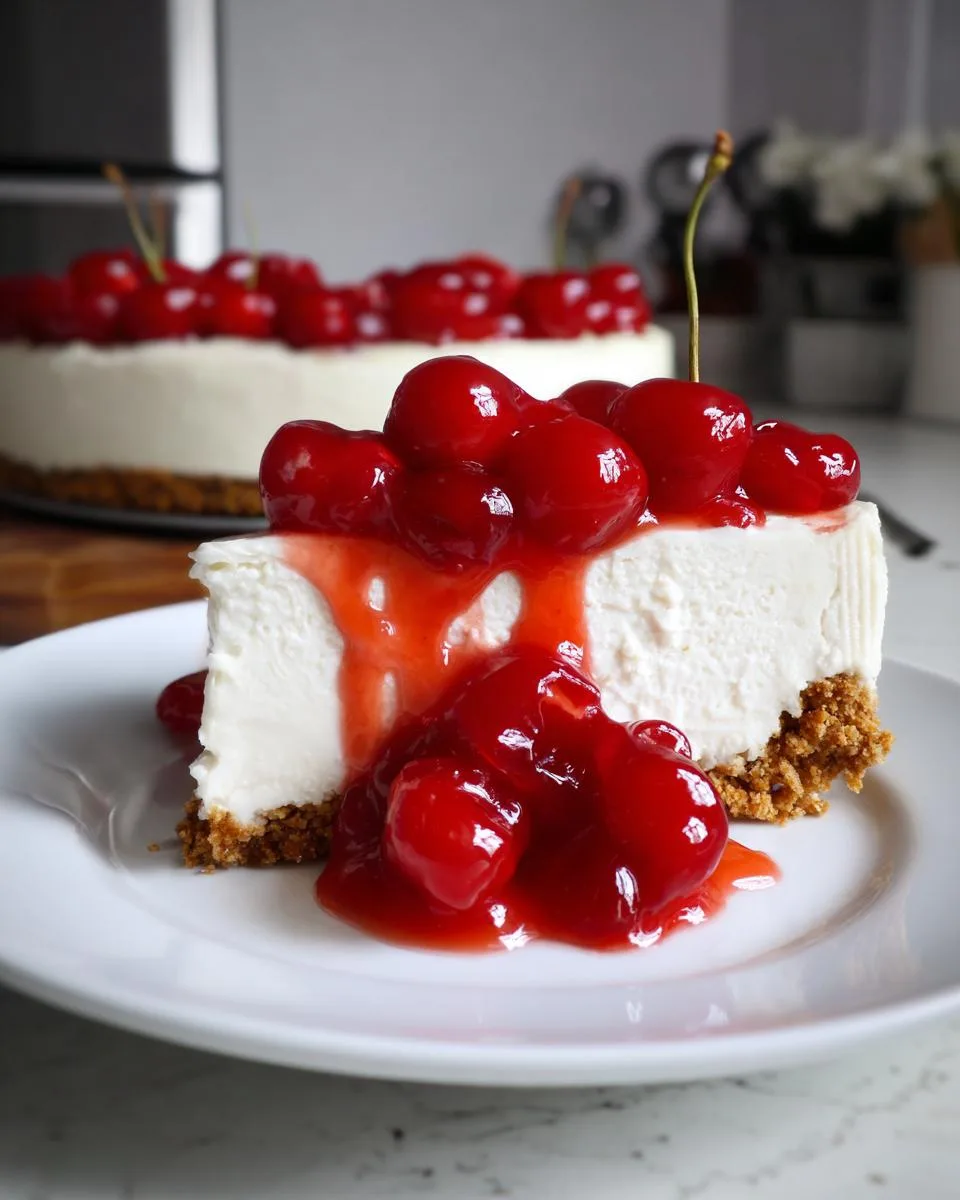
- 1 cup canned pie filling (cherry’s my fave, but go wild!)
Ingredient Notes & Substitutions
A few pro tips before you start mixing:
Cold cream is non-negotiable—it whips up light and airy, giving that perfect fluffy texture. Warm cream? Soupy disaster. For the crust, try swapping grahams for crushed Oreos or shortbread cookies if you’re feeling fancy. Out of pie filling? Fresh berries tossed with sugar or even melted chocolate drizzled on top works beautifully.
And listen—don’t use low-fat cream cheese here. That extra richness makes all the difference!
How to Make No Bake Cheesecake
Ready for the easiest dessert magic trick? Here’s how we turn simple ingredients into that creamy, dreamy no-bake cheesecake you’re craving. Follow these steps—and my sneaky tips—for perfect results every time!

Step 1: Prepare the Graham Cracker Crust
First, grab your pie plate and let’s make that buttery crust. Mix graham cracker crumbs with melted butter until it looks like wet sand—you want every crumb coated. Press it firmly into the bottom and up the sides (I use a measuring cup to really pack it down). Pop it in the fridge for 10 minutes—don’t skip this! Chilling helps the crust hold its shape when we add that luscious filling.
Step 2: Make the Cheesecake Filling
Now the fun part! Beat softened cream cheese and sugar until smooth—scrape that bowl to banish lumps. Add vanilla, then the magic happens: slowly pour in cold cream while mixing. Whip it good until thick and fluffy (about 1 minute). Pro tip: add the cream in 4 batches, letting each incorporate before adding more. When it forms soft peaks that hold their shape, you’re golden!
Step 3: Chill and Serve
Spoon that cloud-like filling into your crust, smooth the top, and cover with plastic wrap. Here’s where patience pays off—chill for at least 2 hours (overnight’s even better!). Right before serving, add your favorite toppings. I love watching guests’ eyes light up when I slice into this creamy masterpiece!
Print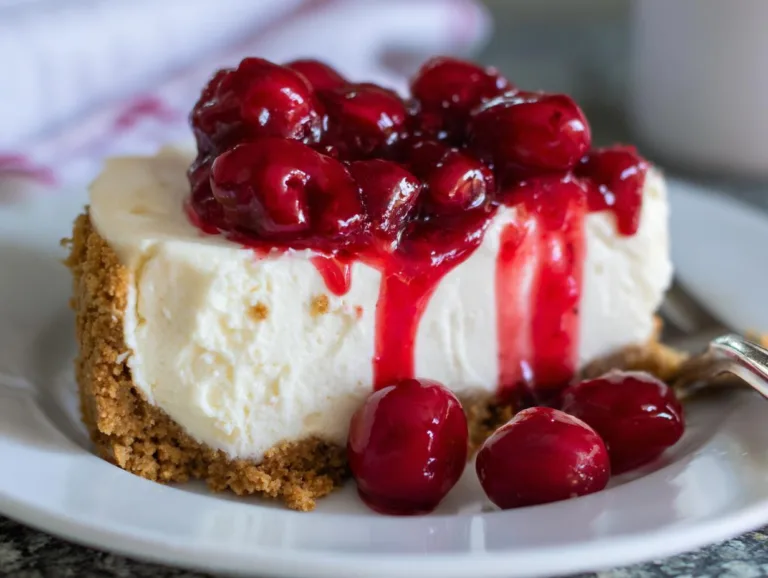
15-Minute No Bake Cheesecake – Irresistibly Creamy & Simple
A simple and delicious no-bake cheesecake with a graham cracker crust and your choice of pie filling topping.
- Total Time: 2 hours 15 minutes
- Yield: 8 servings 1x
Ingredients
- 1 1/4 cups graham cracker crumbs
- 6 tablespoons butter, melted
- 16 oz cream cheese, softened (two 8 oz packages)
- 1/2 cup granulated sugar
- 2 teaspoons vanilla extract
- 1 cup heavy cream, cold
- 1 cup canned pie filling (cherry, blueberry, etc.) or topping of choice
Instructions
- In a small bowl, stir graham cracker crumbs and melted butter together to moisten. Press into an 8 or 9-inch glass pie plate and refrigerate.
- In a large bowl, mix cream cheese and granulated sugar together until smooth and well combined. Scrape the sides and mix again to ensure there are no lumps. Stir in vanilla extract.
- With the mixer on, add cream in four increments, letting it whip into the cream cheese after each addition. Whip 1 minute until thick and light. Scrape the sides to ensure even mixing and whip again if needed.
- Pour into prepared pie shell and smooth the top. Refrigerate 2 hours to overnight, covered in plastic wrap.
- To serve, cut into pieces and top with two tablespoons of pie filling (or whipped cream) if desired.
Notes
- Use cold cream for best whipping results.
- Refrigerate the cheesecake for at least 2 hours to set properly.
- Customize with your favorite pie filling or whipped cream topping.
- Prep Time: 15 minutes
- Cook Time: 0 minutes
- Category: Dessert
- Method: No Bake
- Cuisine: American
- Diet: Vegetarian
Nutrition
- Serving Size: 1 slice
- Calories: 350
- Sugar: 25g
- Sodium: 200mg
- Fat: 25g
- Saturated Fat: 15g
- Unsaturated Fat: 8g
- Trans Fat: 0g
- Carbohydrates: 30g
- Fiber: 1g
- Protein: 4g
- Cholesterol: 70mg
Tips for the Perfect No Bake Cheesecake
After making hundreds of these (yes, I have a problem!), here are my can’t-miss tips:
- Full-fat cream cheese only! Low-fat versions make weepy, sad filling—trust me, it’s worth the splurge
- Chill like you mean it—that 2-hour minimum sets the texture. I pop mine in the freezer for 20 minutes first if I’m impatient
- Stop the mixer often to scrape the bowl—those hidden cream cheese lumps will haunt you otherwise
- Add toppings last-minute so they don’t make the crust soggy (learned this the hard way with cherry juice!)
Follow these, and you’ll get perfect slices every time—no oven required!
No Bake Cheesecake Variations
Okay, now let’s get creative! The beauty of no-bake cheesecake is how easily you can dress it up. My personal favorite? Swirl melted chocolate into the filling before chilling—so decadent! For a zesty twist, add lemon zest and juice (about 2 tablespoons) to the cream cheese mixture. Fresh fruit lovers, toss berries with sugar and let them macerate while the cheesecake chills. Or go wild with crushed cookies mixed right into the filling—Oreos, anyone? The best part? Every variation keeps that same luscious, no-bake cheesecake texture we all adore.
Storing and Reheating
Here’s the scoop on keeping your no-bake cheesecake happy! It’ll stay perfect in the fridge for 3-4 days—just keep it covered with plastic wrap pressed right against the surface. Don’t freeze it though—that gorgeous creamy texture turns grainy when thawed. If you must store longer, freeze just the crust and make fresh filling later!
Nutrition Information
Just a heads up—these numbers are estimates since your exact ingredients might vary (extra cherry sauce, anyone?). Per generous slice, you’re looking at:
- 350 calories – Perfect for treating yourself!
- 25g fat – That’s where all the creamy goodness comes from
- 25g sugar – Sweet but not overwhelming
- 4g protein – Hey, dairy counts!
Remember—no-bake cheesecake is dessert, not health food. But life’s too short not to enjoy every creamy bite!
Frequently Asked Questions
Let’s tackle those burning no-bake cheesecake questions I get all the time:
Why is my filling runny? Oh honey, I’ve been there! Usually it’s one of three things: cream wasn’t cold enough, you didn’t whip it long enough (aim for soft peaks!), or the cream cheese wasn’t fully softened. Next time, try chilling your bowl and beaters for extra insurance!
Can I use frozen fruit for topping? Absolutely—just thaw and drain it well first. Toss those berries with a little sugar to draw out excess juice. Pro tip: pat them dry with paper towels right before serving to prevent a soggy crust.
How do I get cleaner slices? Run your knife under hot water between cuts—the heat glides right through that creamy filling. And don’t press down—let the knife’s weight do the work while you gently saw back and forth.
For More recipes, Follow me on Facebook!