Oh my gosh, you guys – Halloween baking just got a whole lot cuter (and tastier!) with these Spooky Peanut Butter Spider cookies. I still remember the first time I made them with my niece – her eyes lit up when she saw those little chocolate legs crawling across the cookies! These treats are seriously foolproof, which is why they’ve become my go-to Halloween recipe year after year.
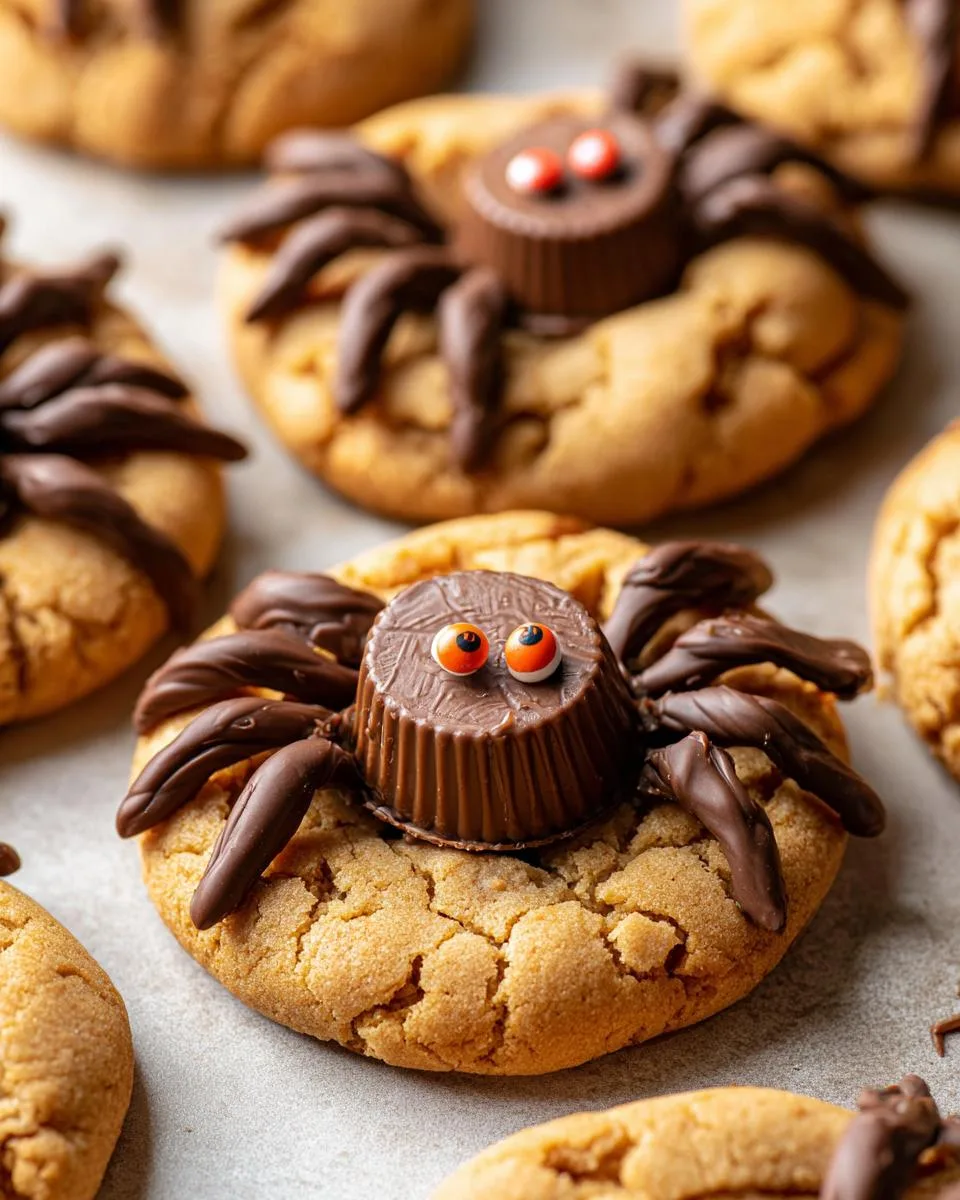
Table of Contents
Table of Contents
As a chef who lives for simple, comforting recipes, I can tell you these cookies check all the boxes. They combine everyone’s favorite peanut butter-chocolate combo with just enough spooky fun to make kids go wild. The best part? You probably have most of the ingredients in your pantry right now. No fancy decorating skills needed – just melt some chocolate, stick on candy eyes, and boom! You’ve got yourself a batch of adorable edible spiders that taste way better than they look (and trust me, they look pretty darn cute).
What I love most is how these bring families together in the kitchen. Last year, my nephew insisted on being the official “leg drawer” – his chocolate squiggles were hilariously uneven, but that’s what made them perfect. Whether you’re baking with kids or just want a festive treat for your Halloween party, these Spooky Peanut Butter Spider cookies are guaranteed to be a hit!
Why You’ll Love These Spooky Peanut Butter Spider Cookies
Let me count the ways these adorable cookies will steal your heart (and maybe give you a little Halloween fright!):
- Super simple to make – No fancy techniques here! If you can mix dough and melt chocolate, you’re golden.
- Kid-approved fun – Little hands love helping press in the Reese’s cups and draw those creepy-crawly legs.
- Party perfect – They disappear fast at Halloween gatherings (just like real spiders – poof!).
- Peanut butter dream – That creamy combo with chocolate? Absolute magic in every bite.
- Memory maker – My family still talks about our messy, chocolatey decorating sessions years later!
Seriously, what’s not to love? These cookies are equal parts delicious and delightful – just like Halloween should be!
Ingredients for Spooky Peanut Butter Spider Cookies
Here’s everything you’ll need to create these creepy-crawly treats – I promise it’s all simple stuff! Pro tip: measure everything out before you start. That way, you won’t be scrambling mid-baking (we’ve all been there!).
-
- ½ cup (113g) unsalted butter – 1 stick, room temperature (this is key for easy mixing!)
- ½ cup (107g) brown sugar – Pack it in there like you mean it
- ⅓ cup (66g) granulated sugar – Plus extra for rolling
- ¾ cup (201g) creamy peanut butter – Not natural – we need that smooth texture!
- 1 large egg – Crack it in a separate bowl first to avoid shells
- 1 tsp vanilla extract – The good stuff makes a difference
- 1 ½ cups (180g) all-purpose flour – Spoon and level to measure right
- 1 tsp baking soda
- ½ tsp salt – Balances all that sweetness perfectly
- 24 mini Reese’s Peanut Butter Cups – Unwrapped and ready to freeze
- ½ cup (85g) semi-sweet chocolate chips – For those spidery legs
- Candy eye balls – About 48 (the googly-er, the better!)
See? Nothing too scary in this ingredient list – just good, simple baking staples with a few fun Halloween touches. Now let’s make some spider magic!
Equipment You’ll Need
Gather these trusty tools before diving in – nothing fancy, just the basics that make baking these Spooky Peanut Butter Spider cookies a breeze! Here’s what you’ll be reaching for:
- Large mixing bowl (my favorite well-loved one works perfectly)
- Baking sheets (lined with parchment or silicone mats)
- Microwave-safe bowl for melting chocolate
- Wooden spoon or spatula (for that satisfying dough mixing)
- Measuring cups and spoons
- Cookie scoop or tablespoon (for evenly sized spider bodies)
That’s it! No special gadgets required – just good ol’ reliable kitchen helpers.
How to Make Spooky Peanut Butter Spider Cookies
Alright, let’s get these spooky little guys crawling into your oven! I’ve broken it down into simple steps – trust me, even if you’re not a baker, you’ve got this. Just follow along and before you know it, you’ll have a whole army of edible spiders!
Step 1: Prepare the Reese’s Cups
First things first – unwrap about 24 mini Reese’s cups and pop them in the freezer for 15 minutes. This is my secret weapon! Freezing helps them keep their perfect cup shape when we press them into the warm cookies later. While they’re chilling, go ahead and preheat your oven to 350°F.
Step 2: Make the Cookie Dough
Now for the fun part! In your mixing bowl, beat together the butter, brown sugar, and granulated sugar until it’s nice and fluffy – about 1 minute should do it. Add in the peanut butter, egg, and vanilla, and mix just until combined. Here’s my tip: don’t overbeat after adding the egg or your cookies might spread too much.
Next, add all your dry ingredients – flour, baking soda, baking powder, and salt. I like to mix these in by hand with a spatula just until no flour streaks remain. The dough should be soft but not sticky – perfect for rolling!
Step 3: Bake and Assemble the Spooky Peanut Butter Spider Cookies
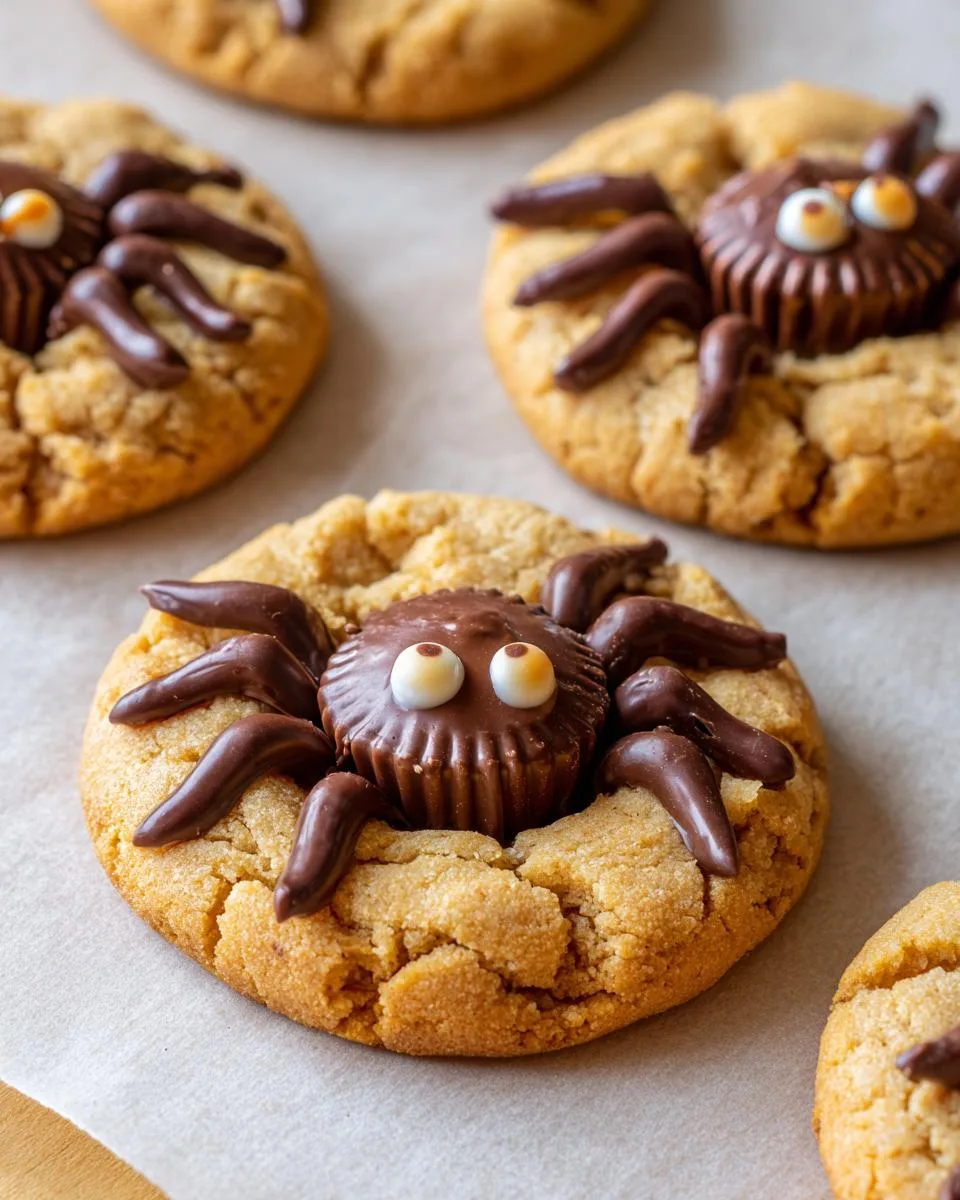
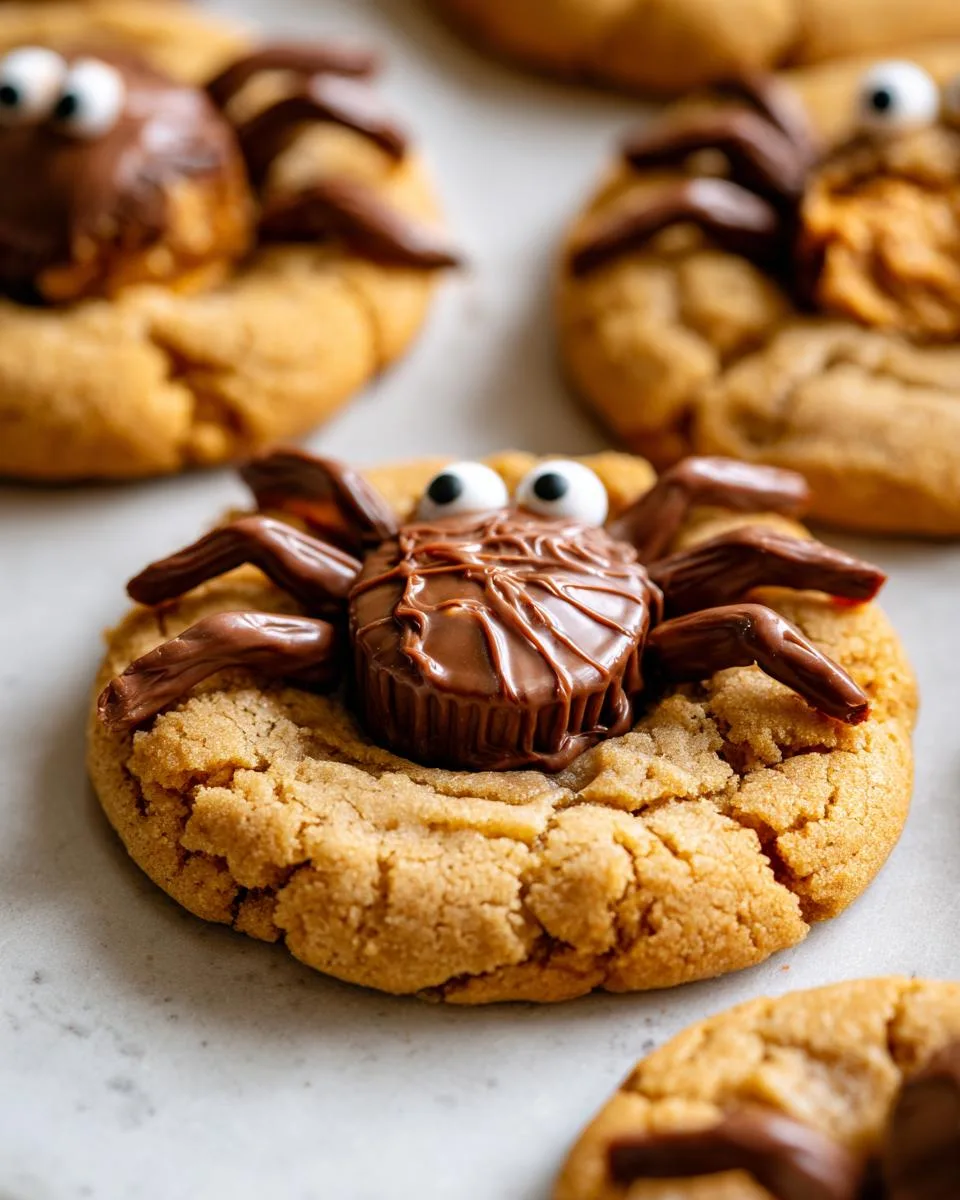
Roll tablespoon-sized dough balls between your palms, then roll them in granulated sugar for that extra sparkle (and crunch!). Place them on your lined baking sheet about 2 inches apart – these babies will spread! Bake for 8-11 minutes until the edges are lightly golden and cracked.
Here comes the magic: as soon as the cookies come out of the oven, gently press a frozen Reese’s cup into the center of each one. Let them cool completely on the baking sheet – about 15-20 minutes – before moving them or they might break!
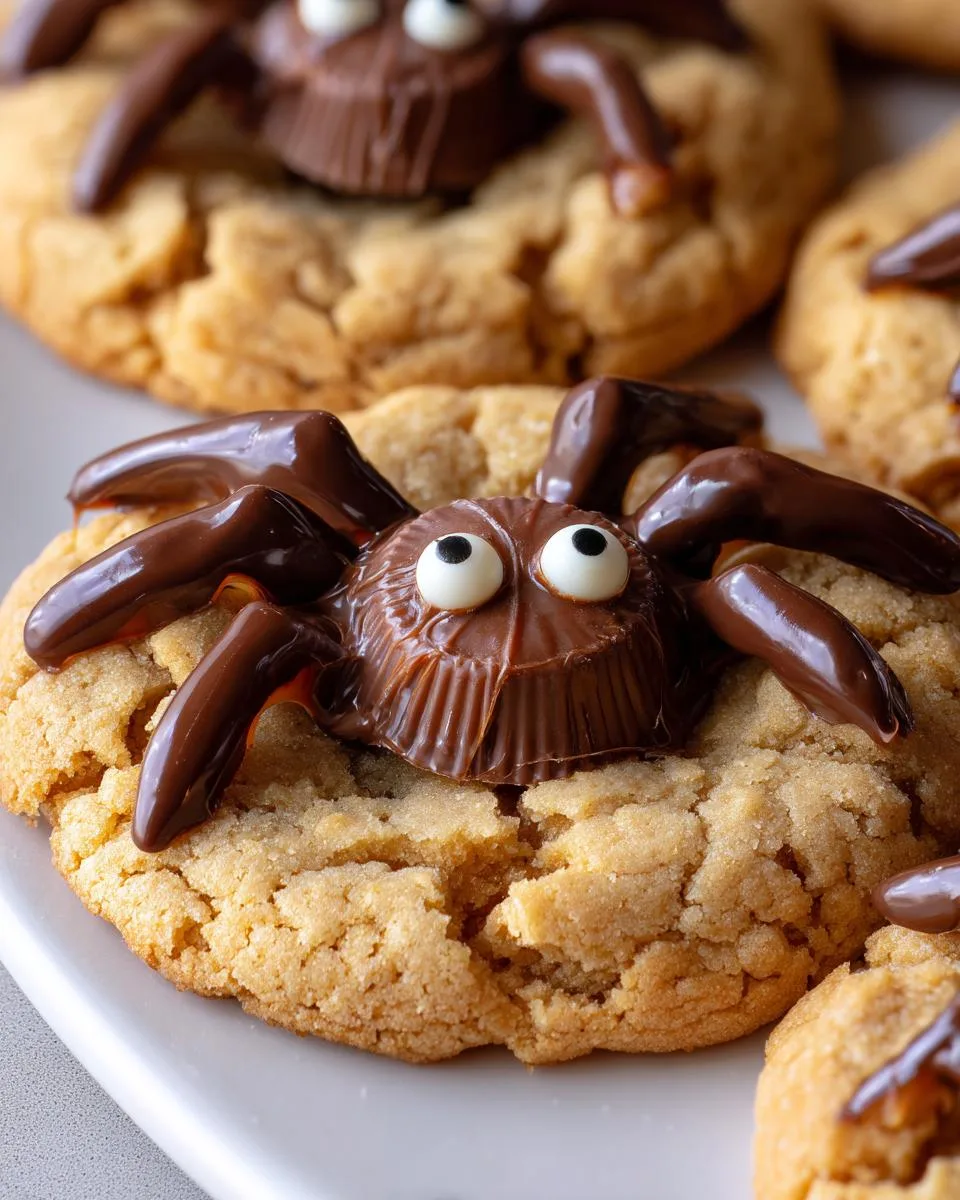
For the grand finale, melt your chocolate chips in the microwave at 50% power, stirring every minute until smooth. Use a spoon or piping bag to draw 4 legs on each side of the Reese’s cup. Finally, dab a tiny bit of melted chocolate on the back of candy eyes and stick them on. Voila! Your Spooky Peanut Butter Spider cookies are ready to crawl straight into everyone’s hearts!
Print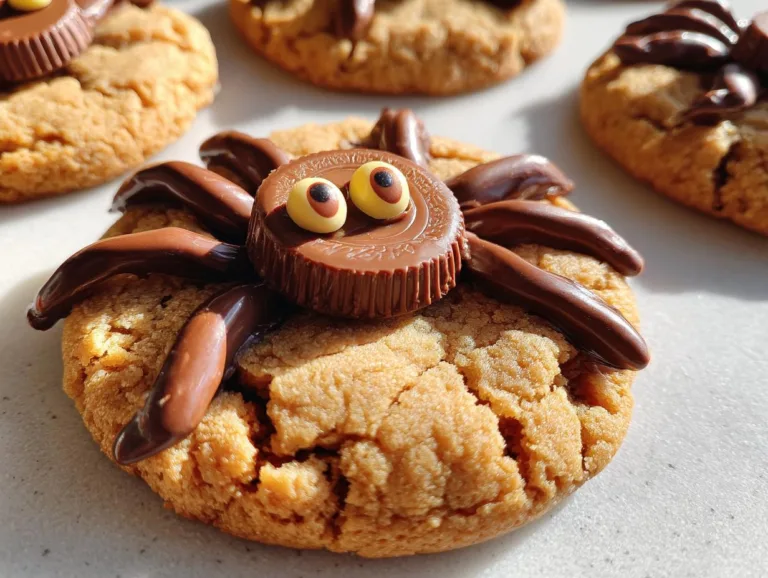
13 Easy Spooky Peanut Butter Spider Cookies Kids Will Devour
These Spooky Peanut Butter Spider cookies are a fun and delicious treat perfect for Halloween. They combine the rich flavors of peanut butter and chocolate with a playful spider design.
- Total Time: 30 minutes
- Yield: 24 cookies 1x
Ingredients
- ½ cup (113g) unsalted butter, 1 stick, room temperature
- ½ cup (107g) brown sugar
- ⅓ cup (66g) granulated sugar
- ¾ cup (201g) creamy peanut butter, not natural
- 1 large egg
- 1 tsp vanilla extract
- 1 ½ cups (180g) all purpose flour
- 1 tsp baking soda
- ½ tsp baking powder
- ½ tsp salt
- Granulated sugar, for rolling the cookies
- Mini Reese’s Peanut Butter Cups
- ½ cup (85g) semi-sweet chocolate chips, for melting
- Candy eye balls
Instructions
- Unwrap about 24 mini Reese’s cups, place in a bowl, and freeze to help them maintain shape.
- Preheat the oven to 350ºF.
- In a mixing bowl, combine butter, brown sugar, and granulated sugar. Beat for 1 minute until smooth and fluffy.
- Add peanut butter, egg, and vanilla extract. Beat again for less than 1 minute.
- Add flour, baking soda, baking powder, and salt. Mix on low or with a spatula just until combined.
- Form tablespoon-sized dough balls, roll in granulated sugar, and place on a lined baking sheet.
- Bake for 8-11 minutes until edges crack and turn golden.
- Press a mini Reese’s cup into the center of each cookie. Cool for 15-20 minutes before moving.
- Melt chocolate chips in a microwave, stirring every minute at 50% power.
- Use melted chocolate to draw 4 legs on each side of the cookies.
- Attach candy eyes to the Reese’s cup with melted chocolate. Let set before serving.
Notes
- Freezing Reese’s cups helps them hold their shape.
- Do not overmix the dough to keep cookies tender.
- Allow cookies to cool before moving to prevent sinking.
- Prep Time: 20 minutes
- Cook Time: 10 minutes
- Category: Dessert
- Method: Baking
- Cuisine: American
- Diet: Vegetarian
Nutrition
- Serving Size: 1 cookie
- Calories: 150
- Sugar: 12g
- Sodium: 100mg
- Fat: 8g
- Saturated Fat: 3g
- Unsaturated Fat: 4g
- Trans Fat: 0g
- Carbohydrates: 18g
- Fiber: 1g
- Protein: 3g
- Cholesterol: 15mg
Tips for Perfect Spooky Peanut Butter Spider Cookies
After making these cookies more times than I can count (and learning from all my mistakes!), here are my foolproof tips for spider cookie success:
- Freeze those Reese’s cups! Seriously, don’t skip this – it keeps them from melting into a puddle when you press them into warm cookies.
- Watch the bake time – Pull them out when edges are just golden. They’ll continue cooking on the sheet (overbaked spiders are sad spiders).
- Let cookies cool completely before decorating or you’ll smudge those perfect chocolate legs everywhere.
- Microwave chocolate in short bursts – Burnt chocolate smells awful and ruins the spooky vibe.
- Have extra candy eyes – Little fingers tend to “accidentally” eat them before they make it onto the cookies!
Follow these simple tricks and your Spooky Peanut Butter Spider cookies will turn out picture-perfect every time!
Variations for Spooky Peanut Butter Spider Cookies
Want to put your own spin on these creepy-crawly treats? Here are some fun ideas I’ve tried (and loved!):
- Dark chocolate lovers – Swap semi-sweet chips for dark chocolate when making the legs – extra rich and spooky!
- Halloween sprinkles – Roll dough balls in orange and black sprinkles instead of sugar for festive crunch.
- Nut-free version – Use sunflower seed butter and chocolate-covered sunflower seeds instead of peanut butter and Reese’s cups.
Get creative – that’s half the Halloween fun!
How to Store Spooky Peanut Butter Spider Cookies
These little spiders keep surprisingly well! Just pop them in an airtight container with parchment between layers – they’ll stay fresh at room temperature for up to 5 days. The chocolate legs might soften a bit, but honestly? They disappear way before that in my house! Pro tip: don’t refrigerate or the cookies will dry out.
Nutritional Information
Here’s the scoop on what’s in these Spooky Peanut Butter Spider cookies – but remember, these are just estimates! Actual numbers can change depending on the exact ingredients and brands you use. Each creepy-crawly cookie comes in at about:
- 150 calories
- 8g fat (3g saturated)
- 18g carbs
- 12g sugar
- 3g protein
Not too scary, right? Just enough sweetness to satisfy your Halloween cravings without going overboard. Now go enjoy your edible spiders guilt-free!
Frequently Asked Questions
Over the years, I’ve gotten all sorts of questions about these Spooky Peanut Butter Spider cookies – here are the ones that pop up most often (and my tried-and-true answers!):
Can I use natural peanut butter instead?
Oh gosh, I don’t recommend it! Natural peanut butter tends to be oilier and can make your cookies spread too much. The stabilized kind gives that perfect chewy texture we love. If you must use natural, drain off excess oil and maybe add a tablespoon more flour.
How long do these Halloween cookies stay fresh?
They’re best within 3 days (if they last that long!), but will keep in an airtight container for up to 5 days. The chocolate legs might soften a bit over time, but they’ll still taste amazing!
Can I make the dough ahead?
Absolutely! The dough balls freeze beautifully for up to 3 months – just thaw for 30 minutes before baking. But don’t freeze already-assembled spiders – the decorations won’t survive.
My chocolate legs keep breaking – help!
Try piping slightly thicker legs and letting them set completely before moving the cookies. If your kitchen’s warm, pop them in the fridge for 10 minutes to speed up setting.
Got more questions? Drop them in the comments – I love helping troubleshoot baking adventures!
For More recipes, Follow me on Facebook!