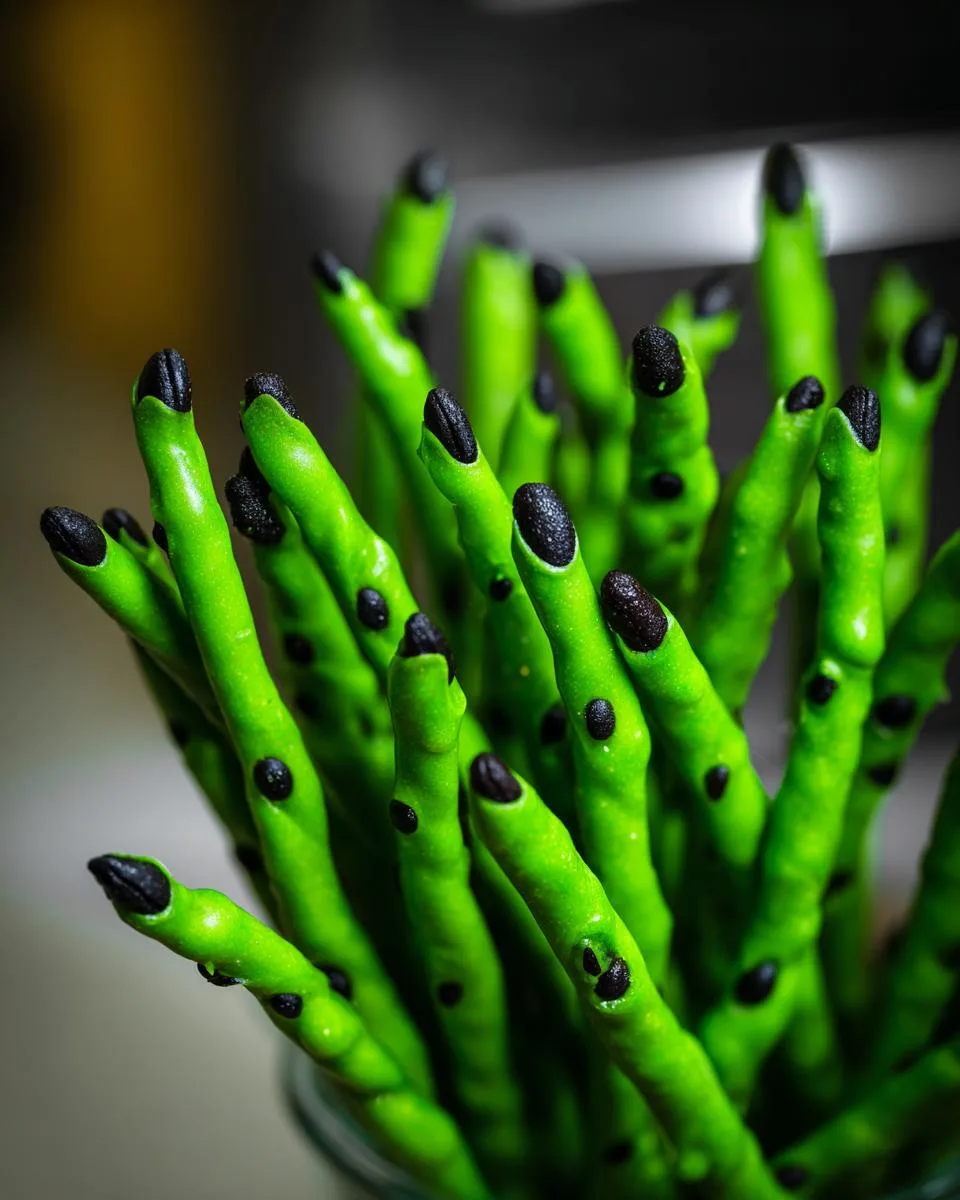
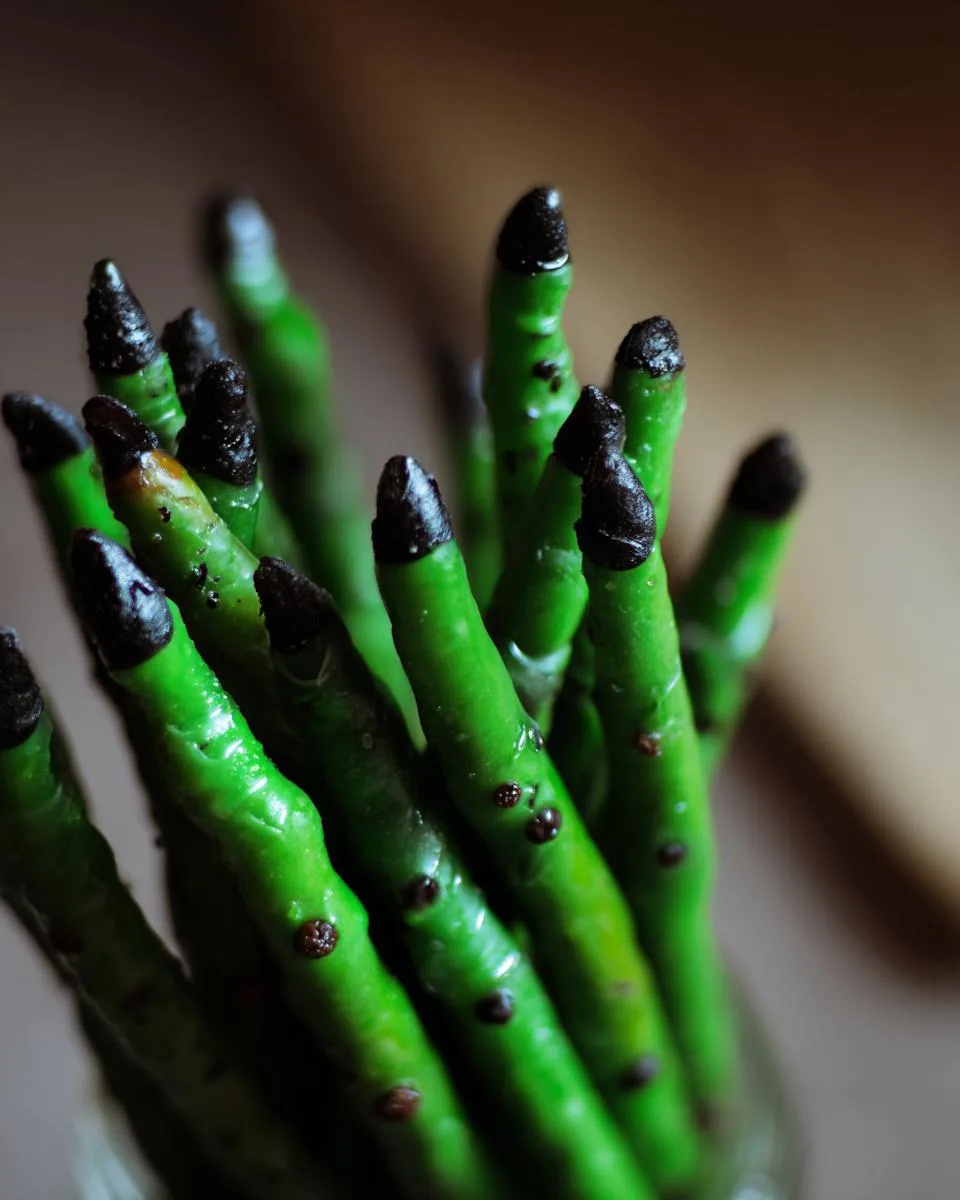
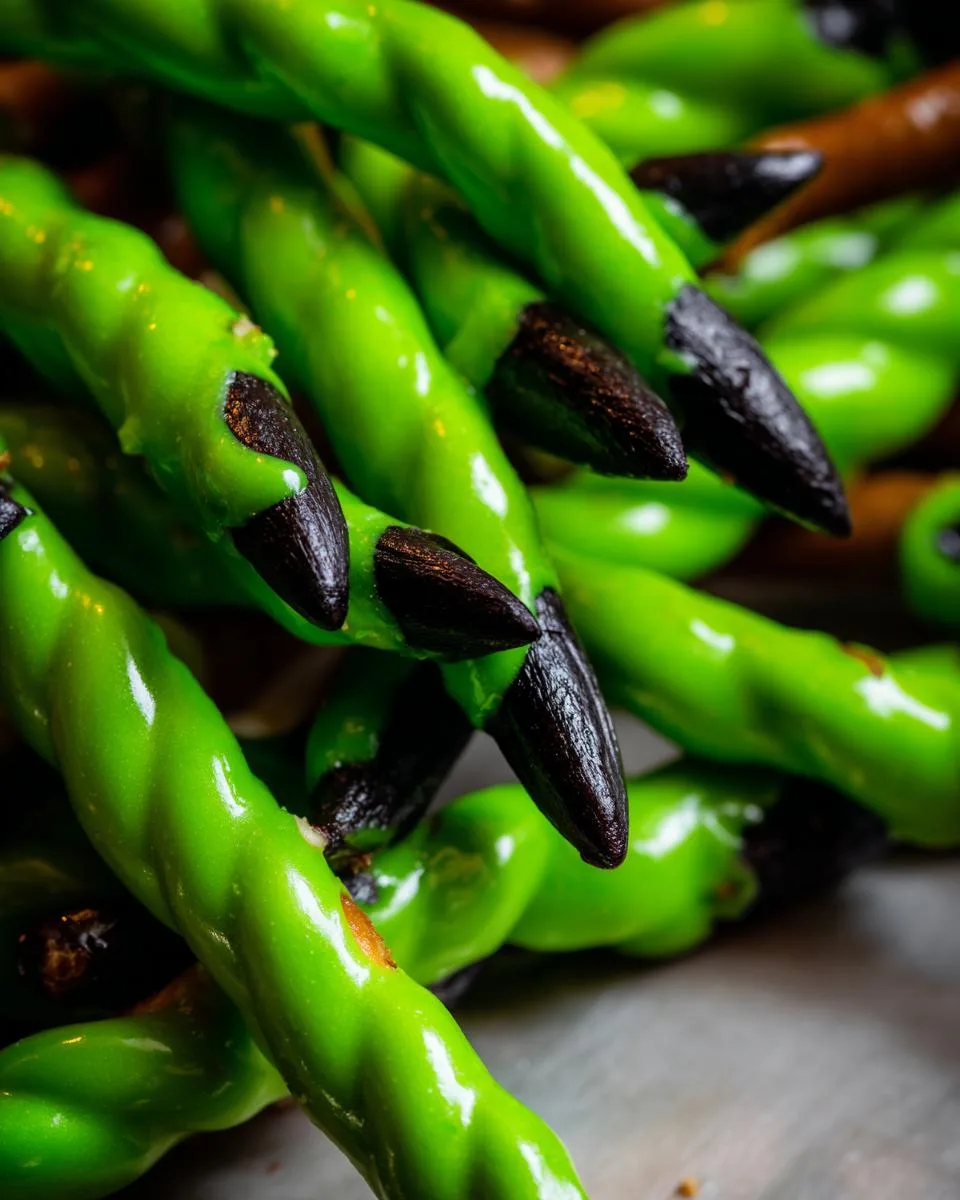
Halloween is my favorite time to get creative in the kitchen, and these Witch Finger Pretzels are the perfect blend of creepy and delicious! Picture this: crunchy pretzel rods dipped in vibrant green candy coating, topped with almond “nails” painted black. They’re so simple to make, yet they always steal the show at parties. Trust me, nothing gets more “oohs” and “ahhs” than a tray of these spooky fingers poking out from a bowl!

I love recipes like this that bring people together with a mix of fun and flavor. You don’t need fancy skills or hours in the kitchen—just a few basic ingredients and a little creativity. Whether you’re prepping for a Halloween bash or just want to surprise the kids with something special, these Witch Finger Pretzels are my go-to treat every October.
Table of Contents
Table of Contents
Why You’ll Love These Witch Finger Pretzels
These creepy-crawly treats check all the boxes for Halloween fun:
- Super quick – You’ll have a batch ready in under 20 minutes (perfect for last-minute party prep!)
- No oven needed – Just melt, dip, and decorate – even kids can help with this one
- Total crowd-pleaser – The dramatic presentation always gets laughs and Instagram snaps
- Customizable – Make them extra spooky with different colored “nails” or coatings
Seriously, they’re so easy and fun that I make them every year – sometimes just because they make me giggle when I open the snack cabinet!
Witch Finger Pretzels Ingredients
Here’s what you’ll need to make these delightfully creepy treats:
- 28 blanched almonds – Look for the ones with the skins already removed
- 1 tube black gel food coloring – The gel type works better than liquid for this
- 14 large pretzel rods – Go for the thickest ones you can find – they make the best fingers!
- 12 ounces bright-green candy coating – I like the neon green for extra spooky effect
Quick tip: Grab some food-safe gloves before you start – that black food coloring stains like crazy (learned that the hard way my first Halloween making these!).
How to Make Witch Finger Pretzels
Okay, let’s get to the fun part – turning ordinary ingredients into creepy witch fingers that’ll have everyone talking! Follow these simple steps and you’ll have a spooky snack platter ready in no time.
Step 1: Prepare the Almond Nails
First, lay out some wax paper on your work surface (this will be your drying station). Using a food-safe brush – or even a toothpick if you’re careful – paint the rounded end of each almond with black gel food coloring. Trust me, wear gloves unless you want Halloween hands for days! Let them dry completely while you prep the rest.
Step 2: Coat the Pretzel Rods
Break each pretzel rod in half – the uneven break makes them look more like gnarly fingers! Now melt your green candy coating in 30-second intervals, stirring between each burst in the microwave. When it’s smooth, dip each pretzel piece about three-quarters of the way up, leaving space at the top for your “nail.” Let the excess drip off before placing them on fresh wax paper.
Step 3: Assemble the Witch Fingers
Here’s where the magic happens! While the coating is still tacky (work quickly!), press a blackened almond onto the undipped end of each pretzel at a slight angle – just like a real fingernail. Give it a gentle wiggle to make sure it sticks, then step back and admire your creepy creations!
Print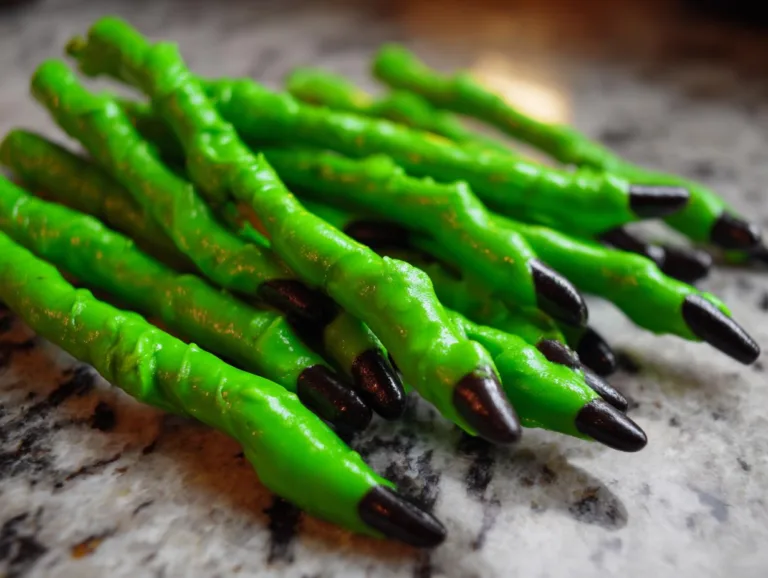
25-Minute Witch Finger Pretzels: Spooky Fun Will Haunt Your Tastebuds
Witch Finger Pretzels are a fun and spooky Halloween treat. They are easy to make with pretzel rods, green candy coating, and almond nails for a creepy effect.
- Total Time: 20 minutes
- Yield: 28 witch fingers 1x
Ingredients
- 28 blanched almonds
- 1 tube black gel food coloring
- 14 large pretzel rods
- 12 ounces bright-green candy coating
Instructions
- Gather the ingredients.
- Paint the top of each almond with black gel food coloring using a food-safe brush. Let dry on waxed paper.
- Break or cut each pretzel rod in half.
- Melt the green candy coating in a microwave-safe bowl in 30-second intervals, stirring until smooth.
- Dip each pretzel rod into the melted coating, leaving a 1/2-inch undipped section at the top.
- Place the coated pretzels on waxed paper and press a black almond onto the tip of each to create a fingernail.
- Let set before serving.
Notes
- Wear food-safe gloves to avoid staining your fingers black.
- Store in an airtight container to keep fresh.
- Prep Time: 15 minutes
- Cook Time: 5 minutes
- Category: Dessert
- Method: No-Bake
- Cuisine: American
- Diet: Vegetarian
Nutrition
- Serving Size: 1 witch finger
- Calories: 80
- Sugar: 6g
- Sodium: 45mg
- Fat: 4g
- Saturated Fat: 2g
- Unsaturated Fat: 1g
- Trans Fat: 0g
- Carbohydrates: 10g
- Fiber: 1g
- Protein: 1g
- Cholesterol: 0mg
Tips for Perfect Witch Finger Pretzels
After making these spooky treats for years, I’ve picked up some tricks to guarantee your Witch Finger Pretzels turn out perfectly creepy every time:
- Parchment is your best friend – It prevents sticking way better than wax paper when the coating sets
- Work fast with the melted coating – It hardens quickly, so assemble your fingers in small batches
- Keep your almond nails handy – Have them prepped and lined up before you start dipping
- Store them airtight – A container with a tight seal keeps them fresh (and keeps dust off those creepy nails!)
One more thing – if your coating gets too thick, a tiny bit of vegetable oil helps smooth it back to perfect dipping consistency!
Witch Finger Pretzels Variations
Don’t stop at green! These creepy fingers are perfect for experimenting:
- Zombie fingers – Use white candy coating and add “blood” streaks with red icing
- Vampire nails – Paint almond tips deep red for a bloody effect
- Glow-in-the-dark – Mix edible glow powder into your coating for party wow factor
The possibilities are endless – just let your Halloween imagination run wild!
Storing and Serving Witch Finger Pretzels
Pop these creepy fingers in an airtight container – they’ll stay fresh and crispy for 3-4 days (if they last that long!). For parties, I love arranging them crawling out of a “graveyard” made from crumbled chocolate cookies, or poking through a bowl of candy eyeballs for extra spooky fun. Pro tip: lay them on their sides in the container to avoid snapping those delicate almond nails!
Witch Finger Pretzels Nutritional Information
Just so you know – these nutrition facts are estimates per witch finger (because who can eat just one?): 80 calories, 6g sugar, and 45mg sodium. They’re vegetarian-friendly and totally worth every spooky bite!
FAQs About Witch Finger Pretzels
Got questions about these creepy treats? I’ve answered the most common ones below:
- Can I use milk chocolate instead of candy coating? Absolutely! Just temper it properly so your witch fingers don’t melt at room temperature. Dark chocolate works great too for extra spooky contrast.
- How do I prevent the coating from cracking? The key is working quickly while the coating is warm and letting them set completely before moving. A tiny bit of vegetable oil mixed into the coating helps too!
- Are these gluten-free? They can be! Just swap regular pretzels for gluten-free rods (I’ve found great ones made from almond flour that work perfectly).
- Can I make these ahead of time? You bet – they keep beautifully for 3-4 days stored properly. The almond nails might lose a little shine, but they’ll still taste deliciously creepy!
For More recipes, Follow me on Facebook!