Oh my goodness, let me tell you about these Crack Chicken Sliders – they’re the kind of dish that disappears before you can even say “seconds please!” I’m Martavia, and after years in the kitchen, I can promise you this recipe is foolproof. It’s my go-to when I need something quick but impressive, whether it’s game day with friends or just a cozy family dinner.

Table of Contents
Table of Contents
What makes these sliders so special? Imagine tender chicken and crispy bacon swimming in the creamiest ranch-infused sauce, all hugged by soft Hawaiian rolls with that perfect golden top. The best part? You probably have most ingredients already! I’ve made these dozens of times, and they never fail to get those “wow” reactions. Trust me, once you try them, you’ll understand why we call them “crack” chicken – they’re just that addictive!
Why You’ll Love These Crack Chicken Sliders
Listen, I don’t throw around the word “perfect” lightly, but these sliders? They check every box. Here’s why they’ve become my secret weapon:
- Crazy easy – From fridge to table in 40 minutes flat (most of that’s hands-off baking time!)
- Flavor bombs – That creamy ranch-chicken-bacon combo? Absolute magic. Even picky eaters beg for thirds.
- Party MVP – One batch feeds a crowd, and they’re equally at home on game day or at a bridal shower.
- Leftover wizardry – Rotisserie chicken transforms into something extraordinary (no one will guess it’s a shortcut!).
- Customizable – Swap cheeses, add jalapeños, or go light on ranch – they’re forgiving like that.
Seriously, these sliders have saved me during last-minute potlucks more times than I can count. The first time I made them, my neighbor texted me for the recipe before she’d even finished chewing!
Ingredients for Crack Chicken Sliders
Okay, let’s talk ingredients – and I mean the good stuff. These measurements matter, especially that ranch seasoning (trust me, I learned the hard way after dumping in a whole container once – oops!).
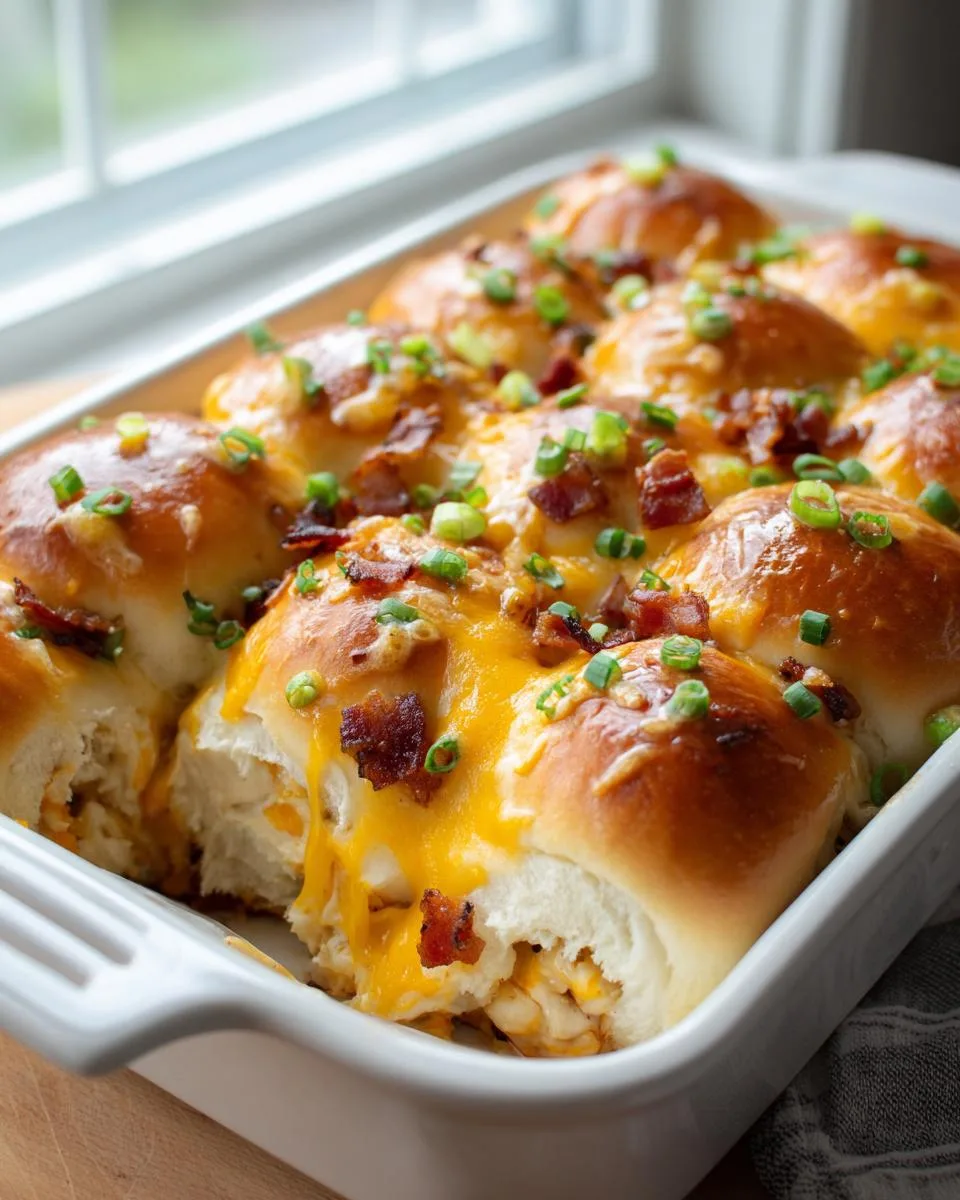
Here’s exactly what you’ll need:
- 6 slices thick-cut bacon – We’ll bake it until crisp and chop it (none of that floppy microwave bacon!)
- 8 oz cream cheese – Cubed small so it melts evenly (full-fat works best here, no skimping!)
- ¼ cup chicken broth – The secret to keeping our filling creamy without being gloppy
- 1 packet (1 oz) ranch dressing mix – That powdered gold that makes these sliders legendary
- 2 cups cooked chicken – Shredded rotisserie chicken is my lazy-day hero
- 1½ cups sharp cheddar – Freshly shredded (the pre-shredded stuff just doesn’t melt as dreamily)
- ¼ cup green onions – Thinly sliced for that pop of color and freshness
- 12 Hawaiian rolls – Their sweetness balances the savory filling perfectly
- 2 tbsp melted butter + ½ tsp minced garlic – For that golden, garlicky brush on top
- 1 tsp Parmesan + 1 tbsp chives – The finishing touches that make them look bakery-fancy
See? Nothing weird or hard-to-find – just pantry staples transformed into something magical. Pro tip: Set your cream cheese out an hour early – it’ll blend smoother than my toddler’s excuses for not napping!
How to Make Crack Chicken Sliders
Alright, let’s get cooking! I’ve made these sliders so many times I could do it in my sleep, but I’ll walk you through each step carefully. Follow these instructions, and you’ll have golden, gooey perfection in no time.

Step 1: Cook the Bacon
First things first – we gotta get that bacon crispy! Preheat your oven to 425°F and line a baking sheet with foil (this makes cleanup a breeze). Lay out your 6 bacon slices in a single layer – no overlapping or they’ll stick together. Pop them in the oven for 15-20 minutes until they’re gloriously crisp.
Now, here’s the important part: let them cool completely before chopping! I’ve burned my fingers too many times rushing this step. Once cooled, chop into bite-sized pieces – about the size of chocolate chips.
Step 2: Prepare the Creamy Filling
Turn your oven down to 350°F now – we’ll need it soon. Grab a large pot and set it over medium heat. Add your cubed cream cheese, chicken broth, and that precious ranch packet. Now, here’s where patience pays off: whisk constantly as it melts.
At first it’ll look lumpy and weird (don’t panic!), but keep whisking until it’s smooth as silk – about 3-4 minutes. Once it’s creamy, stir in your chopped bacon, chicken, ½ cup of cheddar, and those pretty green onions. Give it a good mix – you’ll notice how the cheese makes it stretch beautifully. Turn off the heat.
Step 3: Assemble and Bake the Sliders
Time to build our masterpiece! Take your Hawaiian rolls and slice the whole package in half horizontally (like a giant sandwich). Place the bottom half on a baking sheet. Spread all that luscious chicken mixture evenly over the rolls – I like to use a spatula for this. Sprinkle the remaining 1 cup of cheddar over the top – go all the way to the edges!
Place the top halves of the rolls back on. Mix your melted butter with minced garlic and brush it generously over the tops – this gives that golden crunch. Finally, sprinkle with Parmesan and chives. Bake for 8-10 minutes until the cheese is bubbly and the tops are just kissed with gold. Let them cool for 5 minutes (I know, torture!) before slicing into individual sliders.
Print
40-Minute Crack Chicken Sliders That’ll Steal the Show
Crack Chicken Sliders are a delicious and easy-to-make dish perfect for any occasion. These sliders feature a creamy chicken and bacon filling topped with melted cheese and baked to perfection.
- Total Time: 40 minutes
- Yield: 12 sliders 1x
Ingredients
- 6 slices bacon
- 8 ounces cream cheese, cut into small pieces
- ¼ cup chicken broth
- 1 ounce ranch dressing mix (1 packet)
- 2 cups cooked chicken, chopped or shredded
- 1 ½ cups cheddar cheese, shredded
- ¼ cup green onion, thinly sliced
- 12 Hawaiian rolls
- 2 tablespoons butter, melted
- ½ teaspoon garlic, minced
- 1 teaspoon Parmesan cheese, grated
- 1 tablespoon chives, thinly sliced
Instructions
- Preheat oven to 425 degrees F. Lay bacon on a baking sheet lined with foil. Bake for 15-20 minutes until crispy. Remove from oven and let cool before chopping.
- Turn oven to 350 degrees F and place a large pot over medium heat.
- Add cream cheese, chicken broth, and ranch mix to the pot. Cook until cream cheese is melted and mixture is smooth, whisking often.
- Add bacon, chicken, 1/2 cup cheddar cheese, and green onions to cream cheese mixture. Stir to mix.
- Cut rolls in half so you have tops and bottoms. Place bottom half of rolls on a baking sheet.
- Spread chicken mixture over roll bottoms. Sprinkle with the remaining 1 cup cheddar over the filling. Top with the top half of the buns.
- Melt butter and stir in garlic. Brush over buns. Sprinkle Parmesan and chives over buns.
- Bake sliders for 8-10 mins until cheese is melty and tops are golden. Remove from oven. Cool slightly and then cut into 12 sliders before serving.
Notes
- Let bacon cool before chopping to avoid burning yourself.
- Use shredded rotisserie chicken for a quicker option.
- Prep Time: 15 minutes
- Cook Time: 25 minutes
- Category: Appetizer
- Method: Baking
- Cuisine: American
- Diet: Low Lactose
Nutrition
- Serving Size: 1 slider
- Calories: 280
- Sugar: 6g
- Sodium: 520mg
- Fat: 18g
- Saturated Fat: 9g
- Unsaturated Fat: 7g
- Trans Fat: 0g
- Carbohydrates: 18g
- Fiber: 1g
- Protein: 14g
- Cholesterol: 60mg
Pro Tips for Perfect Crack Chicken Sliders
Here’s the secrets that make these sliders foolproof (learned from my 3am kitchen experiments – no more dry sliders on my watch).
- Use rotisserie chicken – 3 cups is the Goldilocks amount (not too much, not too little)
- Spread the filling edge-to-edge – no naked bites (my first batch had sad, dry edges)
- Shred cheese by hand – the pre-shredded kind doesn’t melt as dreamily
- Let them rest 5 minutes – I know, but slicing hot = melty mess!
- Reheat leftovers in the oven – 350°F for 5 mins revives the magic
- Freeze extras between parchment – 2 months of future sliders on hand
- Double the garlic butter – garlic makes them next-level
- Serve with pickles – the tang cuts the richness
- Use a serrated knife – clean cuts through the layers
- Make ahead – assemble cold and bake when guests arrive
Pro tip: Rotisserie chicken saves 20 minutes – my lazy-day hack for when I’m too hungry to wait!
Ingredient Substitutions
No dairy? No problem – here’s the best swaps that work (learned when my lactose-intolerant friend asked for alternatives).
- Dairy-free:
- For cream cheese – 8 oz dairy-free cream cheese (Tofutti works)
- For cheddar – 1:1 dairy-free shreds (Daiya melts decently)
- Butter – olive oil (1:1 for butter)
- Lower-carb:
- Rolls – 1:1 cloud bread (1g net carbs)
- Ranch – 1 packet (hidden valley)
- Chicken – 1:1 rotisserie
- Spicy twist:
- Jalapeños – 1 tbsp (diced)
- Pepper jack – 1 cup (spicy swap)
- Hot sauce – 1 tsp
Pro tip: Dairy-free cream cheese needs 1 tbsp starch (tapioca helps it thicken) – no more grainy texture!
Serving Suggestions for Crack Chicken Sliders
Now, let’s talk about the perfect partners for these addictive sliders! I always serve them with a big bowl of dill pickles – that tangy crunch cuts through the richness like a dream. For parties, I set out a build-your-own slider bar with extras like:
- Crispy waffle fries (for dipping in that extra cheesy filling!)
- Cool, creamy coleslaw (my vinegar-based recipe balances the flavors)
- Spicy ranch dip (just mix hot sauce into sour cream)
- Sweet potato chips (for that salty-sweet contrast)
Pro tip: Set out small bowls of extra bacon bits and chives – let guests customize their sliders for maximum fun!
Storing and Reheating Crack Chicken Sliders
Okay, let’s talk leftovers (though I doubt you’ll have many!). These sliders keep beautifully if you play your cards right. Store them in an airtight container in the fridge for up to 3 days – but here’s my trick: wrap individual sliders in foil first to prevent dryness.
Need to freeze? Slide parchment between each slider before bagging – they’ll keep for 2 months! When reheating, skip the microwave (soggy buns = sad day). Instead, pop them in a 350°F oven for 5-7 minutes until the cheese gets all gooey again. That first bite? Just like fresh from the oven!
Crack Chicken Sliders FAQs
I’ve gotten so many questions about these sliders over the years – let me share the answers to the ones that pop up most often. Trust me, I’ve made every mistake so you don’t have to!
Can I assemble these sliders ahead of time?
Absolutely! In fact, I do this for parties all the time. Assemble everything (except the garlic butter topping), wrap tightly in foil, and refrigerate up to 24 hours. When ready, brush with butter and bake 10-12 minutes – they’ll taste freshly made!
Help! My cream cheese mixture is lumpy – what do I do?
Don’t panic! Remove from heat and whisk vigorously. If lumps persist, strain through a mesh sieve (I keep one handy just for this). Next time, cut cream cheese smaller and use room temp ingredients – makes all the difference.
Can I use something other than Hawaiian rolls?
Sure! Dinner rolls or slider buns work, but the sweetness of Hawaiian rolls balances the salty filling perfectly. For savory-only fans, try King’s Hawaiian Savory Butter rolls – they’re my new obsession!
How do I keep the bottoms from getting soggy?
Two tricks: 1) Don’t overfill (I measure exactly 1/3 cup per slider), and 2) Bake directly on the oven rack (no tray) for extra crispness. Learned this after one disastrous potluck!
Can I make these in a slow cooker?
Sort of! Cook the filling in the slow cooker (3 hours on low), but always assemble and bake separately. The rolls need that oven time to get golden – trust me, mushy sliders aren’t worth it!
Nutritional Information
Now, I’m no nutritionist, but here’s the scoop on what’s in these heavenly sliders (because I know someone’s always asking!). These values are per slider – but let’s be real, who stops at just one?
- Calories: 280 (worth every single one!)
- Fat: 18g (that’s where the flavor lives)
- Protein: 14g (chicken power!)
- Carbs: 18g (mostly from those sweet rolls)
Remember – these numbers are estimates based on my kitchen scale and calculator. Your exact counts might vary depending on brands and how generously you stuff those sliders! Now go enjoy without the guilt – life’s too short to skip the bacon. If you’re looking for more great recipes like this, check out my main recipes page!
Share Your Crack Chicken Sliders
I want to hear all about your slider adventures! Did you add a spicy twist? Maybe your family devoured them in record time? Snap a pic and tag me – nothing makes me happier than seeing your kitchen creations. Leave a rating below if these became your new obsession (I know they will!). Now go forth and spread the slider love!
For More recipes, Follow me on Facebook!