There’s something magical about the smell of chocolate cookies baking during the holidays, isn’t there? Every Christmas, my kitchen transforms into a cocoa-scented wonderland where these chocolate thumbprint cookies take center stage. I’ve been perfecting this recipe for years – ever since my grandma let me press my tiny thumbs into the dough as a kid. That indentation? It’s not just for looks – it cradles the richest ganache that’ll make your holiday guests swoon. Trust me, once you try these fudgy gems with their shiny chocolate centers, they’ll become your new must-make tradition too!
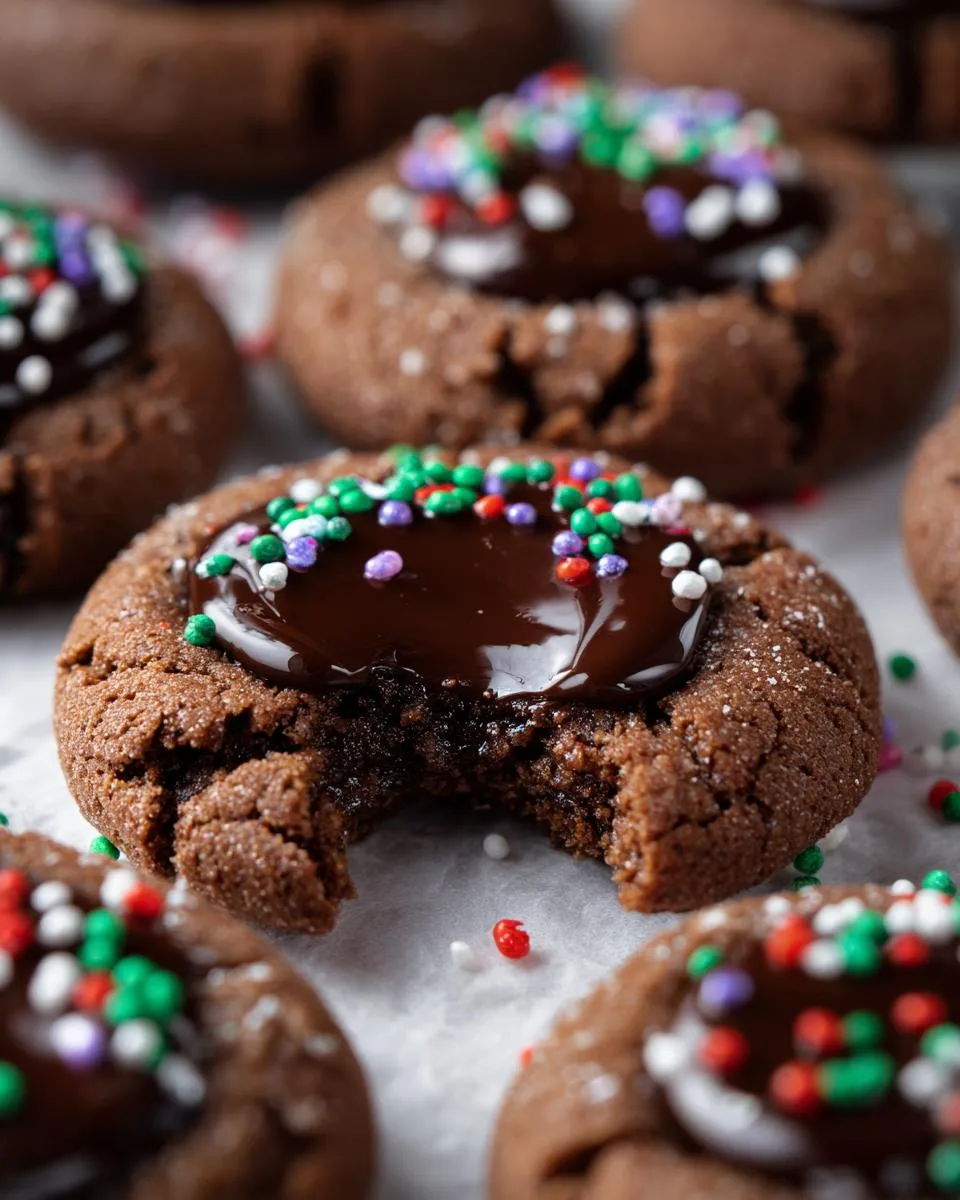
Table of Contents
Table of Contents
Why You’ll Love These Chocolate Thumbprint Christmas Cookies
Oh, where do I even start? These cookies are pure holiday magic in every bite! Here’s why they’ll become your new favorite:
- That deep chocolate flavor – Dutch process cocoa powder gives them an intense, almost brownie-like richness that regular cookies just can’t match
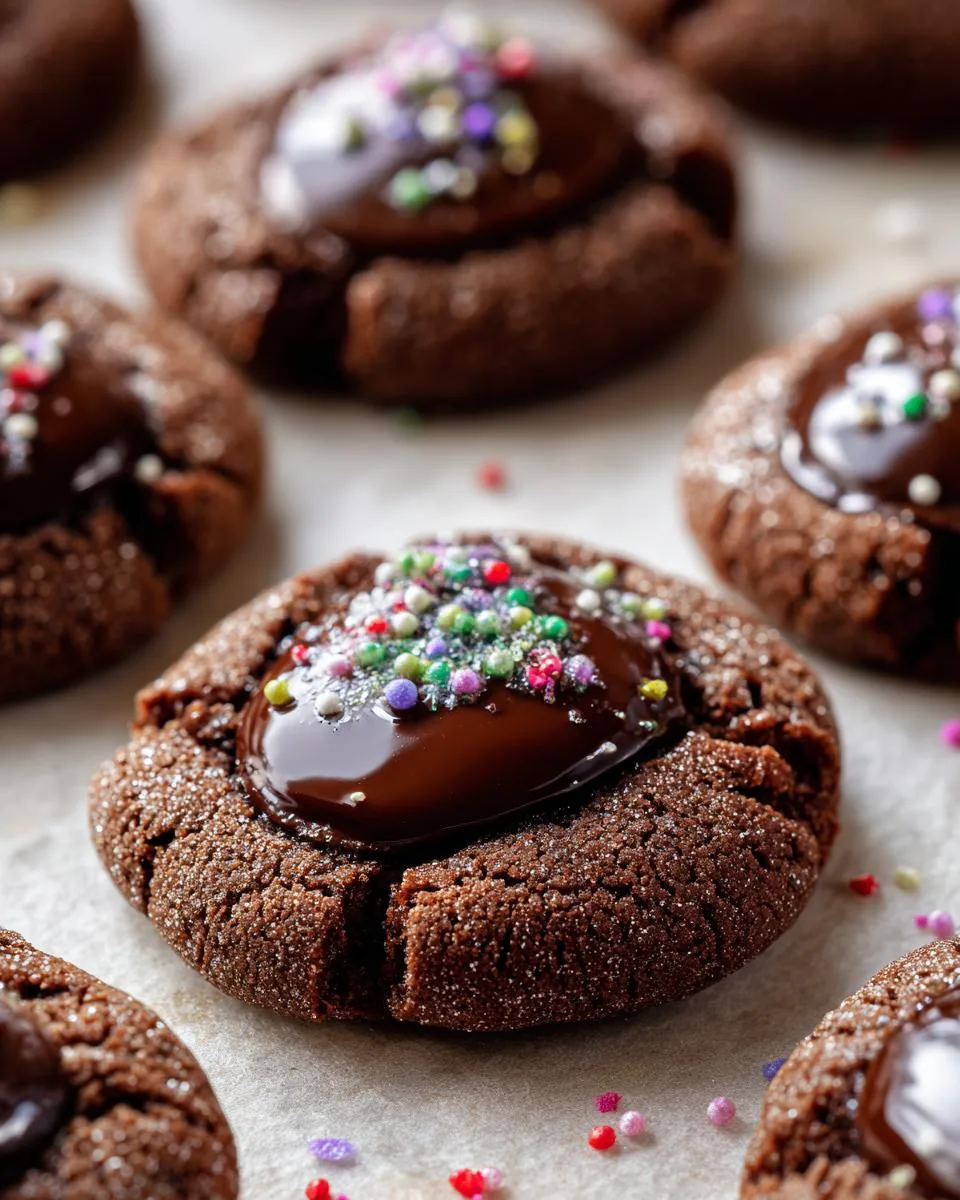
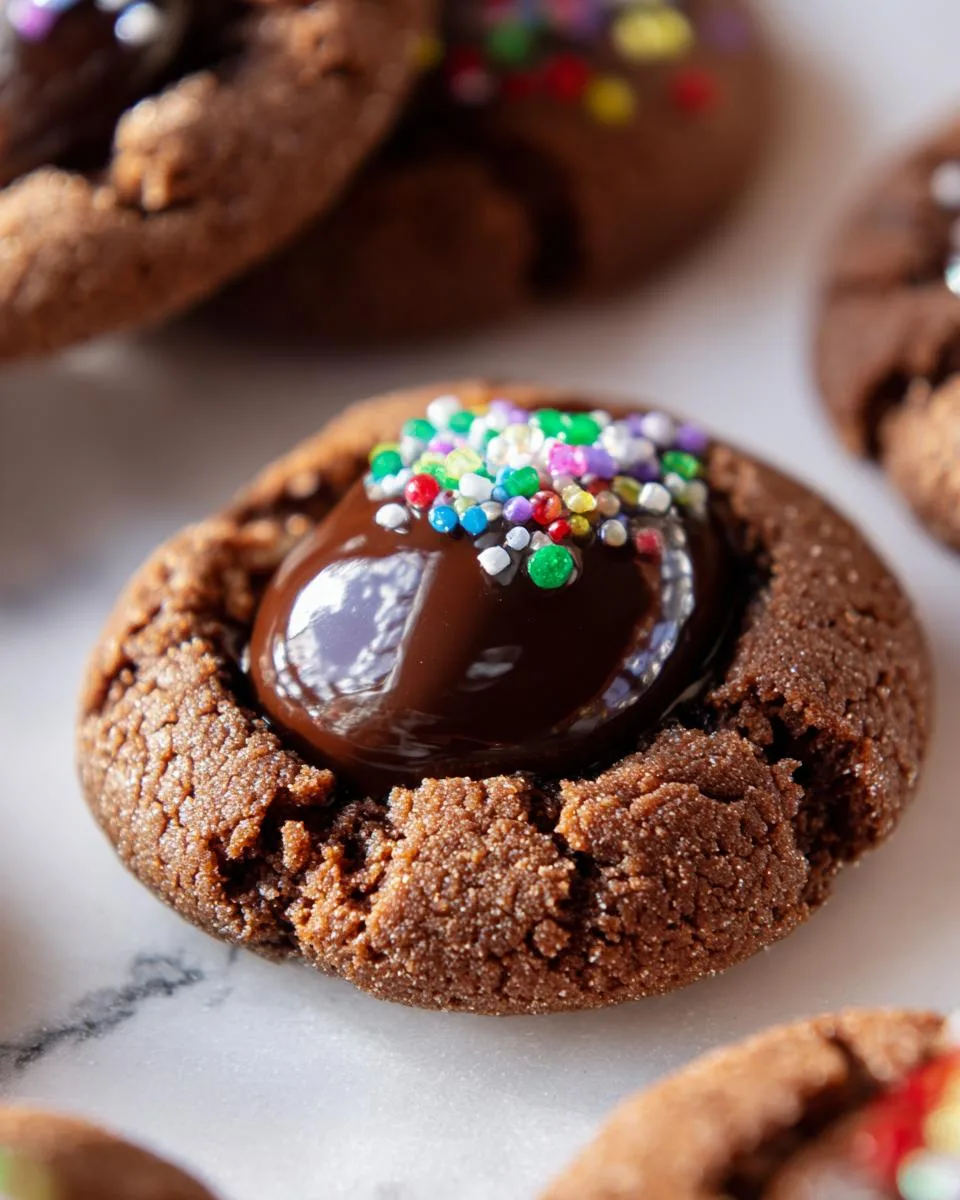
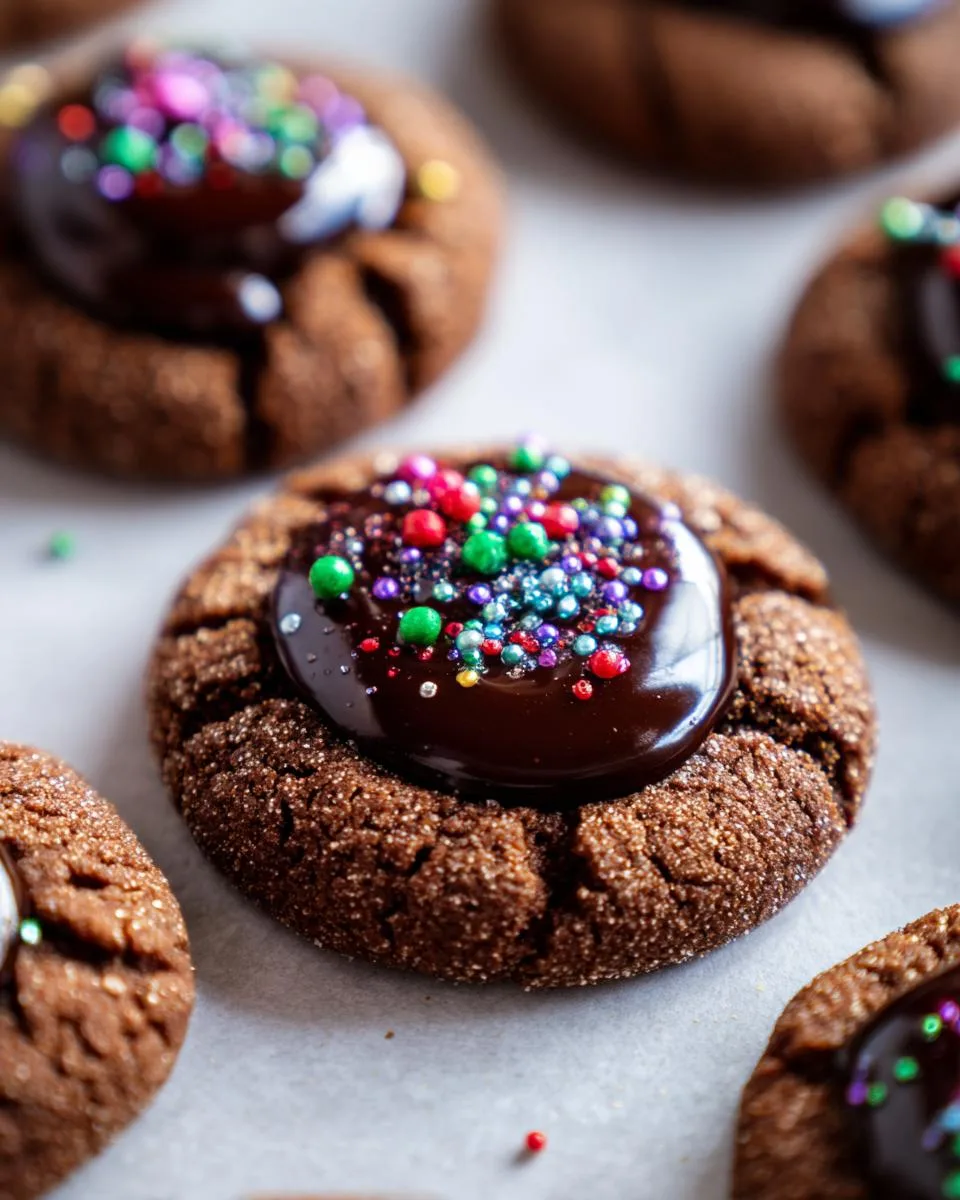
- They look like little edible presents – the glossy ganache centers sparkle with sprinkles, making them almost too pretty to eat (almost!)
- Surprisingly easy to make – no fancy piping or decorating skills needed, just press, bake, and fill
- The texture is perfection – crisp edges with a slightly chewy center that melts in your mouth
- They freeze beautifully – make them weeks ahead so you’re not stuck baking when guests arrive
Seriously, one taste and you’ll understand why my family fights over the last cookie every year!
Ingredients for Chocolate Thumbprint Christmas Cookies
Okay, let’s gather our cookie-making treasures! I’m super particular about ingredients – trust me, these little details make all the difference between good cookies and oh-my-goodness cookies. Here’s exactly what you’ll need:
- 1 1/2 cups (188 g) all-purpose flour – spooned and leveled, please! No scooping straight from the bag or you’ll end up with dry cookies
- 1/2 cup (40 g) Dutch process cocoa powder – this darker, richer cocoa is non-negotiable for that deep chocolate flavor
- 1/2 tsp salt – just enough to make the chocolate sing without tasting salty
- 1/2 tsp baking powder – our secret for cookies that stay thick and chewy
- 3/4 cup (168 g) unsalted butter – softened to that perfect “finger leaves an indent” stage (cold butter won’t cream right!)
- 3/4 cup (165 g) light brown sugar – packed firmly into the measuring cup for maximum moisture
- 1/4 cup (50 g) granulated white sugar – for that crisp edge we all love
- 2 egg yolks – at room temperature (save the whites for meringues!)
- 1 1/2 tsp vanilla bean paste or extract – the good stuff, none of that imitation flavoring
- 1 cup (200 g) semi-sweet chocolate chips – for the ganache (I like Ghirardelli or Guittard)
- 1/2 cup (120 ml) heavy whipping cream – the higher the fat content, the glossier your ganache
- Nonpareils for sprinkling – totally optional but so festive!
See? Nothing too crazy – just quality ingredients treated right. Now let me tell you why each one matters…
Equipment You’ll Need
Don’t worry – you won’t need any fancy gadgets for these cookies! Just grab these trusty kitchen staples (you probably have most already):
- 2 large mixing bowls – one for dry ingredients, one for creaming that butter and sugar
- Electric hand mixer or stand mixer – though a strong arm and wooden spoon will work in a pinch
- 2 baking sheets – no need to grease them if you use…
- Parchment paper – my secret for cookies that never stick (and easy cleanup!)
- 1/4 teaspoon measuring spoon – the perfect size for making those thumbprint indents
- Cookie scoop or tablespoon – for portioning uniform dough balls
- Wire cooling rack – because nobody likes soggy-bottomed cookies
- Small saucepan – just for heating the cream for the ganache
- Heatproof bowl – for melting the chocolate with the hot cream
That’s it! See? No special tools required – just the basics that make baking these little chocolate treasures a breeze. Now let’s get to the fun part…
How to Make Chocolate Thumbprint Christmas Cookies
Alright, let’s dive into the magic! These cookies come together in three simple but important steps – each one adding to that perfect texture and flavor. Follow along, and soon your kitchen will smell like Santa’s workshop!
Step 1: Prepare the Dough
First things first – let’s talk dry ingredients. Grab that bowl of flour, Dutch process cocoa, salt and baking powder you whisked together earlier. See how the cocoa makes it look like edible dirt? That’s the good stuff!
Now for the fun part – creaming the butter and sugars. Your softened butter should feel like cold buttercream when you press it. Toss it in the bowl with the brown and white sugars, then beat them for a full 2 minutes with your mixer. Don’t skimp! This step creates those tiny air pockets that make our cookies light yet rich.
Next, add those room-temperature egg yolks one at a time. Cold yolks straight from the fridge? They’ll make your batter curdle – and nobody wants that. A splash of vanilla goes in last, filling your kitchen with that warm, sweet scent.
Now slowly mix in your dry ingredients just until the dough comes together. It should look like thick chocolate frosting – sticky but not wet. If it seems too soft, don’t panic! That’s exactly what we want before chilling.
Step 2: Shape and Chill the Cookies
Here’s where those perfect little thumbprints take shape! Scoop the dough into 34 little balls – about 1 tablespoon each. I use my trusty #40 cookie scoop because uniform size means even baking, but a spoon works too.
Now for the signature move! Take that 1/4 teaspoon and press gently into each ball to make an indent. Don’t go all the way through – leave a little base so the ganache doesn’t leak out later. The dough might crack a bit – just smooth it with your fingers.
Pop those beauties on parchment-lined baking sheets and into the fridge they go for at least 1 hour. I know – waiting is hard! But this chill time is crucial. It prevents spreading so our cookies stay thick and our thumbprints stay perfect.
Step 3: Bake and Fill with Ganache
Time to bake! Preheat your oven to 350°F while the cookies chill. When ready, bake them for 9-11 minutes – they’ll look slightly puffed and dry on top when done. Here’s a pro tip: the second they come out, use that 1/4 teaspoon to gently re-press any indents that puffed up. This ensures perfect little wells for our ganache!
Let cookies cool on the sheets for 5 minutes – they’ll firm up – then transfer to racks. While they cool, make the ganache: heat cream until just simmering, pour over chocolate chips, let sit 1 minute, then stir until smooth and glossy. So simple, yet so decadent!
Once cookies are completely cool, spoon or pipe that luscious ganache into each indent. Top with sprinkles if you’re feeling festive, then let them set for 10-15 minutes. The hardest part? Waiting to eat them!
Print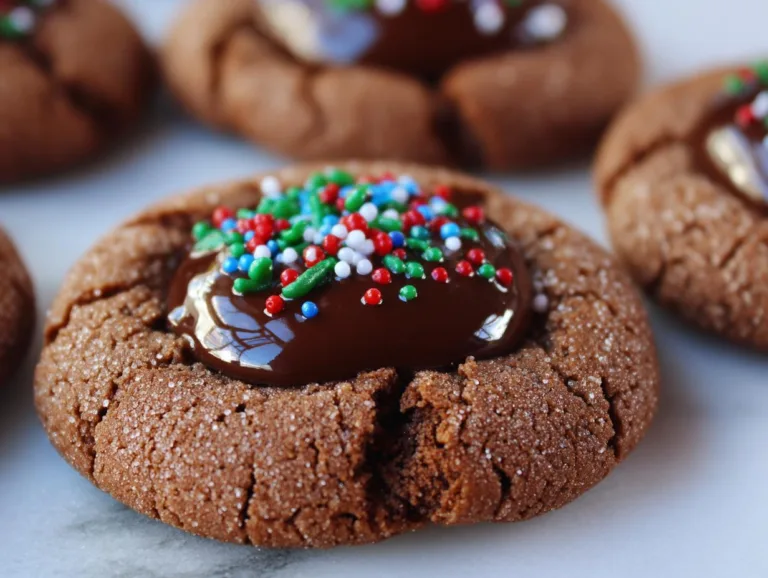
Chocolate Thumbprint Christmas Cookies in 3 Easy Steps
Delicious chocolate thumbprint cookies filled with rich ganache, perfect for holiday celebrations.
- Total Time: 1 hour 40 minutes (includes chilling)
- Yield: 34 cookies 1x
Ingredients
- 1 1/2 cups (188 g) all-purpose flour, spooned and leveled
- 1/2 cup (40 g) cocoa powder, Dutch process
- 1/2 tsp salt
- 1/2 tsp baking powder
- 3/4 cup (168 g) unsalted butter, softened
- 3/4 cup (165 g) light brown sugar, packed
- 1/4 cup (50 g) granulated white sugar
- 2 egg yolks, at room temperature
- 1 1/2 tsp vanilla bean paste or extract
- 1 cup (200 g) semi-sweet chocolate chips
- 1/2 cup (120 ml) heavy whipping cream
- nonpareils for sprinkling on top (optional)
Instructions
- Line two baking sheets with parchment paper.
- Whisk flour, cocoa powder, salt, and baking powder in a bowl.
- Cream butter, brown sugar, and granulated sugar for 2 minutes.
- Add egg yolks and vanilla, mix until fluffy.
- Mix in dry ingredients until combined.
- Scoop dough into 34 balls, roll, and place on baking sheets.
- Press an indent in each dough ball with a 1/4 tsp.
- Chill dough for at least 1 hour.
- Preheat oven to 350°F.
- Bake cookies for 9-11 minutes.
- Re-press indents while cookies are hot.
- Cool on baking sheet for 5 minutes, then transfer to a rack.
- Make ganache by pouring hot cream over chocolate chips.
- Fill cookie indents with ganache and add sprinkles if desired.
- Chill cookies for 10-15 minutes to set ganache.
Notes
- Store leftovers in an airtight container for up to 3 days.
- Use Dutch process cocoa for best results.
- Chilling the dough ensures better shape retention.
- Prep Time: 30 minutes
- Cook Time: 10 minutes
- Category: Dessert
- Method: Baking
- Cuisine: American
- Diet: Vegetarian
Nutrition
- Serving Size: 1 cookie
- Calories: 120
- Sugar: 8 g
- Sodium: 40 mg
- Fat: 6 g
- Saturated Fat: 3.5 g
- Unsaturated Fat: 2 g
- Trans Fat: 0 g
- Carbohydrates: 15 g
- Fiber: 1 g
- Protein: 1.5 g
- Cholesterol: 25 mg
Tips for Perfect Chocolate Thumbprint Christmas Cookies
After making these cookies more times than I can count (and eating even more!), I’ve picked up some tricks that’ll take yours from good to knock-your-santa-hat-off amazing. Here are my hard-earned secrets:
- Dutch process cocoa is non-negotiable – Regular cocoa powder just doesn’t give that deep, fudgy flavor. The difference is like night and day!
- Butter temperature matters – Too cold and it won’t cream properly; too soft and your cookies will spread. Look for that perfect “finger leaves an indent” stage.
- Chill that dough! I know it’s tempting to skip this step, but that hour in the fridge is what keeps your cookies thick and your thumbprints from disappearing in the oven.
- Re-press while warm – The second those cookies come out of the oven, gently redefine those indents with your measuring spoon. They’ll puff up slightly during baking.
- Let ganache cool slightly – If it’s too hot when you fill the cookies, it’ll soak in. Wait until it’s thick but still pourable – about 5 minutes after mixing.
- Use a piping bag for neat filling – A zip-top bag with the corner snipped off gives you way more control than a spoon for those perfect little ganache pools.
- Bake one sheet at a time – I know it’s slower, but rotating pans in the oven leads to uneven baking. Patience pays off with perfect cookies!
- Watch the bake time – These go from perfect to overdone quickly. Start checking at 9 minutes – they should look set but still soft in the center.
Oh! And one last thing – always make a double batch. Trust me, these disappear faster than you can say “ho ho ho!”
Variations for Chocolate Thumbprint Christmas Cookies
Now, I know these chocolate thumbprint cookies are perfect as-is (if I do say so myself!), but sometimes it’s fun to switch things up. Here are my favorite twists that keep the holiday spirit while adding new flavors:
- Peppermint Perfection – Add 1/2 teaspoon peppermint extract to the dough (skip the vanilla) and top the ganache with crushed candy canes. Instant winter wonderland vibes!
- White Chocolate Wonder – Swap the semi-sweet chips for white chocolate in the ganache. The contrast with the dark cookie is just stunning on a cookie platter.
- Nutty Delight – Roll the dough balls in finely chopped pecans or hazelnuts before pressing the indents. That crunch with the smooth ganache? *Chef’s kiss*
- Orange Zest Magic – Add 1 tablespoon fresh orange zest to the dough and use orange-flavored chocolate for the ganache. Like a chocolate orange in cookie form!
- PB&J Surprise – Skip the ganache and fill the cooled cookies with a dollop of peanut butter, then top with raspberry jam. My kids go wild for these.
- Mocha Madness – Stir 1 teaspoon instant espresso powder into the dry ingredients for grown-up coffee lovers. Pairs beautifully with the chocolate.
The best part? You can make a few different batches and let everyone pick their favorite. Just don’t be surprised when they sneak one (or three) of each kind!
Serving and Storing Chocolate Thumbprint Christmas Cookies
Now that you’ve made these gorgeous cookies, let’s talk about keeping them fresh and serving them up right! Nothing worse than going through all that effort only to have them go stale or lose their shine.
For serving: These beauties shine brightest at room temperature – that’s when the ganache is perfectly silky and the cookie has just the right crisp-chewy balance. Arrange them on a pretty holiday platter with some parchment between layers so they don’t stick together. I love adding a dusting of powdered sugar or extra sprinkles right before serving for that extra festive touch!
Short-term storage: If (and that’s a big IF) you have leftovers, store them in an airtight container at room temperature for up to 3 days. Separate layers with parchment paper to keep them from sticking. The ganache will firm up but stays delicious!
Freezing tips: These freeze like a dream! Here’s how I do it:
- Freeze unfilled cookies for up to 1 month – just thaw and fill with fresh ganache when ready to serve
- Already filled? Flash freeze on a baking sheet first, then transfer to freezer bags with parchment between layers
- Thaw frozen cookies overnight in the fridge, then bring to room temperature before serving
Quick refresh: If your cookies seem a bit stale, pop them in a 300°F oven for 2-3 minutes – just until they smell fragrant again. Let them cool completely before serving so the ganache doesn’t melt!
Pro tip: Make extra ganache and keep it in a jar in the fridge – it reheats beautifully for filling more cookies or drizzling over ice cream. Waste not, want not!
Nutritional Information
Okay, let’s be real – we’re not eating Christmas cookies for their nutritional value! But since some folks like to know (or need to track), here’s the scoop on what’s in each of these chocolatey delights. Just remember – these numbers are estimates based on my exact ingredients, so yours might vary slightly.
- Calories: 120 per cookie (but let’s be honest, nobody stops at just one!)
- Total Fat: 6g (3.5g saturated – thank you, real butter!)
- Carbohydrates: 15g (8g sugars – mostly from that brown sugar goodness)
- Fiber: 1g (thanks to the cocoa powder)
- Protein: 1.5g (egg yolks doing their thing)
- Sodium: 40mg (just enough salt to make the chocolate pop)
- Cholesterol: 25mg (those yolks add richness)
Now, before anyone comes at me with calculators – yes, these numbers will change if you use different brands of chocolate or swap ingredients. And no, I didn’t include the sprinkles because…well, it’s Christmas! A little extra joy never hurt anyone.
My philosophy? Enjoy these in moderation (or not – no judgment here!) as part of your holiday celebrations. After all, memories made baking with loved ones are calorie-free!
FAQs About Chocolate Thumbprint Christmas Cookies
Over the years, I’ve gotten all sorts of questions about these cookies – and I love helping bakers troubleshoot! Here are answers to the ones I hear most often:
Can I use regular cocoa powder instead of Dutch process?
Oh honey, I wish! Dutch process cocoa is specially treated to remove acidity, giving our cookies that deep, mellow chocolate flavor. Regular cocoa will work in a pinch, but your cookies might taste slightly bitter and won’t have that rich brownie-like color. If it’s all you’ve got, add 1/8 teaspoon baking soda to balance the acidity.
Help! My ganache split – what did I do wrong?
Don’t panic – we can fix this! Usually it means the cream was too hot when you added the chocolate (scalded cream is the culprit). Just whisk in a teaspoon of warm cream or milk 1/2 teaspoon at a time until it comes back together. If it’s really stubborn, blend in an immersion blender – works like magic!
Can I freeze these cookies?
Absolutely! I always stash some away for last-minute guests. Here’s how:
- Freeze unfilled cookie shells for up to 1 month (thaw and fill with fresh ganache later)
- Already filled? Freeze in a single layer first, then stack with parchment between layers
- Thaw overnight in the fridge – the ganache stays perfect this way
Pro tip: Write the date on your freezer bag – not that they’ll last long enough for you to forget!
Why do my cookies spread too much?
Ah, the great cookie spread! Three likely culprits:
- Butter too soft when creaming (should leave a slight indent when pressed)
- Skipped the chilling step (that hour in the fridge is non-negotiable!)
- Overcrowded baking sheet – leave at least 2 inches between cookies
Next batch, try using a chilled baking sheet too – works wonders!
Can I make these gluten-free?
You bet! Swap the all-purpose flour for a 1:1 gluten-free blend (I like King Arthur’s). Add 1/2 teaspoon xanthan gum if your mix doesn’t include it. The texture might be slightly more delicate, but they’ll still taste amazing. Just be extra gentle when making the thumbprints!
Got more questions? Drop them in the comments – I love helping fellow bakers master these chocolatey delights!
Share Your Holiday Baking Success
Nothing makes me happier than seeing these chocolate thumbprint cookies spread holiday cheer in other kitchens! Every year, I get the sweetest notes from bakers who’ve made them – the college student surprising her roommates, the grandpa baking with his grandkids for the first time, the neighbor who finally found a cookie her picky eater loves. Those stories? They’re the real magic of Christmas baking.
If you make these (and I hope you do!), I’d love to hear how they turned out. Did your family fight over the last one like mine does? Maybe you put your own spin on them with different sprinkles or fillings? Snap a photo of your cookie platter all dressed up for the holidays – those glossy ganache centers catching the twinkle lights are just begging to be shared!
And hey, if you ran into any hiccups along the way, don’t be shy – we’ve all been there. Maybe your first batch spread a bit too much (been there!) or your ganache wasn’t quite as shiny as you hoped (done that!). Sharing those moments helps everyone learn. After all, some of my best baking tips came from other cooks’ “oops” stories!
However your cookies turn out, remember – what makes them special isn’t perfection, but the love you bake into them. Whether they’re picture-perfect or charmingly lopsided, they’ll taste like holiday joy all the same. Now go enjoy your well-earned cookie break – you’ve earned it!
For More recipes, Follow me on Facebook!