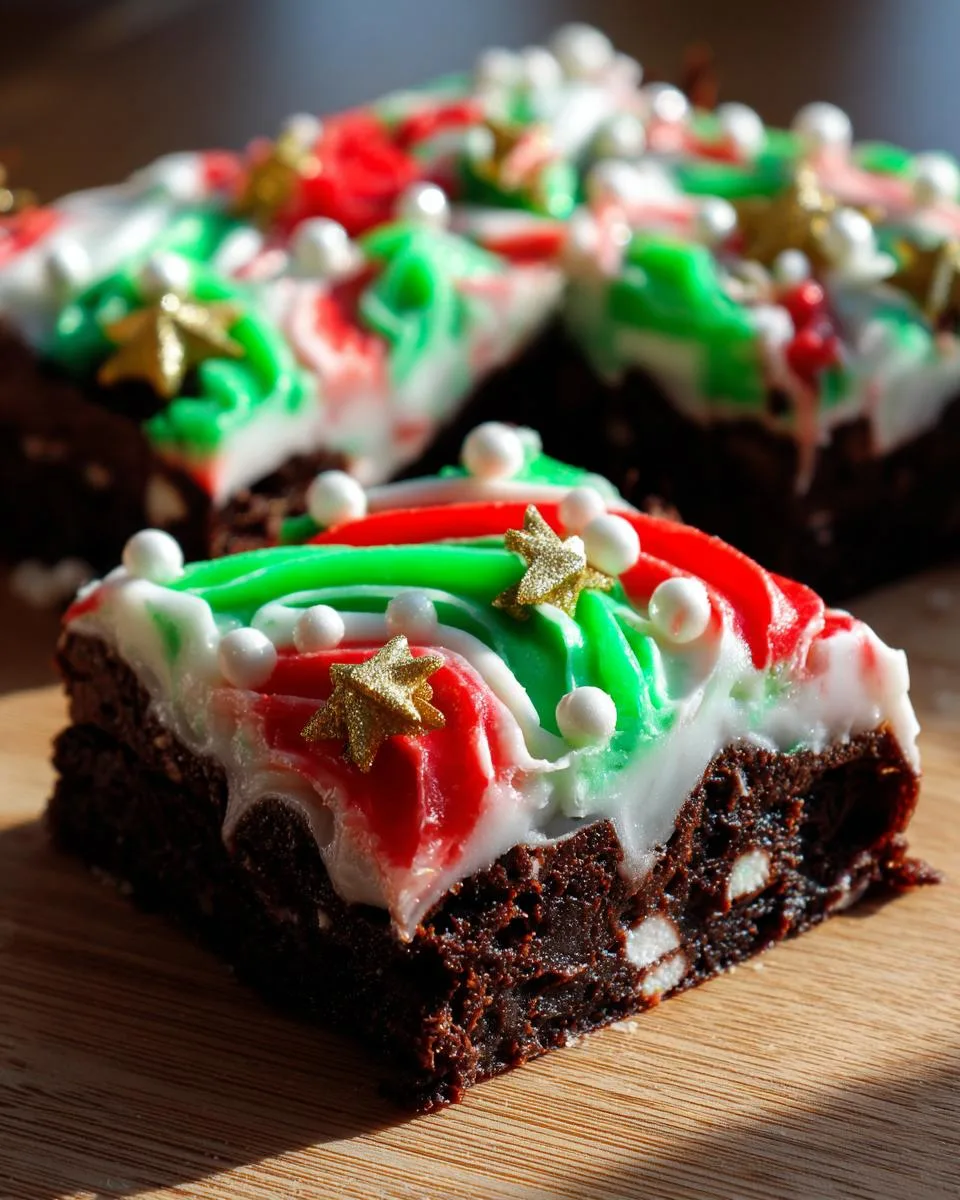
You know that moment when you walk into a holiday party and see a tray of Frosted Christmas Brownies—those rich, fudgy triangles dressed up like tiny Christmas trees and Santa hats? That’s pure magic right there. I’ve been making these every December since my niece declared them “the best part of Christmas” after sneaking three off the plate at our family cookie exchange. (Oops!) The best part? They’re ridiculously easy—boxed brownie mix, a swirl of colored frosting, and some sparkly sprinkles turn into edible holiday cheer in under an hour. No fancy skills needed—just a springform pan, a couple icing bags, and that giddy feeling you get when someone bites into one and their eyes light up. Trust me, these disappear faster than wrapping paper on Christmas morning!
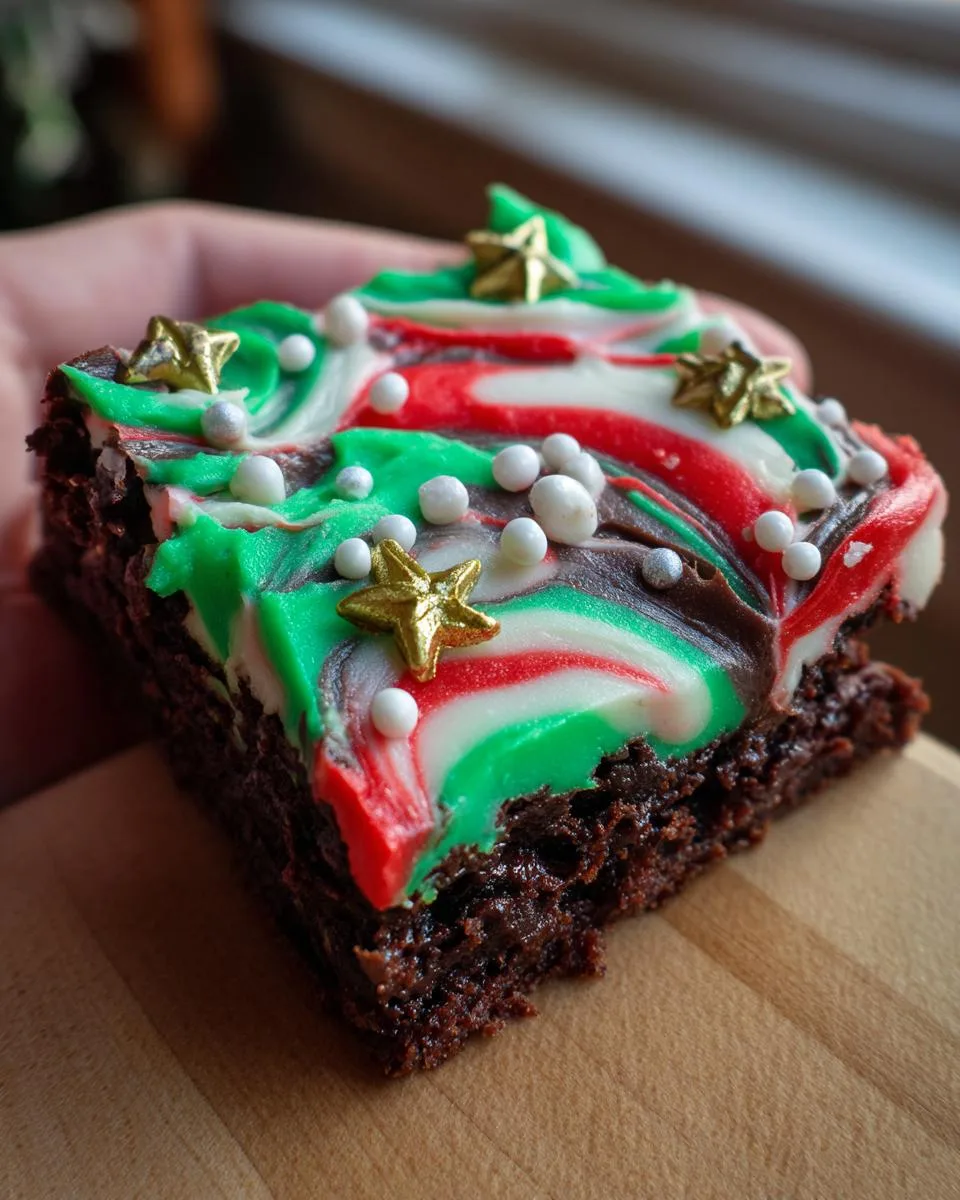
Table of Contents
Table of Contents
Why You’ll Love These Frosted Christmas Brownies
Listen, I know holiday baking can feel overwhelming—between cookie swaps, dinner parties, and those last-minute gift baskets. But these Frosted Christmas Brownies? They’re your secret weapon. Here’s why:
- Super quick – Start with boxed mix (no shame!), and you’re halfway done before the oven finishes preheating.
- Instantly festive – A swirl of red and green frosting plus those edible gold stars? Boom—your dessert table just became the centerpiece.
- Everyone goes crazy for them – Kids love the colors, adults sneak seconds, and your gluten-free cousin can join in if you swap the mix.
- Forgiving as can be – Frosting hides any cracks, and no two trees look exactly alike (that’s part of the charm!).
Seriously, these brownies are like edible holiday joy—easy to make, impossible to resist. For more easy holiday treats, check out our dessert recipes.
Ingredients for Frosted Christmas Brownies
Okay, let’s talk ingredients! The beauty of these Frosted Christmas Brownies is how simple the shopping list is—most of this stuff is probably already in your pantry. Here’s what you’ll need to make holiday magic happen:
- 2 boxes of brownie mix (or a double batch of your favorite homemade recipe—I won’t tell!)
- 1-3 jars of white frosting (amount depends on how much swirl you love—I’m team “more is more”)
- Edible gel food coloring—red and green, obviously (the gel kind gives you those vibrant holiday colors without watering down your frosting)
- Edible gold stars (because everything’s fancier with a little sparkle)
- White pearl sprinkles (they look like tiny ornaments on your tree-shaped brownies)
Pro tip: Grab an extra brownie mix box—you’ll want to make a second batch after everyone raves about the first!
Equipment You’ll Need
Here’s the fun part—you likely already have most of these tools in your kitchen! For perfect Frosted Christmas Brownies, grab:
- 9-inch springform pan (the kind with the removable bottom—trust me, it’s a game-changer for clean slices)
- Mixing bowls (one for batter, one for melting butter if your mix calls for it)
- Icing bags (or ziplock bags in a pinch—just snip the corner!)
- Large star tip (1M) (for those swoopy, bakery-worthy frosting swirls)
- Cooling rack (because warm brownies + frosting = melty mess)
That’s it! No fancy gadgets needed—just these basics and your holiday spirit.
How to Make Frosted Christmas Brownies
Alright, let’s get to the fun part—turning those simple ingredients into show-stopping holiday treats! I’ve broken it down into easy steps so you can nail these Frosted Christmas Brownies on your first try. Just follow along, and soon you’ll have a platter of edible holiday cheer!
Step 1: Bake the Brownies
First things first—fire up that oven to whatever temperature your brownie mix calls for (usually around 350°F). Here’s my little secret: always use a springform pan for these. That removable bottom makes getting perfect slices out so much easier—no more wrestling with the pan!
Mix up your batter according to the box directions (or your homemade recipe). Pour it into your greased springform pan—it’ll be a thick layer, but that’s perfect for our sturdy Christmas tree shapes. Pop it in the oven and bake until a toothpick comes out with just a few moist crumbs, about 25-30 minutes usually. Your whole kitchen will smell like chocolatey heaven!
Step 2: Cool and Cut the Brownies
Now comes the hard part—waiting! Let those brownies cool completely in the pan. I know, I know—it’s tough when they smell so good, but warm brownies plus frosting equals a big ol’ melty mess. I usually let mine sit for a good hour.
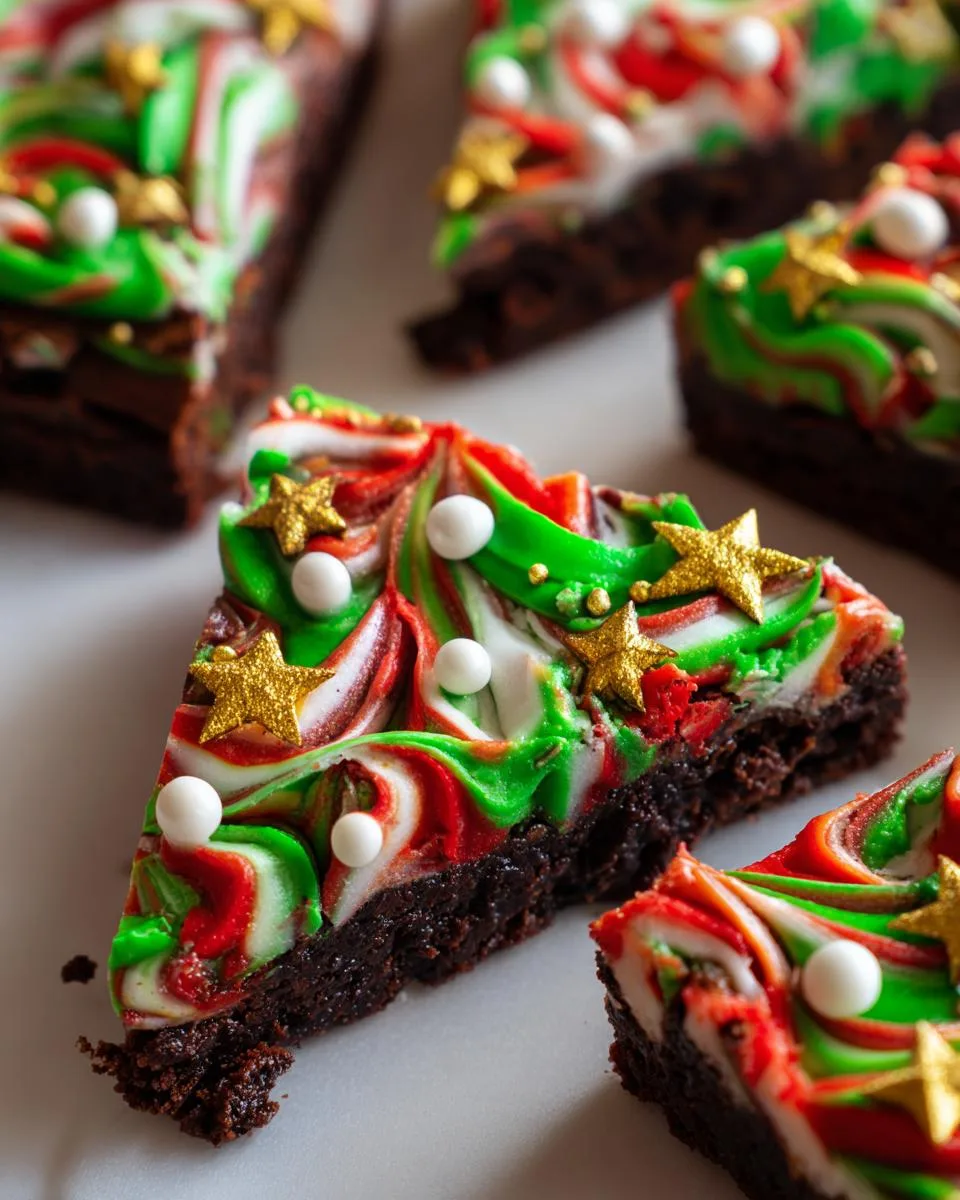
Once they’re cool, run a knife around the edge, pop off the springform ring, and carefully transfer the brownie round to a cutting board. Here’s where the magic happens—slice it into 8 equal triangles. These will be our Christmas trees and Santa hats! Pro tip: wipe your knife clean between cuts for super neat edges.
Step 3: Prepare the Frosting
Time to get colorful! Divide your white frosting into three bowls—one stays white (for Santa hat trim), and the others get colored red and green. Use gel food coloring (not liquid!) because it gives you those vibrant holiday colors without making your frosting runny. Start with just a little—you can always add more to get that perfect shade.
Spoon each color into its own piping bag fitted with a large star tip (the 1M is my go-to). If you don’t have piping bags, no worries! Just use ziplock bags and snip a corner—it works almost as well.
Step 4: Decorate the Brownies
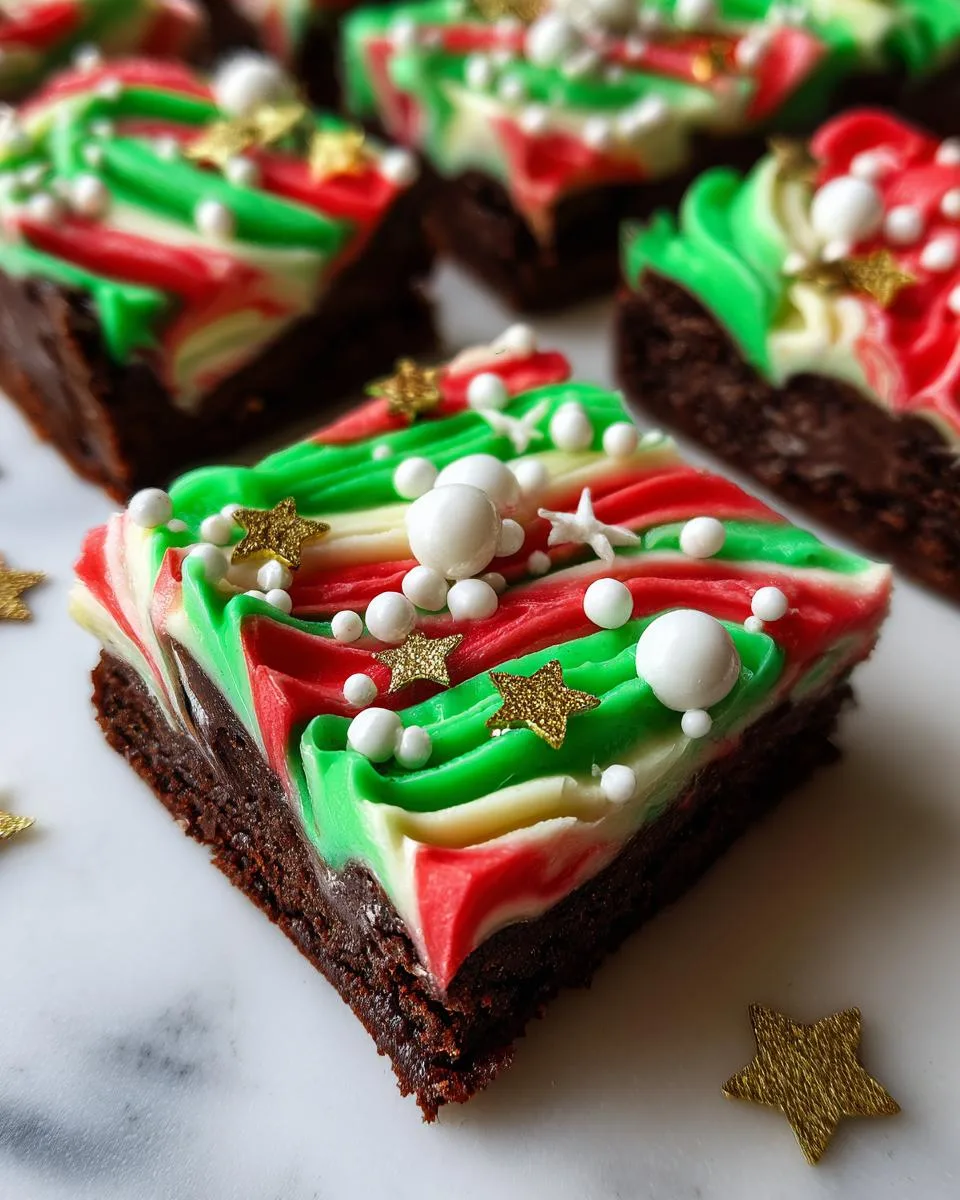
Let your inner artist shine! For Christmas trees: pipe green frosting in swirls from the base to the point of each triangle. Top with pearl sprinkles (like ornaments!) and a gold star at the very tip. For Santa hats: cover the wide end with red frosting, add a white “fur” trim at the bottom, and finish with a white pompom at the point.
The best part? No two will look exactly alike, and that’s what makes them special! Now step back and admire your edible masterpieces before they disappear—because trust me, they will!
Print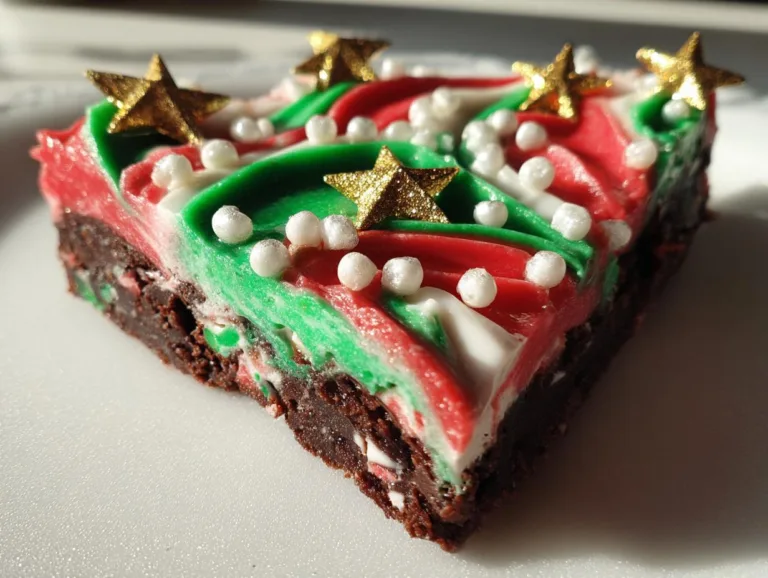
3-Ingredient Frosted Christmas Brownies Nobody Can Resist
Frosted Christmas Brownies are a festive and delicious treat perfect for the holiday season. These brownies are topped with colorful frosting and festive decorations, making them a hit at any Christmas gathering.
- Total Time: 40 minutes
- Yield: 8 brownies 1x
Ingredients
- 2 Boxes of Brownie Mix, or a double batch of homemade brownies
- White Frosting, 1-3 jars
- Edible Gel Food Coloring (alternative no artificial dye food coloring)
- Edible Gold Stars
- White Pearl Sprinkles
- Icing Bags
- Frosting Tips (large star – 1M)
Instructions
- Preheat the oven according to your brownie box instructions and spray a 9 inch spring form pan with spray oil.
- Mix both of your brownie mixes and pour them into the spring form pan.
- Bake according to the packaging instructions, or until a toothpick comes out clean.
- Once the brownie has baked and cooled, remove it from the spring form pan, place it on a cutting board, and cut the brownie into 8 triangles.
- In a small bowl, mix white frosting with red food coloring. And in a second small bowl, mix white frosting with green food coloring.
- Place the red frosting, green frosting, and white frosting in individual icing bags with your favorite frosting tips.
- Decorate your Christmas Tree Brownies with green frosting, white pearl sprinkles, and edible gold stars and your Santa Clause Hat Brownies with green and white frosting.
- Serve and enjoy!
Notes
- Use a double batch of homemade brownies if you prefer not to use boxed mix.
- Adjust the amount of frosting based on your preference.
- Ensure the brownies are completely cooled before frosting.
- Prep Time: 15 minutes
- Cook Time: 25 minutes
- Category: Dessert
- Method: Baking
- Cuisine: American
- Diet: Vegetarian
Nutrition
- Serving Size: 1 brownie
- Calories: 250
- Sugar: 20g
- Sodium: 150mg
- Fat: 10g
- Saturated Fat: 3g
- Unsaturated Fat: 5g
- Trans Fat: 0g
- Carbohydrates: 35g
- Fiber: 2g
- Protein: 3g
- Cholesterol: 20mg
Tips for Perfect Frosted Christmas Brownies
Okay, let me share my hard-earned tricks for making these Frosted Christmas Brownies absolutely foolproof! First—always use gel food coloring. That liquid stuff? It’ll turn your frosting into soup before you get those rich holiday colors. Second, patience is key—let those brownies cool completely (I stick mine in the fridge if I’m in a hurry). Warm brownies make frosting slide right off!
If your frosting feels too stiff, add a tiny splash of milk. Too thin? More powdered sugar to the rescue! And here’s my favorite hack: microwave your frosting bags for 10 seconds before piping—it glides on like a dream.
Frosted Christmas Brownies Variations
Ohhh, the fun part—playing with flavors and decorations! These Frosted Christmas Brownies are like a blank holiday canvas. Try swapping peppermint extract into your white frosting—just a 1/4 teaspoon gives that classic candy cane zing. Crushed candy canes make gorgeous “ornaments” on your trees too!
Need gluten-free? Use your favorite GF brownie mix—nobody will know the difference once they’re frosted. Feeling fancy? Melt white chocolate drizzle “snow” over everything before adding stars. The possibilities are endless! For more festive ideas, check out our pumpkin-shaped veggie platter.
Storage and Serving Suggestions
Here’s the beautiful thing about these Frosted Christmas Brownies—they actually get better after sitting overnight! Store them in an airtight container (I layer them between wax paper so the frosting stays pretty) for up to 3 days. The flavors meld together, and that fudgy texture becomes even more incredible. Serve them at room temperature with mugs of steaming hot cocoa—the perfect combo for Christmas movie nights. Just watch them disappear!
Nutritional Information
Now, let’s be real—these Frosted Christmas Brownies are pure holiday indulgence, and we’re not counting calories here! But since you asked: nutritional values will vary depending on your brownie mix and frosting brands. As a general guideline, each festive triangle packs that perfect balance of chocolatey comfort and holiday cheer. (Wink!)
If you need specific dietary info, always check your ingredient labels—but really, this is the season for enjoying every delicious bite without worry!
Frequently Asked Questions
Can I use homemade brownies instead of box mix?
Absolutely! My grandma’s from-scratch brownie recipe works beautifully here—just make sure you have enough batter to fill your springform pan about 2/3 full. The key is getting that thick, sturdy base to hold all that festive frosting!
How do I keep the frosting from melting?
Two words: cool brownies! Let them sit until completely room temperature (or pop them in the fridge for 20 minutes if you’re impatient like me). Also, avoid placing them near warm ovens or heaters—those little frosting swirls will hold their shape perfectly at normal room temp.
Can I make these ahead of time?
You bet! These Frosted Christmas Brownies actually taste better on day two. Bake and cool the brownies one day, frost them the next morning, and they’ll be party-ready. Just store them in an airtight container so the sprinkles stay crispy!
What if I don’t have piping bags?
No worries! Ziplock bags with a tiny corner snipped off work nearly as well—or go rustic with a butter knife swoosh of frosting. The holiday colors alone will make them magical!
Share Your Festive Creation
I’d love to see your Frosted Christmas Brownies! Snap a photo of your edible masterpieces and tag me on Instagram—I’m always amazed by the creative twists you all come up with! Leave a comment below with your favorite decorations, or share your tips for making these even more festive. Let’s spread some holiday baking joy together!
For More recipes, Follow me on Facebook!