Halloween is my absolute favorite time of year for baking – well, if you can even call these Oreo spider cookies “baking” since there’s no oven required! I discovered these adorable treats years ago when my niece begged me to make something “spooky but cute” for her school party. We spent a whole afternoon giggling while assembling these creepy-crawly cookies, and let me tell you – they were the hit of the classroom! The best part? Oreo spider cookies come together in just 15 minutes with four simple ingredients you probably already have. No fancy skills needed – just Oreos, pretzels, chocolate, and a whole lot of fun. Every time I make them now, I remember that first batch we created together, chocolate smudges and all!
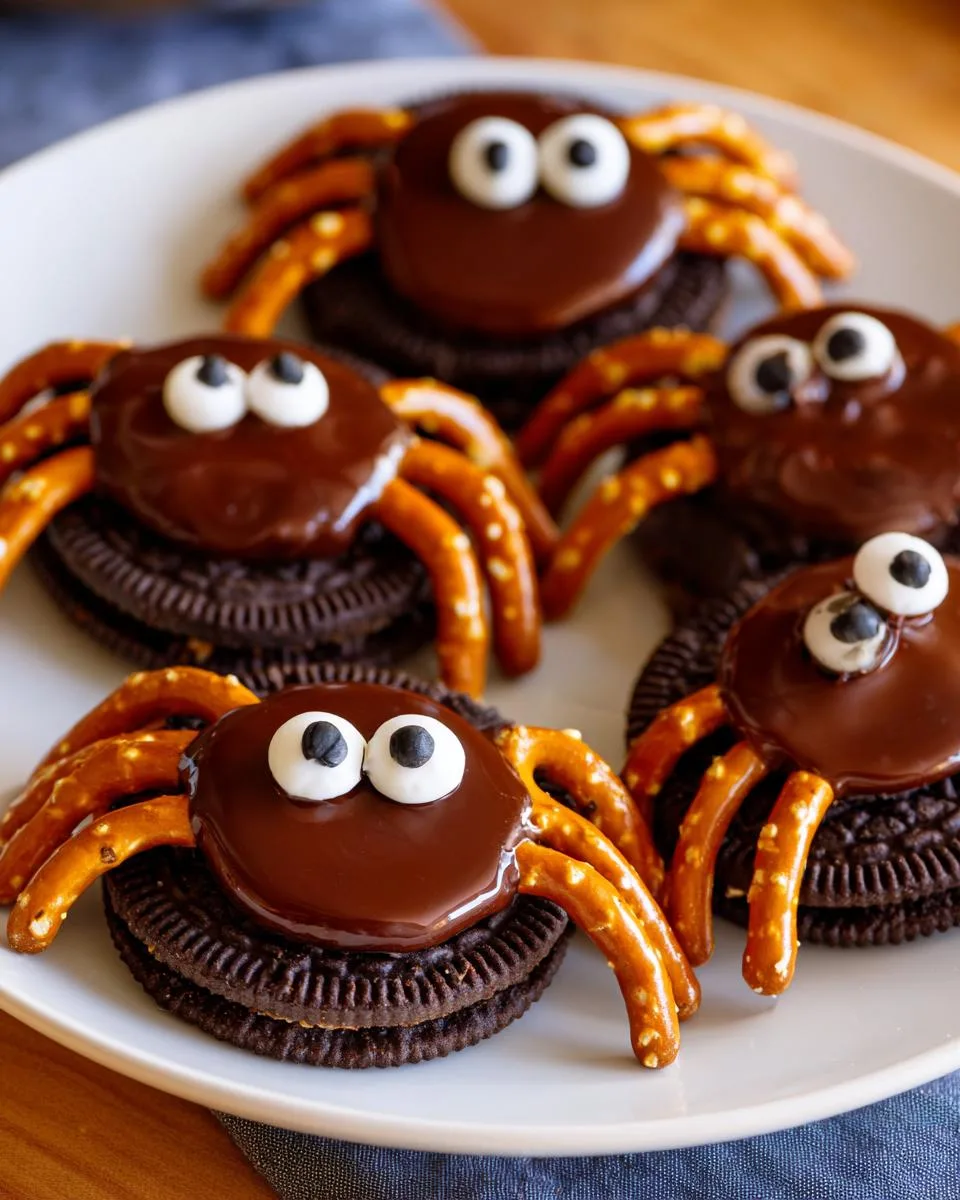
Table of Contents
Table of Contents
Why You’ll Love These Oreo Spider Cookies
These little critters aren’t just adorable – they’re practically magic in cookie form! Here’s why they’ve become my go-to treat:
- No-bake bliss: No oven, no fuss – just melt, assemble, and chill
- Kid-approved fun: Perfect for little hands to help decorate (messy fingers welcome!)
- Instant Halloween vibes: Turns any party into a spooky celebration in minutes
- Speedy solution: Ready in 15 minutes flat when you need a last-minute treat
Seriously – I’ve never met anyone who didn’t crack a smile when presented with these eight-legged sweeties!
Ingredients for Oreo Spider Cookies
Here’s the beautiful thing – you only need four simple ingredients to create these adorable Oreo spider cookies! I always keep these basics stocked for last-minute Halloween fun:

- 1 package Oreos (about 16 cookies) – Go for the regular size, not minis – they make the perfect spider bodies! The double-stuffed ones work great too if you want extra cream filling.
- 1/4 cup semi-sweet chocolate chips – This is our edible “glue” – I like semi-sweet for balance, but milk chocolate works too!
- 8 pretzel rods (broken into 16 halves) – These become our spider legs. The salty crunch is such a fun contrast to the sweet Oreo!
- 1 pack candy eyes (about 32 pieces) – Because what’s a spider without those googly eyes staring back at you?
Pro tip from my many spider-making sessions: Regular full-size Oreos give you the best canvas to work with. The minis are cute but tricky with the tiny pretzel legs – trust me, I learned that the messy way!
Equipment You’ll Need
Grab these three simple tools and you’re ready to create your spider army:
- Microwave-safe bowl – For melting our chocolate “glue” (I use my favorite little glass mixing bowl)
- Toothpicks – Your precision eye-application tools (break them in half if you want shorter handles)
- Baking sheet – Any flat surface works, but I line mine with parchment for easy cleanup
That’s it – no fancy gadgets needed! Though I won’t judge if you want to wear spiderweb-print oven mitts for Halloween spirit.
How to Make Oreo Spider Cookies
Okay, let’s get our spider-making station ready! These steps are so simple even my four-year-old nephew can help (and believe me, he does – every single time!). The key is working quickly once that chocolate melts – but don’t worry, I’ll walk you through every step.
Step 1: Melt the Chocolate
First things first – we need our edible “glue” ready! Pour those chocolate chips into your microwave-safe bowl. Here’s my foolproof method:
- Microwave for 20 seconds, then stir – the chips won’t look melted yet, but trust the process!
- Repeat in 15-second bursts, stirring between each, until smooth (usually 2-3 rounds total)
Watch it like a hawk after the first minute – chocolate burns so easily! If it starts looking thick, stop immediately. We want it pourable but not scorched. Pro tip: If it gets too thick, add 1/2 tsp vegetable oil to loosen it up.
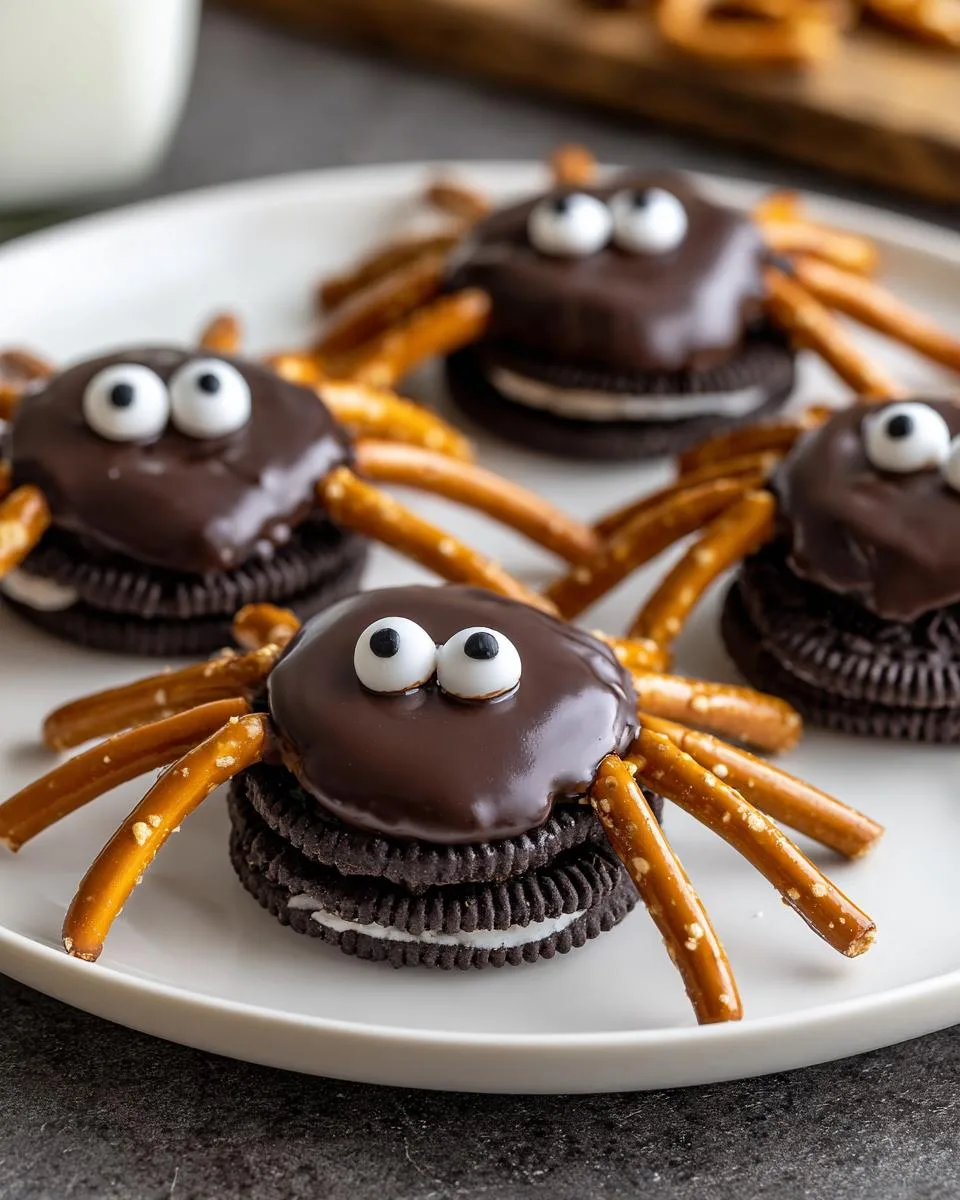
Step 2: Assemble the Spider Legs
Now for the fun part – giving our Oreos legs! Break each pretzel rod carefully in half (I press mine against the counter for clean breaks). Then:
- Dip one end of a pretzel half into melted chocolate – just about 1/4 inch is perfect
- Press gently onto the side of an Oreo, holding for 3 seconds to set
- Repeat with three more legs on that side
- Flip and attach the remaining four legs
Don’t press too hard or you’ll crack the Oreo – ask me how I know! If a leg falls off, just re-dip in chocolate and try again. The beauty of these Oreo spider cookies is they’re very forgiving.
Step 3: Add the Eyes
Time to bring these little guys to life! Grab your toothpick:
- Dip the tip in melted chocolate and dab two small dots where you want eyes
- Quickly place candy eyes before the chocolate sets (they’ll stick immediately!)
- Repeat for all your spider cookies
- Pop them in the fridge for about 10 minutes to fully set
Work in batches of 3-4 cookies at a time so the chocolate doesn’t harden while you’re decorating. And don’t stress about perfect eye placement – wonky-eyed spiders are extra charming if you ask me!
Print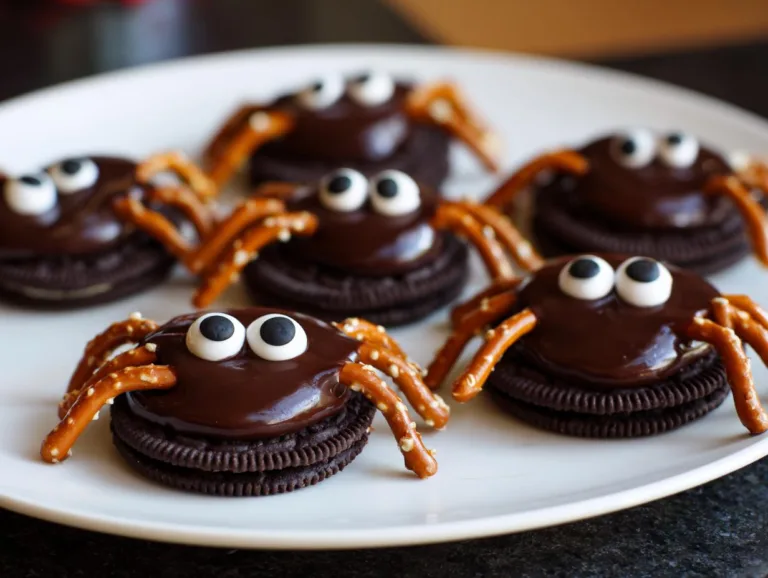
15-Minute Oreo Spider Cookies That Wow Every Guest
Oreo Spider Cookies are a fun and easy treat perfect for Halloween or any festive occasion. These cookies combine Oreos, pretzel rods, and candy eyes to create adorable spider-shaped desserts.
- Total Time: 15 minutes
- Yield: 8 cookies 1x
Ingredients
- 1 package Oreos
- 1/4 cup chocolate chips
- 1 pack googly eye candy
- 8 pretzel rods
Instructions
- Melt chocolate chips in a bowl. Use about 1/4 cup or less depending on how many spiders you make.
- Break pretzel rods in half and place them on both sides of the Oreos to form spider legs.
- Use a toothpick to dab melted chocolate where the eyes will go. Attach the candy eyes immediately.
- Place the cookies in the fridge until the chocolate sets.
Notes
- Break pretzel rods carefully to avoid crumbling.
- Work quickly when attaching eyes before the chocolate hardens.
- Store in an airtight container to keep fresh.
- Prep Time: 10 minutes
- Cook Time: 5 minutes
- Category: Dessert
- Method: No-Bake
- Cuisine: American
- Diet: Vegetarian
Nutrition
- Serving Size: 1 cookie
- Calories: 120
- Sugar: 8g
- Sodium: 90mg
- Fat: 5g
- Saturated Fat: 2g
- Unsaturated Fat: 2g
- Trans Fat: 0g
- Carbohydrates: 18g
- Fiber: 1g
- Protein: 1g
- Cholesterol: 0mg
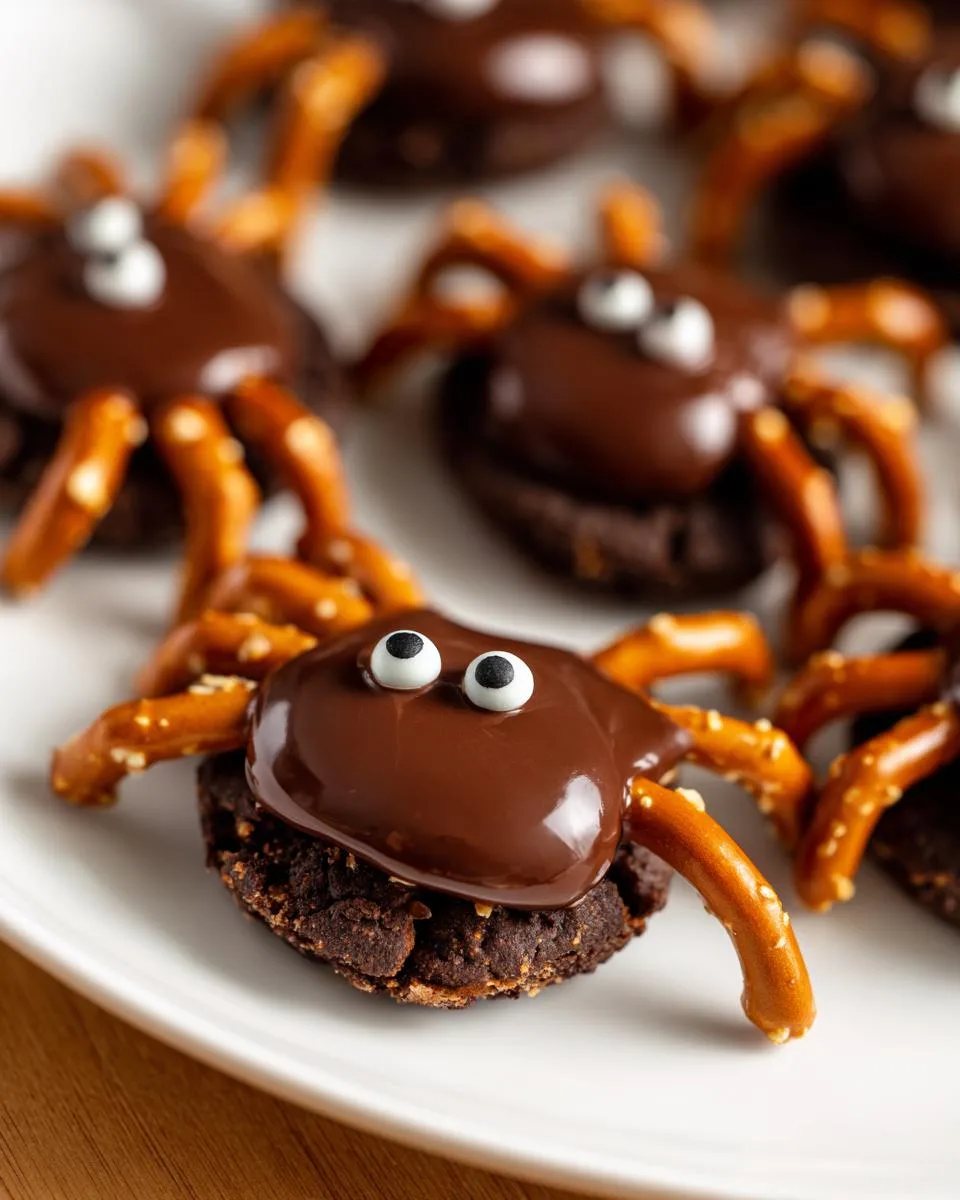
Tips for Perfect Oreo Spider Cookies
After making hundreds (maybe thousands?) of these Oreo spider cookies over the years, I’ve picked up some tricks that’ll make your creepy-crawly creations foolproof. Here are my absolute must-know tips:
- Chill out for faster setting: That 10-minute fridge time isn’t just a suggestion – it’s your secret weapon! The cold helps the chocolate “glue” harden quickly so legs stay put. If you’re in a real hurry, pop them in the freezer for 5 minutes instead.
- Airtight is right: Store these little guys in an airtight container with parchment between layers. They’ll stay fresh at room temp for 3 days, but honestly? Mine never last that long! The pretzels do soften over time, so I like them best within 24 hours.
- Double-dip for sturdy legs: If your spiders seem wobbly, dip the pretzel ends in extra melted chocolate before attaching. That thicker chocolate base acts like superglue! Bonus – it makes the legs look like they’re emerging from the Oreo’s “body.”
One more pro tip from my kitchen disasters – if your chocolate starts hardening while you work, just microwave it for another 10 seconds to loosen it up again. No one wants stiff-legged spiders!
Variations for Oreo Spider Cookies
Want to mix things up? These Oreo spider cookies are crazy adaptable! Try swapping the semi-sweet chocolate for white chocolate drizzle “webs” across the cookies. For extra creepy legs, use thin black licorice ropes instead of pretzels. My niece loves when we add red icing fangs – suddenly our sweet spiders look deliciously dangerous! The possibilities are endless with this simple base recipe.
Serving and Storing Oreo Spider Cookies
Here’s the best part – these adorable Oreo spider cookies are ready to party the moment they come out of the fridge! I always serve them chilled because that chocolate “glue” stays nice and firm when they’re cool. Arrange them on a spooky platter with some cobweb decorations, and watch them disappear faster than you can say “trick or treat!”
Now, if by some miracle you have leftovers (does that ever really happen?), here’s how to keep them fresh:
- Room temp: Store in an airtight container with parchment between layers for up to 3 days. The pretzels will start to soften a bit, but they’re still delicious!
- Fridge: For longer storage, keep them refrigerated up to 1 week. The cold actually helps maintain that satisfying crunch in the pretzel legs.
One word of caution – these little guys are fragile! Transport them carefully in a single layer if you’re taking them to a party. I learned this the hard way when my spider cookies arrived at a bake sale looking more like they’d been in a spider apocalypse! Now I always pack mine in a shallow container with paper towels to cushion any bumps in the road.
Oreo Spider Cookies FAQs
I’ve gotten so many questions about these adorable Oreo spider cookies over the years – here are the answers to the ones that pop up most often! Trust me, I’ve made every mistake possible with these little guys, so I’ve got all the troubleshooting tips you’ll need.
Can I use gluten-free Oreos for these spider cookies?
Absolutely! The gluten-free Oreos work just as well – I’ve used them when baking for friends with dietary restrictions. Just be sure to check that your pretzels are gluten-free too if needed (there are some great GF pretzel options out there now!). The assembly process is exactly the same, and nobody can tell the difference once those spooky eyes are staring up at them!
How do I prevent the pretzel rods from breaking when making the legs?
Ah, the pretzel-breaking struggle is real! Here’s my foolproof method: instead of trying to snap them with your hands (which always leaves me with crumbly bits), press each pretzel rod firmly against the edge of your counter or table. Apply steady pressure with your palm – they’ll break cleanly right in the middle almost every time. If you’re still having trouble, try microwaving the pretzels for about 10 seconds first – the slight warmth makes them more pliable!
Can I make Oreo spider cookies ahead of time for a party?
You totally can – with one little trick! Assemble them completely (legs and all), then freeze them in a single layer for about 30 minutes until the chocolate is rock solid. Transfer to an airtight container with parchment between layers, and they’ll keep beautifully in the fridge for up to 3 days. Wait to add the eyes until just before serving though – the candy eyes can get a bit “sweaty” if they sit too long in the fridge. I’ve found they look freshest when the eyes go on within a few hours of serving!
Nutritional Information
Okay, let’s be real—these Oreo spider cookies aren’t winning any health food awards, but who cares when they’re this much fun? Here’s the nutritional breakdown per cookie, based on standard brands (because let’s face it, we’re not measuring grams when we’re busy making spiders!):
- Calories: About 120
- Fat: 5g (those Oreo creme centers add up!)
- Carbs: 18g
- Sugar: 8g
Just a heads-up—nutrition can vary depending on your Oreo variety (double-stuffed, I’m looking at you) or if you go wild with extra chocolate drizzle. But hey, it’s Halloween—live a little!
For More recipes, Follow me on Facebook!