Oh my goodness, let me tell you about my absolute favorite way to enjoy summer strawberries – these Strawberry Shortcake Cups! I’ve been making this recipe for years, ever since my aunt showed me how to turn classic strawberry shortcake into adorable individual servings. There’s something magical about biting into those layers of fluffy cake, juicy strawberries, and cloud-like cream all in one perfect little cup.
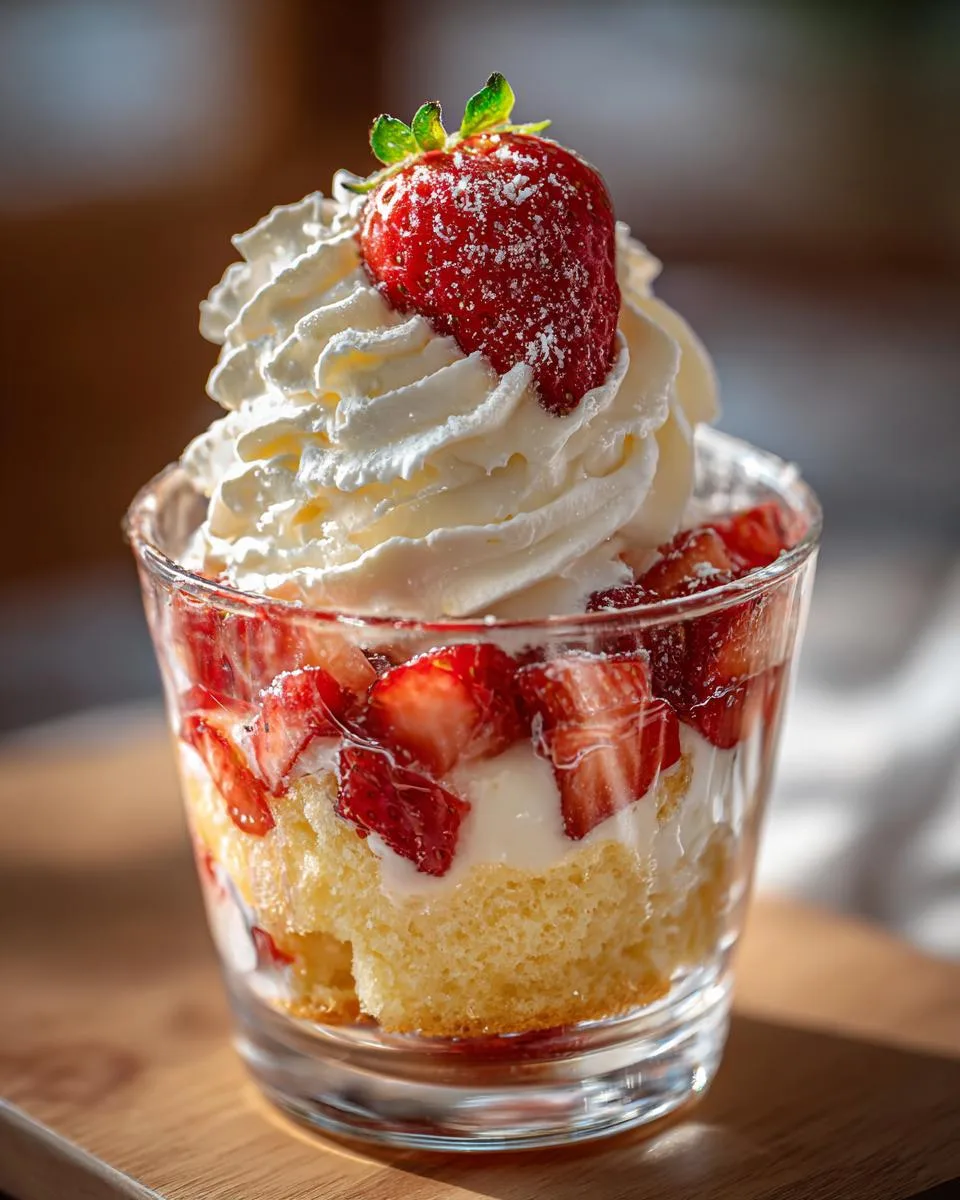
Table of Contents
Table of Contents
What I love most is how simple they are to throw together – no fancy piping or complicated techniques here! The cake bakes up in one big sheet (less fuss than individual cakes), then gets cut into rounds that fit perfectly into cups or glasses. And those fresh strawberries? Just toss them with a bit of sugar to bring out their natural sweetness – no cooking required!
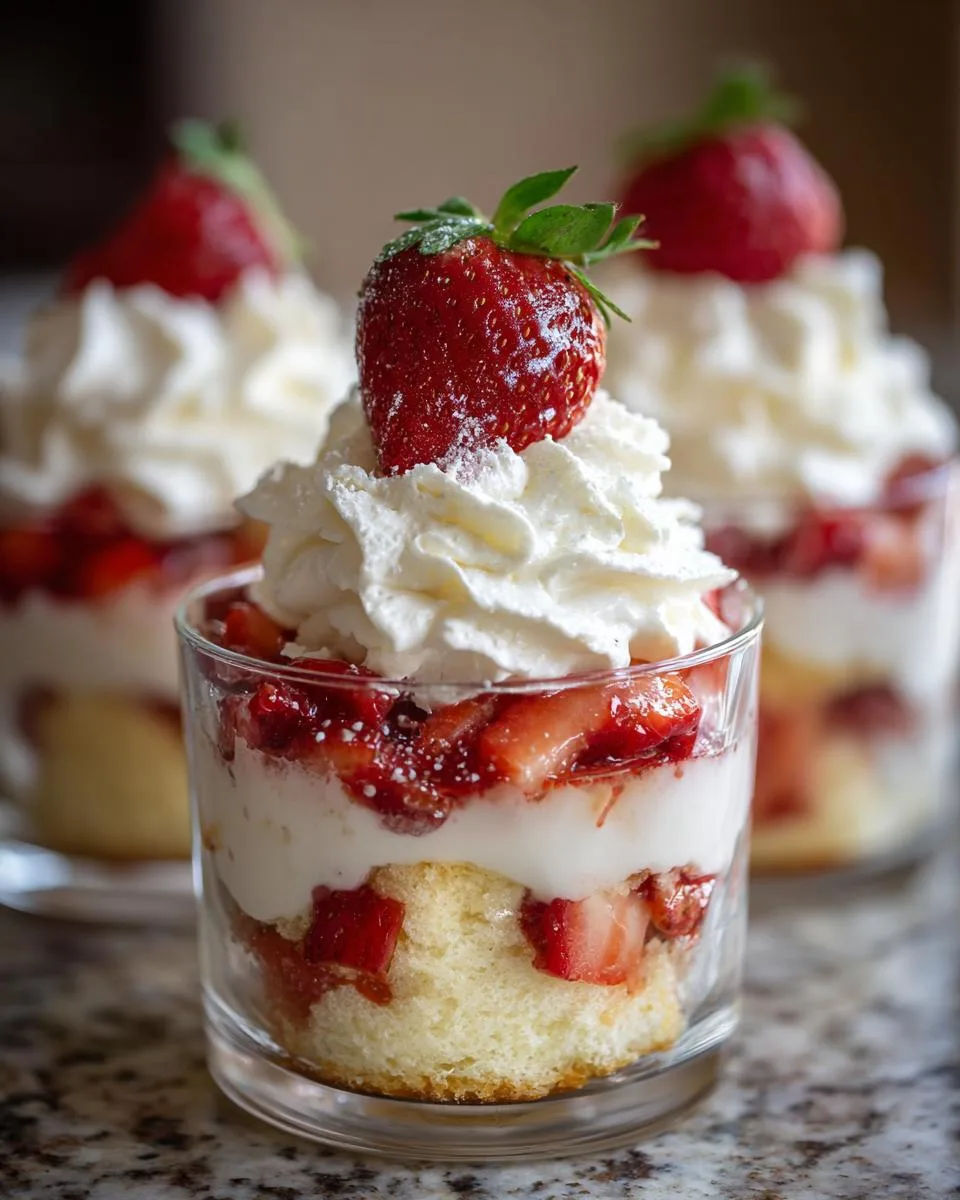
These became my go-to dessert for everything from backyard barbecues to bridal showers after I realized how much people adore getting their own personal portion. No messy slicing, no fighting over who got more strawberries – just happy faces all around. The best part? You can prep most components ahead, then assemble right before serving so everything stays fresh and delicious.
Why You’ll Love These Strawberry Shortcake Cups
Trust me, once you try these little cups of joy, you’ll be hooked! Here’s why:
- Effortless elegance: They look fancy but couldn’t be simpler to make—no pastry skills required!
- Party perfection: Individual servings mean no messy slicing—just pass them around at gatherings.
- Summer in every bite: That fresh strawberry flavor sings against the fluffy cake and creamy topping.
- Make-ahead magic: Bake the cake base ahead, then assemble when you’re ready to impress.
- Customizable cuteness: Use pretty glasses, mason jars, or even teacups for different vibes.
My favorite part? Watching people’s eyes light up when they dig into their own personal strawberry cloud!
Ingredients for Strawberry Shortcake Cups
Okay, let’s gather our goodies! I’ve learned over the years that quality ingredients make all the difference with these little cups of happiness. Here’s exactly what you’ll need, broken down by component so you can prep like a pro:
For the Cake:
- 2 cups (284g) all-purpose flour – plus extra for dusting your pan
- 3 Tbsp (26g) cornstarch – my secret for that perfect tender crumb!
- 1/2 tsp each: salt, baking soda, and baking powder
- 12 Tbsp (170g) unsalted butter – softened (I leave mine out for 30 minutes)
- 1 1/2 cups (315g) granulated sugar
- 1 tsp lemon zest – trust me, this brightens everything up
- 4 large eggs – room temperature blends better
- 1 1/2 tsp vanilla extract – the good stuff makes a difference
- 1 cup (283g) sour cream – full fat gives the best texture
For the Strawberry Layer:
- 2 lbs fresh strawberries – diced, plus 12 small whole ones for garnish
- 3 1/2 Tbsp (45g) granulated sugar – just enough to coax out the juices
For the Cream Layer:
- 2 cups (475ml) heavy cream – cold straight from the fridge
- 6 oz (170g) cream cheese – softened (this adds amazing stability)
- 1/2 tsp vanilla extract
- 3/4 cup (90g) powdered sugar – sifted if you’re feeling fancy
Pro tip: Measure everything before you start – I call this my “mise en place” moment that makes baking so much smoother! If you are looking for more great recipes, check out my general recipes page.
Equipment You’ll Need
Don’t worry—you probably have most of these already! Here’s what I grab from my kitchen:
- 18×13-inch rimmed baking sheet – for that perfect thin cake layer
- Electric mixer – handheld or stand, your choice
- Mixing bowls – one large, one medium
- 2 1/2-inch round cutter – or a glass works in a pinch!
- Spatula – for folding and spreading
- Whisk – my trusty dry ingredient mixer
See? Nothing fancy—just basic tools for delicious results!
How to Make Strawberry Shortcake Cups
Alright, let’s dive into the fun part – making these adorable little desserts! I’ve broken it down into simple steps so you can nail it on your first try. Just follow along and you’ll have strawberry magic in no time.

Preparing the Cake Base
First things first – preheat that oven to 350°F (175°C). While it’s heating up, butter and flour your baking sheet really well – we don’t want any sticking disasters!
Now for the dry ingredients: whisk together the flour, cornstarch, salt, baking soda, and baking powder in a medium bowl. Set this aside while we work on the good stuff.
Here’s where the magic starts – cream together the softened butter, sugar, and lemon zest until pale and fluffy. This takes about 3 minutes with my mixer. Then add eggs one at a time, mixing well after each, followed by the vanilla.
The secret to perfect texture? Alternate adding the flour mixture and sour cream in batches, starting and ending with flour. Mix just until combined – overmixing makes tough cake!
Spread the batter evenly in your prepared pan. Bake for 20-24 minutes until golden and a toothpick comes out clean. Let it cool completely before cutting out 24 perfect little rounds.
Preparing the Strawberry Layer
While the cake cools, let’s prep those gorgeous berries! Dice your strawberries (I like them in small chunks) and toss with sugar in a bowl.
Now walk away for 10 minutes – this resting time lets the sugar draw out the strawberry juices naturally. You’ll know it’s ready when you see that beautiful ruby syrup forming.
Whipping the Cream Layer
Chill your mixing bowl and beaters for 5 minutes first – cold tools make better whipped cream!
Whip the heavy cream to soft peaks – they should just hold their shape when you lift the beater. In another bowl, beat the cream cheese, powdered sugar and vanilla until smooth.
Now gently fold the cream cheese mixture into the whipped cream. This combo stays stable longer than plain whipped cream – perfect for parties!
Assembling the Strawberry Shortcake Cups
Here comes the fun part! For each cup, layer:
- One cake round
- A spoonful of juicy strawberries
- A dollop of cream
- Repeat!
Top each with a whole strawberry for that picture-perfect finish. Serve within an hour for maximum freshness – though I doubt they’ll last that long!
Print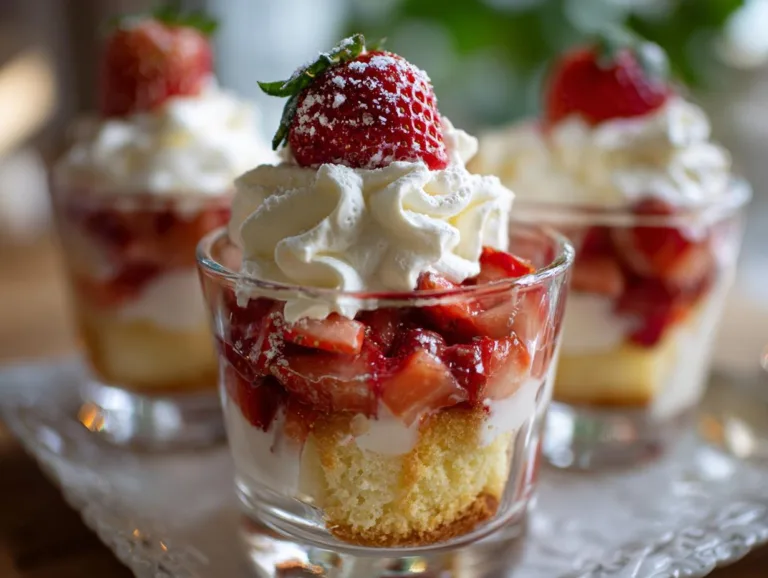
Irresistible Strawberry Shortcake Cups in 5 Simple Steps
Strawberry Shortcake Cups are delightful individual desserts featuring layers of fluffy cake, fresh strawberries, and creamy whipped topping. Perfect for gatherings or a sweet treat.
- Total Time: 54 minutes
- Yield: 12 servings 1x
Ingredients
- Cake: 2 cups (284g) all-purpose flour, plus more for dusting pan
- 3 Tbsp (26g) cornstarch
- 1/2 tsp salt
- 1/2 tsp baking soda
- 1/2 tsp baking powder
- 12 Tbsp (170g) unsalted butter, softened
- 1 1/2 cups (315g) granulated sugar
- 1 tsp lemon zest
- 4 large eggs
- 1 1/2 tsp vanilla extract
- 1 cup (283g) sour cream
- Strawberry layer: 2 lbs fresh strawberries, diced, plus 12 more small whole for garnish
- 3 1/2 Tbsp (45g) granulated sugar
- Cream layer: 2 cups (475ml) heavy cream
- 6 oz (170g) cream cheese, softened
- 1/2 tsp vanilla extract
- 3/4 cup (90g) powdered sugar
Instructions
- Preheat oven to 350°F. Butter and flour an 18×13-inch rimmed baking sheet.
- Whisk flour, cornstarch, salt, baking soda, and baking powder in a bowl. Set aside.
- Beat butter, sugar, and lemon zest until pale and fluffy. Mix in eggs one at a time, then vanilla.
- Alternate adding flour mixture and sour cream in batches, ending with flour. Mix just until combined.
- Spread batter evenly in baking sheet. Bake 20–24 minutes until a toothpick comes out clean.
- Cool completely, then cut into 24 rounds.
- Toss diced strawberries with sugar and let rest for 10 minutes.
- Whip heavy cream to soft peaks. Separately, whip cream cheese, powdered sugar, and vanilla until fluffy. Fold into whipped cream.
- Assemble cups: layer cake, strawberries, cream, and repeat. Garnish with fresh strawberries.
- Serve within an hour for best results.
Notes
- Use light sour cream for a lower-fat option.
- Cake can be made a day ahead—store covered until ready to assemble.
- Prepare cream and strawberries just before serving.
- Prep Time: 30 minutes
- Cook Time: 24 minutes
- Category: Dessert
- Method: Baking
- Cuisine: American
- Diet: Vegetarian
Nutrition
- Serving Size: 1 cup
- Calories: 420
- Sugar: 32g
- Sodium: 180mg
- Fat: 25g
- Saturated Fat: 15g
- Unsaturated Fat: 8g
- Trans Fat: 0g
- Carbohydrates: 45g
- Fiber: 2g
- Protein: 6g
- Cholesterol: 120mg
Tips for Perfect Strawberry Shortcake Cups
After making these dozens of times (okay, maybe hundreds – I have a problem!), I’ve picked up some foolproof tricks:
- Don’t overmix the batter – stop as soon as the flour disappears for that perfect tender crumb
- Chill your bowl and beaters before whipping cream – cold tools = fluffy peaks every time
- Assemble just before serving – nobody likes soggy cake! The layers stay perfect for about an hour
- Use room temp ingredients – eggs, butter, and cream cheese blend smoother when not cold
- Cut cake rounds neatly – dip your cutter in flour between cuts to prevent sticking
Oh! And always make extra – these disappear faster than you’d think!
Variations & Substitutions
One of the best things about this recipe is how easily you can mix it up! Here are my favorite twists:
- Gluten-free? Swap the flour for your favorite GF blend – just add 1/4 tsp xanthan gum if it’s not included.
- Dairy-free dream: Use coconut cream instead of heavy cream and vegan cream cheese – it whips up beautifully!
- Berry swap: Try raspberries, blackberries, or a mix when strawberries aren’t in season.
- Lemon lover? Add a tablespoon of lemon juice to the strawberries for extra zing.
- Short on time? Use store-bought pound cake rounds – I won’t tell!
The possibilities are endless – make it your own!
Storing and Serving Suggestions
Let’s be real – these Strawberry Shortcake Cups are best devoured fresh, preferably while standing in the kitchen with friends gathered around! But if you must store leftovers (who are we kidding, leftovers?), here’s how to keep them tasting great:
The assembled cups will hold their texture beautifully for about an hour at room temperature. After that, pop any uneaten ones in the fridge for up to 24 hours – though the cake will soften a bit more each hour. I like to store components separately when possible:
- Cake rounds: Keep in an airtight container at room temp for 2 days or freeze for up to a month
- Macerated strawberries: Refrigerate in their juices up to 2 days
- Whipped cream mixture: Stores beautifully in the fridge for 24 hours – just give it a quick whisk before using
For serving, I love pairing these with:
- Hot tea (Earl Grey is my favorite contrast to the sweet berries)
- Iced coffee for summer gatherings
- Sparkling rosé when feeling fancy
Pro tip: If you’re transporting these to a party, assemble them on-site! Just pack the components separately in coolers and layer them when you arrive – your friends will think you’re a dessert wizard.
Strawberry Shortcake Cups Nutrition
Okay, let’s talk numbers – but remember, these are just estimates because we’re all using slightly different strawberries, brands of flour, etc. Here’s the nutritional breakdown per serving (because yes, I’ve actually done the math while enjoying my third cup…for research purposes, obviously!).
Per 1 Strawberry Shortcake Cup:
- Calories: 420
- Total Fat: 25g (15g saturated, 8g unsaturated)
- Cholesterol: 120mg
- Sodium: 180mg
- Total Carbohydrates: 45g
- Dietary Fiber: 2g
- Sugars: 32g
- Protein: 6g
A few notes from my kitchen experiments:
- Using light sour cream instead of full-fat? You’ll save about 40 calories per serving.
- Fresh strawberries vary in sweetness – less sugar in the berry layer means fewer carbs.
- That cream cheese in the whipped topping? It actually helps stabilize the cream so you use less sugar overall!
Important disclaimer: These values are approximate and calculated using standard ingredients. Your exact nutrition may vary based on specific brands, strawberry sweetness, and whether you lick the whipped cream bowl (I always do!).
Now stop worrying about numbers and enjoy your delicious creation – life’s too short not to savor every bite of these strawberry delights!
Frequently Asked Questions
I’ve gotten so many questions about these Strawberry Shortcake Cups over the years! Here are the answers to the ones I hear most often:
Can I Make Strawberry Shortcake Cups Ahead?
Absolutely! The cake rounds freeze beautifully for up to a month – just thaw at room temp when ready to use. You can macerate strawberries 2-3 hours ahead (any longer and they get too juicy). The cream mixture holds well refrigerated overnight. But assemble those pretty layers just before serving – trust me, it makes all the difference!
Can I Use Whipped Topping Instead of Fresh Cream?
You can, but the homemade cream really shines here! Store-bought whipped topping tends to be sweeter and lacks that lovely tang from the cream cheese. If you must substitute, try folding softened cream cheese into thawed whipped topping to mimic the texture.
How Do I Prevent Soggy Cake Layers?
Three secrets: 1) Let cake cool completely before assembling, 2) Don’t overdress strawberries with sugar (just enough to coat), and 3) Serve within an hour of assembly. The cornstarch in the cake helps resist sogginess too!
Final Thoughts
Alright, now it’s your turn! Whip up these Strawberry Shortcake Cups and watch them disappear faster than you can say “seconds please!” I’d love to hear how yours turn out – tag me on Instagram or leave a comment when you make them. Nothing makes me happier than seeing your kitchen adventures!
Remember: baking should be fun, not fussy. So grab those strawberries, turn up your favorite playlist, and let’s make some sweet memories together. Happy baking, friends!
For More recipes, Follow me on Facebook!