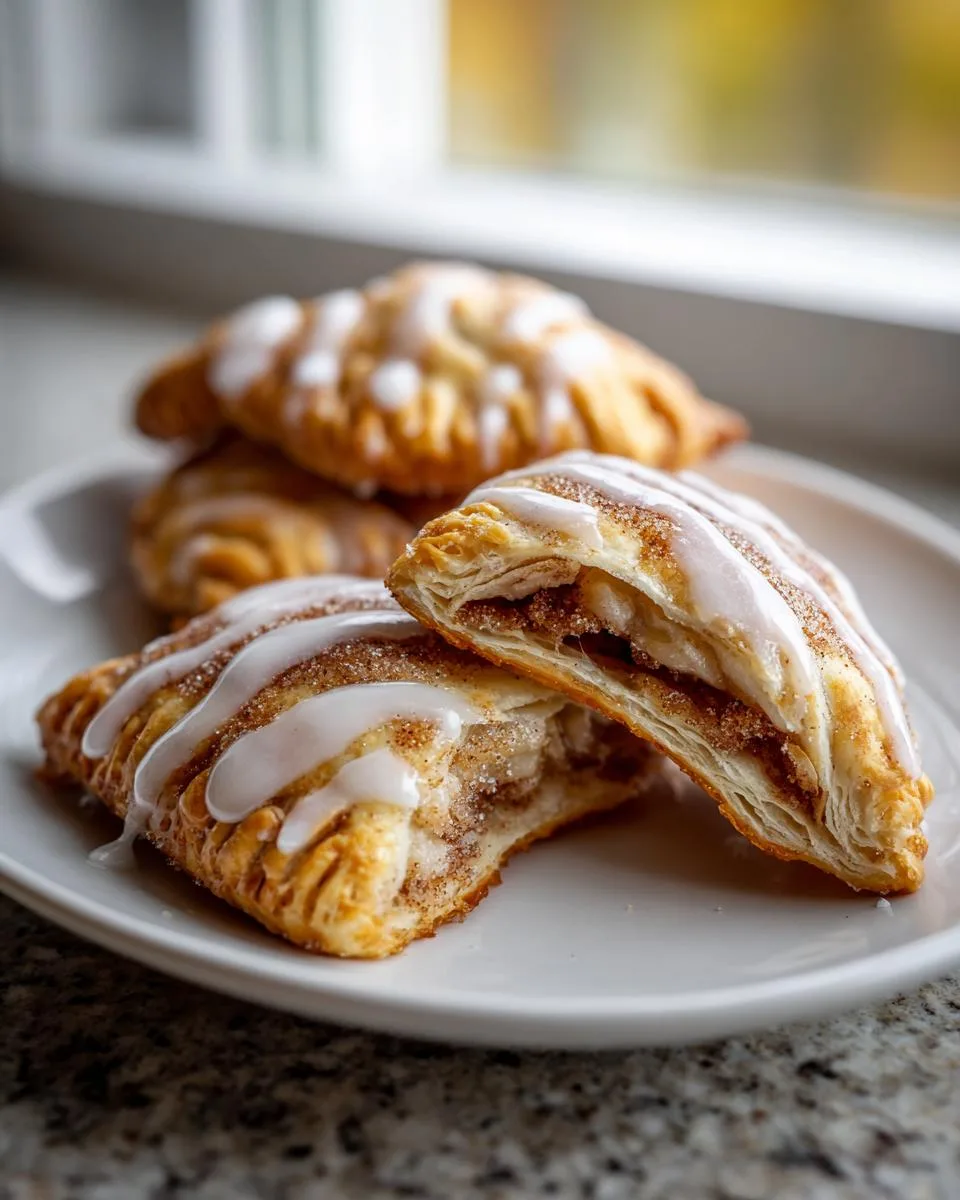
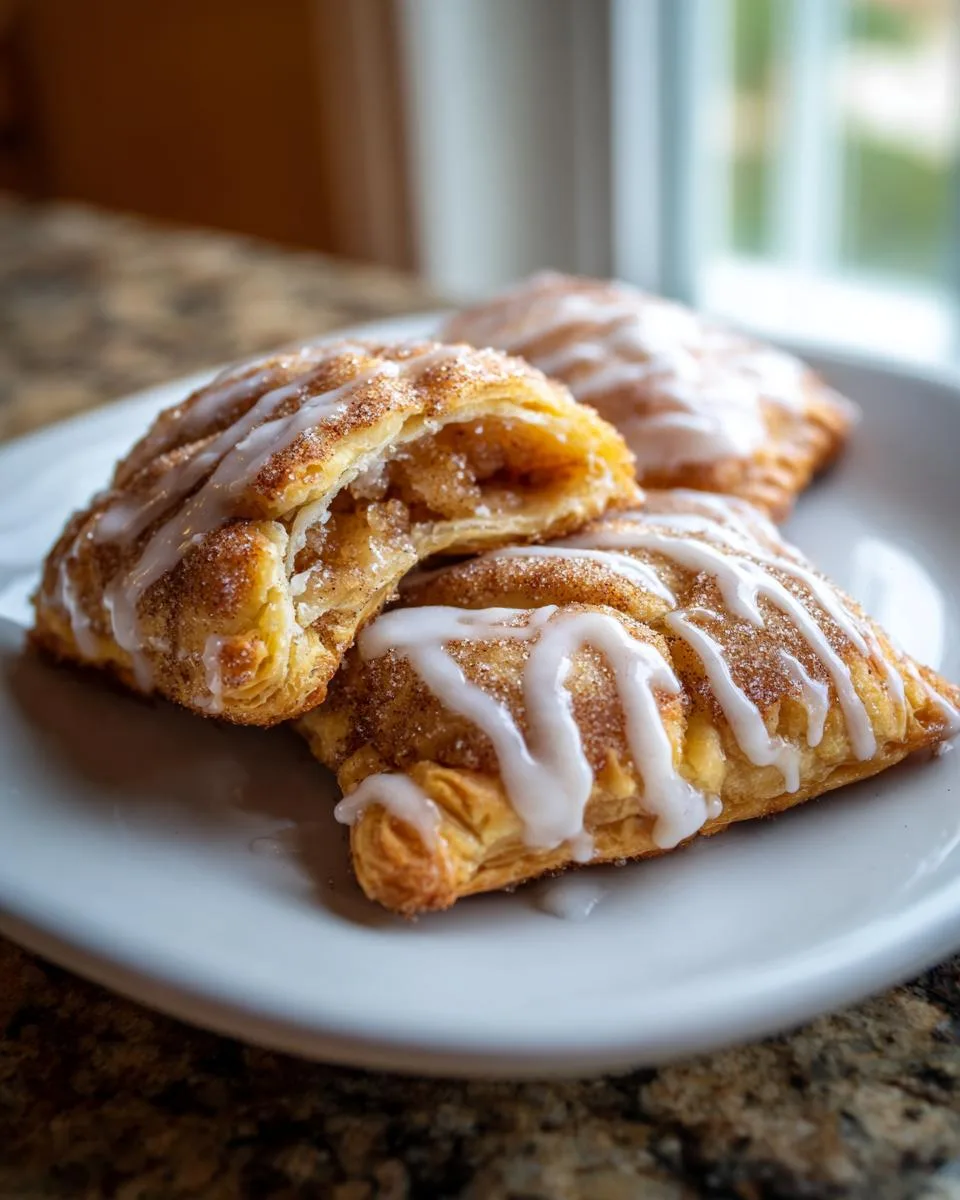
Oh my gosh, you guys—nothing beats the smell of homemade breakfast pop tart pastries baking in the oven on a lazy weekend morning! I still remember the first time I made these for my niece’s sleepover. The way her eyes lit up when she bit into that warm, flaky pastry with cinnamon-sugar oozing out? Priceless.
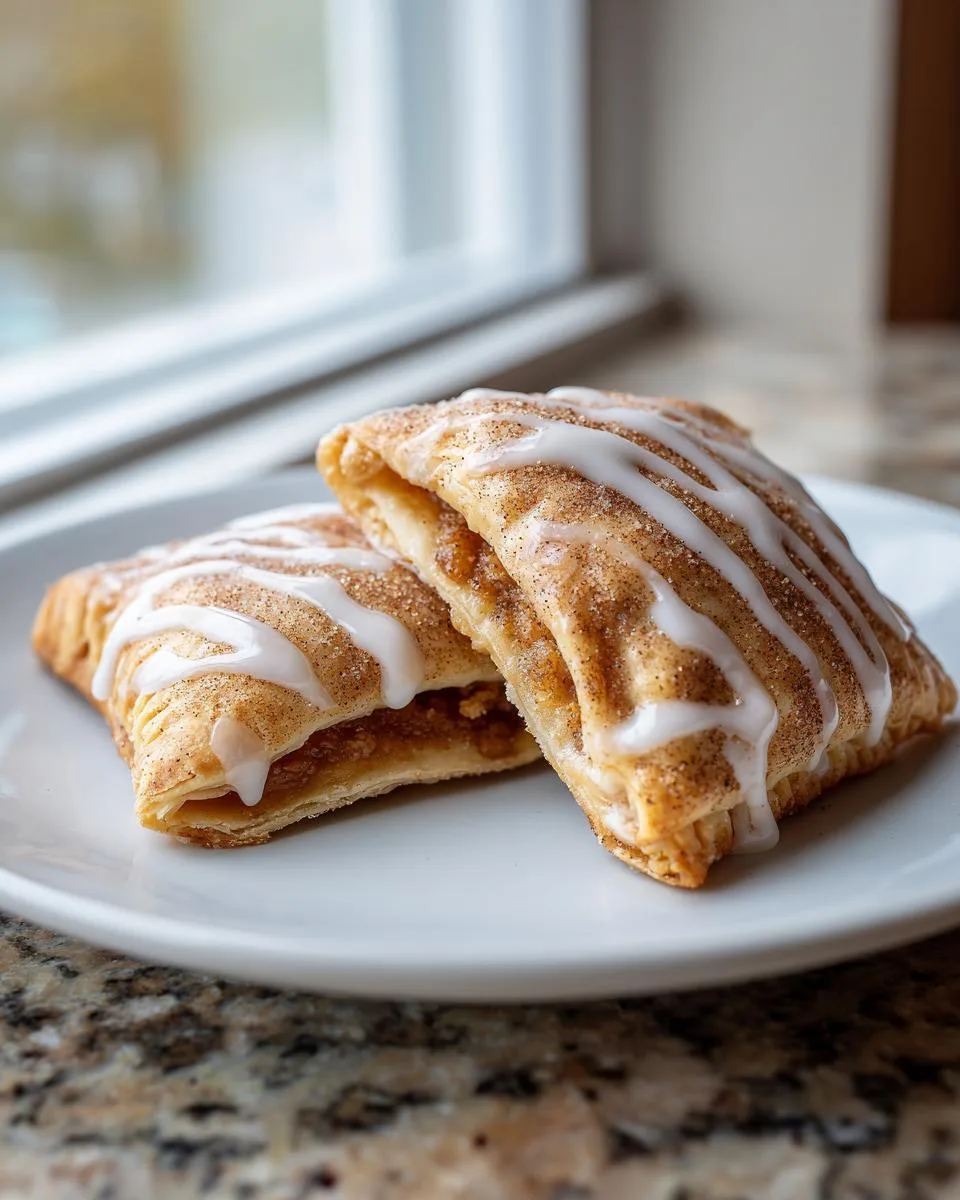
Table of Contents
Table of Contents
Store-bought pop tarts can’t even compare to these buttery, from-scratch beauties. And here’s the best part—they’re way easier to make than you’d think! Just wait till you taste that sweet glaze melting into every nook and cranny of the golden crust. Trust me, once you try these, you’ll never go back to the boxed version again.
Why You’ll Love These Breakfast Pop Tart Pastries
Let me count the ways these homemade pop tarts will steal your heart:
- Morning magic: Wake up to warm pastries that make weekday breakfasts feel special
- Better than store-bought: Flaky, buttery layers that put those cardboard-box versions to shame
- Customizable fillings: Swap the cinnamon-sugar for jam, Nutella, or even savory options!
- Perfect for batch cooking: Make a bunch and freeze them for grab-and-go mornings
- Kid-approved: Little hands love helping assemble these (and eating them, obviously)
Honestly? Once you taste that first bite of golden pastry with the sweet glaze dripping down your fingers, you’ll be hooked. I know I was!
Ingredients for Breakfast Pop Tart Pastries
Okay, let’s talk ingredients – because using the right stuff makes ALL the difference with these pop tarts. I learned the hard way that skimping on quality here leads to sad, soggy pastries (we don’t want that!). Here’s exactly what you’ll need, grouped neatly so you can tackle this recipe in stages:
For the Pastry Dough:
- 2 and 1/2 cups (313g) all-purpose flour, plus extra for dusting (trust me, you’ll need it)
- 2 teaspoons granatsugar – just enough to sweeten the dough subtly
- 1 teaspoon salt – balances all that sweetness beautifully
- 1 cup (16 Tbsp; 226g) unsalted butter, chilled and cubed (cold butter = flaky layers!)
- 1/2 cup (120ml) ice water – I keep mine in the freezer for 10 minutes before using
For That Irresistible Cinnamon-Sugar Filling:
- 1/2 cup (100g) packed brown sugar – dark or light both work, but I prefer dark for deeper flavor
- 2 teaspoons ground cinnamon – the star of the show!
- 1 tablespoon (8g) all-purpose flour – this little bit helps thicken the filling so it doesn’t leak
For the Glaze That Makes Everything Shine:
- 3/4 cup (90g) confectioners’ sugar, sifted (no lumps allowed!)
- 1 tablespoon (15ml) milk – whole milk gives the richest glaze
- 1/2 teaspoon ground cinnamon – because why stop at the filling?
- 1/4 teaspoon pure vanilla extract – the good stuff makes all the difference
Quick pro tip: Measure your flour correctly! Spoon it into the measuring cup and level it off – packing it down leads to dense dough. And please, PLEASE use real butter. Those margarine imposters just don’t create the same magical flakiness. Now let’s get baking!
How to Make Breakfast Pop Tart Pastries
Alright, let’s roll up our sleeves and make some magic happen! I’ll walk you through each step just like I do with my baking students – clear, simple, and with all my favorite tricks along the way.
Prepare the Pastry Dough
First things first – keep that butter COLD. I pop mine back in the fridge after cubing it, just to be safe. In a large bowl, whisk together flour, sugar, and salt. Now the fun part – use your fingers to work the chilled butter into the flour until it looks like uneven pea-sized crumbs. Don’t overdo it – those butter chunks will create flaky layers!
Slowly drizzle in ice water while stirring with a fork. The dough should just come together when pinched – if it’s too crumbly, add water teaspoon by teaspoon. Turn it out onto a floured surface, gather into a ball, then divide in half. Flatten each into a 1-inch thick disc, wrap in plastic, and chill for at least 2 hours (overnight works too!). This rest relaxes the gluten so your pastry stays tender, not tough.
Make the Cinnamon-Sugar Filling
While the dough chills, let’s whip up that irresistible filling. Simply stir together brown sugar, cinnamon, and flour in a small bowl. The flour acts like a little insurance policy against runny fillings. Taste it – is the cinnamon punchy enough foil you? Adjust to your liking. Just remember, a heaping teaspoon per pop tart is plenty – overfilling leads to messy leaks (been there!).</ recently>
Assemble and Bake the Pop Tarts
Here’s where the magic happens! Roll one dough disc into a 9×12-inch rectangle on a floured surface (keep the other chilled). Use a ruler and pizza cutter to divide into nine 3×4-inch rectangles – don’t stress about perfection. Transfer half to a parchment-lined baking sheet.
Whisk together the egg wash (1 egg + 2 tsp milk) and brush it over the rectangles on the sheet. Sprinkle each with about 1 tablespoon filling, leaving a 1/2-inch border. Top with remaining rectangles, press edges with a fork to seal, then poke steam holes in the tops with a toothpick. Chill assembled pop tarts for 20 minutes – this prevents spreading.
Bake at 350°F for 25-30 minutes until golden. That heavenly smell means they’re done!
Glaze and Serve
Patience, friend – let them cool completely before glazing (warm pop tarts = melted glaze puddles). For the glaze, whisk confectioners’ sugar, milk, cinnamon and vanilla until smooth. It should ribbon off the whisk – too thick? Add milk drop by drop. Drizzle or spread over cooled pastries. The glaze sets in about 15 minutes…if you can wait that long!
Print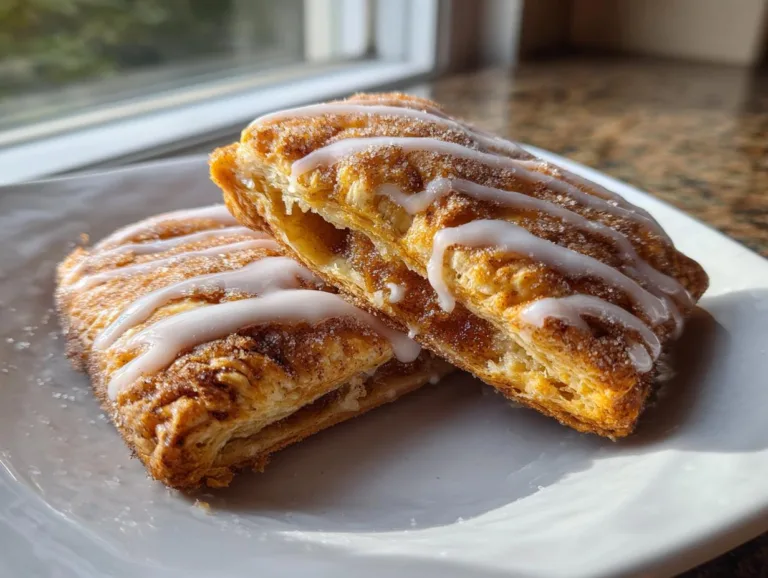
2-Ingredient Breakfast Pop Tart Pastries You’ll Adore
Homemade breakfast pop tart pastries with a cinnamon-sugar filling and sweet glaze.
- Total Time: 3 hours (including chilling)
- Yield: 9 pop tarts 1x
Ingredients
- 2 and 1/2 cups (313g) all-purpose flour, plus more as needed
- 2 teaspoons granulated sugar
- 1 teaspoon salt
- 1 cup (16 Tbsp; 226g) unsalted butter, chilled and cubed
- 1/2 cup (120ml) ice water, plus more as needed
- 1/2 cup (100g) packed dark or light brown sugar
- 2 teaspoons ground cinnamon
- 1 tablespoon (8g) all-purpose flour
- 1 large egg mixed with 2 teaspoons milk (egg wash)
- 3/4 cup (90g) confectioners’ sugar, sifted
- 1 tablespoon (15ml) milk, plus more as needed
- 1/2 teaspoon ground cinnamon
- 1/4 teaspoon pure vanilla extract
Instructions
- Make the pastry dough by combining flour, sugar, salt, and butter. Gradually add ice water until dough forms.
- Divide dough into two discs, wrap in plastic, and refrigerate for at least 2 hours.
- Roll out one dough disc into a 9×12-inch rectangle and cut into nine 3×4-inch rectangles. Repeat with the second disc.
- Mix brown sugar, cinnamon, and flour for the filling.
- Brush egg wash on half the rectangles, add filling, then cover with remaining rectangles. Seal edges and poke holes for steam.
- Refrigerate assembled pop tarts for 20 minutes, then bake at 350°F for 25–30 minutes.
- Prepare glaze by whisking confectioners’ sugar, milk, cinnamon, and vanilla. Spread over cooled pop tarts.
- Store pop tarts in an airtight container for up to 3 days at room temperature or 5 days in the fridge.
Notes
- Chill dough thoroughly for easier handling.
- Seal edges tightly to prevent filling from leaking.
- Use a ruler for precise rectangle sizes.
- Let pop tarts cool completely before glazing.
- Prep Time: 30 minutes
- Cook Time: 30 minutes
- Category: Breakfast
- Method: Baking
- Cuisine: American
- Diet: Vegetarian
Nutrition
- Serving Size: 1 pop tart
- Calories: 280
- Sugar: 18g
- Sodium: 150mg
- Fat: 14g
- Saturated Fat: 8g
- Unsaturated Fat: 5g
- Trans Fat: 0g
- Carbohydrates: 35g
- Fiber: 1g
- Protein: 3g
- Cholesterol: 45mg
Tips for Perfect Breakfast Pop Tart Pastries
After burning through more batches than I’d like to admit (who knew sugar could smoke like that?), here are my hard-won secrets for pop tart perfection:
- Keep everything chilly – I even chill my rolling pin! Cold dough prevents shrinking and keeps those beautiful flaky layers.
- Seal like your life depends on it – Press edges firmly with a fork, then go back with your fingers to really crimp them shut.
- Poke generous steam holes – Tiny punctures lead to puffy disasters. I use a chopstick for perfect little vents.
- Roll dough between parchment – No sticking, no tears, no flour overload – just easy-peasy rolling.
- Wait for the glaze! I know it’s tempting, but glazing warm pop tarts creates a sad, drippy mess. Patience pays off.
Follow these, and you’ll have golden, bakery-worthy pop tarts every single time!
Ingredient Substitutions and Variations
One of the best things about these breakfast pop tart pastries? They’re totally customizable! Here are my favorite ways to mix things up:
- Vegan version: Swap butter for coconut oil and use almond milk in both dough and glaze
- Gluten-free: Try a 1:1 gluten-free flour blend – just add a touch more water if needed
- Different fillings: Raspberry jam.application, Nutella, or even peanut butter and jelly work beautifully
- Glaze alternatives: Maple syrup thinned with lemon juice makes a lovely citrusy glaze, or skip it entirely for a less-sweet option
- Savory twist: Omit sugar in dough, fill with cheese and herbs – perfect for brunch!
See? The possibilities are endless! What variations will you try first? Check out more recipes here!
Storing and Reheating Breakfast Pop Tart Pastries
Okay, let’s talk about keeping these beauties fresh! Store cooled pop tarts in an airtight container at room temp for up to 3 days (if they last that long). For longer storage, refrigerate for 5 days or freeze for 2 months – just pop frozen ones straight into the toaster! Want that fresh-from-the-oven feel? A quick 10-second microwave zap or 5 minutes in a 350°F oven brings back the magic. Pro tip: Glaze after reheating for that perfect drizzle every time!
Nutrition Information for Breakfast Pop Tart Pastries
Now, let’s be real – we’re not eating pop tarts for their health benefits! But I know some of you like to keep track, so here’s the nutritional breakdown per pop tart (based on my exact ingredients). Remember, these numbers can vary depending on your specific brands and any substitutions you make.
- Calories: 280
- Total Fat: 14g (8g saturated, 5g unsaturated)
- Cholesterol: 45mg
- Sodium: 150mg
- Total Carbohydrates: 35g
- Fiber: 1g
- Sugars: 18g
- Protein: 3g
Now, before anyone panics about those numbers – these are homemade treats meant for occasional enjoyment! My philosophy? When you’re using real butter, quality ingredients, and making things from scratch, the joy you get from baking and sharing far outweighs the calorie count. Everything in moderation, right? That’s why I make them small – so you can savor one without guilt!
FAQ About Breakfast Pop Tart Pastries
I get SO many questions about these homemade pop tarts – here are the answers to everything you’ve been wondering!
Can I freeze these pop tarts?
Absolutely! Freeze them unglazed in a single layer first, then transfer to an airtight container with parchment between layers. They’ll keep beautifully for up to 2 months. When the craving hits, just pop frozen pop tarts straight into the toaster (no thawing needed!) or warm in a 350°F oven for about 10 minutes. Add the glaze after reheating for that fresh-baked look and texture.
How long do homemade pop tarts stay fresh?
Here’s the scoop: Glazed pop tarts keep at room temperature for 3 days in an airtight container (if they last that long!). Unglazed ones stay fresh for 5 days in the fridge – just glaze them right before serving. The dough itself can chill for up to 3 days before rolling out, or freeze for a month. Basically, these babies are as flexible as your schedule!
Why did my filling leak out?
Oh honey, I’ve been there bankrupt than once! Leaks usually happen from either overfilling (stick to 1 tablespoon max per pop tart) or not sealing the edges tightly enough. My foolproof method? Press the edges with a fork first, then go back and pinch them together with your fingers. And don’t skip those steam holes – they prevent pressure build-up that can burst seams. Trust me, after a few batches, you’ll be a sealing pro!
Can I make these gluten-free or vegan?
You bet! For gluten-free pop tarts, swap the all-purpose flour with your favorite 1:1 gluten-free blend (I like the ones with xanthan gum already added). Vegan version? Use cold coconut oil instead of butter and swap the egg wash for almond milk. The glaze works perfectly with plant-based milk too. The texture might vary slightly, but the flavor will still be amazing!
What’s the best way to reheat pop tarts?
For that just-baked magic, I recommend either toasting (about 2 minutes on medium) or warming in a 350°F oven for 5-7 minutes. The microwave works in a pinch (10-15 seconds), but can make the pastry a bit soft. My secret? Always glaze AFTER reheating – it keeps that perfect drizzle intact. Now go enjoy your warm, flaky masterpiece!
Share Your Breakfast Pop Tart Pastries
I’d love to see your creations! Snap a pic of those golden beauties and tag me – nothing makes me happier than seeing your kitchen adventures. Did you try any fun variations? Drop a comment below and share your pop tart stories!
For More recipes, Follow me on Facebook!