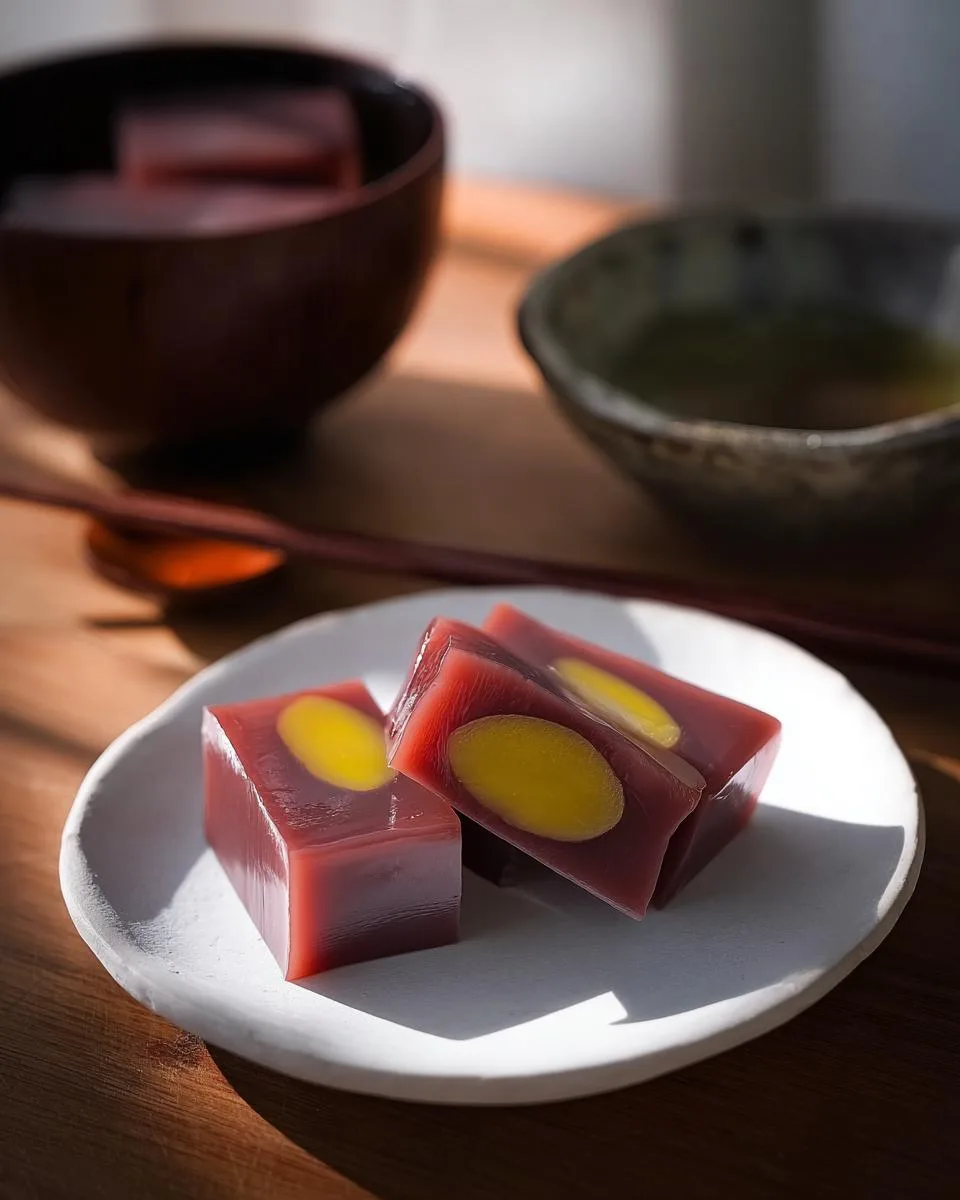
Oh, Mizu Yokan – my absolute favorite summer treat! There’s something magical about that smooth, chilled red bean jelly melting on your tongue after a hot day. I first fell in love with it during a trip to Kyoto, where street vendors sold these gorgeous ruby-red blocks that looked too pretty to eat (but of course, I ate them anyway!). What I love most is how simple yet elegant this dessert is – just a few ingredients transform into something refreshingly sweet and satisfying. Whether you’re new to Japanese sweets or a longtime fan, Mizu Yokan is one of those desserts that feels fancy but is surprisingly easy to make at home. Trust me, once you try making your own batch, you’ll understand why this chilled delight has been cherished in Japan for generations!
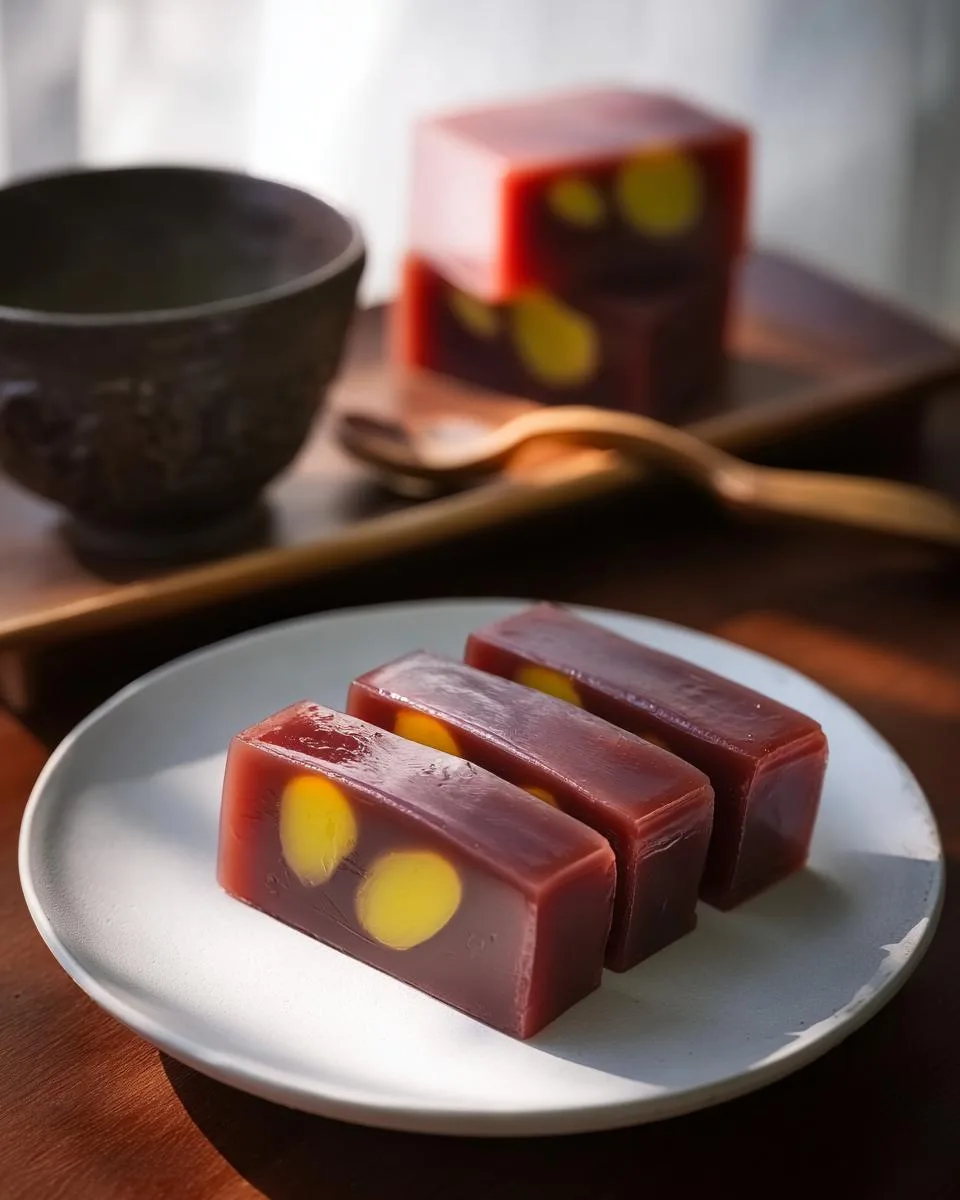
Table of Contents
Table of Contents
Why You’ll Love This Mizu Yokan Recipe
This Mizu Yokan recipe is pure magic – here’s why:
- Effortless elegance: Just 5 simple ingredients transform into a stunning dessert that looks like it came from a fancy wagashi shop
- Cooling perfection: That melt-in-your-mouth jelly texture is the ultimate refreshment on hot days
- Play with flavors: Swap chestnuts for matcha or citrus zest – it’s wonderfully adaptable
- Taste of tradition: You’re making authentic Japanese confectionery right in your kitchen
- Make-ahead dream: Chills beautifully so you can prepare it days before serving
Seriously – once you taste homemade Mizu Yokan, store-bought versions just won’t compare!
Mizu Yokan Ingredients
Here’s everything you’ll need to make this dreamy red bean jelly – I promise it’s simpler than you think!
- 14 oz sweet red bean paste (anko) – Look for the smooth type (koshian) for that velvety texture I love
- 1½ cups water – Filtered works best since we’re tasting every element
- 4 g kanten (agar) powder – This magical seaweed-based gelling agent gives that perfect wobble
- ⅛ tsp Diamond Crystal kosher salt – The flaky crystals balance the sweetness just right
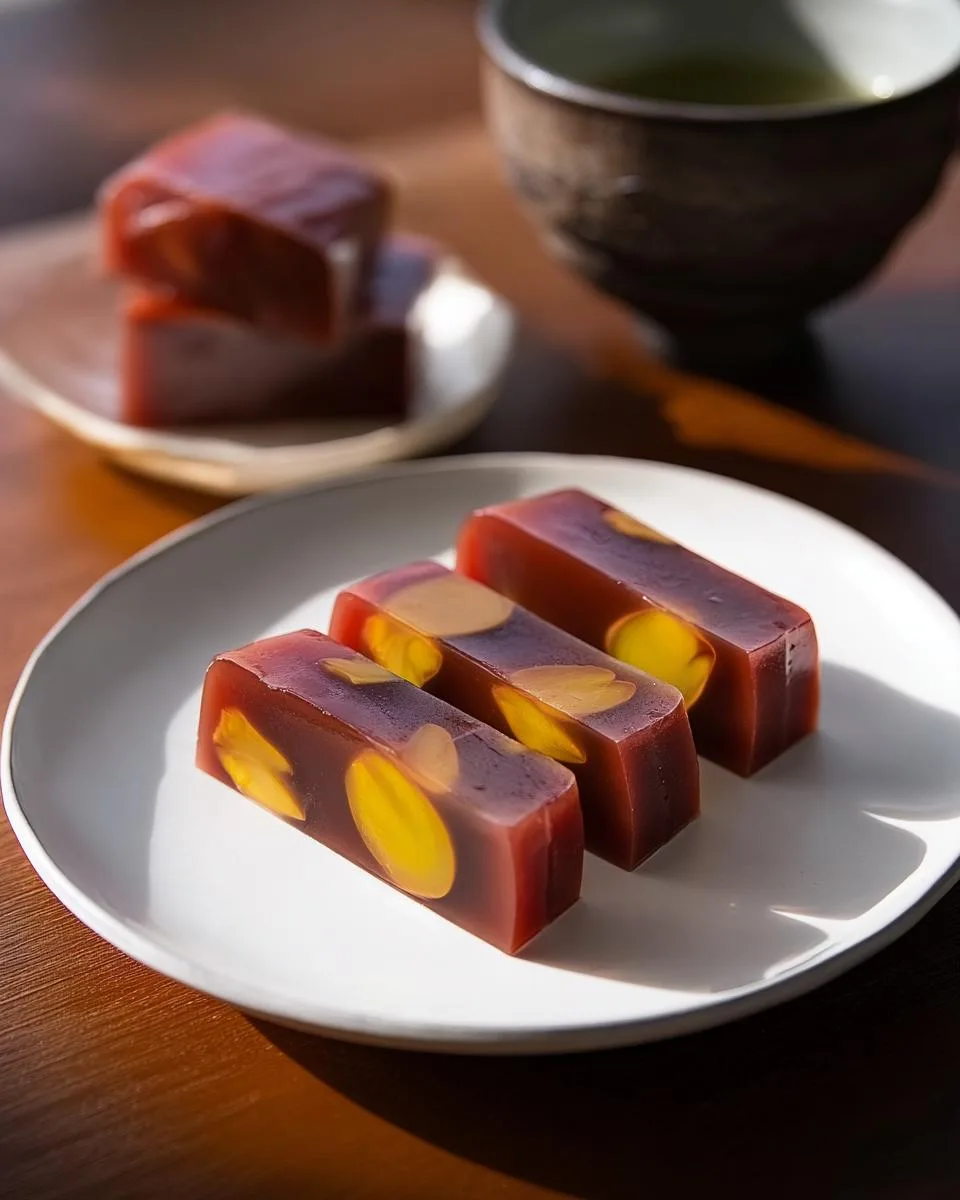
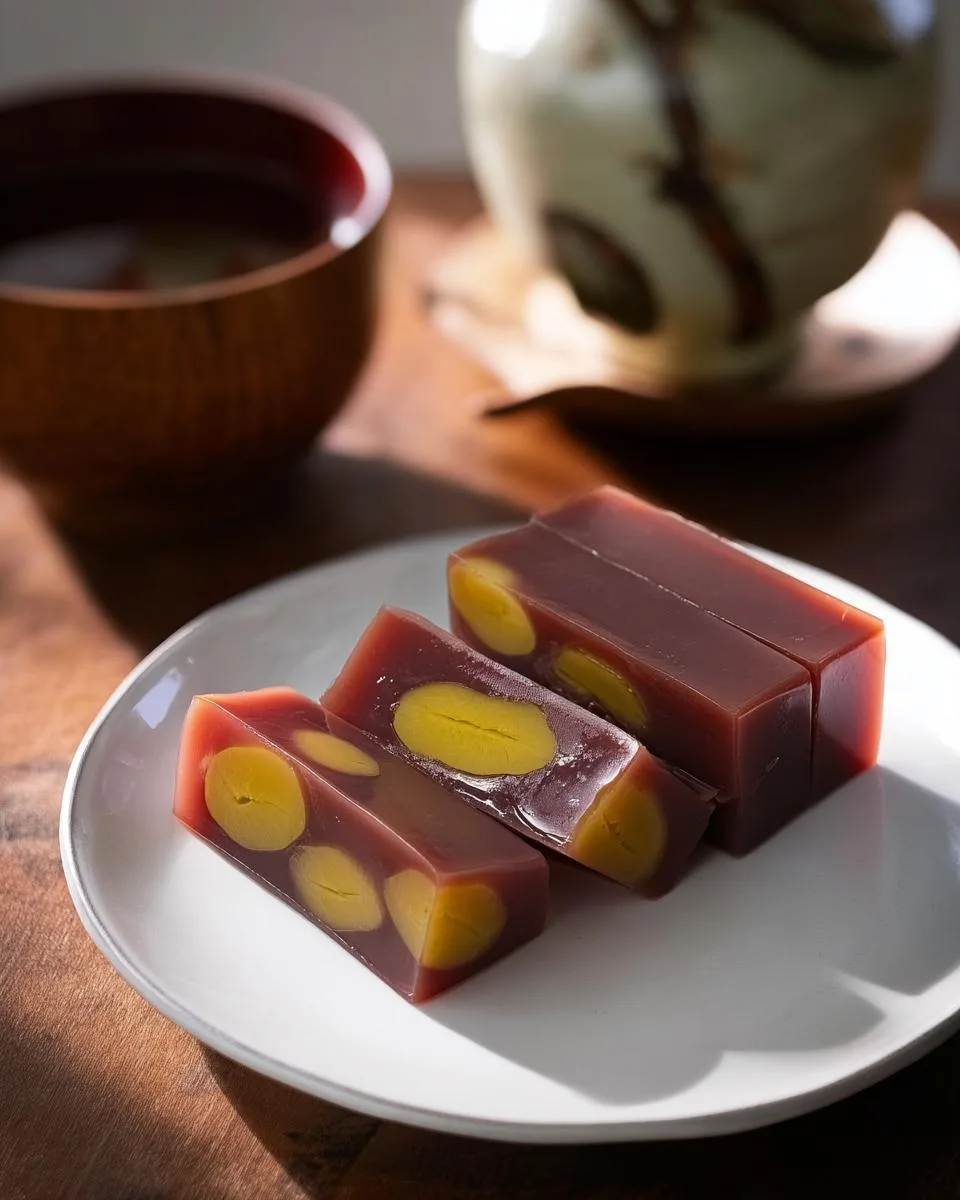
- 1 jar kuri kanroni (chestnuts in heavy syrup) – About 7 oz/200g – my favorite textural surprise!
Quick note: If you can’t find chestnuts in syrup, plain cooked ones work too – just soak them in simple syrup for 30 minutes first!
Equipment You’ll Need for Mizu Yokan
Don’t worry – you probably have most of these tools already! Here’s what you’ll need to make perfect Mizu Yokan:
- Medium saucepan – For dissolving that agar perfectly
- Whisk – My trusty silicone one never fails me
- Square mold or loaf pan – About 7×3 inches works great
- Plastic wrap – Lifesaver for easy removal (unless you’ve got a fancy nagashikan!)
- Rubber spatula – To scrape every last bit of that delicious red bean mixture
See? Nothing too fancy – just everyday kitchen essentials for creating something extraordinary!
How to Make Mizu Yokan Step by Step
Okay, let’s dive into the magic! Making Mizu Yokan is like conducting a sweet little science experiment – but don’t worry, it’s way easier than it looks. Follow these steps and you’ll have perfect jelly every time!
Preparing the Mold
First things first – grab your mold and line it with plastic wrap, letting the edges hang over. This little trick makes popping out your perfect Mizu Yokan blocks SO much easier later!
Cooking the Agar Mixture
Now, whisk together your water and agar powder in a saucepan – really get in there to prevent lumps! Bring it to a rolling boil, then reduce heat and keep whisking for about 2 minutes until it’s completely dissolved. This step is crucial – undercooked agar won’t set properly!
Adding the Red Bean Paste
Time for the star ingredient! Gradually stir in your red bean paste until it’s fully incorporated and silky smooth. Taste it now – if you prefer it sweeter, add a touch of sugar, but I find most anko is perfectly sweet already.
Layering and Setting
Here’s where the fun begins! Pour a thin layer of the mixture into your prepared mold and let it set for about 10 minutes – just until it’s firm enough to hold your chestnuts. Arrange them evenly, then pour the remaining mixture over top. Let it cool for 15 minutes at room temperature before transferring to the fridge for at least 2 hours – patience is key for that perfect jelly texture!
See? Not complicated at all! The hardest part is waiting for it to chill – but trust me, it’s worth every minute.
Print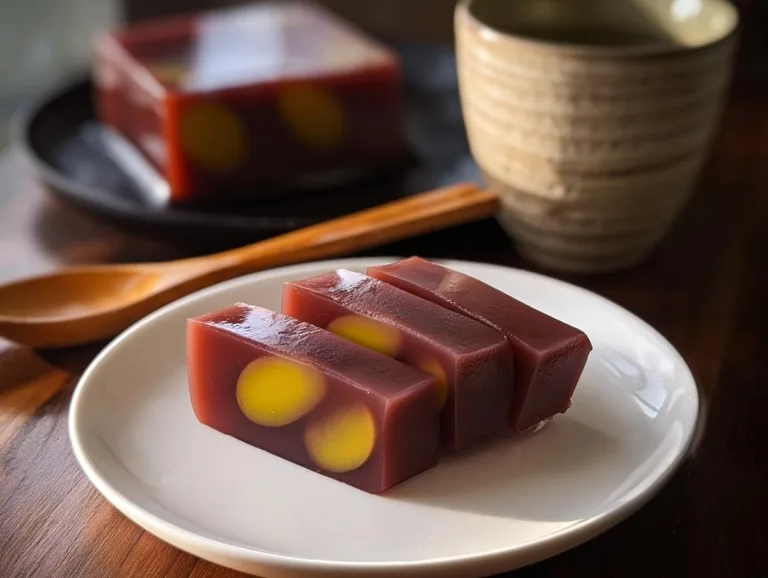
Chilled Mizu Yokan: Japanese Red Bean Jelly Bliss
Mizu Yokan is a traditional Japanese dessert made with sweet red bean paste and agar, resulting in a refreshing jelly-like treat. It’s often enjoyed chilled and can be customized with chestnuts for added texture and flavor.
- Total Time: 2 hours 25 minutes
- Yield: 12 servings 1x
Ingredients
- 14 oz sweet red bean paste (anko)
- 1½ cups water
- 4 g kanten (agar) powder
- ⅛ tsp Diamond Crystal kosher salt
- 1 jar kuri kanroni (chestnuts in heavy syrup) (7 oz, 200 g)
Instructions
- Gather all ingredients. Line your mold with plastic wrap if not using a nagashikan.
- Whisk water and agar powder in a saucepan. Bring to a boil.
- Reduce heat and dissolve agar completely, about 2 minutes.
- Add red bean paste and stir until fully dissolved.
- Mix in salt and remove from heat. Let cool slightly.
- Pour a thin layer of the mixture into the mold and let set for 10 minutes.
- Place chestnuts evenly on the set layer.
- Pour remaining mixture over chestnuts. Let cool for 15 minutes.
- Refrigerate for 2 hours until fully chilled.
- Remove from mold, slice, and serve chilled.
Notes
- Adjust sweetness based on your red bean paste brand.
- Use plastic wrap for easy removal if not using a nagashikan.
- Store leftovers in the refrigerator for up to 3 days.
- Prep Time: 15 minutes
- Cook Time: 10 minutes
- Category: Dessert
- Method: Chilled
- Cuisine: Japanese
- Diet: Vegetarian
Nutrition
- Serving Size: 1 piece
- Calories: 120
- Sugar: 20g
- Sodium: 50mg
- Fat: 0.5g
- Saturated Fat: 0g
- Unsaturated Fat: 0g
- Trans Fat: 0g
- Carbohydrates: 25g
- Fiber: 2g
- Protein: 2g
- Cholesterol: 0mg
Tips for Perfect Mizu Yokan
After making countless batches of Mizu Yokan (and eating even more!), here are my foolproof tips for jelly perfection:
- Agar alert: Don’t rush the dissolving process – keep whisking until your mixture is completely smooth with no grainy bits. Undissolved agar means sad, crumbly jelly!
- Sweetness check: Taste your red bean mixture before pouring – brands vary wildly in sweetness. I sometimes add a teaspoon of honey if my anko isn’t quite sweet enough.
- Plastic wrap magic: Seriously, don’t skip lining your mold! Those clean edges make all the difference when slicing.
- Chill time matters: Let it set fully for at least 2 hours – impatient cutting leads to messy slices (though still delicious!).
- Knife trick: Dip your knife in hot water before slicing for picture-perfect clean cuts every time.
Remember – even “imperfect” Mizu Yokan still tastes amazing, so don’t stress!
Mizu Yokan Variations
Oh, the fun part – making this recipe your own! Here are my favorite ways to play with Mizu Yokan:
- Matcha magic: Whisk in 1 tsp matcha powder with the agar for a gorgeous green twist
- Citrus zing: Add a tablespoon of yuzu or orange zest for a refreshing kick
- Nut-free option: Skip the chestnuts entirely – the smooth jelly is divine on its own
- Fruity layers: Try sliced strawberries or kiwi instead of chestnuts for a colorful surprise
See? Endless possibilities – just don’t tell my Japanese grandma I’m messing with tradition!
Serving and Storing Mizu Yokan
Here’s the best part – enjoying your beautiful creation! Serve Mizu Yokan chilled straight from the fridge – I love slicing it into elegant rectangles that show off those gorgeous layers. Leftovers? No problem! Just wrap tightly in plastic and refrigerate for up to 3 days (though mine never lasts that long!). Pro tip – if it gets too firm in the fridge, let it sit at room temperature for 10 minutes before serving to bring back that perfect jelly texture.
Mizu Yokan Nutritional Information
Here’s the scoop on what’s in each delightful slice of Mizu Yokan (based on my recipe!):
- Calories: About 120 per serving
- Sugar: 20g (mostly from the natural sweetness of red beans)
- Fat: Just 0.5g – practically guilt-free!
- Protein: 2g (those beans pack a little punch)
- Fiber: 2g – dessert that’s actually good for you
Remember – these numbers can vary based on your specific ingredients. Using different brands of anko or skipping the chestnuts will change things slightly. But hey – it’s dessert, let’s not overthink it!
Frequently Asked Questions About Mizu Yokan
I get so many questions about this lovely dessert – here are the ones that pop up most often!
Can I use gelatin instead of agar?
Oh honey, I wish! But agar gives Mizu Yokan its signature firm-yet-delicate texture that gelatin just can’t match. If you’re desperate, you could try – but expect a much softer set. My advice? Hunt down that kanten powder – Asian markets always have it!
My Mizu Yokan turned out too sweet – help!
No worries! Next time, use less sweetened red bean paste or cut the amount slightly. You can also add a pinch more salt to balance it out. I always taste the mixture before pouring – better safe than sorry!
Can I make this vegan?
Absolutely! Just double-check your red bean paste ingredients (most are naturally vegan) and skip the chestnuts in syrup if needed. The agar is already plant-based – isn’t that wonderful?
Why did my Mizu Yokan turn out grainy?
Ah, that means your agar didn’t dissolve completely. Next time, whisk more vigorously and make sure it boils fully – those stubborn powder clumps need convincing! A fine-mesh strainer can help catch any stragglers too.
How thin/thick should I slice it?
I love elegant ½-inch slices – thick enough to show off the layers but thin enough to melt delicately. But honestly? Cut it however you like! It’s your dessert, after all.
For more delicious recipes, check out our recipes section!
For More recipes, Follow me on Facebook!