There’s something downright magical about banana pudding, isn’t there? That creamy, dreamy dessert where every spoonful tastes like a warm hug. Honestly, just the smell of vanilla wafers and ripe bananas takes me straight back to my grandma’s kitchen—where she’d let me sneak a few bites before Sunday dinner, acting like she didn’t notice… even though she absolutely did. That’s the thing about banana pudding—it’s not just dessert. It’s memory food.
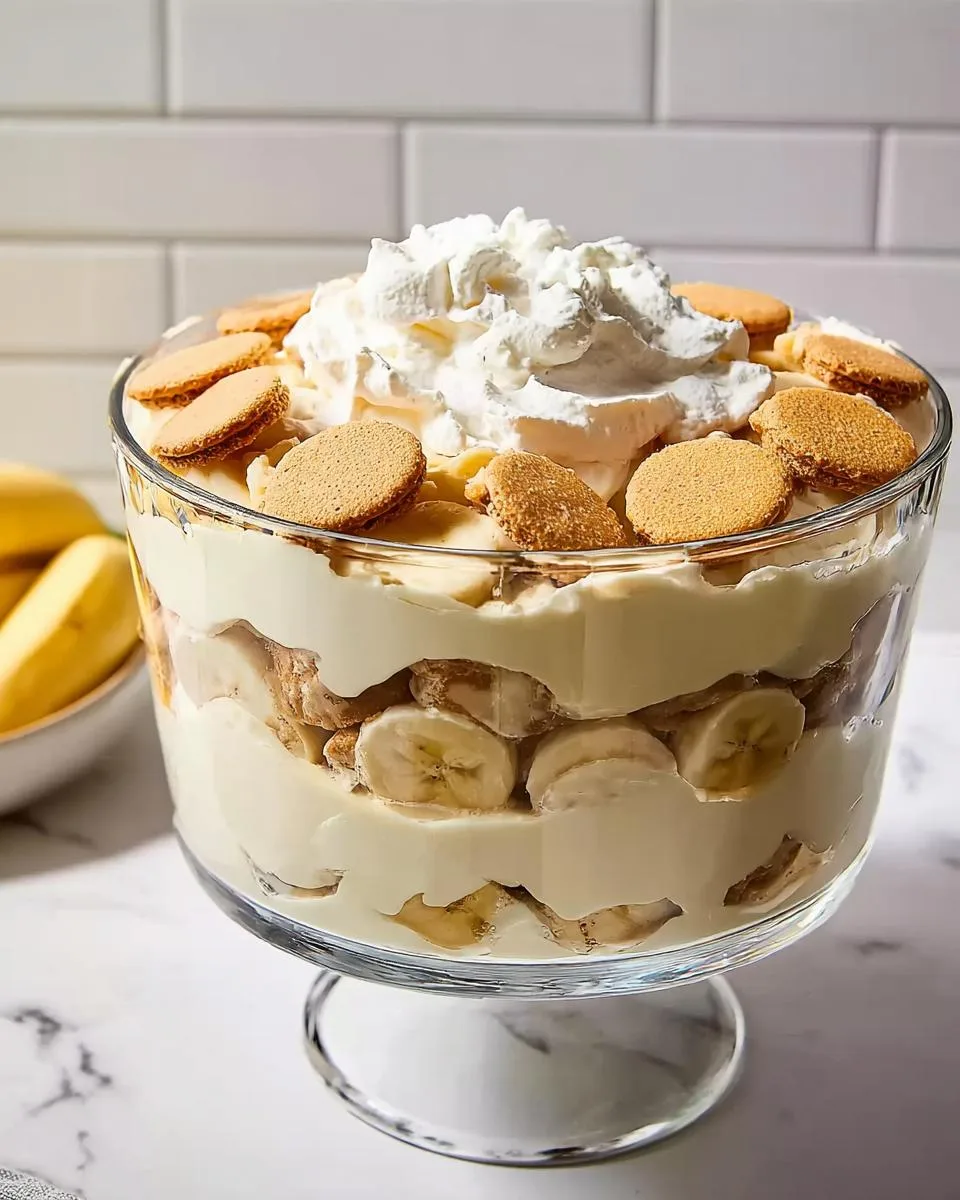
Table of Contents
Table of Contents
I’ve been making this recipe for years for everything from backyard barbecues and potlucks to those random Tuesday nights when the whole house needs a little comfort. And the secret is simple: keep it classic. No fancy techniques, no fussy steps—just good ingredients layered with love.
Because when you get that perfect balance of silky pudding, sweet bananas, and crisp vanilla wafers that soften just enough… oh honey, it’s pure happiness in a bowl. And the best part? No oven required. Just mix, layer, chill, and watch it disappear.
Why You’ll Love This Banana Pudding
Let me tell you why this banana pudding will become your new go-to dessert:
- No oven needed – perfect for hot summer days when you can’t bear to turn on the heat
- Ready in 15 minutes (plus chilling) – faster than running to the store!
- Crowd-pleaser magic – I’ve never met anyone who could resist seconds
- That perfect texture – creamy pudding meets crisp wafers and fresh bananas
- Easy enough for weeknights, special enough for holidays
Trust me, this is the dessert that’ll have everyone asking for your recipe. Again and again.
The Simple Ingredients That Make Magic
Here’s the beautiful thing about banana pudding – you probably have most of these ingredients already! But let me tell you exactly what you’ll need to make it perfect:
- 5 oz instant vanilla pudding mix – the secret shortcut for creamy texture
- 2 cups cold milk – whole milk makes it richest, but any works
- 1 tbsp vanilla extract – real vanilla makes all the difference!
- 14 oz sweetened condensed milk – that irresistible sweetness
- 3 cups heavy cream, chilled – whip it up fluffy
- 16 oz Nilla wafers – the classic, but graham crackers work too
- 8 ripe bananas – slice them just before assembling
See? Nothing fancy – just pantry staples that transform into something extraordinary. The bananas should be ripe but firm – too soft and they’ll turn mushy. And don’t skip chilling that cream – cold whips up so much better!
Equipment You’ll Need
You don’t need fancy gadgets for this banana pudding – just a few basics from your kitchen:
- Stand mixer or hand mixer – to whip that cream into fluffy clouds
- Large mixing bowl – for combining all that creamy goodness
- Whisk – my trusty tool for smooth, lump-free pudding
- 9×13 dish or trifle bowl – show off those pretty layers!
That’s it! No special equipment needed – just the tools you probably already have.
How to Make Banana Pudding
Okay, let’s get to the fun part – making this dreamy banana pudding! I promise it’s easier than you think. Just follow these simple steps, and you’ll have a dessert that’ll make everyone think you spent hours in the kitchen.
Step 1: Prepare the Pudding Base
First, grab that big mixing bowl and whisk together your vanilla pudding mix and cold milk. Now here’s my trick – whisk for a full 3 minutes! I know it seems long, but trust me, this makes the pudding super smooth and creamy. Then, stir in that sweetened condensed milk and vanilla extract. Oh wow, the smell alone is heavenly! You’ll want to lick the bowl, but resist – we’ve got more to do.
Step 2: Whip the Heavy Cream
Now for the magic – whip that chilled heavy cream in your stand mixer until stiff peaks form. This takes about 3-4 minutes on medium-high speed. Don’t walk away! Overwhipped cream turns grainy, and we want fluffy clouds here. Gently fold the whipped cream into your pudding mixture with a rubber spatula. Folding – not stirring! – keeps all that air in the cream for the lightest texture.
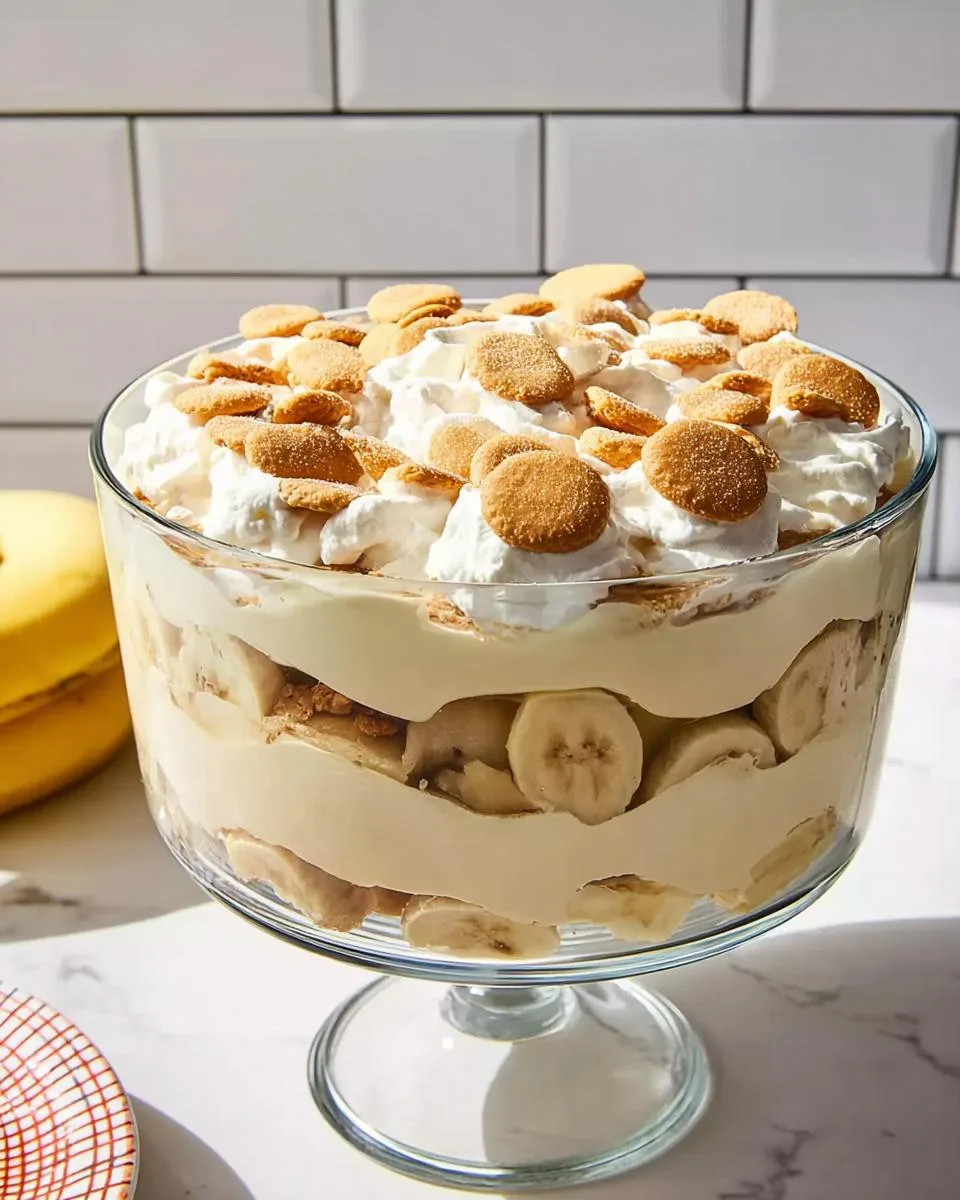
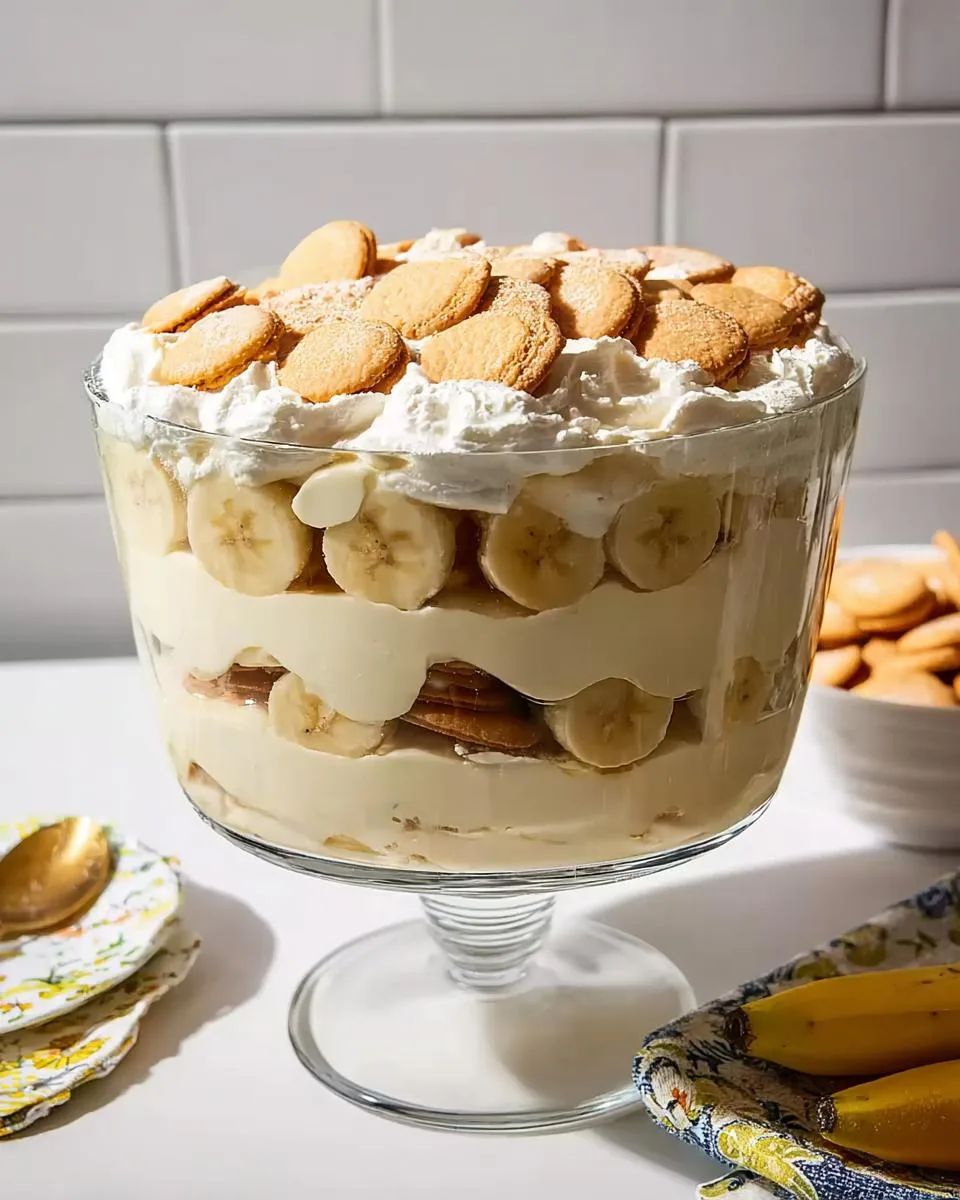
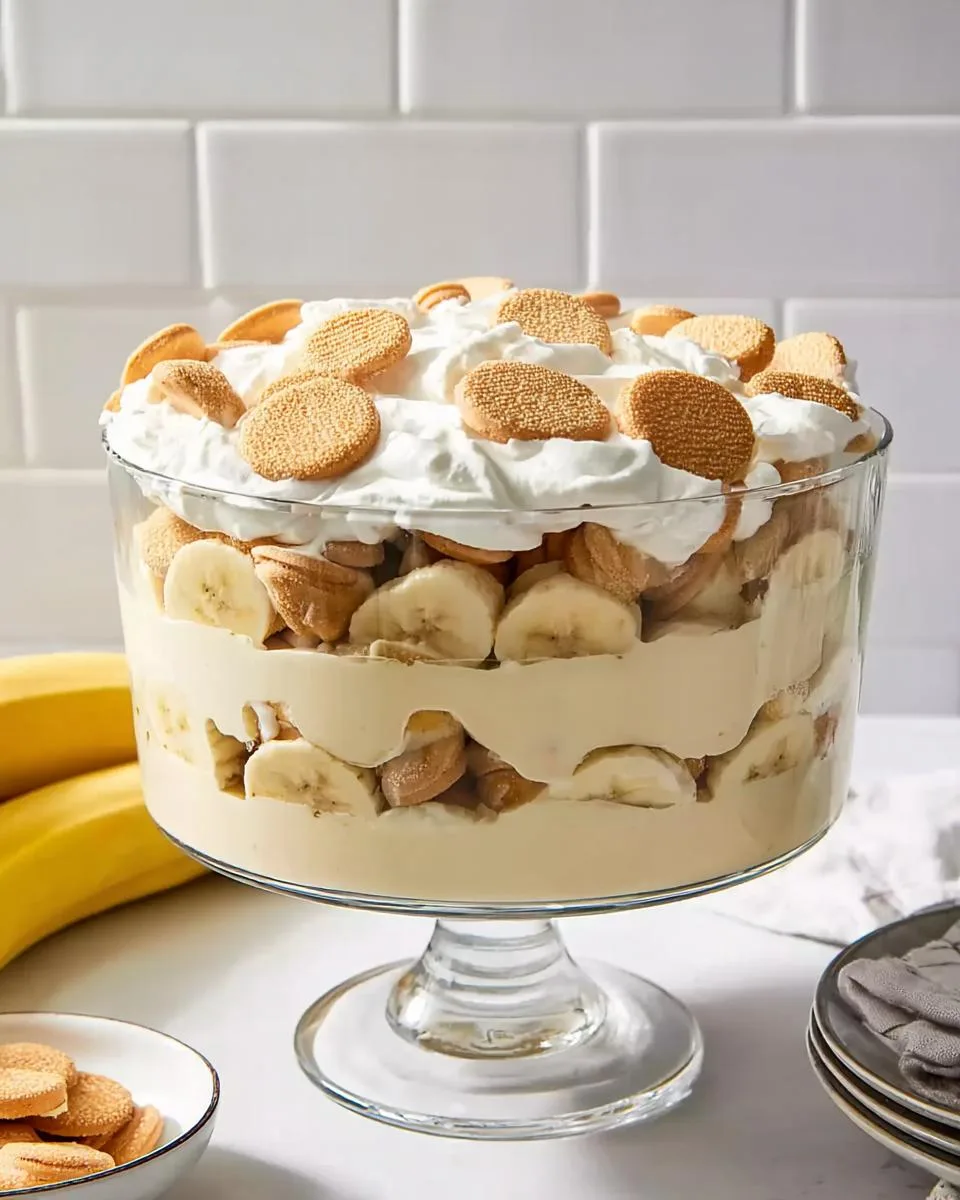
Step 3: Layer the Banana Pudding
Time to assemble! In your serving dish, start with a layer of Nilla wafers (I like to stand some up against the sides for a pretty look). Then add a layer of banana slices – use about 2 bananas per layer. Spoon half the pudding mixture over top. Repeat the layers once more, ending with pudding. Pro tip: slice your bananas right before assembling to prevent browning!
Step 4: Chill and Serve
Here’s the hardest part – waiting! Cover your masterpiece and chill for at least 2 hours (overnight is even better). This lets the wafers soften just right and the flavors meld together perfectly. When you finally dig in, you’ll get that perfect bite – creamy pudding, sweet bananas, and just-slightly-soft wafers. Pure bliss!
Print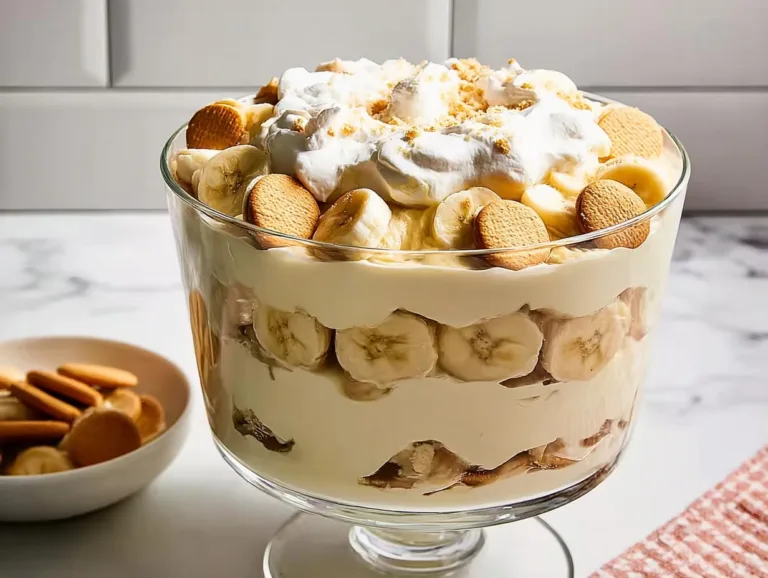
Creamy Banana Pudding Recipe Ready in Just 15 Minutes
A creamy and delicious banana pudding recipe that’s easy to make and perfect for any occasion.
- Total Time: 2 hours 15 minutes
- Yield: 8 servings 1x
Ingredients
- 5 ounces package instant vanilla pudding mix
- 2 cups cold milk
- 1 tablespoon vanilla extract
- 1 can (14 ounces) sweetened condensed milk
- 3 cups heavy cream
- 16 ounces Nilla wafers
- 8 bananas, sliced
Instructions
- In a large mixing bowl, add vanilla pudding mix and milk. Whisk until smooth, about 3 minutes.
- Add condensed milk and vanilla extract. Whisk until creamy and smooth.
- Add heavy cream to a stand mixer and whip to stiff peaks, about 3-4 minutes.
- Fold whipped heavy cream into the pudding mixture.
- Layer a serving dish with bananas, wafers, and pudding as desired.
- Chill for 2 hours before serving.
Notes
- Use ripe bananas for the best flavor.
- Chill the pudding for at least 2 hours to set properly.
- Store leftovers in the refrigerator for up to 3 days.
- Prep Time: 15 minutes
- Cook Time: 0 minutes
- Category: Dessert
- Method: No-Bake
- Cuisine: American
- Diet: Vegetarian
Nutrition
- Serving Size: 1 serving
- Calories: 450
- Sugar: 35g
- Sodium: 200mg
- Fat: 25g
- Saturated Fat: 15g
- Unsaturated Fat: 8g
- Trans Fat: 0g
- Carbohydrates: 50g
- Fiber: 2g
- Protein: 6g
- Cholesterol: 80mg
Tips for the Best Banana Pudding
After making this banana pudding more times than I can count, I’ve learned a few tricks that make all the difference:
- Slice bananas last minute – those brown spots appear fast!
- Keep everything cold – chilled cream whips better, and cold pudding sets faster
- Fold, don’t stir – gentle motions keep the whipped cream fluffy
- Let it rest – those 2 hours of chilling aren’t optional, promise!
- Taste as you go – adjust vanilla or add a pinch of salt if needed
Follow these simple tips, and your banana pudding will be perfect every single time. Now go make some memories!
Banana Pudding Variations
Oh, the fun part – playing with flavors! While classic banana pudding is perfection, sometimes I love mixing it up:
- Chocolate twist – swap Nilla wafers for chocolate graham crackers
- Tropical vibes – add toasted coconut flakes between layers
- Caramel dream – drizzle salted caramel sauce over the top
- Peanut butter lover – mix 2 tbsp peanut butter into the pudding
- Berry delicious – layer fresh strawberries with the bananas
See? Endless ways to make it your own. Just promise me you’ll try the original first!
Serving and Storage
When it’s time to serve, I love topping my banana pudding with extra Nilla wafers and fresh banana slices – makes it look fancy with zero effort! Leftovers? Just cover tightly with plastic wrap (press it right against the pudding surface to prevent that icky skin from forming).
It’ll keep beautifully in the fridge for up to 3 days – if it lasts that long! No reheating needed – this dessert tastes best cold straight from the fridge.
Banana Pudding FAQs
I get asked about banana pudding all the time – so let me answer those burning questions!
Can I use homemade pudding instead of instant? Absolutely! Just make sure it’s chilled completely before layering. My grandma always made hers from scratch – takes a bit longer but oh-so-worth it.
How do I keep the bananas from turning brown? Two tricks: slice them right before assembling, and toss the slices with a little lemon juice if you’re extra worried. The pudding covers them anyway!
Can I make banana pudding ahead? You bet! It actually tastes better the next day. Just wait to add the final banana layer until right before serving.
What if I don’t have Nilla wafers? No sweat! Graham crackers, shortbread cookies, or even pound cake cubes work great in a pinch.
Can I freeze banana pudding? I wouldn’t – the texture gets weird. But it keeps beautifully in the fridge for days!
Nutritional Information
Now, let’s be real – we’re not eating banana pudding for its health benefits! But if you’re curious, here’s the scoop (per serving): about 450 calories, 25g fat, 50g carbs, and 6g protein.
Remember – these numbers can change depending on the brands you use. My philosophy? Enjoy every creamy, dreamy bite – life’s too short to stress over dessert! You can find more recipes on our site.
For more delicious recipes, check out our recipes page.
For More recipes, Follow me on Facebook!